Change These iPhone Settings Immediately If You Haven’t
 Credit: Shutterstock
A new iPhone will work perfectly from the get-go. You really don't need to change anything to it in order to use it.
However, if you really want to step up your game or just want to make the most of every setting your iPhone has available, you might want to consider playing around with its settings.
There are a lot of things you can change on your iPhone to customize your experience and make using your iPhone just a tad bit easier. From taking better pictures to adding a couple of extra buttons to your iPhone, read on for 15 settings you should check out.
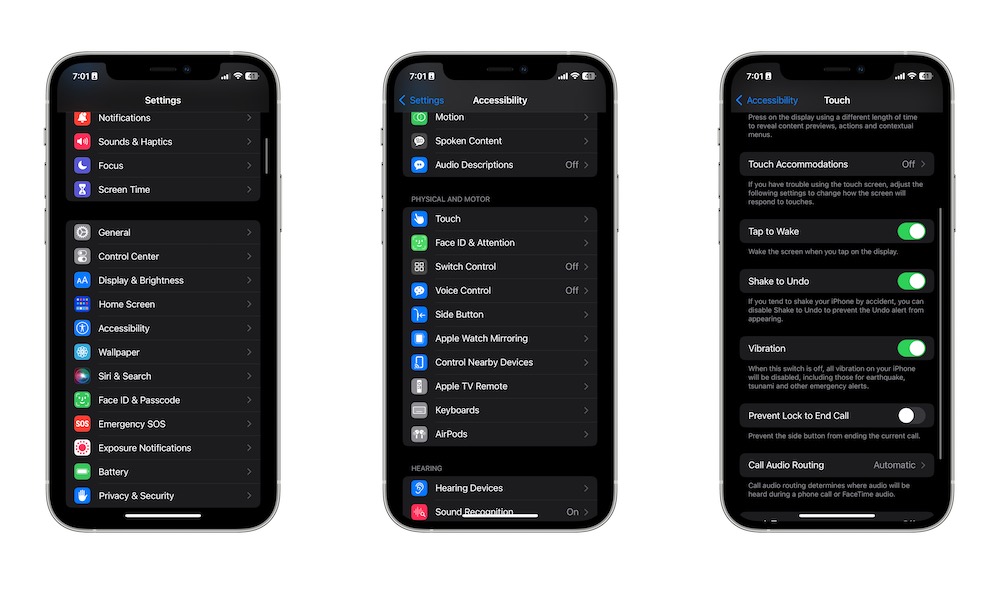
Shake Your iPhone to Undo Anything
By default, your iPhone lets you shake your iPhone to undo something you just did on it. You can use it to reopen a Safari tab, undo something you just wrote, and even move an app back to its original place if you just rearranged it on your Home Screen.
Shake to undo should be turned on by default, but you can turn it on yourself — or disable it — by doing the following:
- Open the Settings app.
- Scroll down and tap on Accessibility.
- Select Touch.
- Scroll down and toggle Shake to Undo.
And that's it. If you just turned it on, you can try it by typing something on a message and then shaking your iPhone. A smaller window will pop up, asking you to confirm your decision.
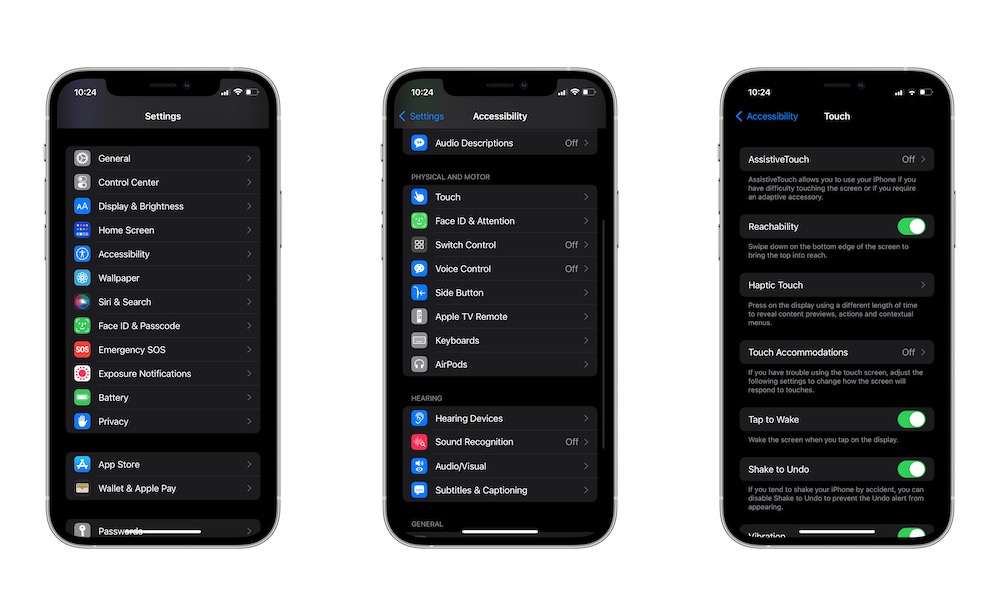
Reach Anywhere on Your Screen With Reachability
Let's face it: smartphones aren't getting any smaller, and that includes the iPhone. Most of us don't have huge hands to reach the top of the screen with one hand, so Apple implemented a cool feature called Reachability.
As you can guess by its name, this feature will move your screen lower so it's easier to reach the top of your iPhone.
This feature should be on by default, but you can enable it or disable it yourself by doing the following:
- Open the Settings app.
- Scroll down and go to Accessibility.
- Select Touch.
- Enable Reachability.
And that's it. You can try this feature by swiping down on your iPhone's home bar (the small bar at the bottom of the screen). If you have an iPhone SE, you'll need to double-tap the Home Button.
To go back to the normal screen, all you need to do is swipe up from the bottom of the screen or press your Home Button.
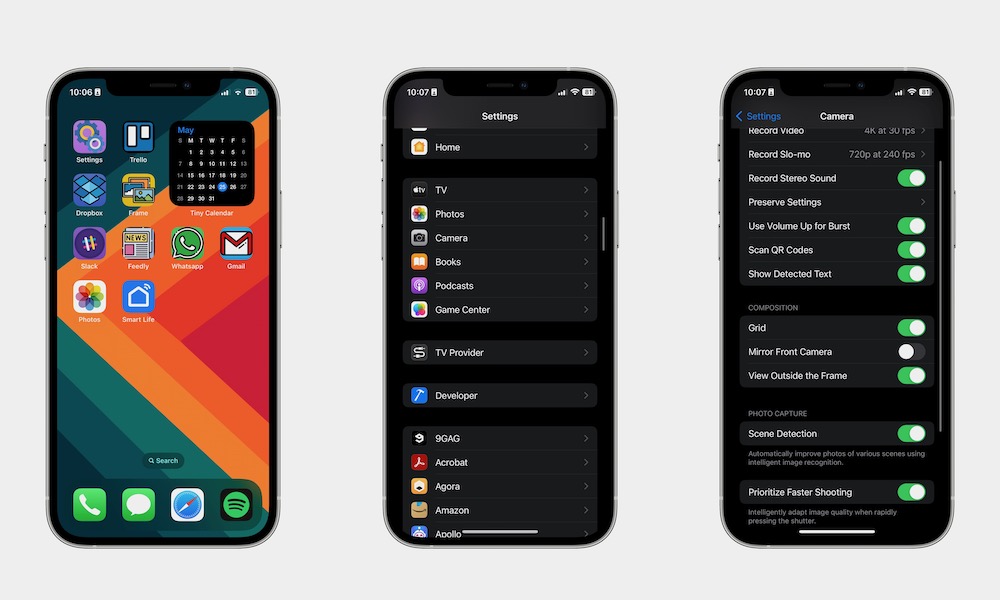
Add a Camera Grid to Take Better Pictures
One of the most important parts of taking a great picture on your iPhone is to keep the subject in the right place. However, unless you're a professional photographer, this might be easier said than done.
Fortunately, Apple knows this and decided to add a camera grid to make it easy to place your subjects in the right place of the frame. Here's how to use the camera grid:
- Open the Settings app.
- Scroll down and go to Camera.
- Enable Grid.
Now, open your Camera app, and you'll notice a grid on the screen. This will automatically appear when you take a picture or shoot a video.
Start Using Focus Modes
While your iPhone is a fantastic tool, it can also be a very distracting device. Getting bombarded with notifications on a daily basis can be tough, but you can tweak a few settings to make your iPhone help you focus.
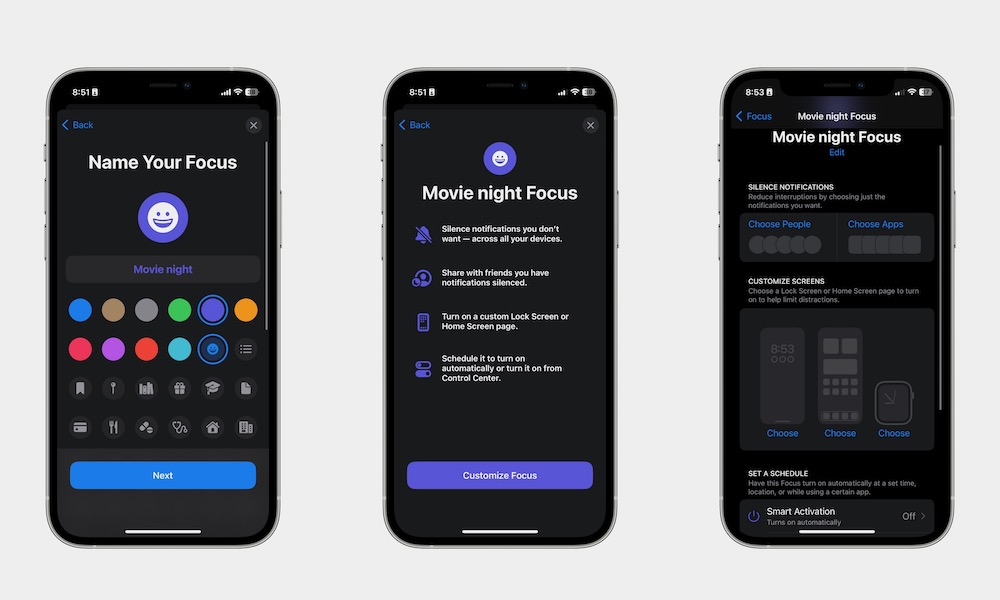
This is thanks to a fairly new feature called Focus. You can create Focus modes for different aspects of your life, such as working, gaming, or spending time with your family.
Here's how to create a new Focus mode:
- Open the Settings app.
- Scroll down and select Focus.
- Tap the plus icon in the top right corner of your screen.
- Choose a default Focus mode, or select Custom to create one from scratch.
- Now, your Focus mode is created, but you can tap on Customize Focus to change a few settings.
- Tap on Choose People or Choose Apps to select which contacts or apps can send notifications while you're in that Focus mode. You can also customize your Home Screen and Lock Screen from here.
- When you're done, tap the back button in the top left corner of your screen.
You can create as many Focus modes as you want and schedule them to turn on automatically at a specific time or location or when you're using a specific app. You can also toggle them on manually from the Focus button in your Control Center.
Hide Your Hidden Album
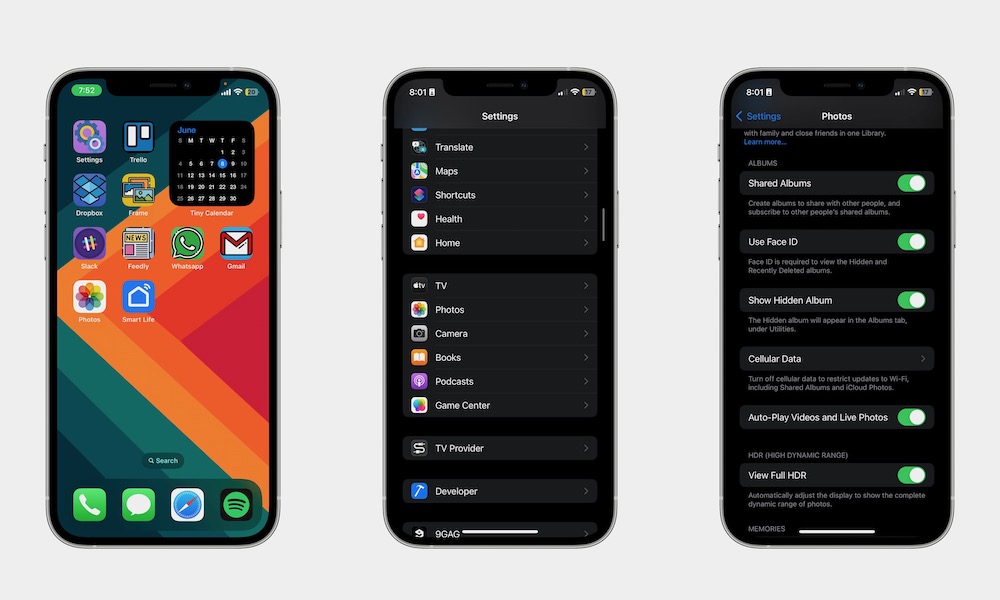
If you go to the Albums tab in the Photos app, you'll find a Hidden album. As you can probably guess, you can use this to hide any picture from the world. That way, no one will be able to access it unless they have your passcode.
While that's already pretty useful, you can make your Hidden album even more secure. You can also hide the Hidden folder itself so no one can access it at all. Here's how:
- Open the Settings app.
- Scroll down and go to Photos.
- Disable Show Hidden Album.
And that's it! When disabled, you won't be able to see the Hidden folder in your Photos app. To see it again, repeat the steps above and enable Show Hidden Album.
Stop Apps From Asking for Ratings or Reviews
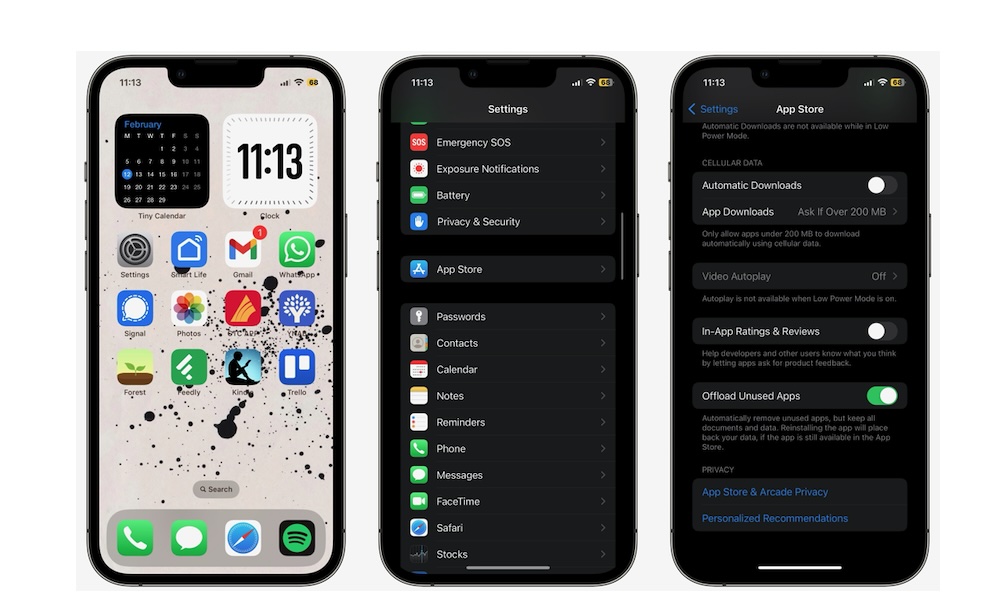
While it's always a great idea to support developers you know and love, it gets old when every app you use nags you to review it on the App Store.
Sure, it can help the app and its users know what's great about the app and what needs to improve, but if you already declined once, you shouldn't see the message again.
Fortunately, you can disable this with just a few taps. Here's how:
- Open the Settings app.
- Scroll down and go to App Store.
- Scroll down and disable In-App Ratings & Reviews.
Now, you won't receive a message again. Of course, remember to send your feedback to the apps you think deserve it by going to the App Store and leaving a review manually.
Choose What You Can Access on Your Lock Screen
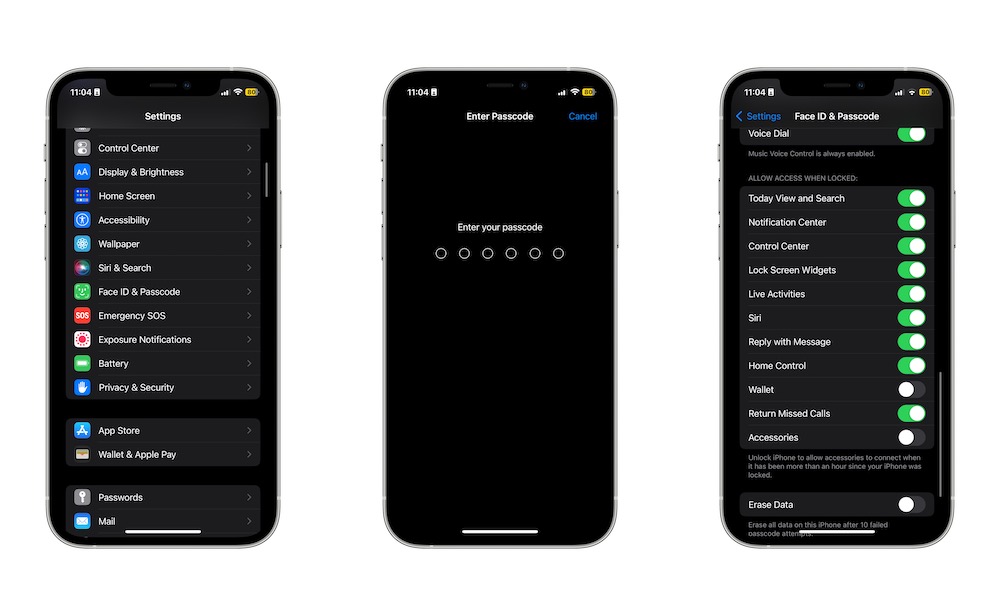
By default, you can do a lot of things while your iPhone is locked, including replying to messages, using Siri, or pulling up cards in the Wallet app.
However, if you really want to keep things private, you might want to disable some of these features so no one can see or access them by mistake. Here's how you can disable these features:
- Open the Settings app.
- Scroll down and go to Face ID & Passcode.
- Enter your passcode.
- Scroll down and under Allow Access When Locked, disable all the features you don't want to see.
Note that these only apply when your iPhone is actually locked, so if you're using a Face ID-equipped phone, you might not even notice they're switched off, as your iPhone typically unlocks as soon as you look at it, even before you swipe up from the Lock Screen.
Stop Using Your iPhone So Close to Your Face
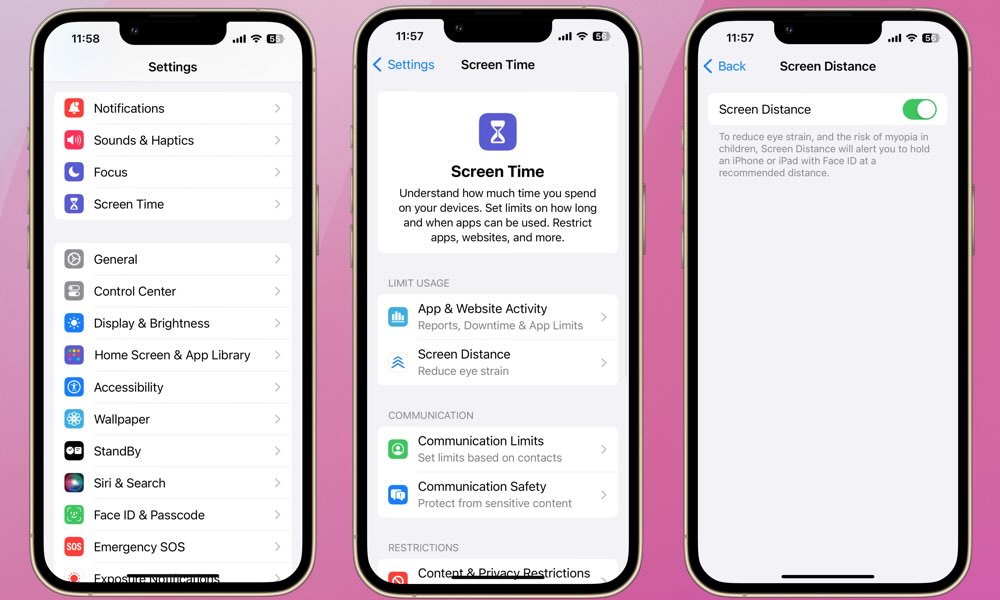
Apple introduced a ton of new and helpful features in iOS 17, but one that stands out is Screen Distance. With it, you can make your iPhone usable only if you hold it at a certain distance from your face.
This can potentially help you with eye strain and reduce the risk of myopia. Here's how to use it:
- Open the Settings app.
- Scroll down and select Screen Time.
- Scroll down again and tap on Screen Distance.
- Enable Screen Distance.
And that's it. Next time you use your iPhone too close to your face, you'll see a message that covers your whole screen and practically makes your iPhone useless until you move it a safe distance away. It will get annoying, but you should be able to get used to it after a while.
It's worth mentioning that Screen Distance is only available on iPhones with Face ID and iOS 17.
Don't Let Apple Track You
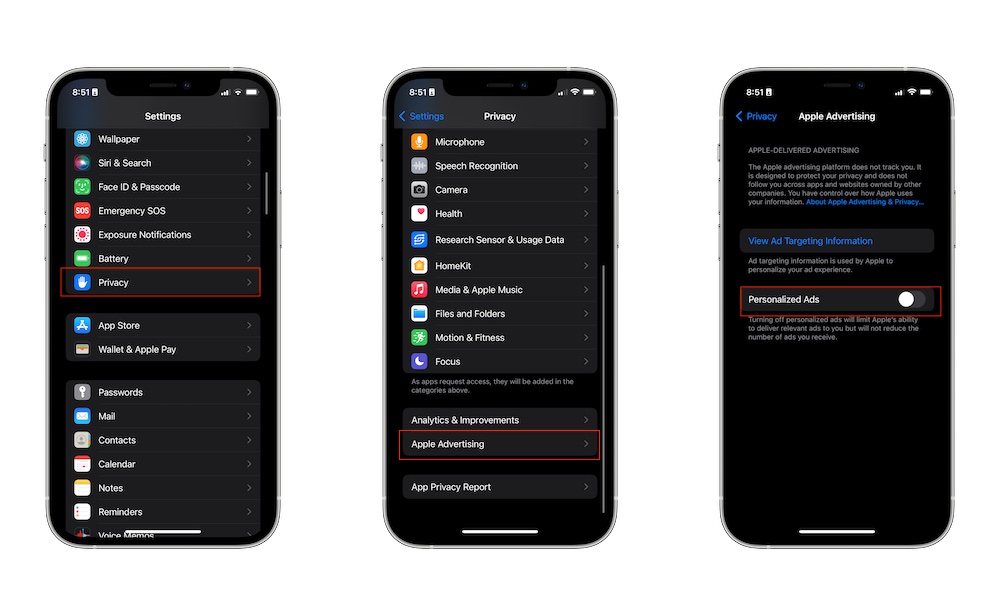
When using your iPhone, Apple can potentially track your activity to send you personalized ads. While this might sound good at first, it's a bit creepy to see ads for something you just searched for.
Fortunately, Apple makes it really easy to disable personalized ads. This is what you need to do:
- Open the Settings app.
- Scroll down and tap on Privacy & Security.
- Scroll down again and go to Apple Advertising.
- Disable Personalized Ads.
Keep in mind that this will only reduce the personalized ads you see, not the number of ads you get.
Use Picture-in-Picture
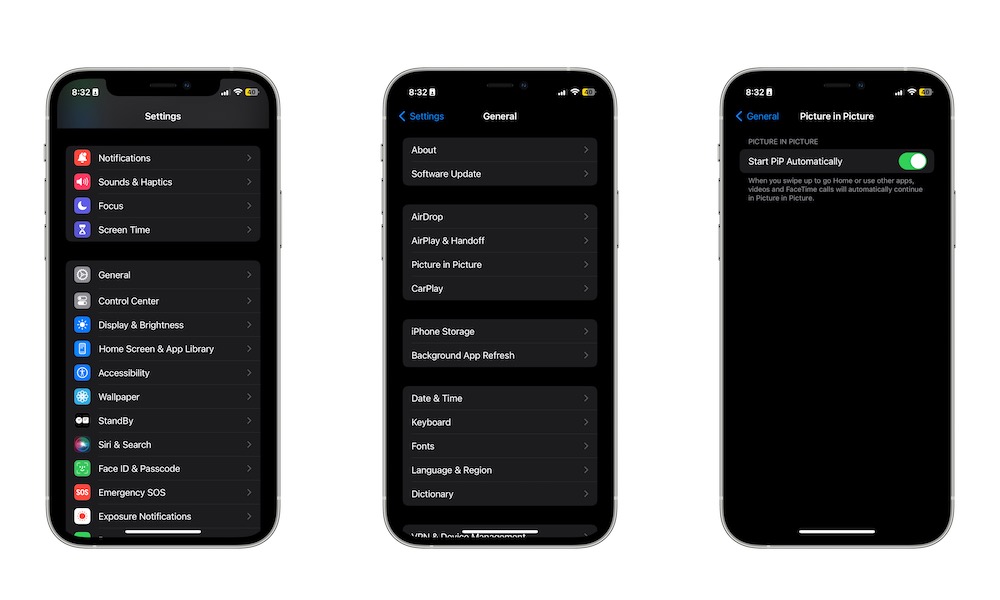
Picture-in-Picture (PiP) is a clever multitasking feature that lets you continue watching a video or stream while you hop back to your Home Screen or even into a different app.
To enable PiP, you need to:
- Open the Settings app.
- Scroll down and go to General.
- Tap on Picture in Picture.
- Enable Start PiP Automatically.
With PiP turned on, you can start watching a movie on Netflix, then go back to your Home Screen and start playing a game or sending a message without missing any action. Just keep in mind that PiP doesn't work with every app or video as it's up to each developer when and how they want to support it. For example, Netflix doesn't allow PiP on its ad-supported plans as wants to make sure you're actually watching the ads.
Change Your Default Mail App
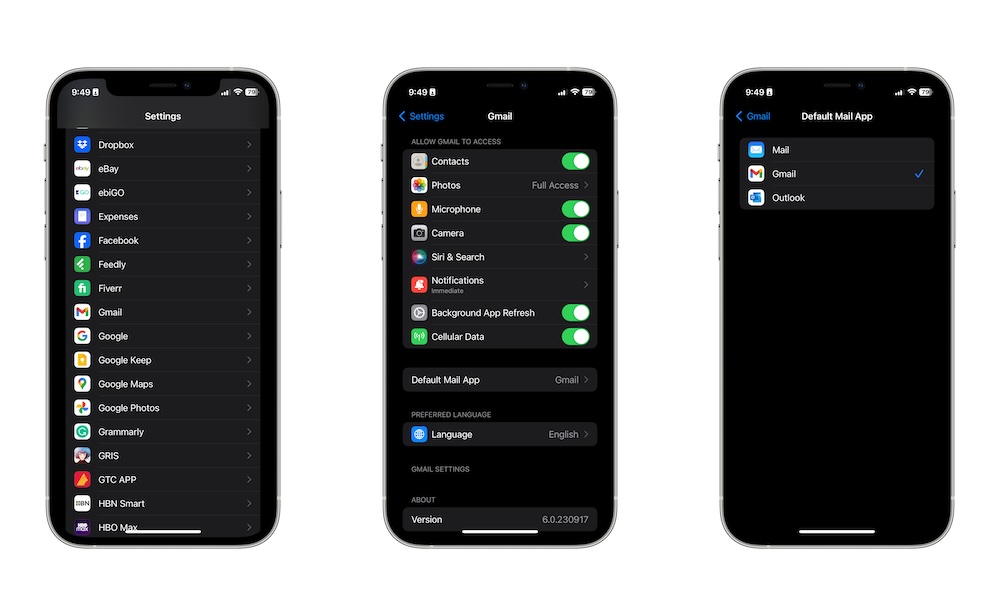
By default, Apple Mail will be your go-to Mail app when you start using your iPhone, but it doesn't have to be this way.
Apple lets you choose which mail app you want to set as primary, meaning you can even delete Apple Mail and use whichever alternative you love.
Here's how to change your default Mail app:
- Open the Settings app.
- Scroll down and find the mail app you want to set as default.
- Tap on Default Mail App.
- Select your mail app from the list.
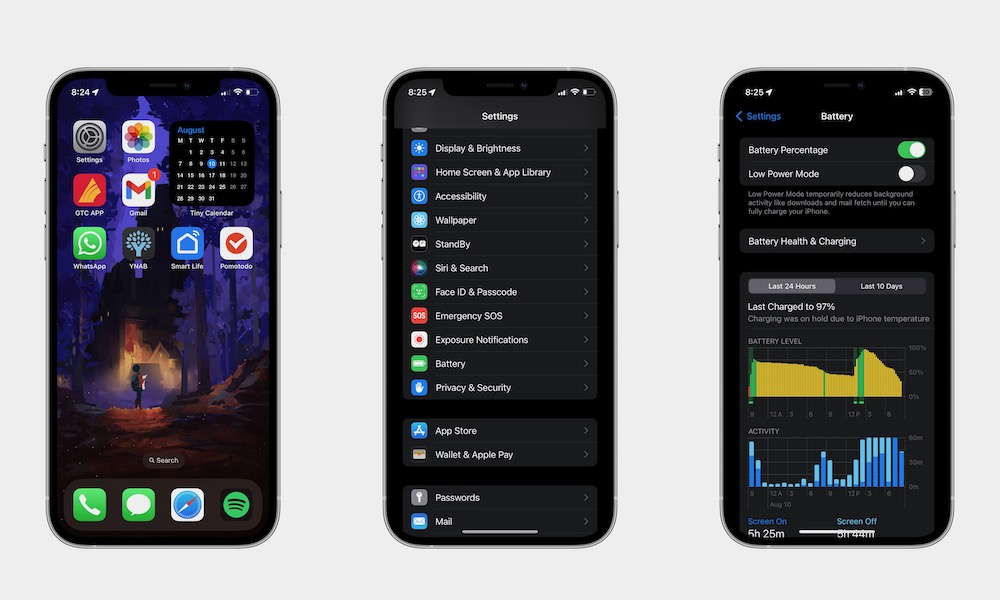
See Your iPhone's Battery Percentage
While traditional iPhones with a Home Button have shown the battery percentage in the status bar since 2009, when Apple adopted the notch in the iPhone X, the narrower status bar left no room for the battery percentage to be displayed. This left users with only a visual "fuel gauge" indicator.
Fortunately, Apple changed its mind in iOS 16 and redesigned the battery icon that superimposed the percentage on top, allowing users to see their specific battery life remaining without taking up extra space. However, it's still off by default on Face ID-equipped iPhones. Here's how to turn it on:
- Open the Settings app.
- Scroll down and go to Battery.
- Enable Battery Percentage.
You can also use this setting if you want to turn the battery percentage off on older iPhone models that still show it by default.
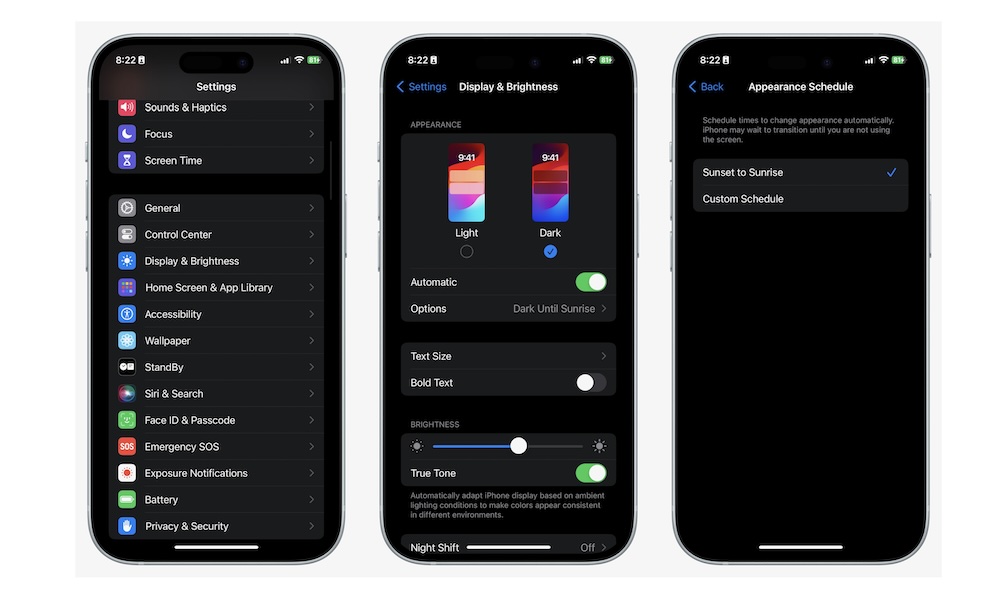
Start Using Dark Mode
If you want your iPhone to look and feel way cooler and keep your eyes from burning when using it at night, you can and should use Dark Mode. This small feature will turn everything black, including those apps and websites that follow your iPhone's settings.
Here's how to enable Dark Mode on your iPhone:
- Open the Settings app.
- Scroll down and go to Display & Brightness.
- Tap on Dark.
And that's all. Of course, if you want to use both Light and Dark modes, you can enable Automatic right below both modes and then tap on Options to customize when you want to use each mode.
Manage Background App Refresh
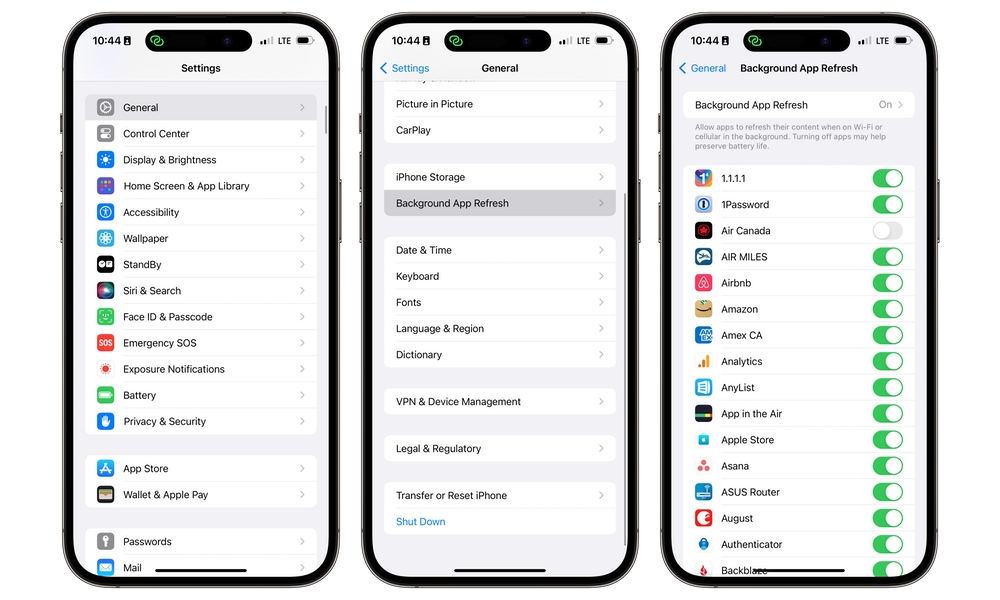
With Background App Refresh, you can let your apps automatically update their content behind the scenes so they're up to date as soon as you open them. For example, an e-mail app can continue fetching new email messages so you don't need to wait for them to download when you open the app.
However, if all your apps are using Background App Refresh, you might see a decrease in your battery life, as some apps might be too demanding for your iPhone.
Overall, it's best to manage Background App Refresh and only let your most important apps use it. Here's where to find it:
- Open the Settings app.
- Scroll down and go to General.
- Select Background App Refresh.
Once there, you can enable or disable Background App Refresh for individual apps or, if you don't want to use it at all, toggle off Background App Refresh at the top of the page to disable it entirely.
Note that disabling Background App Refresh for an app doesn't usually prevent you from receiving notifications. Notifications from online services like Facebook, Instagram, and Gmail are typically sent directly to your iPhone whether the corresponding app is running or not, and even apps that use time- or location-based notifications register these with iOS and thus don't need to be running for those alerts to go off.
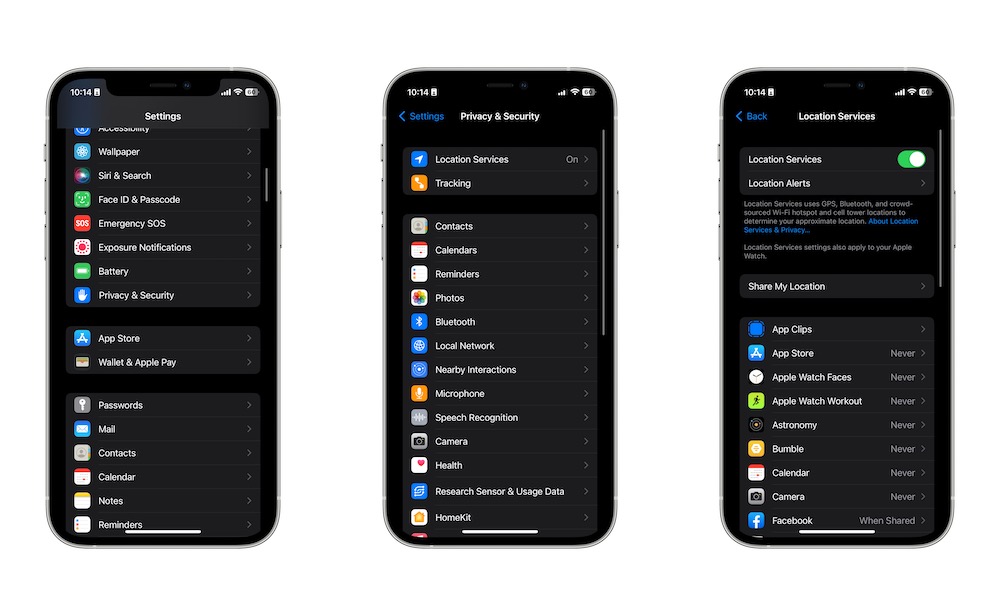
Manage Your Location Services
Location Services is an iPhone feature that lets apps access your current location. While this is useful for specific apps like Apple Maps, it might not be the best idea to use it with every app you have installed on your iPhone. Not to mention that, like Background App Refresh, it can decrease your battery life in some cases.
Here's how to manage Location Services:
- Open the Settings app.
- Scroll down and go to Privacy & Security.
- Tap on Location Services.
Tap on any app you want to customize Location Services for that app. By default, most should be set to While Using, which means that they'll only be able to read your location when they're running — although that includes running in the background if Background App Refresh is enabled for that app. Apps that are set to Always will be able to track your location even when the app isn't open.
If you don't want anything on your iPhone to use your location, you can disable Location Services at the top of the page. However, this will also affect Apple's first-party apps like Maps, Weather, and Find My.

