17 New iOS 12 Features You’ll Want to Try Right Now
 Credit: iDrop News
Apple’s latest mobile operating system — iOS 12 — is finally here. It’s available on a wide range of devices, it improves and refined features of iOS 11, and it’s said to make your devices more responsive and quicker than before! While it’s not a feature-heavy update, it still has some great new additions.
While iOS 12 may seem a little lackluster on the surface, the truth is it brings a lot of refining features to an already fantastic mobile operating system. Apple’s spent time making the small things we do everyday, faster, more intuitive, and quite simply: better.
The best part of iOS 12 is that there are new features that haven't been widely publicized, and so you'll definitely learn how to do a few new tricks with your iPhone today. For example, the "Live Listen" feature, which we'll talk about in-depth on the next page, basically allows you to be come a super spy by using the iPhone's microphone(s) to boost sounds straight to your AirPods! How cool is that?
But of course there are many other new features in iOS 12 that you'll want to learn about, and so we've taken the time to lay all of those out for you today. Continue reading to learn about 17 new features introduced in iOS 12 that you'll want to try today!
17 Use "Live Listen" with AirPods

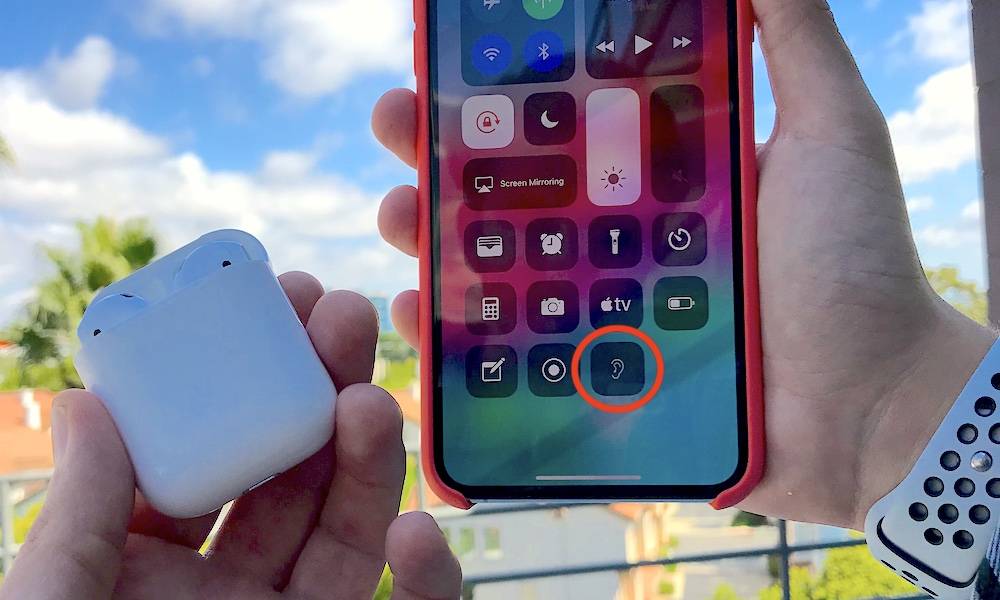
Live Listen is an accessibility feature in iOS 12 that lets users connect Made for iPhone hearing aids to amplify sounds using their iPhone’s microphone. It features different presets—such as “restaurant” or “outdoor”—and lets users choose different presets and volume levels for each ear.
However, it also works with Apple’s AirPods. It’s a great feature if you’re hard of hearing or just want to better hear in a noisy environment. You could also get creative. Like using it to listen to a meeting while you step out for a drink or becoming a super spy. If you have great ideas for this feature, please let us know in the comments and on social media.
To make it easy to launch Live Listen, you can add it as a Control Center control.
- Just go to Settings > Control Center > Customize Controls and find the “Hearing” control.
- Tap the green “+” circle to add it to your controls. You can drag your controls around to change their order in Control Center.
- Once you’ve added the control, access Control Center by swiping down from the top-right corner of the display (or up from the bottom-center of the display on older iPhones).
- If your AirPods are connected you’ll be able to tap it—it’s the icon with an ear—and start amplifying sounds. You will also see a sound meter. Just position the phone near the person or sound you’re trying to hear. The sound will be amplified through your AirPods.
If you want to adjust your Live Listen settings, go to Settings > General > Accessibility > MFi > Hearing Devices. Tap your hearing device for options such as presets or volume. Presets include basic, restaurant, outdoor, and party.
16 Spice up FaceTime with New Fun Features
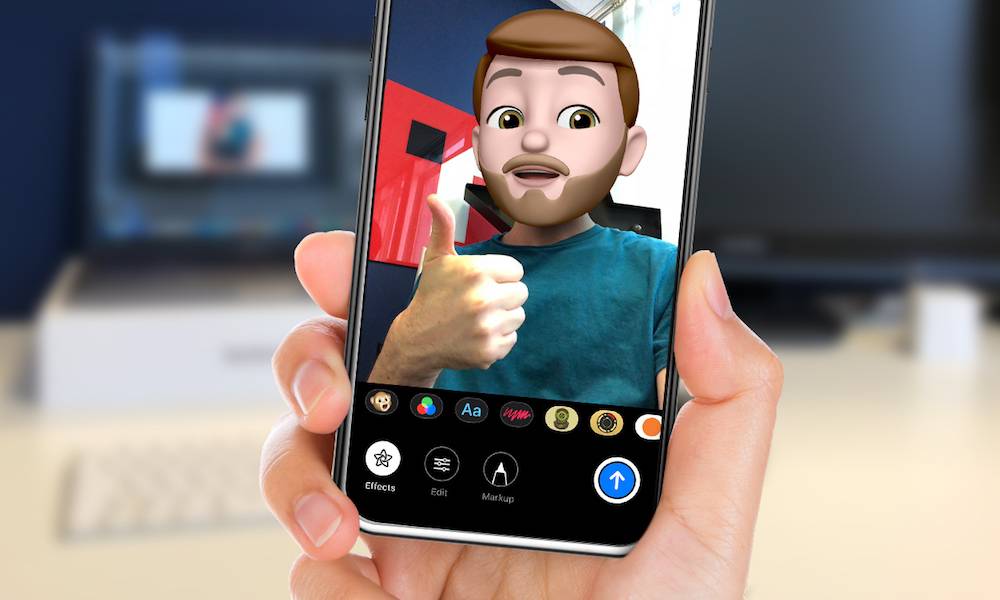
FaceTime is one of the best ways to participate in video calls with family and friends. Apple will be adding group FaceTime to iOS 12 in a future update—iOS 12.1—which will also contain over 70 new emoji.
While group calling may not be available yet, there are still plenty of new FaceTime features for you to try. You can apply filters for a dramatic effect, place stickers, add text, and more. When you add a sticker or other object it will even stay where you put it. For example, add a sticker to your forehead and it will stay on your forehead.
But perhaps the most fun new FaceTime feature has to do with Animoji. In iOS 12 Apple introduced four new Animoji and a new Memoji feature that lets users create Animoji that looks like them—or anyone else. Now you can use those Animoji and Memoji to replace your head in your FaceTime calls. So if you’re a bit camera shy, want to impersonate a friend, or feel like being a unicorn, now you can.
15 Take Charge of Your Notifications
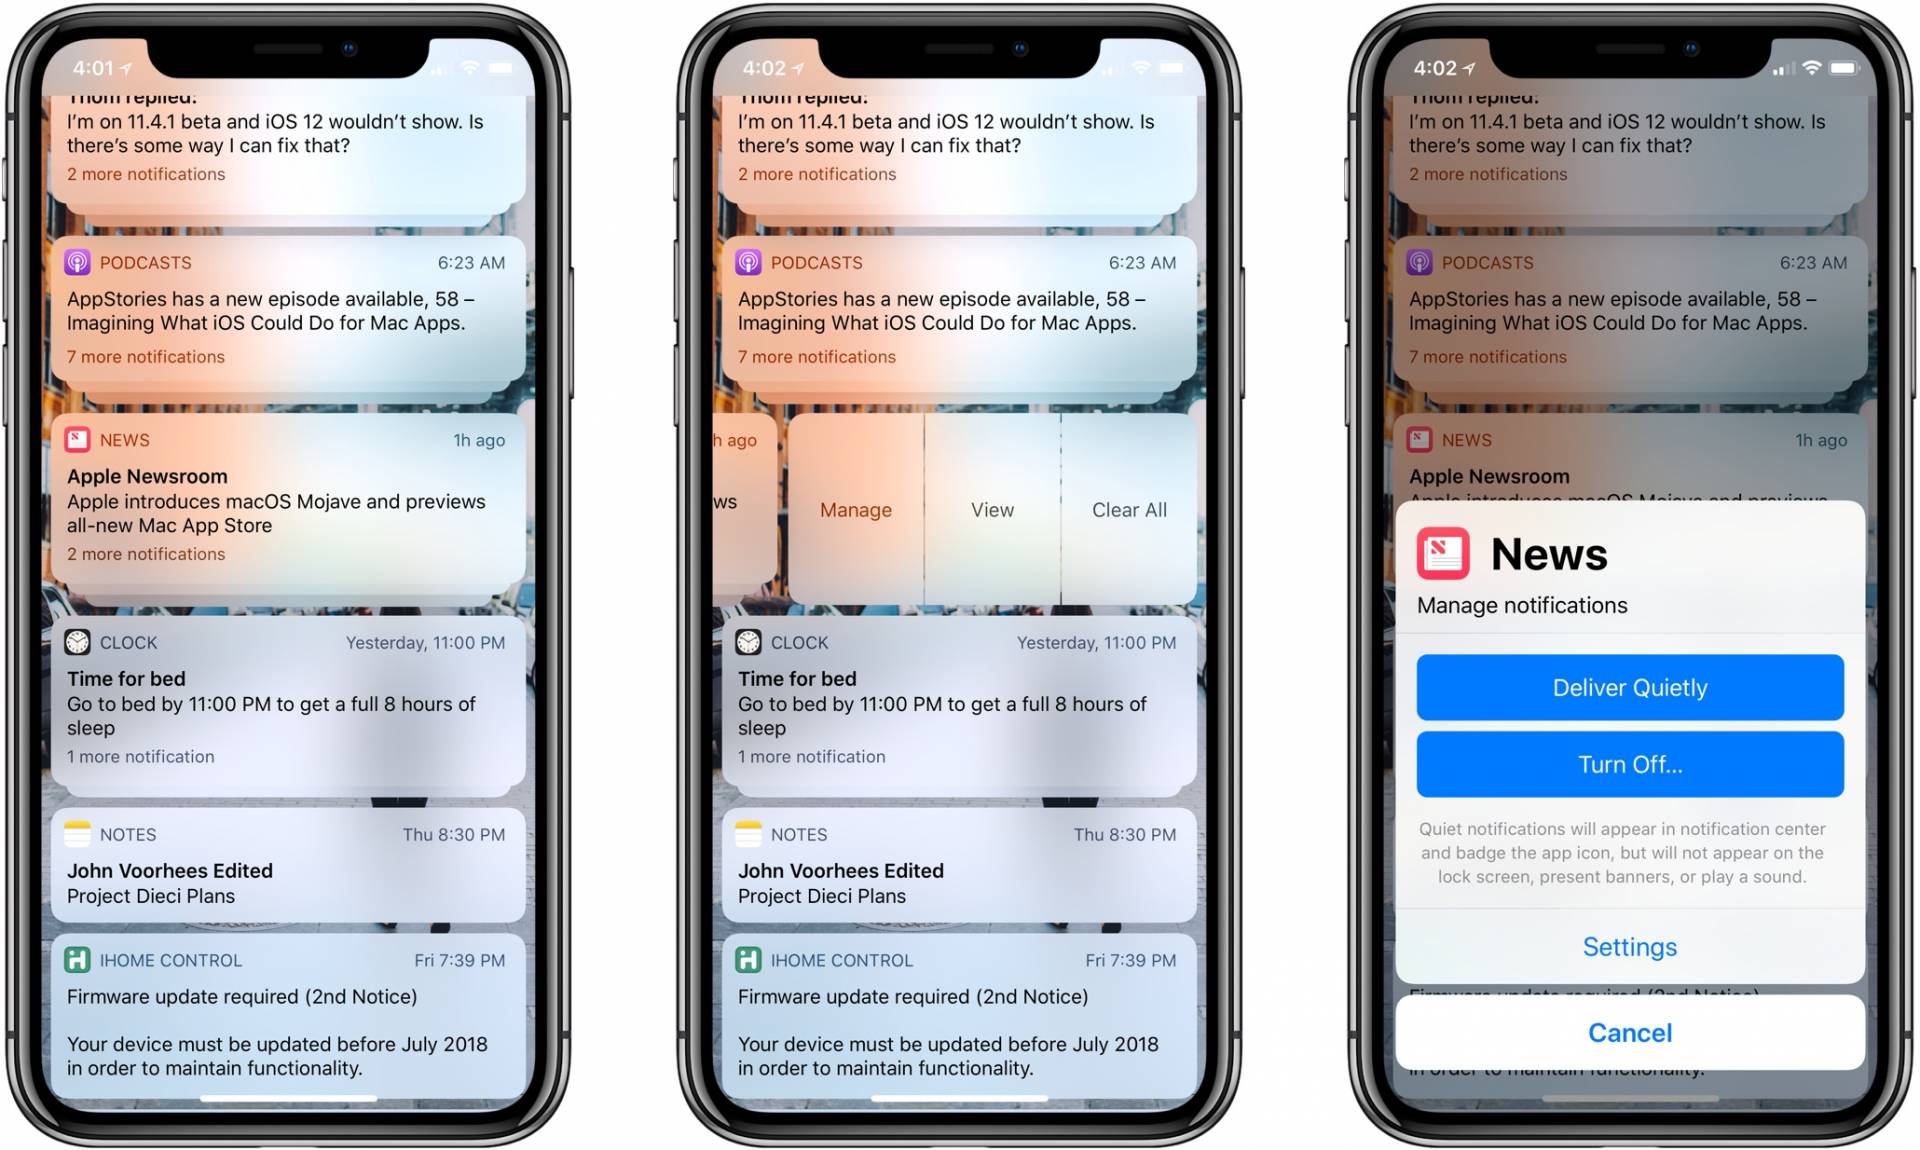
Ah, notifications. Sometimes you love them, sometimes you hate them. When you have a lot of apps—and a lot of notifications—it can be daunting to open Notification Center.. and opening Settings and trying to figure out how you want notifications to work can feel like a chore. In iOS 12, Apple solves this by letting you decide how notifications are delivered right when one appears.
Now when a new notification appears you can do one of two things:
Swipe left and select “Manage” or 3D Touch the notification and tap the three dots in the top-right corner.
You’ll see three options. “Deliver Quietly” will turn off badges, banners, lock screen notifications, and sounds for the app. You can also select “Turn Off…” to disable notifications completely. Lastly, you can tap the “Settings” button to configure other notification settings for the app in question.
14 Use Tapback on iMessage Notifications
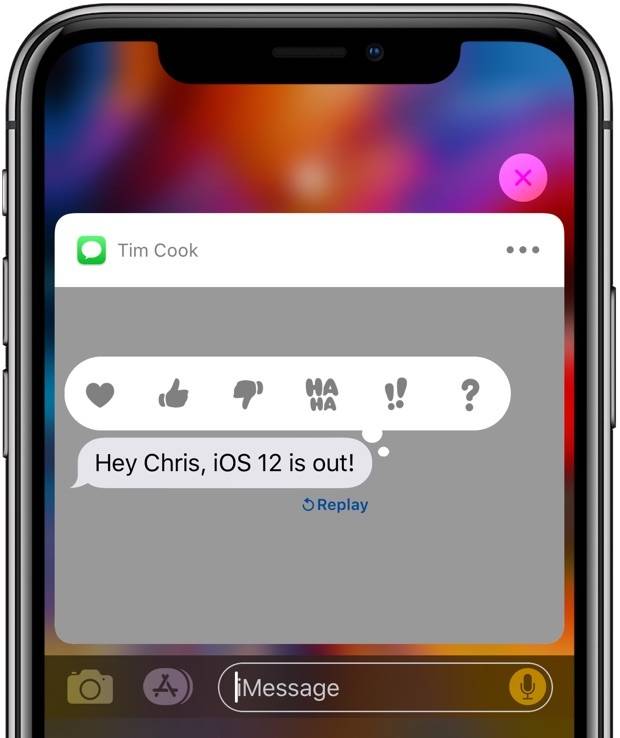
Tapback is an awesome feature in iMessage that lets you quickly respond to a message by double-tapping it and selecting one of six emotes: A heart (love), a thumbs down (dislike), a thumbs up (like), a “Ha ha” (laughed at), two exclamation points (emphasized), and a question mark (questioned).
Tapbacks are available in iMessage on Apple Watch, iOS devices, and Macs. They make it easy to quickly react to a message which is really useful when you’re busy or using your Apple Watch. However, previously if you tried to use Tapback from a notification it would launch the iMessage app. Now you can expand an iMessage notification and double-tap a chat bubble without any problems. So get your tap on.
13 Enjoy Your Life Again with Screen Time
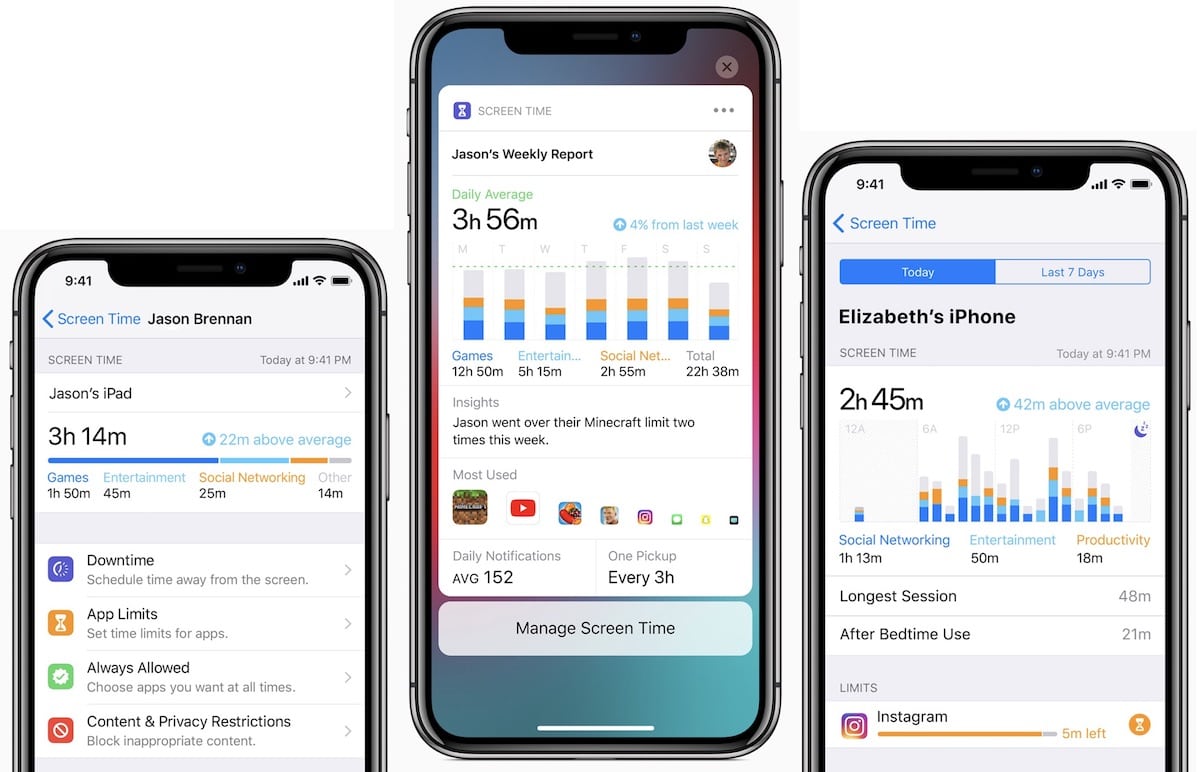
We live in a world where most of us are glued to a screen throughout the day. Whether we’re working, reading, browsing, gaming, FaceTiming, tweeting, et cetera, there’s always something to keep us from reality. Look around you. Not only are you reading this from a screen, but odds are someone close by is also looking at a screen. In iOS 12, Apple thinks they’ve found a solution. They call it “Screen Time.”
Screen Time provides insight into how much time you and your family are spending on your devices. It lets you view how many times you’ve picked up your iPhone, how many notifications you’ve received throughout the day, and how long you’ve been actively using your device. It even breaks down usage by app and category so you can better understand where time is being spent.
You can use Screen Time to better understand your usage. But, you can also use Screen Time to monitor your kids. Family Sharing lets you view your children’s devices so you know how much of their time is being spent in a digital world.
Screen Time does more than just monitor usage. It lets you set limits per app or category to cut down on device usage. You can set them for yourself or your kids (maybe), and choose whether or not the limit can be ignored or extended. Phone calls and specific apps can be whitelisted so they’re always allowed.
To setup Screen Time just find it in the Settings App. It’s the purple icon with an image of an hourglass. You can setup “Downtime” which limits all apps except for one you approve, “App Limits” to set usage limits for specific categories and apps, choose apps that are “Always Allowed,” and setup parental/content controls under “Content & Privacy Restrictions.
You will also see a “Family” section that lists child accounts in your family. Just tap an account to setup Screen Time for that child. Screen Time can also be setup with a passcode or shared across devices.
12 Show Favicons in Safari

If you’re not familiar with a favicon, it’s the little icon associated with a webpage often found in your browser’s URL bar. With iOS 12 you can choose to display favicons while switching between open pages. While it may not be a groundbreaking feature, it does add a nice touch to open tabs in Safari.
To enable this feature, head on over to your Settings and under Safari enable the “Show Icons in Tabs” toggle switch. Now when you’ve got a whole bunch of websites open you will see a little favicon at the top of the page. It makes it a little easier to see what you’re looking for when you have a lot of pages open at once. And it’s nice to look at.
11 Secure Your Lightning Port with USB Accessory Restrictions
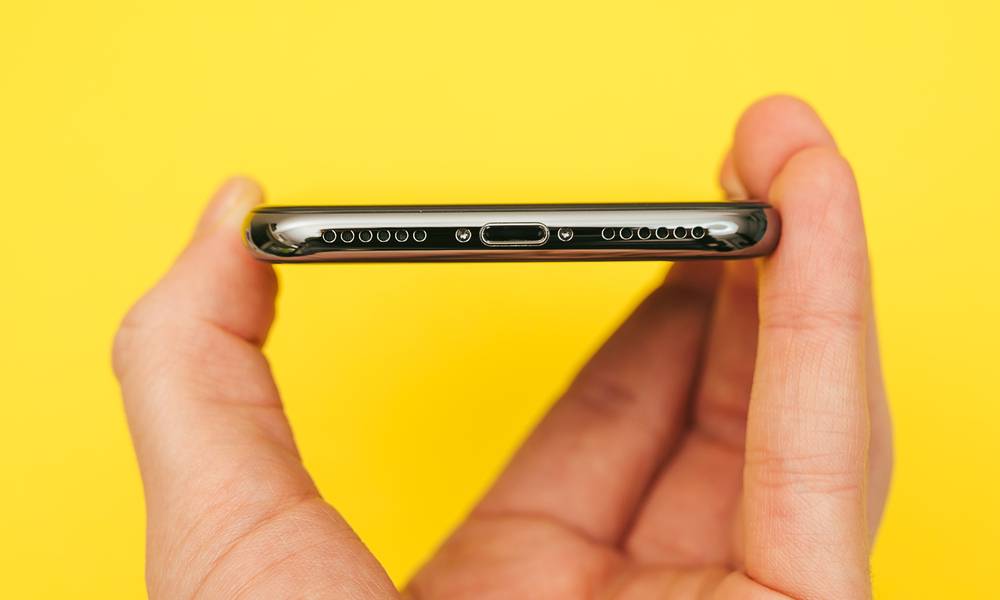
Physical hacks are often used to get into mobile devices. Apple helps mitigate this by asking if you want to trust connected computers. But, in the iOS 12 release Apple has made it even more difficult getting into a locked iPhone by letting users disable USB accessories if the phone has been locked for over one hour.
To disable USB accessories, go to
- Settings
- Face ID & Passscode
- Toggle the USB Accessories switch so it’s off.
Now USB access will be restricted after one hour of inactivity. There are some exceptions. For example, you’ll still be able to charge your phone.
Keep in mind when you connect to a computer to sync photos—or something similar—the connection will timeout after one hour of the phone being locked.
10 Use Do Not Disturb to Silence Notifications During Your Meetings
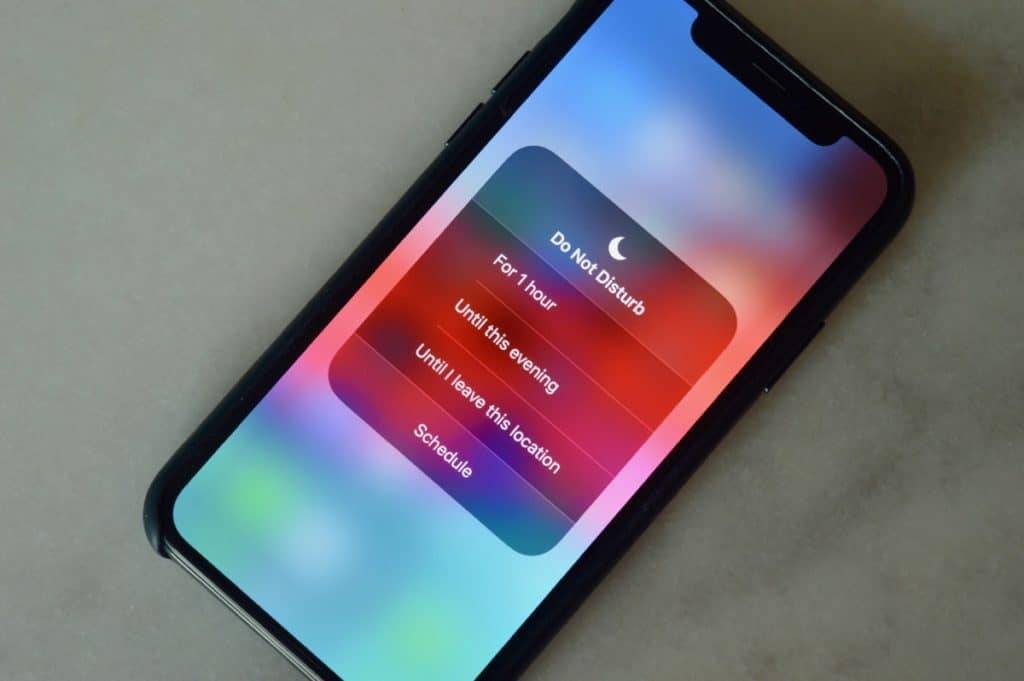
Do not Disturb is probably one of iOS’s most underrated features. When enabled it silences calls and notifications. In previous versions of iOS you could enable it manually, schedule it for a certain period of time, and choose certain contacts to let through (if enabled, all callers will get through if they call two consecutive times). You could even setup “Do Not Disturb While Driving,” which will automatically enable Do Not Disturb when the device is connected to a Bluetooth vehicle or when traveling at a high rate of speed.
One of the problems with Do Not Disturb was it was easy to forget about. Meaning you’d forget to enable it or you’d forget to disable it later resulting in missed calls and messages. iOS 12 aims to fix this by giving users more control over Do Not Disturb. Now users can enable it during calendar chosen events, for one hour, or when they leave a location. You can also have Do Not Disturb enabled during Bedtime (set it up in the Clock app) giving you even more scheduling power.
To enable Do Not Disturb, simply access Control Center, tap the control with a moon on it, and select a duration. You can also ask Siri or visit the Settings app.
9 Use Third-Party Password Keepers
Another underrated feature is Apple’s Keychain feature. It allows you to generate and save passwords, AutoFill usernames and passwords, and sync your login credentials across your Apple devices. One drawback to Keychain is that it’s not available on non-Apple platforms. So if you use an Android phone for work or your computer is a Windows PC (shame on you) then you can’t easily sync passwords across these devices.
Of course, you could always use a third-party password keeper (i.e. 1Password), but they didn't integrate with Safari and most of your apps.. That was, until now.
iOS 12 now let’s users use third-party password keepers in addition to Keychain. To enable another password keeper, just go to
- Settings
- Passwords & Accounts
- AutoFill Passwords and select the apps you want to use under “Allow Filling From.”
8 Close Your Apps with Just a Swipe
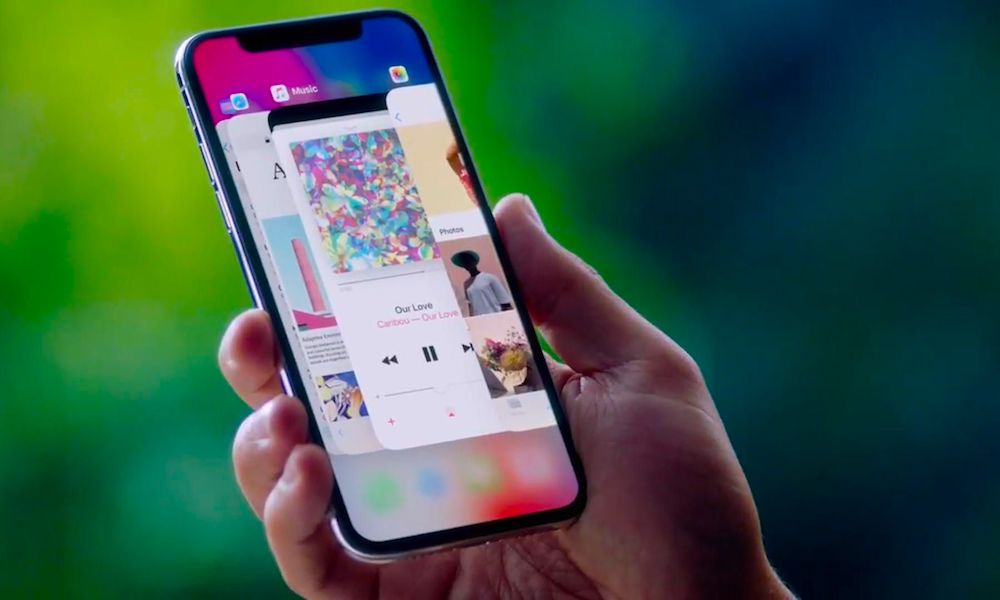
Hey remember when Apple let you close apps by just swiping up on them in the app switcher? Then remember how Apple ruined that with iPhone X and made you hold down on the app and tap a close button (like the old days)? Well now it’s back to swiping.
[Technically there isn’t a reason to be “force closing” apps unless they’re not responding or not functioning correctly. This is because iOS handles memory and power in the background, so closing them can actually cause apps to load back up slower and use more battery when you open them back up. But, people like to close them anyway.]
Now that Apple’s brought it back, just swipe up from the bottom of the screen and pause—or double-click the home button—to bring up the app switcher. Then just swipe up on any apps you want to force close.
7 Use “Hey Siri” in Low Power Mode
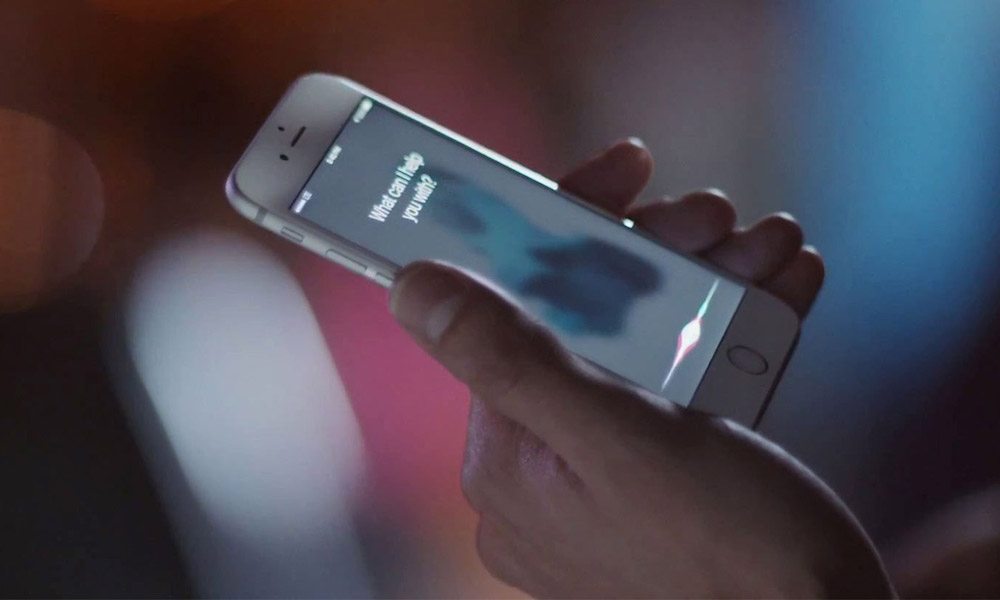
Not a lot to say about this, but “Hey Siri” now works in Low Power Mode. It was previously disabled which could be frustrating for some users and discourage them from using Low Power Mode. Unfortunately, there doesn’t appear to be anyway to turn this off in case you were interested.
6 Use Your Phone as an Augmented Tape Measure (or Level)
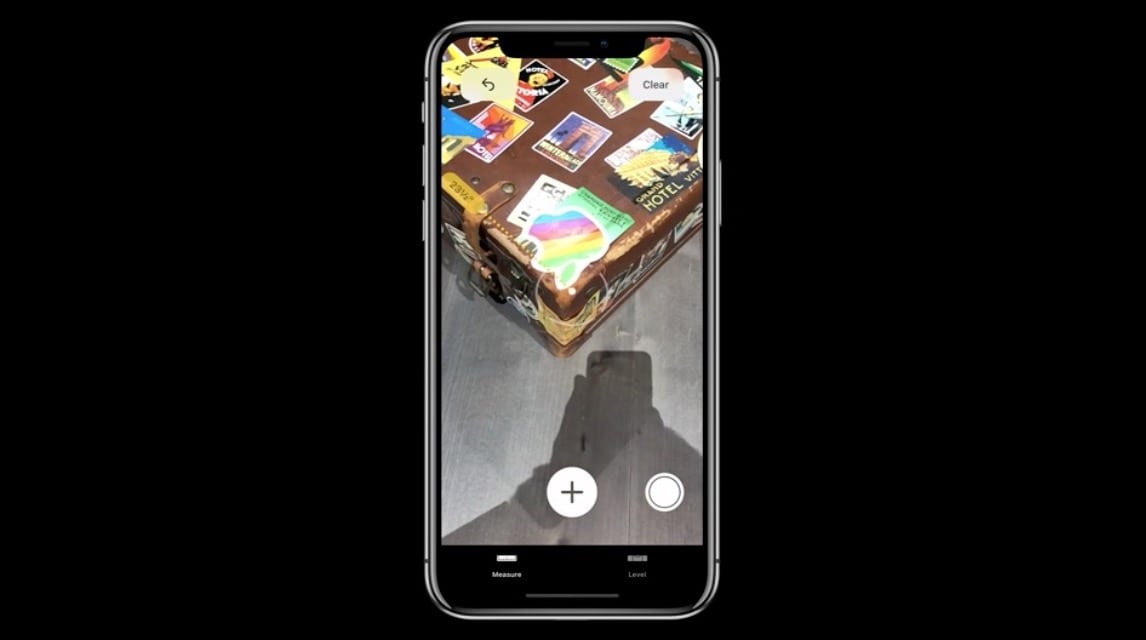
While the level feature isn’t new, it’s moved from the Compass app to Apple’s new Measure app. Measure is pretty cool, it lets user point their camera at an object and measure it in augmented reality. Most of the time it’s pretty accurate, but I’d say it could use some fine-tuning.
To use the app just tap at one end of an object and then the other to draw a line. The app even detects rectangles and lets you measure them with one tap. You can also take a picture of your measurements to save or share. Fishermen and fisherwomen will now be able to share their epic stories with proof!
5 Ask Siri for Help with Passwords, Turning on the Flashlight, and Shortcuts

Siri gains some new tricks in iOS 12. Including the ability to quickly look up passwords. Instead of searching through all your passwords looking for the one you need, just ask Siri to help. You can say something like “Hey Siri, show me my passwords,” or “Hey Siri, find the password for <insert name here>.” Siri will prompt you for your passcode, or use Touch ID or Face ID to make sure it’s really you. Then it will show you the password you need.
Because authentication is required, nobody else should be able to get into your passwords keeping them safe and secure.
Siri also has a few other new abilities such as being able to turn on the flashlight for you and, of course, running your new Shortcuts.
Of course, Siri has a long way to go to become a true virtual assistant. Like more natural conversation, better contextual understanding, and the ability to make calls and converse with real people like Google Duplex. Maybe iOS 13 will be Siri’s moment.
4 Share Passwords with AirDrop
Sharing passwords kind of defeats the point of passwords. If you email or message passwords they can be sitting there waiting for someone to take. If you tell someone a password it can be overheard. No matter what, passwords are only as secure as you treat them. Which is why experts recommend using long, complex passwords, changing them often, and using a different password for each account.
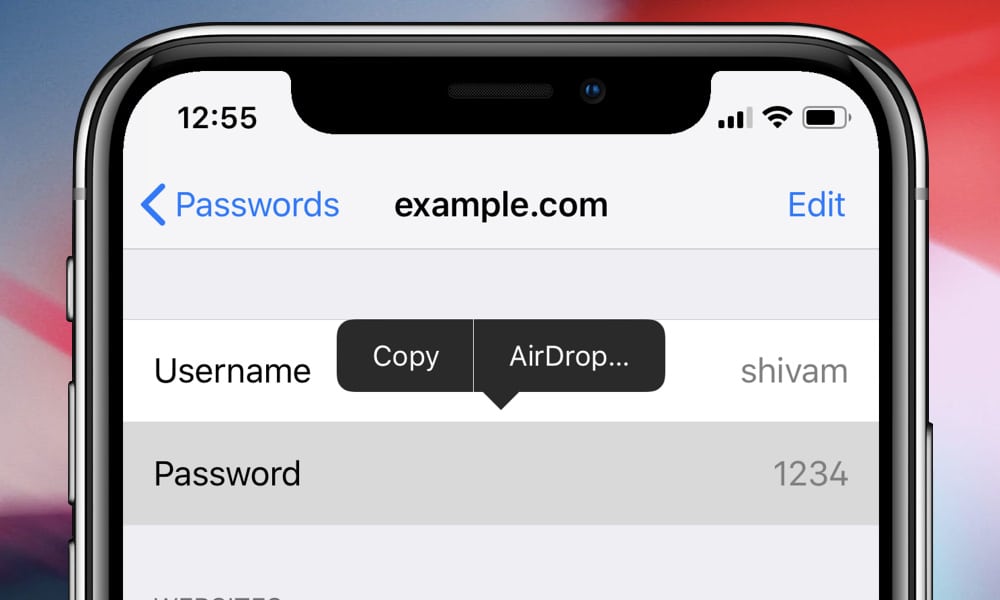
Still, sometimes you need to share passwords. In iOS 11, Apple made it easy to share Wi-Fi passwords to other devices. Now Apple is letting you share other passwords via AirDrop.
Auto generated passwords are never easy to read off to someone, sure copy and paste is always an option, but then we’re back to having that password stored somewhere insecurely. AirDropping a password in iOS 12 is a great solution.
- Open Settings and tap Passwords & Accounts.
- Select Website & App Passwords and find the account you want to share.
- You can share the username or password by typing either and selecting AirDrop. Then just choose a nearby person to share it to.
- You can also choose to copy a password to paste it directly in a field; or, into a document, an email, or message.
Don’t forget you can use Invisible Ink in iMessage to help hide messages from prying eyes.
3 Add an Alternate Appearance or Second Face to Face ID
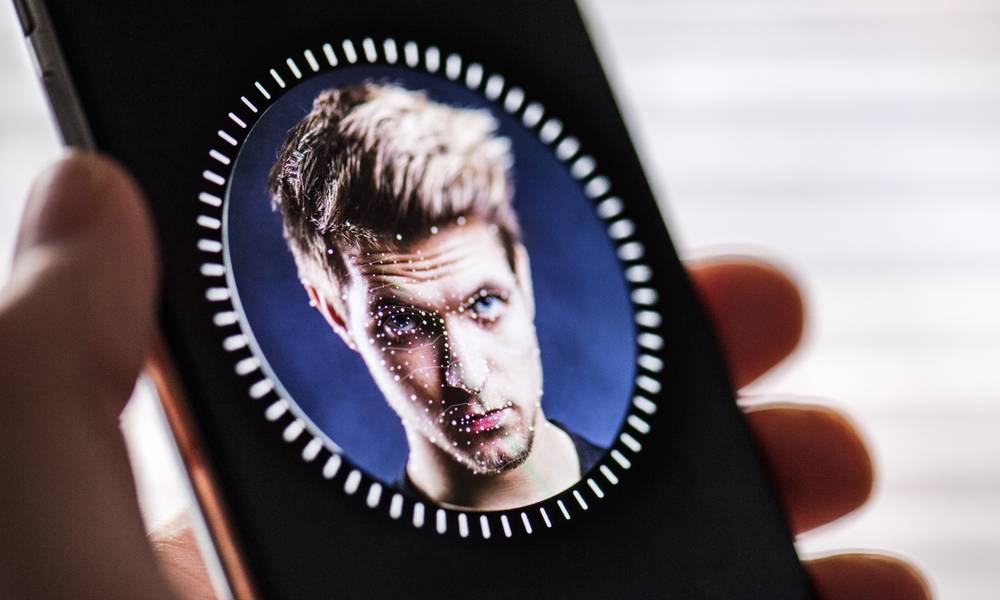
For the most part, Face ID works pretty darn well. It’s often faster and more convenient than Touch ID and it’s definitely faster than typing a long, secure password. Don’t get me wrong, there are some things about Touch ID I really miss, but for the most part Face ID isn’t the train wreck many of us were expecting.
Two of the biggest gripes I’ve heard regarding Face ID is that you can’t add a second face, or it doesn’t recognize a face in certain instances, such as waking up. Now in iOS 12, Apple is allowing users to setup an alternate appearance. This means users can now setup a second face—even if Apple didn’t intend this—or use it to help Face ID better recognize them in certain circumstances.
I don’t know about you, but when I wake up in the morning, not only do I look scarier than usual, but half of my head is still in the pillow. I setup an alternative appearance with my head in my pillow and it actually works a lot better than it did.
So now if your combatting “I just woke up” face, or your part-time job requires you to use a mask, goggles, or something else that drastically changes your face, you’ll still be able to unlock your device. Batman is somewhere rejoicing.
To setup your alternate appearance, find it in
- Settings
- Face ID & Passcode
- Set Up an Alternate Appearance
This will prompt you to go through Face ID scanning to get all angles of your face like the first time you set it up.
2 Open the QR Scanner from Control Center

You might not know it, but you can use the Camera app to automatically scan QR codes. You can quickly access this feature with 3D Touch, but in iOS 12 you can also add a QR scanner control to Control Center. So if you scan a lot of QR codes this feature is for you.
- Settings
- Control Center
- Customize Controls you can add the Scan QR Code control to your Control Center.
Swipe down on the top-left corner of the display to access Control Center and tap the QR Code icon to get scanning. Just keep in mind, the QR scanner is really just the Camera app… so it’s really not any different than opening Camera. Like faces and other elements, QR codes are automatically detected.
1 Retry Face ID with Just a Swipe

We’ve all had that moment when Face ID didn’t recognize us. Maybe we were too close or too far, maybe the sun was washing out our face, or maybe the camera was pointed at the ceiling. In iOS 11 you’d be prompted for a passcode. You could reinitiate the scan by turning the display off and back on, or by swiping up from the bottom and back down (sometimes this worked), or by lowering and raising the device again; but, all of these options were slow, unreliable, and unintuitive.
iOS 12 fixes this by allowing users to simply swipe up to rescan when prompted for a password. That’s it. So now when you’re yawning and your phone prompts for a password, just swipe up. Or, if you yawn a lot, consider setting up a yawning alternate appearance.
iOS 12 Is Full of New Features
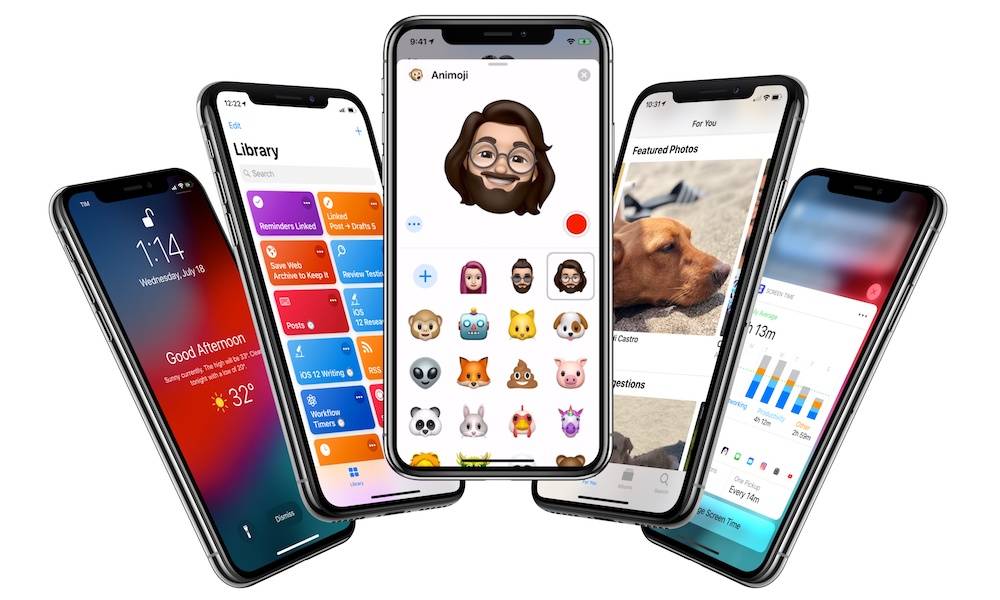
What are your favorite features in iOS 12? What do you think Apple could’ve done better? What “missing” features do you want to see in iOS 13? Let us know in the comments and on social media. We love to hear your ideas. Thanks for reading!
