
How to Fix iOS 11 Wi-Fi Issues
 9to5Mac
Image via iPhone Paradise
Toggle Dark Mode
iOS 11 is packed with tons of exciting new features and changes, but it also has its own share of bugs and software problems. Just like every major release of iOS, the first few versions are not as stable.
If you’ve installed iOS 11 on your device, but have started facing issues with Wi-Fi, then you’re not alone as a number of other iOS 11 users are also facing the same problems. Some of the issues that are being reported include poor Wi-Fi connectivity, random connection drops, slow internet speed, and not being able to connect to a Wi-Fi network.
Fortunately, there are a number of solutions which can you help you remedy the Wi-Fi issues in iOS 11. Here are the workarounds.
How to Fix Wi-Fi Issues in iOS 11
1 Turn Wi-Fi Assist off and Back on
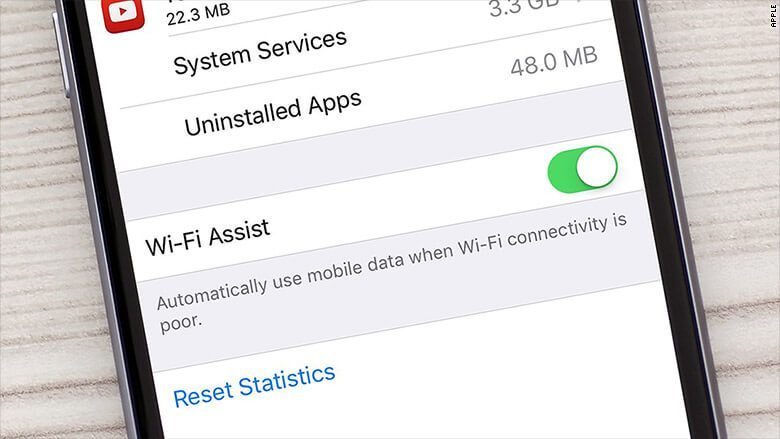
Wi-Fi Assist is a feature in iOS that automatically switches your device to Cellular Data when your Wi-Fi connection is poor. Some users have reported that turning off Wi-Fi Assist and re-enabling it helps to solve Wi-Fi problems.
To access Wi-Fi Assist settings, do the following:
- Open the Settings app.
- Go to Cellular Data.
- Scroll to the bottom and you should see the toggle for Wi-Fi Assist. Turn it off, then turn it back on.
2 Perform a Hard Reset
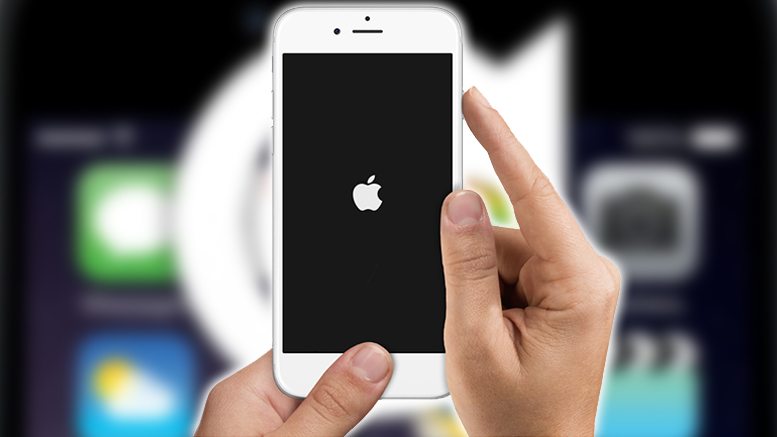
Hard reset is a forced reboot that is usually used to troubleshoot the minor software problems on your device, such as the Wi-Fi issues that you’re facing. Therefore, it’s a good idea to perform a hard reset and see if it solves the problem.
- How to Hard Reset iPhone 8 and iPhone X
- How to Hard Reset iPhone 7
- If you own an older model iPhone, press and hold the Home button and the Sleep/Power button together for a couple of seconds. Once the screen turns black and the Apple logo appears, release the buttons. Now wait until your device boots up normally and the Lock screen appears.
3 Update to the Latest iOS Version
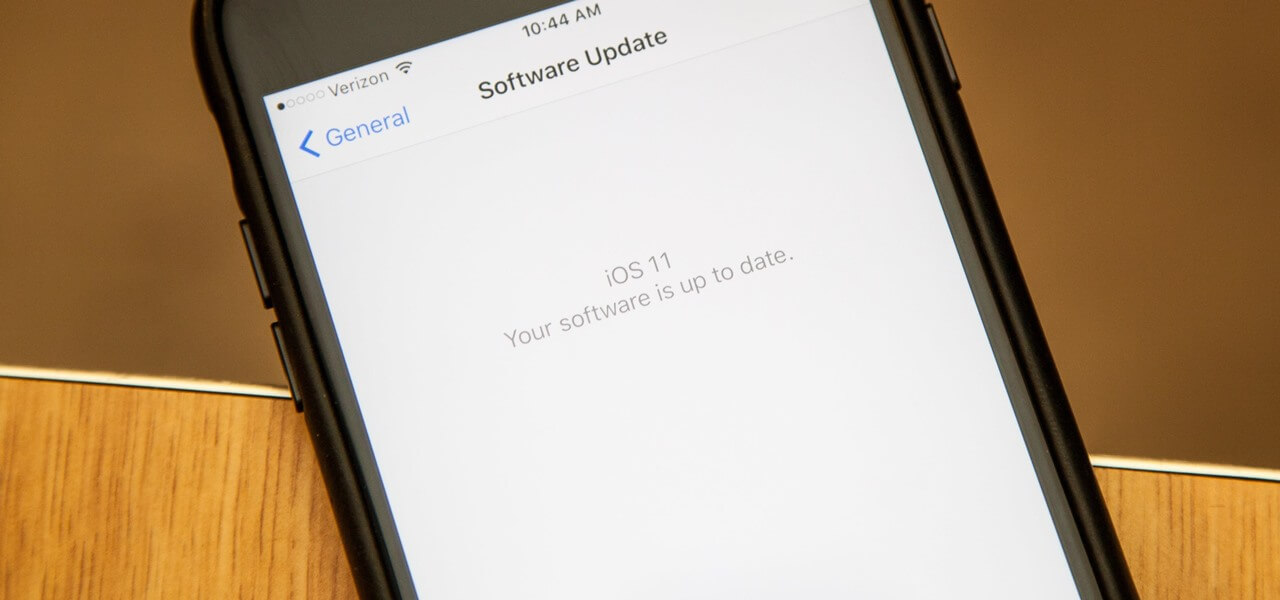
New iOS updates usually fix bugs and issues that were present in the previous version. If there’s a software update available for iOS 11, then we highly recommend that you download and install it as it might fix the Wi-Fi issues that you’re facing.
To update your iOS device:
- Open the Settings app.
- Go to General > Software Update.
- If you see a pending software update, tap on the Download and Install button to download the update. Once the download completes, tap on Install.
4 Turn off Your VPN
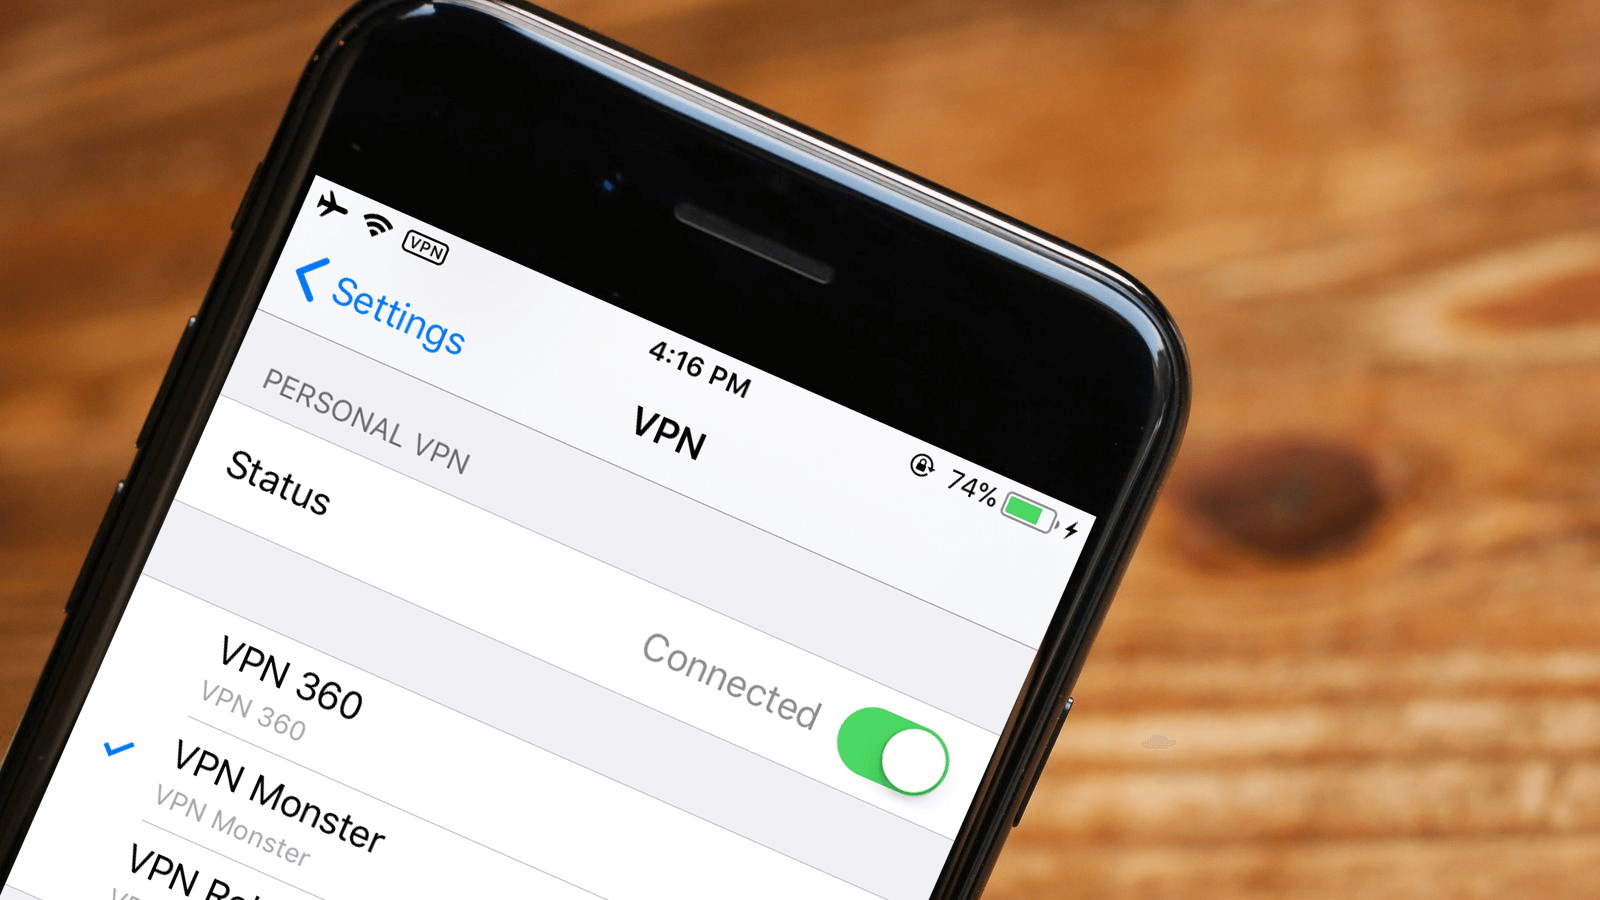
If you have VPN enabled, then it could be the reason why you are having issues with Wi-Fi. Try to disable VPN to see if it solves the issue.
- Open the Settings app and tap on General.
- Tap VPN.
- Turn off the Status toggle to disconnect VPN. If you’re unable to toggle it off, then open the VPN app which you’ve used and toggle it off from there.
5 Reset Network Settings
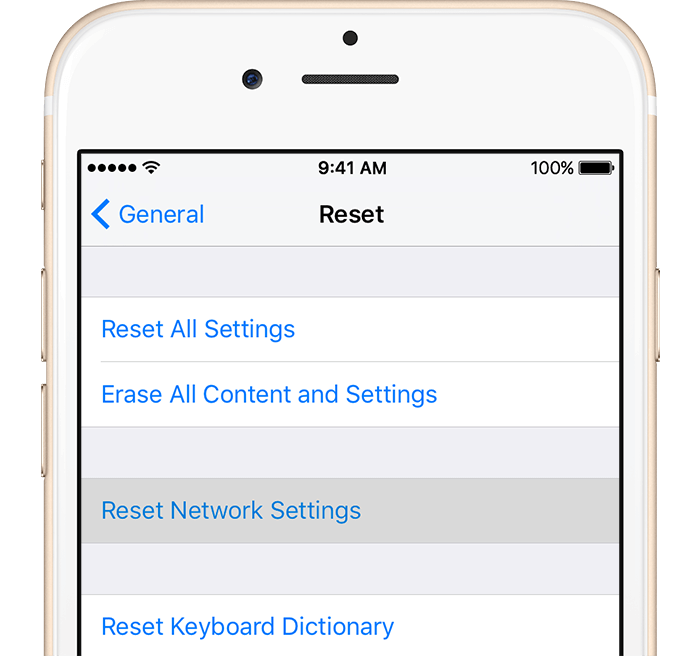
The issues that you’re facing with Wi-Fi could be due to problems with the network settings. One of the effective fixes for this is to reset the network settings, which clears caches and DHCP settings and resets all network-related configurations to factory default. It does not delete any data from your device, so all your files, apps, and important information will remain intact after the network reset.
To reset the network settings on your iOS device:
- Open the Settings app and tap General.
- Scroll to the bottom and tap Reset.
- Choose Reset Network Settings, then enter your iPhone’s passcode to confirm the reset.
6 Reset All Settings
If you’ve reset the network settings and the Wi-Fi issue still remains, then you should try resetting all your device settings. Doing so will put all your device settings back to factory defaults and won’t remove any of your data.
To reset all settings:
- Open the Settings app and tap General.
- Scroll to the bottom and tap Reset.
- Choose Reset All Settings, then enter your iPhone’s passcode to confirm the reset.
7 Restore Your iOS Device or Downgrade to iOS 10.3.3
As a last resort, if none of the above methods work, then you should try restoring your iOS device using iTunes, or downgrade back to iOS 10.3.3. As of this writing, Apple is still signing iOS 10.3.3 so you still have the chance to downgrade to that version and fix the Wi-Fi problems that you’re facing. Another solution is to restore your device via iTunes to see if it solves the issue. This will wipe your device and remove all the data. After the restore, you can either set up as a new device or restore from an iTunes or iCloud backup.
These are the solutions that should hopefully help you fix your Wi-Fi problems. If any of these tips helped you fix the problem, or you’ve got some tips of your own, then let us know in the comments below.


