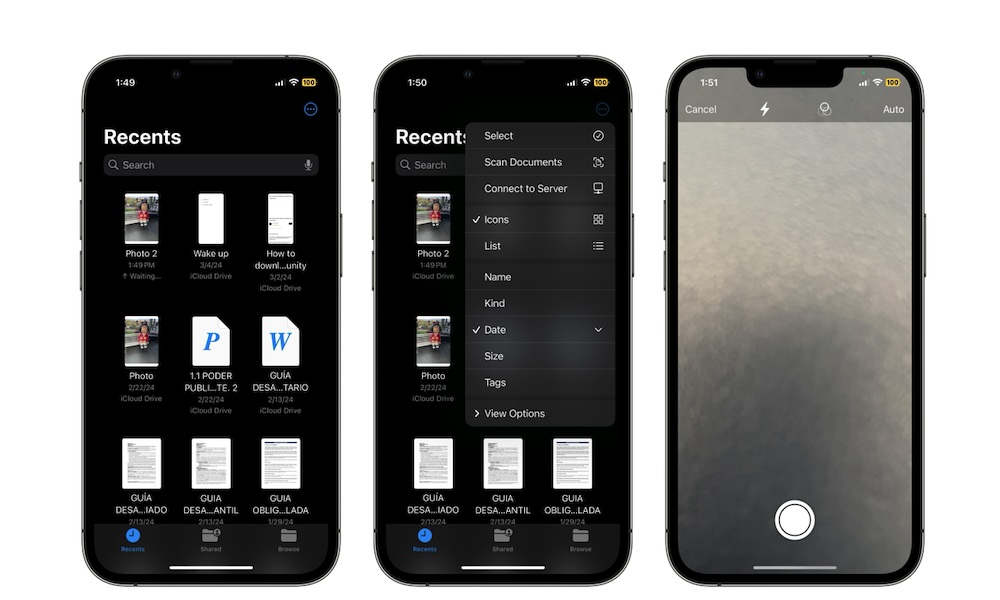
Use Apple Files to Scan Documents
Another cool feature of the Files app is the ability to scan documents and instantly save them into any folder. This makes work and school a bit easier and keeps all your files in the same place.
Here’s how to scan documents with the Files app:
- Open Files.
- Tap on the three-dot button in the top right corner of your screen.
- Select Scan Documents.
- Position the document in view of your iPhone’s camera.
- Tap the shutter button at the bottom.
- Drag the corners of what you just scanned so you only see the important information.
- When you’re done, tap on Keep Scan in the bottom right. Or, you can repeat your scan by tapping Retake in the bottom left.
- When you finish with the scan, tap on Save.
- Enter a name for your scan. You can also tap on Tags to organize it.
- When you’re done, tap on Save.
The scan will be saved as a PDF document in the selected folder.

