10 Tips and Tricks to Master the Files App on iPhone
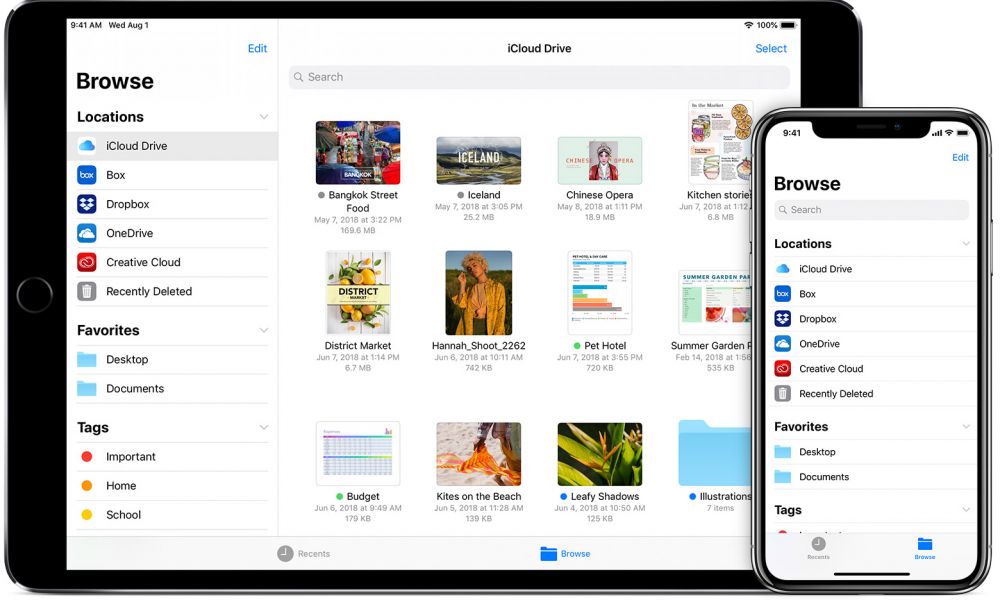 Credit: Apple Support
Even though it might not be as comfortable, you can still use your iPhone to manage all kinds of files. You can view them, edit them, and even add important notes and highlights.
Basically, your iPhone can do anything a computer can, and it's all thanks to the Files app. This simple but powerful app is filled with features that can help you manage your files with just a few taps.
Of course, you need to know how to use it. If you haven't tried Apple Files, make sure that you have installed it on your iPhone. If not, you can always download it from the App Store for free.
After you install it, read on for ten tips and tricks to master Files in no time.
Duplicate Your Files
Sometimes, you might want to duplicate a file so you don't mess with the original one in case you make a mistake, especially when you plan on opening it from your iPhone.
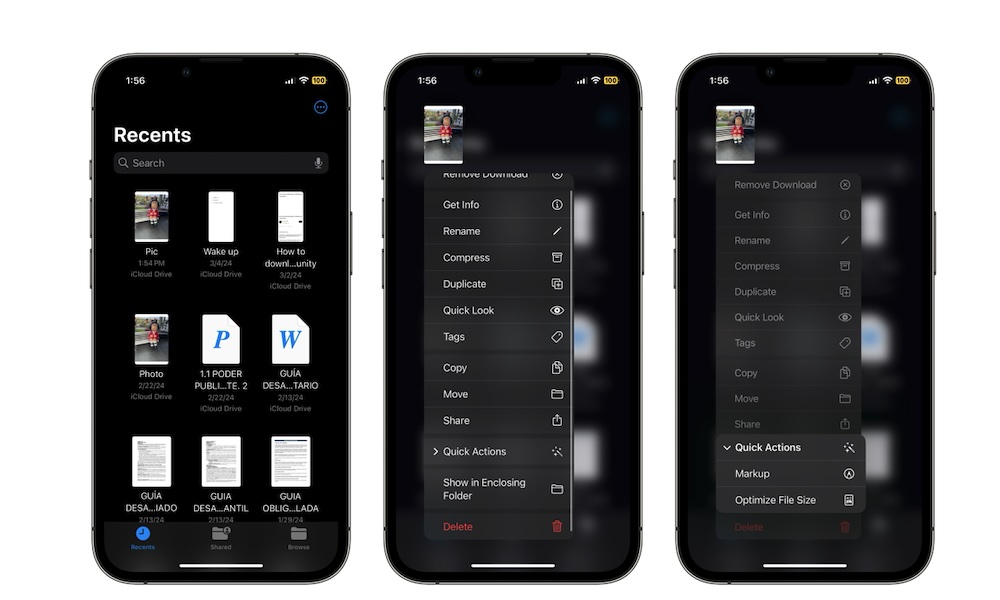
Luckily, the Files app makes it pretty easy to duplicate any files with just a few taps:
- Open the Files app.
- Find the file you want to duplicate.
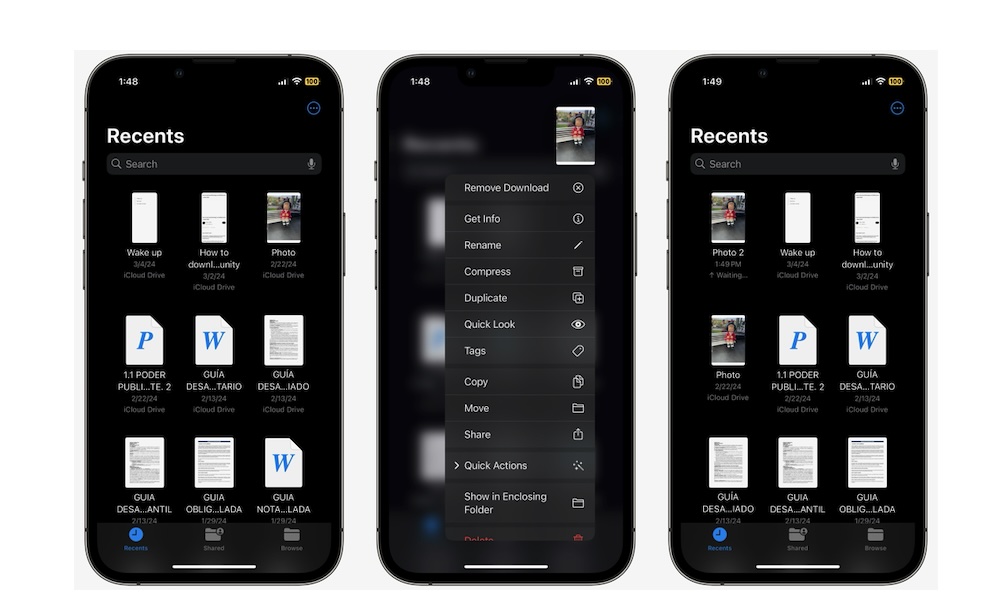
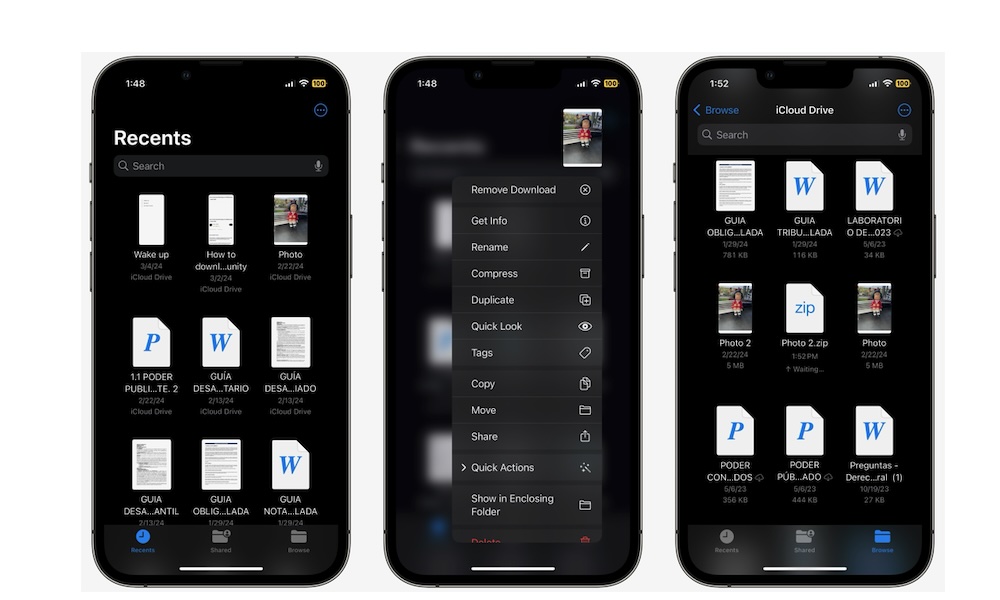
- Press and hold on it until you see a menu pop up.
- Tap Duplicate.
And that's it. Your iPhone will immediately duplicate the file and use the same name as the original file with a number added at the end.
Organize Your Files With Tags
Most of us keep a lot of files on our iPhones. Whether it's because of school, work, or both, you probably have way too many files.
Fortunately, you can easily manage your files by using tags. Tags make it easier to find the files you want. For instance, you can use a blue tag for school projects and a purple tag for work. Or you can create your own tags, so it's easier to identify what they're for.
Here's how to add a tag to your files:
- Open the Files app.
- Find the file you want to tag.
- Long-pres the file until a menu pops up.
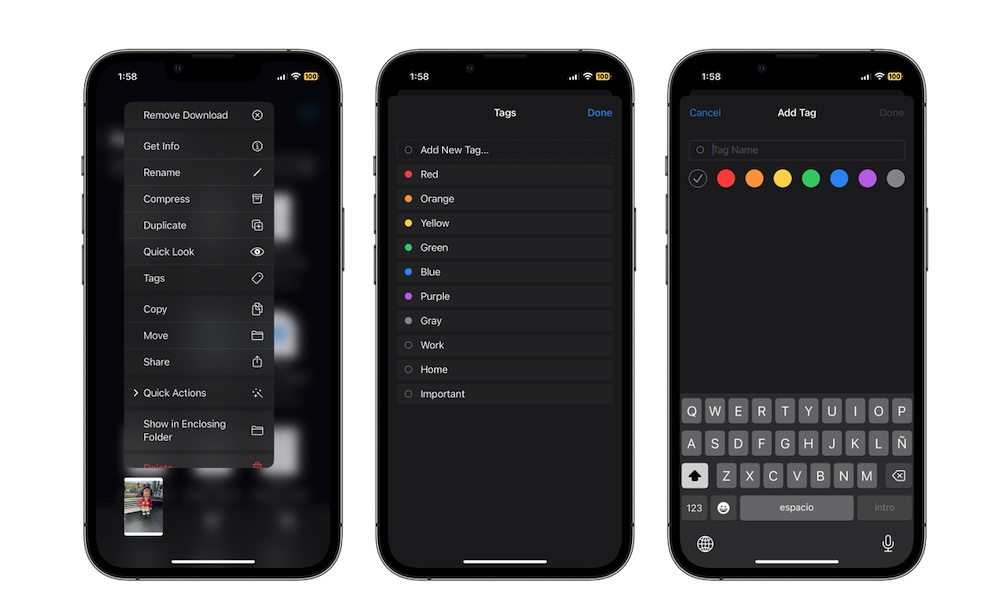
- Tap on Tags.
- Select the tag you want to use or tap on Add New Tag.
- Enter the name of the new tag and choose its color. Then, tap Done.
- Assign the new tag to your file. You can also use more than one tag.
- When you finish, tap on Done in the top right corner.
Once you've tagged your files, you'll not only be able to easily identify them visually, but you can also search for all files with a specific tag by typing the tag name into the search field.
Quickly Switch Between Files
Sometimes, you'll need to check multiple files almost at the same time. Unfortunately, your iPhone doesn't have a multitasking feature that lets you have two files open on your screen.
However, there is still a way for you to switch between your files almost instantly. This is how:
- Open the Files app.
- Open any file you want.
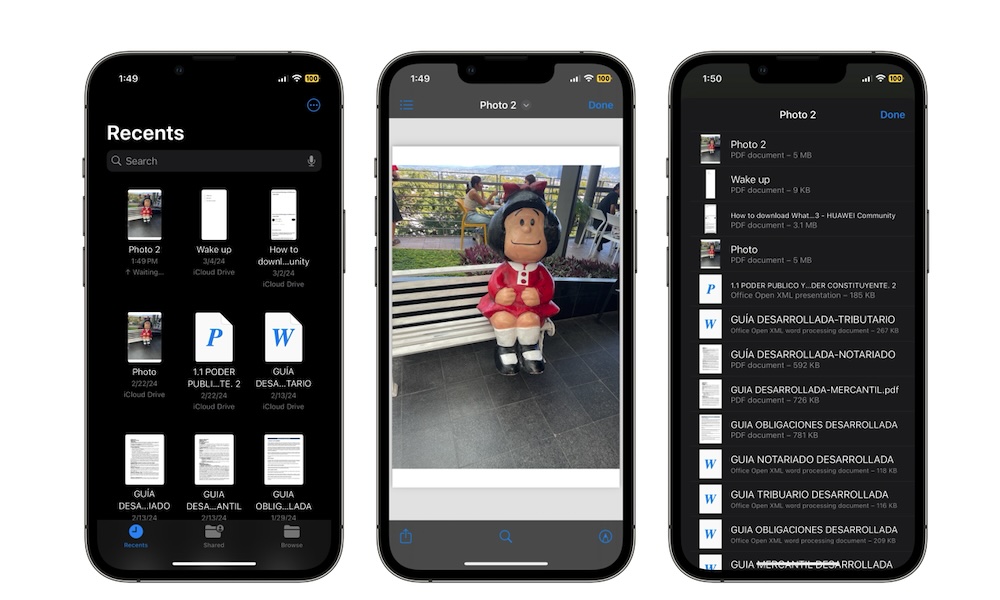
- To switch to another file, tap the three-line button in the top left corner of your screen.
- Scroll down and tap on the other file you want to open.
You can repeat these steps to switch between all your files.
Use Apple Files to Scan Documents
Another cool feature of the Files app is the ability to scan documents and instantly save them into any folder. This makes work and school a bit easier and keeps all your files in the same place.
Here's how to scan documents with the Files app:
- Open Files.
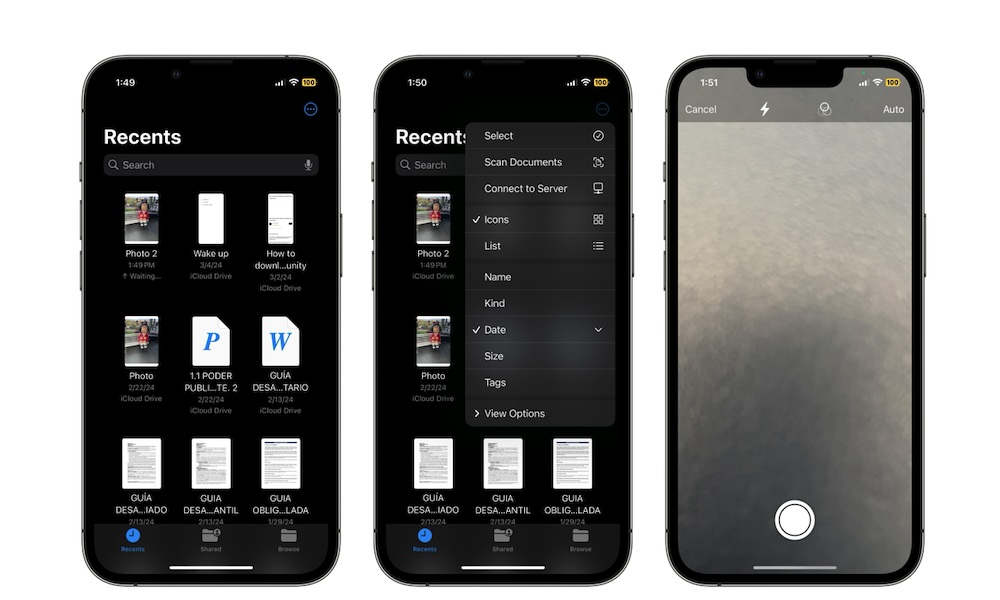
- Tap on the three-dot button in the top right corner of your screen.
- Select Scan Documents.
- Position the document in view of your iPhone's camera.
- Tap the shutter button at the bottom.
- Drag the corners of what you just scanned so you only see the important information.
- When you're done, tap on Keep Scan in the bottom right. Or, you can repeat your scan by tapping Retake in the bottom left.
- When you finish with the scan, tap on Save.
- Enter a name for your scan. You can also tap on Tags to organize it.
- When you're done, tap on Save.
The scan will be saved as a PDF document in the selected folder.
Compress or Uncompress Files
A cool feature that you probably didn't know about is that you can compress or uncompress any file with nothing but Apple's Files app, making it easier to share or receive any document.
Here's how to compress or uncompress files:
- Open the Files app.
- Find the file you want to compress or uncompress.
- Press and hold that file and then select Compress on Uncompress, depending on whether the file is already compressed or not.
And that's it. Files will take care of the rest and place your newly compressed or uncompressed files in the same folders. If you compressed the file, you'll find it as a Zip file.
Rename Your Files
If you just downloaded a new file or saved it with a pretty awkward name, you're probably thinking of changing it.
Luckily, you don't need to use anything other than the Files app. Here's how:
- Open the Files app.
- Find and open the file you want to rename.
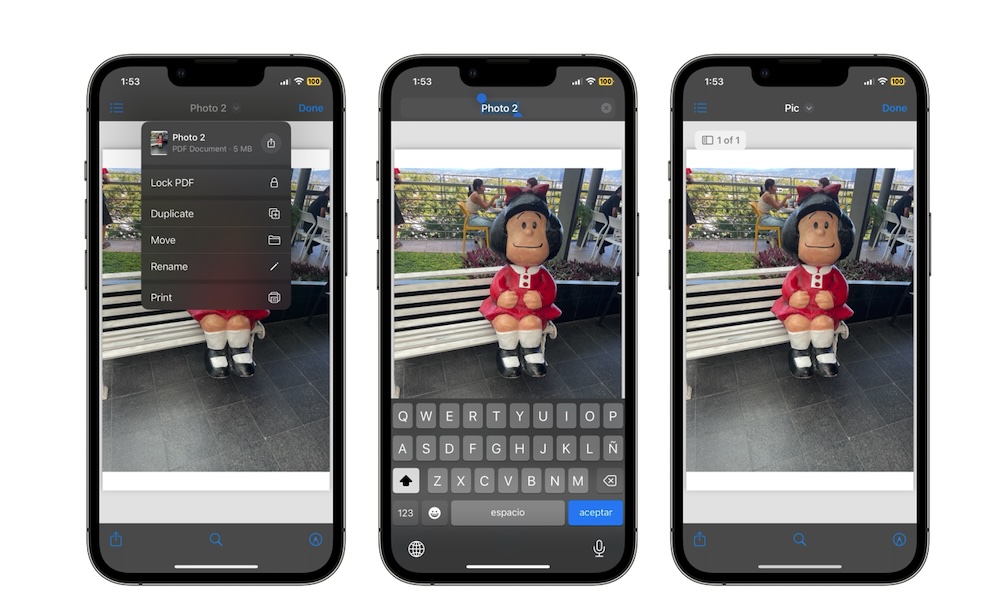
- Tap the name of the file at the top of your screen.
- Select Rename.
- Enter the new name for your file and then tap on Done on your keyboard.
Move Multiple Files at Once
If you're trying to keep your folders organized, you're probably moving some files from one place to the other.
While you can move files individually, that takes a lot of time. Instead, it's best to move multiple files at once by doing the following:
- Open Files.
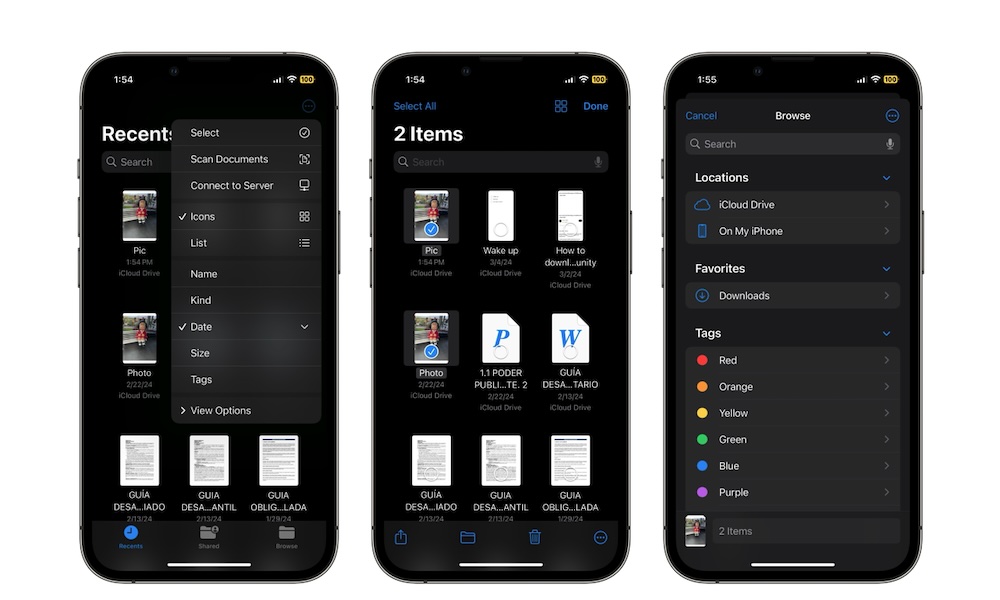
- Tap the three-dot button in the top right corner of your screen.
- Tap on Select.
- Select all the files you want to move.
- Tap the Folder icon at the bottom of your screen.
- Hit Browse in the top left corner.
- Select where you want to move your files to.
- Tap on Move in the top right corner of your screen.
Find Your Recently Deleted Files
When you delete a file inside Apple Files, the app will keep that file for 29 more days. That way, you can recover it if you didn't mean to delete it.
To find your recently deleted files, all you need to do is:
- Open Files.
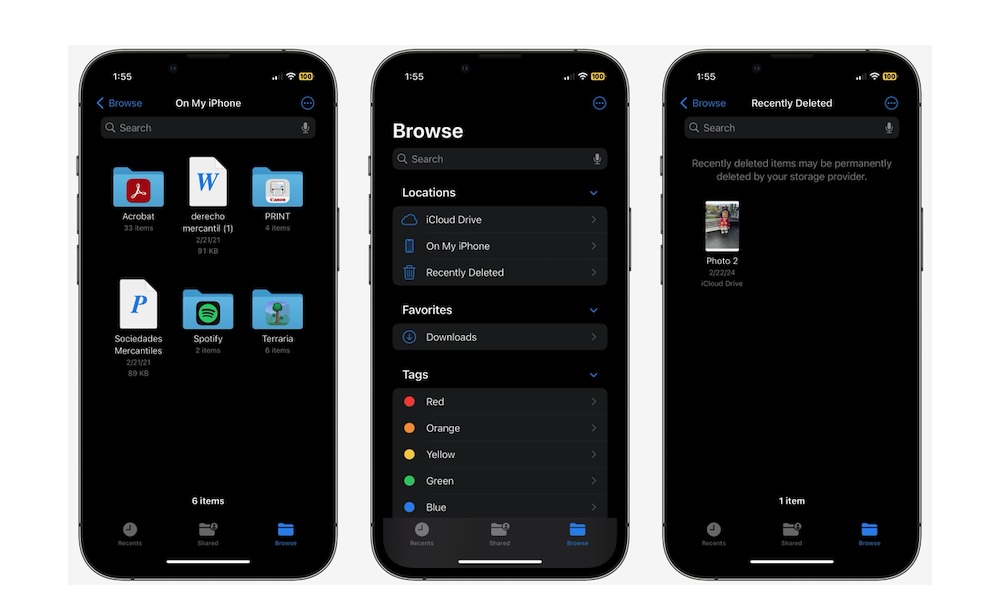
- Go to the Browse tab at the bottom of your screen.
- Tap on Browse in the top left corner.
- Go to Recently Deleted.
You'll find your most recent files here. You can then press and hold any file you want and select Recover to move the file back to its original folder or Delete Now to get rid of it permanently.
Optimize the Size of Your Files
Sometimes, your PDF files may take a lot more storage on your iPhone than they really need to. To avoid this, you can either delete them, or optimize their size.
When you optimize a file's size, the Files app will create a copy with a smaller, compressed size. Keep in mind that while this compresses your files, it's not the same as using the app's Compress feature. Using that app will turn any file into a Zip file, whereas this option will only reduce the size of PDF files.
Here's how to optimize a PDF:
- Open the Files app.
- Find the file you want to optimize the storage of and then long-press it until a menu pops up.
- Scroll down in the menu and select Quick Actions.
- Select Optimize File Size.
You'll know it worked because the Files app will create a copy and add the word Compressed at the end of the file's name. Note that if the PDF was already optimized, it won't be reduced any further.
Annotate Your Files on the Go
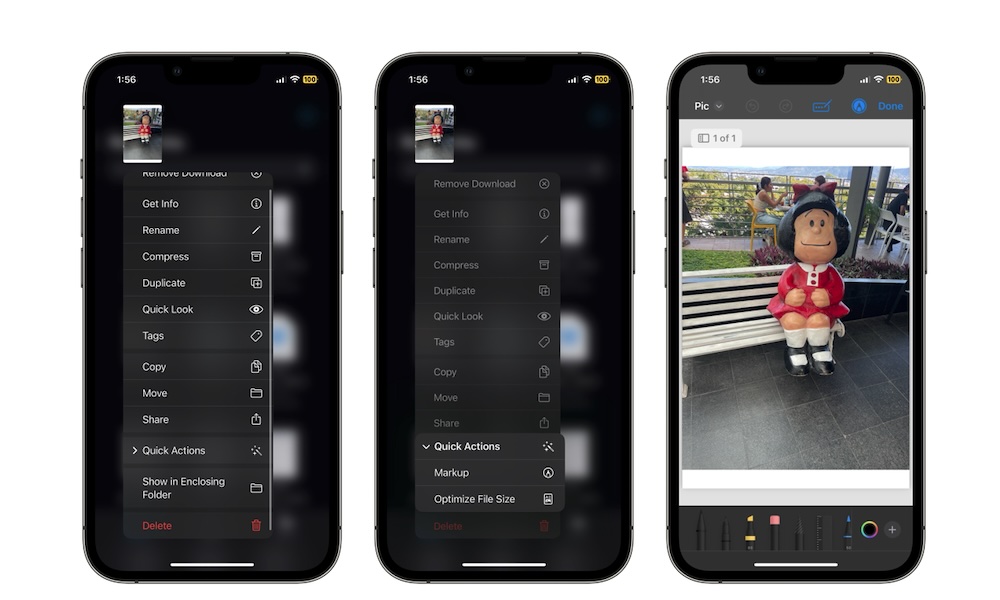
Another cool feature you can use with the Files app is the ability to annotate or markup any PDF or image file right from your iPhone.
Granted, it doesn't work quite as well as doing it on a computer. But it's more than enough to highlight something, add a block of text, or sign a document.
To edit your files, you need to:
- Open the Files app.
- Open the file you want to edit.
- Tap the Markup tool button in the bottom right corner.
- Choose the tool you want to use to edit your file.
- You can also tap the AutoFill button at the top of the screen (the one that looks like a pen signing a document) and then tap the plus icon at the bottom right corner to add a text box or a signature.
- When you finish editing your file, tap on Done.
Note that this only works with PDF files and image files, although you can open other document types from the Files app in their appropriate apps if you have them installed on your iPhone, such as DOCX files in Microsoft Word and Numbers files in Apple's Numbers app.

