AirTag Card: How This Clever DIY Enthusiast Rebuilt His AirTag in Wallet Form
 Credit: Andrew Ngai / YouTube
Toggle Dark Mode
It’s perhaps ironic that one of the predefined names that appears when setting up an AirTag is for a wallet, since as relatively thin as Apple’s new item trackers are, they’re still a bit too thick for many wallets.
In fact, placing an AirTag in most wallets will create an unsightly and awkward bulge, which has led to some clever accessories designed expressly for holding an AirTag in a wallet so that it at least remains flush with everything else.
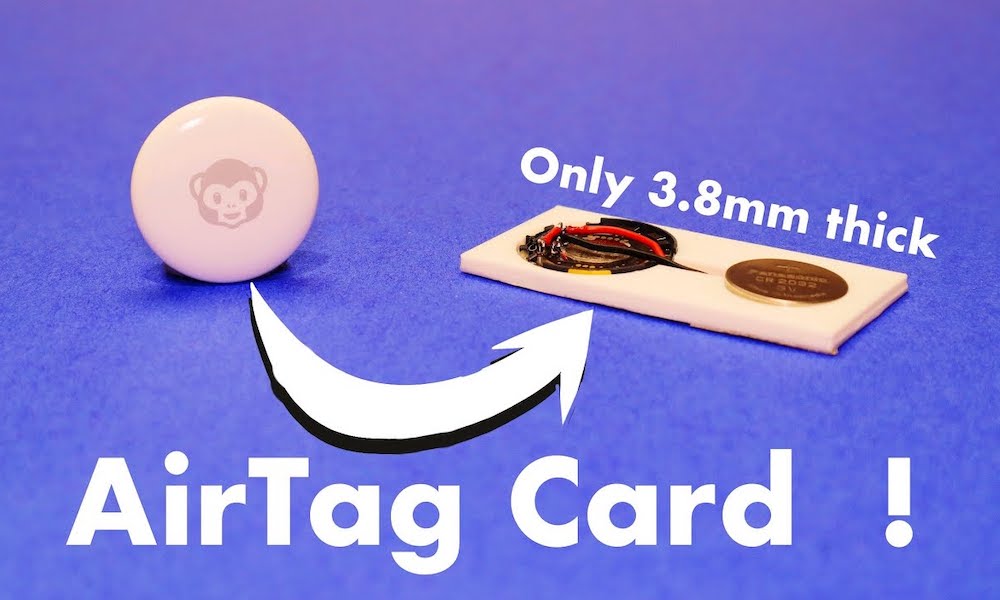
However, one ambitious AirTag user has come up with his own solution that’s even better: decreasing the thickness of the AirTag by taking it apart and re-engineering it into an “AirTag Card.”
Andrew Ngai really wanted to use an AirTag to track the location of his wallet, but also really didn’t want to add any more thickness to it than strictly necessary. So, he decided to rip apart the AirTag and “give it a new body,” he explains.
Ngai put together a YouTube video outlining the process, but basically, he separated the AirTag into two halves, and then 3D-printed a flatter casing to hold both sides.
The result, Ngai demonstrates, is a new AirTag design with the surface area of a credit card that’s only 3.8mm thick — less than half the 8mm thickness of a normal AirTag.
Of course, that makes sense considering that he basically split it in half, although he also removed the outer plastic shell, effectively disabling the speaker in the process. In fact, as his video shows, the entire magnetic speaker core gets removed entirely.
To be clear, this process is not for the faint of heart. It’s also pretty much guaranteed to void your AirTag’s warranty, although for a $29 device, you may not care all that much.
I would not recommend to anybody who is not familiar with hands-on electronic work because some components are really delicate, and I actually broke off the power connector once. I had to solder it back on — that was not fun.
Andrew Ngai
As we already saw from iFixit’s teardown, getting into the guts of the AirTag isn’t exactly simple, and Ngai had to heat it to 150 degrees Fahrenheit to separate the glue between the AirTag’s logic board and its plastic shell. Once that was done, however, the remaining obstacle to slimming the AirTag down was relocating its CR2032 coin cell battery.
At 3.2mm, the CR2032 makes up almost half of the AirTag’s thickness by itself, especially when combined with the rear cover. To address this, Ngai simply ran wires from the battery leads on the AirTag logic board directly to the battery at one side, soldering everything in place.
This was where the need for the 3D-printed casing came in, since the battery still needed to be held in place alongside the AirTag. In theory, it should be possible to wire the two components up side-by-side, but that would be considerably messier and would increase the chances that the battery wires would come loose.
That said, we can see this method being used to effectively build an AirTag directly into a wallet or another product, especially if you didn’t intend to remove it regularly.
More significantly, however, it suggests that Apple’s “one-size-fits-all” approach to AirTags has some definite room for improvement. While we’re a bit skeptical that Apple would ever consider releasing its tracking tags in other designs, we’re at least hoping that third-party manufacturers building Find My compatible items will eventually be able to come up with some similarly clever solutions, especially after Apple opens up the U1 chip to allow these accessories to take advantage of Precision Finding.


