
6 Simple Ways to Make Your iPhone Easier to Use

One of the best things about the iPhone is that it can be perfect for anyone. No matter how old or young you are, Apple has made iOS feel intuitive and easy to use, whether you’re a pro user or just getting started.
Of course, that doesn’t mean that you’ll know everything you need to do from the get-go. There are a few simple tricks everyone can use to make their lives with an iPhone a little easier.
If you’re a senior, for instance, you probably aren’t looking for flashy ways to use your iPhone; you’d probably rather know about settings that make your iPhone easier to read, hear, or control.
Fortunately, you don’t need to master complicated features or install a bunch of extra apps to accomplish that. In many cases, the most helpful improvements are already built in.
If you want to make your iPhone actually useful and easy to use, read on for 6 of the best tips to help you get started.
Make the Text Bigger
One of the most helpful changes you can make on an iPhone is also one of the simplest: make the text larger. If you find yourself constantly holding the phone closer to your face, squinting at menus, or misreading app names, bigger text can make an immediate difference. Messages, settings, mail, notes, and many third-party apps all become easier to read once you give yourself more breathing room on the screen.
This is especially helpful because eye strain can build up over time. Even if you can technically read smaller text, that doesn’t mean it’s comfortable. A phone should feel easy to use, not like something you have to fight with every time you pick it up. Making the text larger can make your iPhone experience almost instantly feel more comfortable.
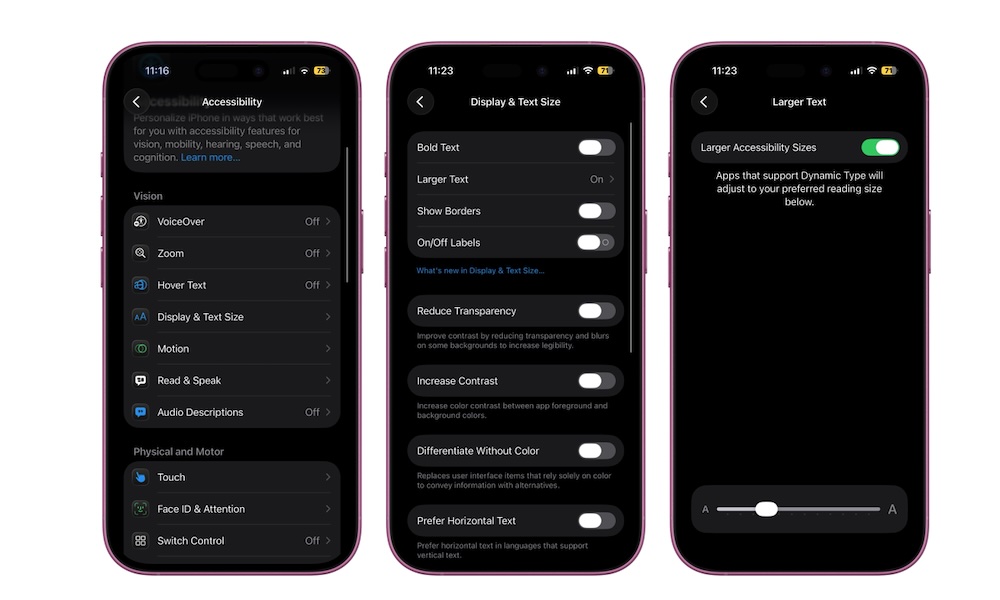
Here’s how to adjust the text size:
- Open the Settings app.
- Scroll down and tap Display & Brightness.
- Tap on Text Size.
- Drag the slider to the right to make the text bigger.
And that’s it. This should give you text that’s big enough to read without your glasses. If you need even larger or easier-to-read text, you can find more size options under Settings > Accessibility > Display & Text Size. From there, you can go to Larger Text and turn on Bold Text to make words pop out a bit more.
Use Zoom to Magnify the Screen
If standard text size changes still aren’t enough, the iPhone’s built-in Zoom feature can help by magnifying the screen itself, which is different and more useful than just making text bigger.
Zoom can enlarge the entire display or part of it, which is especially useful when you run into tiny letters in a banking app, medical website, or when you get a message from friends or family.
Even if making the text larger worked for you, this can still be a great safety net because not every app is designed equally well. Some apps don't support Apple's text sizes, or still use small menus or cramped layouts. Zoom lets you deal with those without straining your eyes.
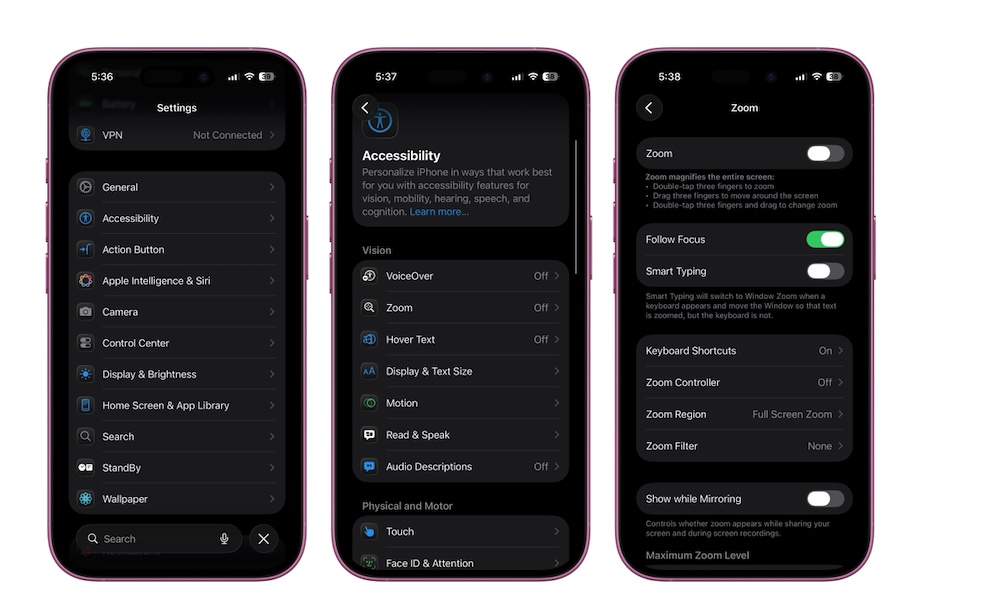
Here's how to turn your iPhone’s zoom on:
- Open the Settings app.
- Scroll down and tap on Accessibility.
- Tap on Zoom.
- Turn on Zoom.
- Adjust the zoom style and settings if you want a different experience.
Once it’s turned on, you might not notice anything at first, but you can enable Zoom instantly by double-tapping your screen with three fingers. This will zoom in on the specific spot where you double-tapped. You can then drag three fingers on your screen to move around.
Have Your iPhone Read Text Out Loud
Reading on a phone can get tiring, especially with long emails, articles, notes, or instructions. That’s where the iPhone’s spoken text features can be incredibly useful. Apple gives you options that can read selected text, or even read all the text that’s on the screen at once. Granted, it won’t replace an audiobook read by James Earl Jones, but it’s still a good (and free) alternative.
It’s also helpful if you want to follow along visually while hearing the words at the same time, which can make information easier to absorb. To get started with this feature, you’ll need to follow these steps:
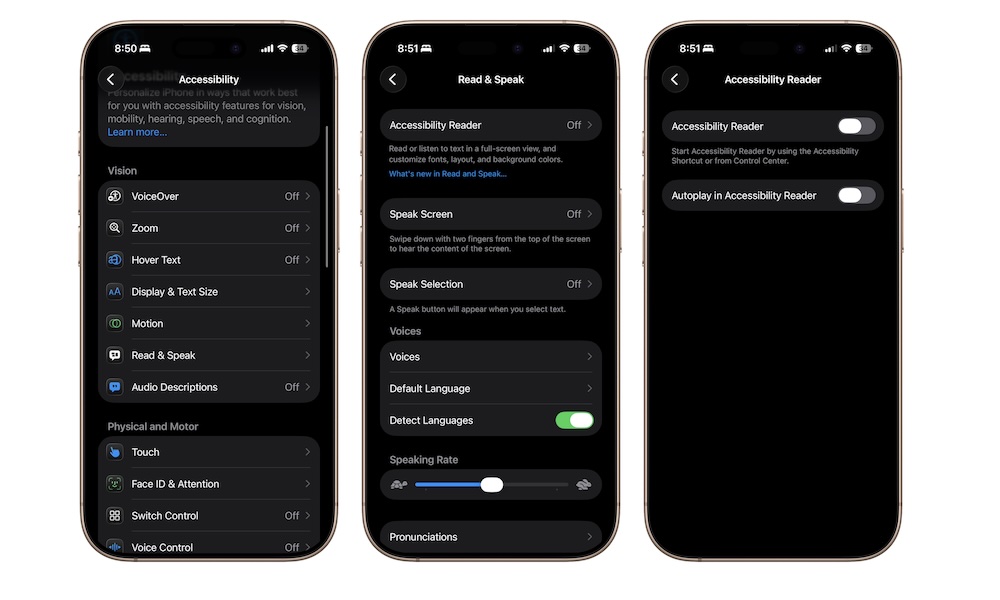
- Open the Settings app.
- Scroll down and tap on Accessibility.
- Tap Read & Speak.
- Tap on Accessibility Reader.
- Turn on Accessibility Reader.
- Go back and change all the reading options you want.
Now, you need to do the next step, which is to add the Accessibility Reader control to your Control Center. To do this, swipe down from the top right corner of your screen to access your Control Center. Tap the plus icon in the top left corner of your screen, and then tap on Add a Control at the bottom.
Use the search bar to search for Accessibility Reader. Next, tap the control to add it to your Control Center. Now you can test this feature. Open a note, webpage, or email, and then go to your Control Center and tap the Accessibility Reader control (the icon that looks like a page).
You’ll be redirected to a new app with all the text from the webpage or email you had on your screen. Tap on play and start hearing the text.
Make Your iPhone Listen for Important Sounds
Sound Recognition is a very helpful feature if you’re worried about missing important sounds. When enabled, your iPhone can listen for alarms, doorbells, sirens, and other sounds and send you an alert when it hears them. It's especially useful if your hearing isn’t as sharp as it used to be or if you simply want another layer of awareness while at home.
What’s great about this feature is that it happens offline. Your iPhone will download the sounds you want it to be alert to, so you can rest assured that no one (not even Apple) is listening to your surroundings without your consent.
This is also more practical than it sounds at first. A lot of people worry about missing the doorbell or simply not hearing when something happens around them. Having your iPhone help with that can add some peace of mind, especially if it’s usually within reach on a table or nearby chair. Here's how to get started with Sound Recognition:
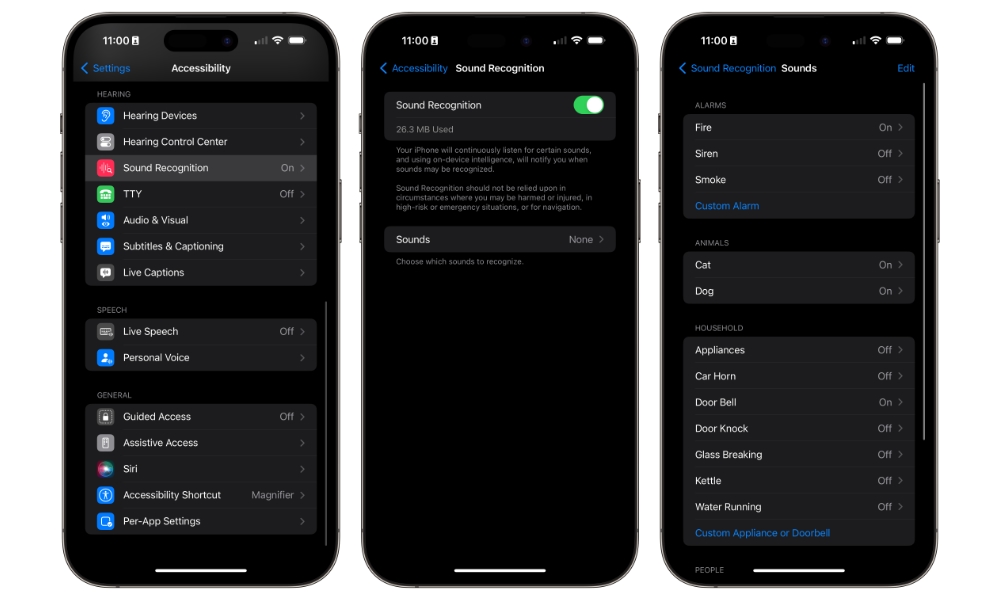
- Open the Settings app.
- Scroll down and tap on Accessibility.
- Scroll down and, under Hearing, tap on Sound & Name Recognition.
- Tap Sound Recognition.
- Turn Sound Recognition on.
- Tap Sounds and choose the sounds you want your iPhone to recognize.
Give it a few seconds to download all the sounds, and then it’ll be ready to go. Whenever it detects a sound nearby, you’ll get a notification from your iPhone.
Pro Tip: You can also enable Sound Recognition in the CarPlay Settings app to alert you to specific sounds like a siren, car horn, or a crying baby while you're driving.
Use Live Captions for Spoken Audio
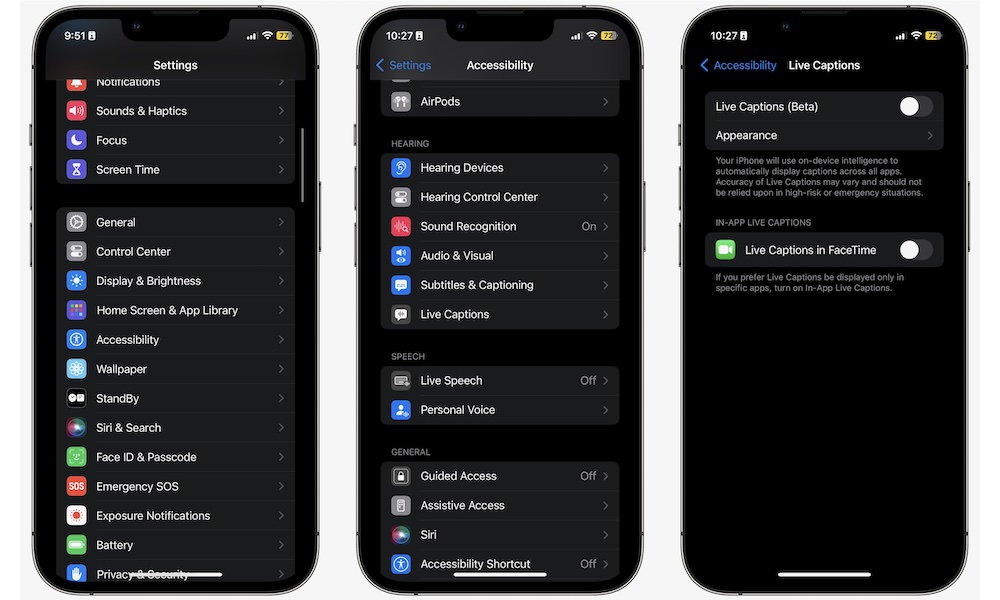
Live Captions can turn spoken audio into text right on your screen, which can be extremely helpful when audio is hard to follow. If you watch videos, use FaceTime, listen to podcasts, or struggle to hear speech clearly in noisy environments, this feature can make content easier to understand without forcing you to keep replaying things.
Audio issues are an especially common problem with today’s shows and movies. The audio levels aren’t even throughout a show, and when you add in background noise, it can be hard to understand what people are talking about. For many people, reading speech while hearing it at the same time makes a huge difference. Here's how to start using Live Captions:
- Open the Settings app.
- Scroll down and tap on Accessibility.
- Scroll down and, under the Hearing section, tap Live Captions.
- Turn on Live Captions and adjust the appearance if available.
What’s great about this feature is that it works for both audio that’s coming from your iPhone, as well as audio that’s coming from anywhere else, so you can use it every day, even if you don’t want to watch a show or movie.
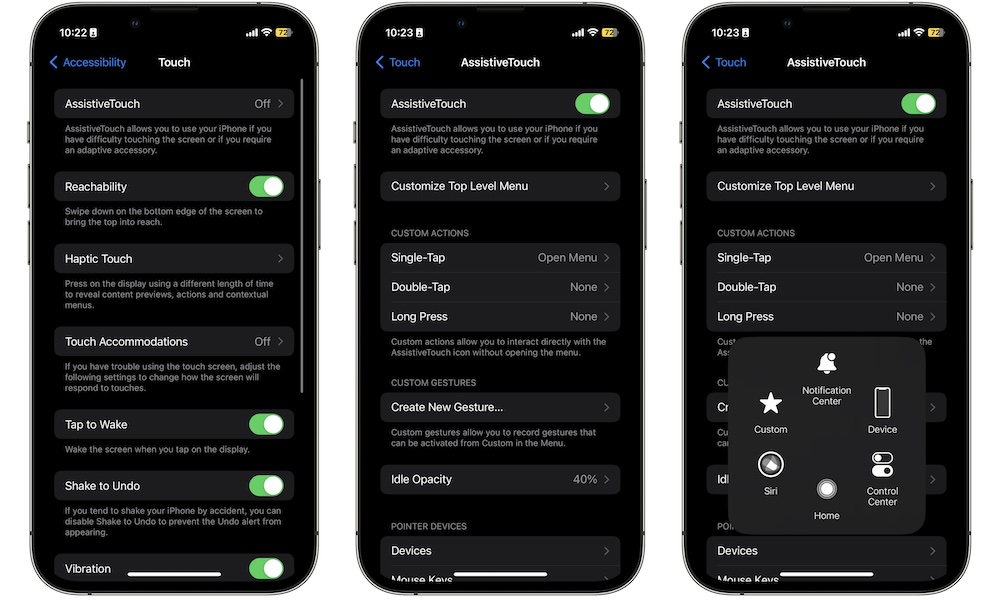
Turn On AssistiveTouch for Easier Control
Let’s face it: if you’re not used to having an iPhone — or a smartphone for that matter — it might be hard at first to control. You probably don’t know where things are or how to do specific actions like taking screenshots.
Luckily, Apple added an even easier way to navigate and control your iPhone. AssistiveTouch adds a floating onscreen button that can help you control your device more easily. That button can open a menu with shortcuts for actions you use often, and it can be especially useful if certain gestures, button presses, or repeated swipes feel awkward or tiring.
This is a great option if you struggle to locate certain features or if you simply want an easier way to access common controls. Either way, AssistiveTouch can make the iPhone feel less demanding on your hands. Here's how to use it:
- Open the Settings app.
- Scroll down and tap on Accessibility.
- Tap on Touch.
- Tap AssistiveTouch.
- Turn AssistiveTouch on.
- Customize the menu if you need to.
You’ll notice a small greyish button has popped up near the bottom right corner of your screen. By default, if you touch it once, you’ll open a bunch of useful features that you can customize to make it even better for you. Likewise, you can customize a double-tap or a long press to do specific actions more easily.
Master These iPhone Settings
The most useful iPhone tips for seniors are those that simply make your iPhone more useful to you. Whether that is bigger text, clearer audio, or better controls, all can change how the iPhone feels in everyday life. And once the phone feels more comfortable, it also becomes a lot less stressful to use.
Of course, trying all of these tips at once can be overwhelming, even if there are almost a handful of them. The best thing you can do is start with one or two, and then try other tips from the list.