
No Mic? No Problem. Here’s the iPhone’s Secret Audio Weapon
 Apple
Apple
Toggle Dark Mode
If you’re someone who likes recording videos with your iPhone, you know how important sound can be. Whether you want the perfect shot for your passion project or you just want to share a high-quality video of your pets with your friends and family, you need to make sure the audio sounds amazing.
Luckily, as long as you have an iPhone 16 or later model — including the new iPhone 17e — you can improve the audio quality of your videos in just a matter of seconds. This is because whenever you record a video on these newer models, your iPhone captures audio in multiple streams simultaneously. This lets you change the audio after the fact to focus on people’s voices and remove background noise. Here’s how to use it.

The iPhone’s Audio Mix Feature Explained

As we mentioned, your iPhone will record video with Spatial Audio by default, using a 3D audio format that feels more immersive when you listen to it.
Your iPhone will automatically choose how to mix the audio when you’re using Cinematic mode, but it also lets you use Audio Mix in the Photos app after you’re finished recording so you can choose the audio quality you want.
Spatial Audio should be turned on by default on supported iPhones — that’s all iPhone 16 and iPhone 17 models, including the 16e, 17e, and iPhone Air — but you can confirm this and turn it on manually if necessary by doing the following:
- Open the Settings app.
- Scroll down and go to Camera.
- Tap on Record Sound.
- Make sure to select Spatial Audio.
And that’s it. Now you’re ready to record any video with 3D audio quality.
How to Change the Sound of Any Video on Your iPhone
Now that you’ve recorded a video with Spatial Audio, you can go to the Photos app and change the sound quality to any of the options available:
- Open the Photos app.
- Open the video that you want to edit.
- Tap the Edit button at the bottom of your screen.
- Tap on Audio Mix at the bottom of your screen.
- Swipe to the left and choose the audio option you want.
- You can also drag the slider below the mix options to increase or decrease the background noise in your video.
- When you finish, tap on Done in the top right corner of your screen.
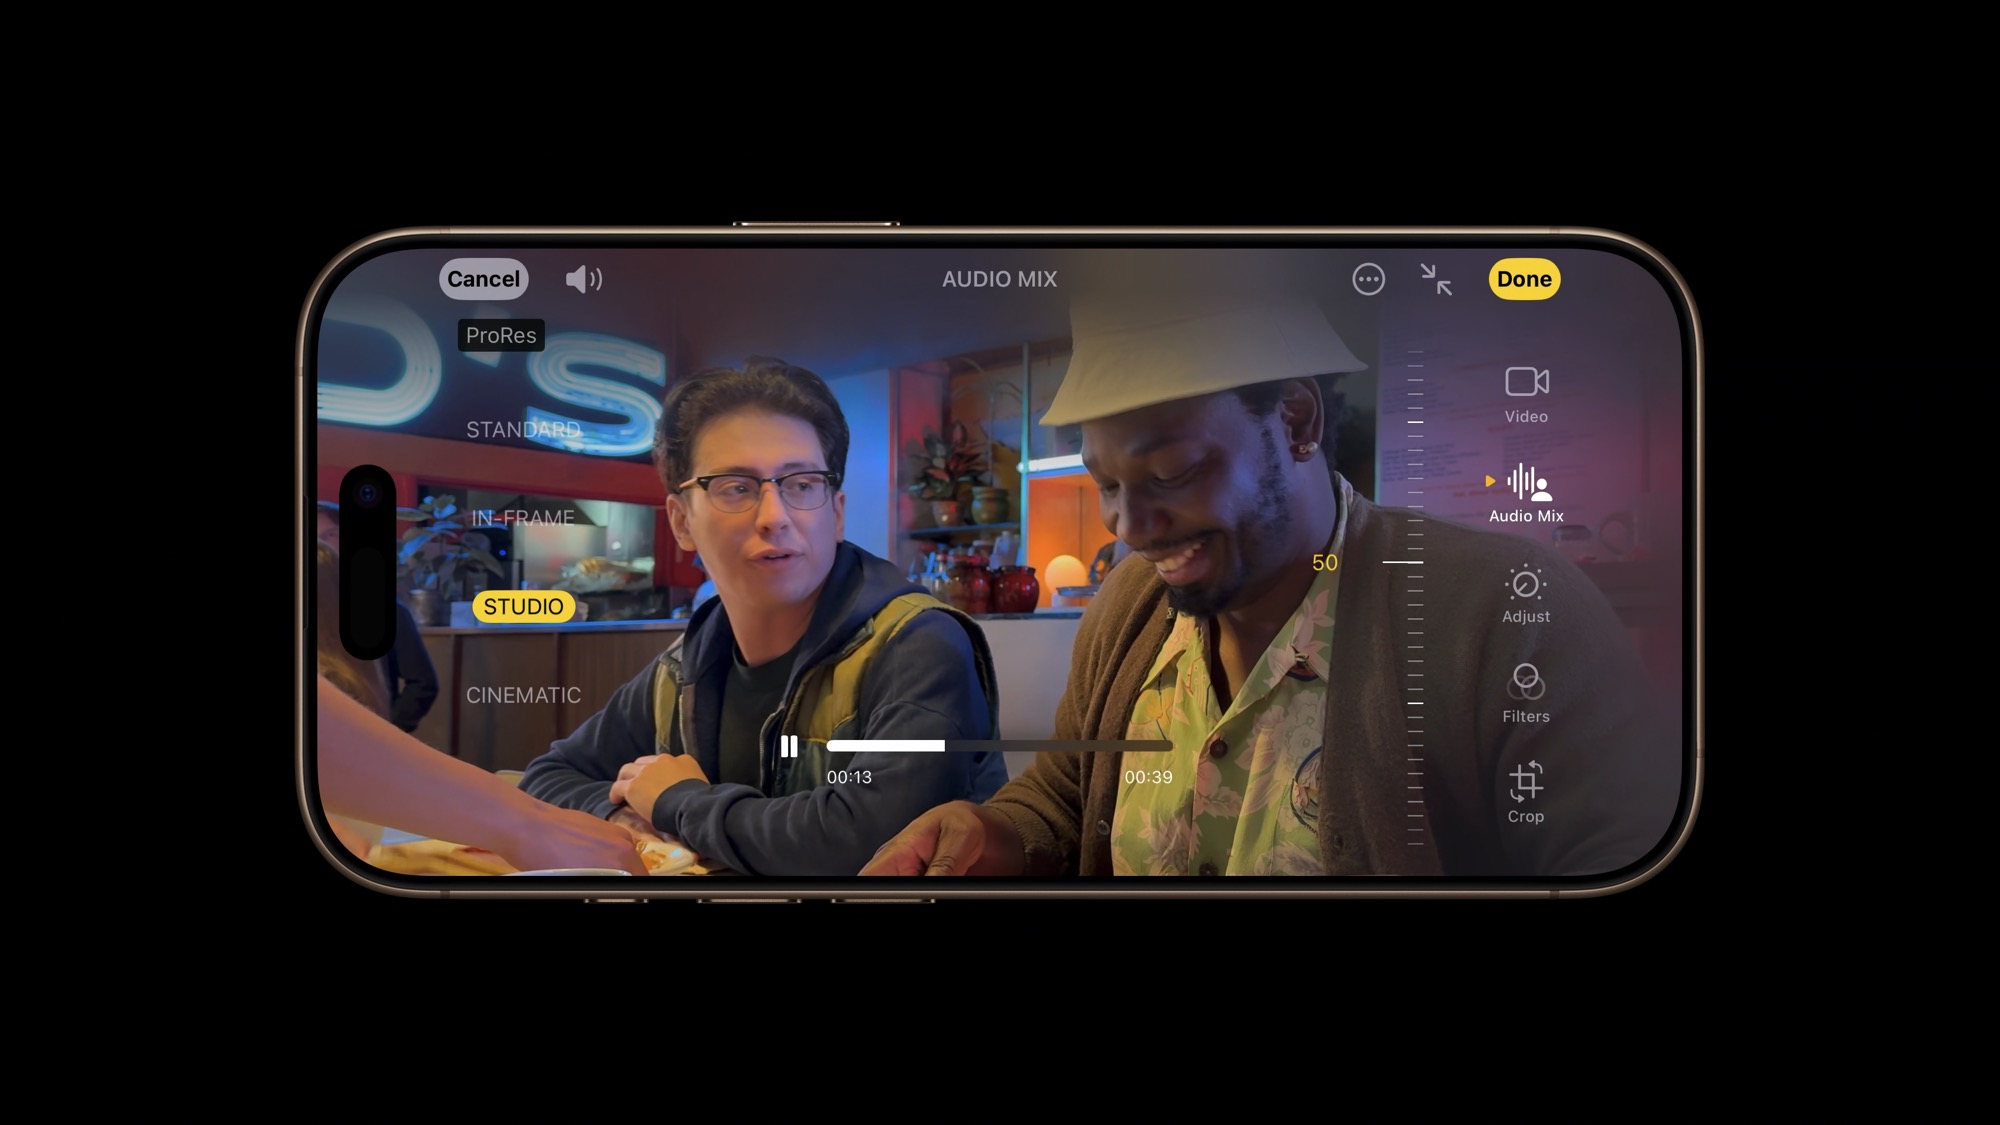
You can explore the differences between all the sounds for yourself, but here’s what they all do in a nutshell:
- Standard: Plays the original audio you recorded.
- In-Frame: Reduces the sounds and voices from sources that are not visible in the video frame.
- Studio: Reduces background sounds and reverb to make it sound more like you’re recording in a professional studio.
- Cinematic: Puts all the voices onto a front-facing track and leaves environmental noises in a surround sound format — much like a professional theatrical mix.
Shoot Videos With the Best Sound Quality on Your iPhone
As you can see, you can start recording cinematic-level videos from your iPhone and give them a more professional feel with just a couple of taps.
While professionals and movie filmmakers in the making might need a bit more to create high-quality movies, changing the Spatial Audio settings on your iPhone works great for most of us who just want to have a pro-quality video to share with our friends and family.


