
How to Use the Screen Recording Feature in iOS 11
 iDrop News / Elijah Fox
Toggle Dark Mode
Apple’s latest iOS 11 firmware will bring with it a host of new features and improvements, if the company’s keynote announcement at WWDC ‘17 was any indication. But iOS 11 has another cool feature that basically went unannounced during WWDC: a built-in screen recording function.
Prior to the feature’s addition to iOS 11, users who wanted to capture screen recordings would have to resort to expensive third-party software, or a clunky, multi-step process involving a computer and QuickTime. It was all a bit of a pain, there were really no other options barring a jailbreak. Now, that’s no longer the case. And best of all, the Screen Recording feature — which lives in the revamped Control Center — is extremely easy to set up, access and use. Here’s how it works.
- Launch the Settings app
- Tap on Control Center
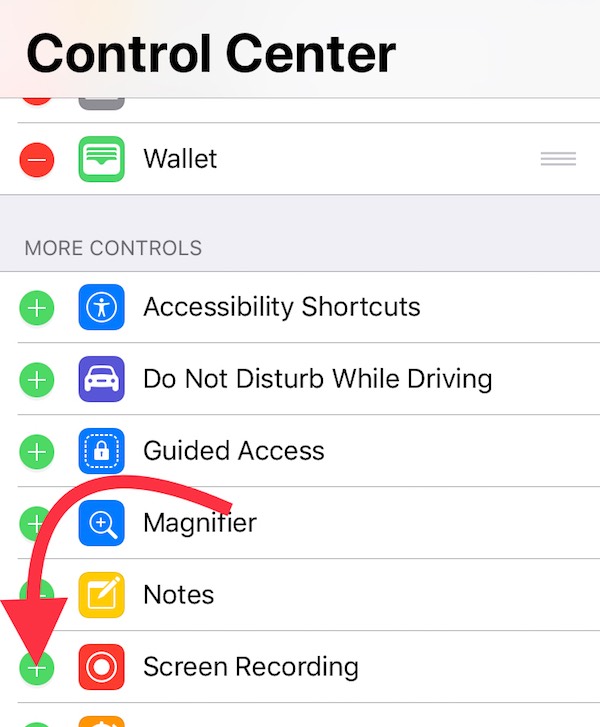
- Under More Controls, find the Screen Recording option.
- Tap the green Plus sign next to Screen Recording to add it to your Control Center pane.
- Once it’s setup, you can simply swipe up to access the Control Center and tap on the Record button.
- When you’re finished, simply tap the blue bar at the top of the screen, and press Stop.
All screen recordings will conveniently be placed directly into the Camera Roll, so you can easily share your videos via social media, text message and email, among the other usual sharing options. It’s an awesome feature and seems to hint that Apple is placing additional focus on the iPhone’s avenues for content creation.
iOS 11 is currently available as a beta for registered developers. The operating system update will see a general rollout in the fall.


