
Start Using Apple’s ‘Mission Control’ Feature Correctly with These 6 Tricks
 MR-R / Shutterstock
Toggle Dark Mode
The Mission Control feature on Mac is a cool tool that not many people even know about when they start using an Apple computer. Even after they know about it, not all of us understand how to make the most out of this useful feature.
If you’re one of the uninitiated, you might not even know what Mission Control is. Don’t worry; we’ve all been there.

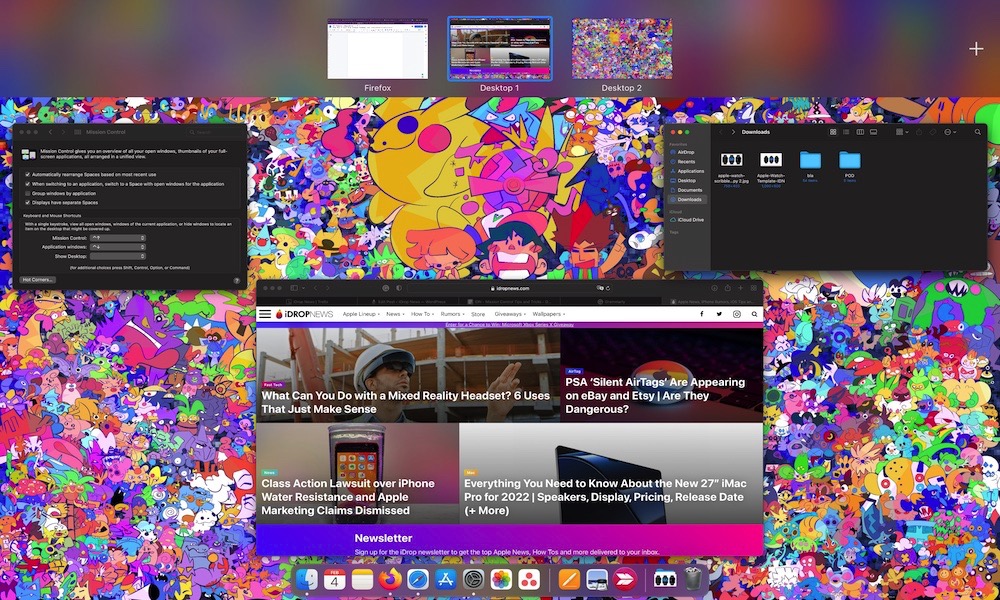
Mission Control is a Mac feature that lets you see all your open windows, desktop spaces, and other apps that are in full screen or Split View. That way, you can quickly see a preview of all your apps and quickly switch between them.
Whether you’ve used Mission Control before or you’re just figuring out how to use it, keep reading to really master the ins and outs of this feature.
Ways You Can Open Mission Control
One of the reasons some people don’t know about Mission Control is because it’s not that easy to open. Fortunately, there are a ton of ways for you to open and start using Mission Control from anywhere you are!
- First, you can open the Mission Control app, which is located in your Applications folder.
- You can also find it by using Mac’s Spotlight and typing Mission Control.
- If you have a Trackpad, you can also open Mission Control by swiping up three or four fingers on your trackpad.
- If you’re using a Magic Mouse, you can double-tap the surface of it with two fingers.
- You can also use your keyboard to open it! The easiest way is pressing the F3 key, which has the Mission Control key (the three random squares icon), but you can also access it by pressing the Control Key + the up arrow.
Now let’s move on to some pro tips.
Change Your Mission Control Keyboard Shortcut
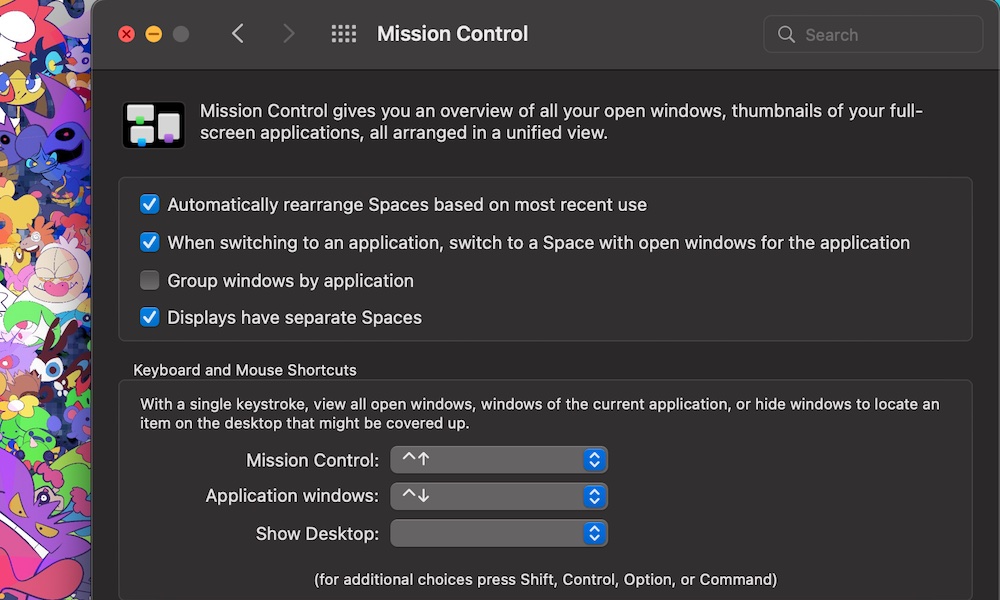
If you don’t like the keyboard shortcut (Control + Up arrow) to open Mission Control, you can change it from the Mac System Preferences like this:
- Click on the Apple Menu in the top left corner of your screen.
- Select System Preferences.
- Click on Mission Control.
- Under Keyboard and Mouse Shortcuts, change the shortcuts to open Mission Control and Application Windows to what you’d like.
- When you’re done, close the window.
And that’s it; you’ll be able to open Mission Control with the keyboard shortcut you prefer.
Tip: You can also customize the Mission Control settings while you’re here.
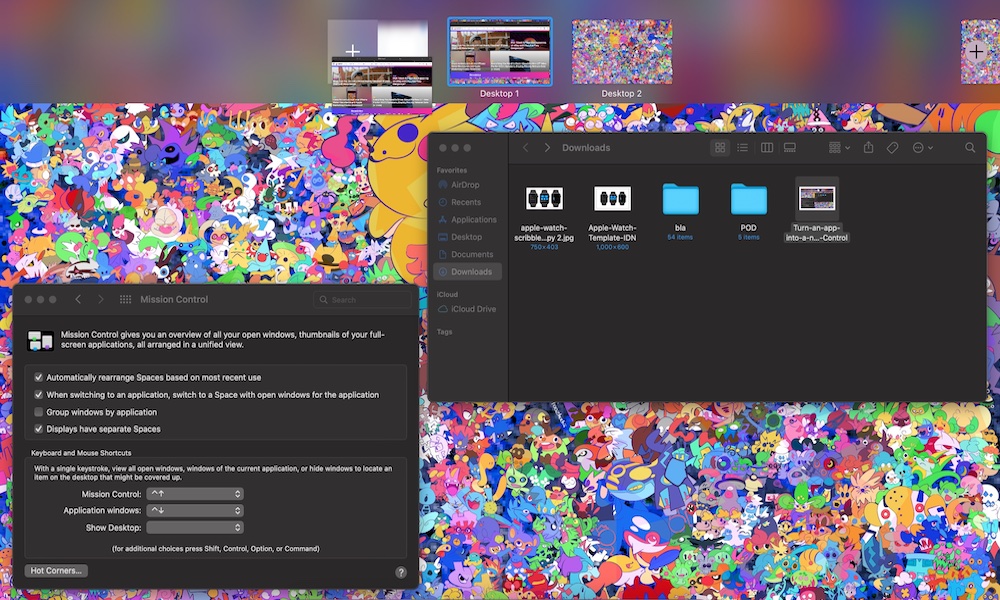
Create and Manage New Spaces in Mission Control
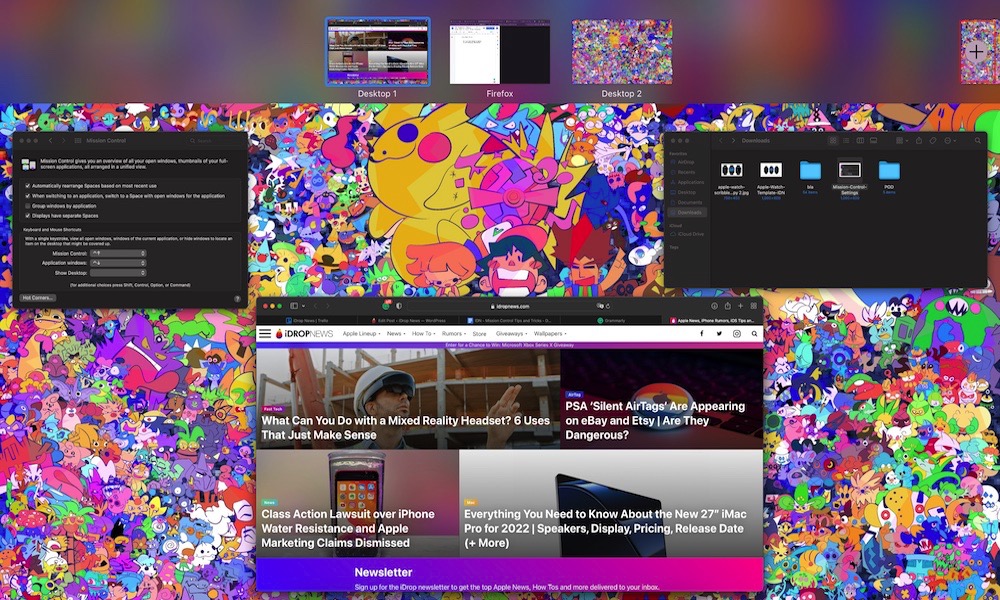
When you open Mission Control, you’ll see a bar at the top of your screen. That’s called the Spaces bar, and it’s meant to hold all your different spaces. Each space can have different apps in it so that you can create your own custom desktops for every part of your life.
To create a new space, do the following:
- Open Mission Control in your Mac.
- Click the Plus icon in the top right corner of your screen.
And that’s it! A new space with a “new” desktop will be added to the right side of the Spaces bar. To switch between them, all you need to do is click on the space you want.
You can rearrange your Spaces however you like by long-pressing a space and dragging it to the position you want to have it.
And if you want to delete a space you created, all you need to do is hover your mouse over the space you want to delete and click on the x in the top left corner of the space.
Turn an App into a New Space
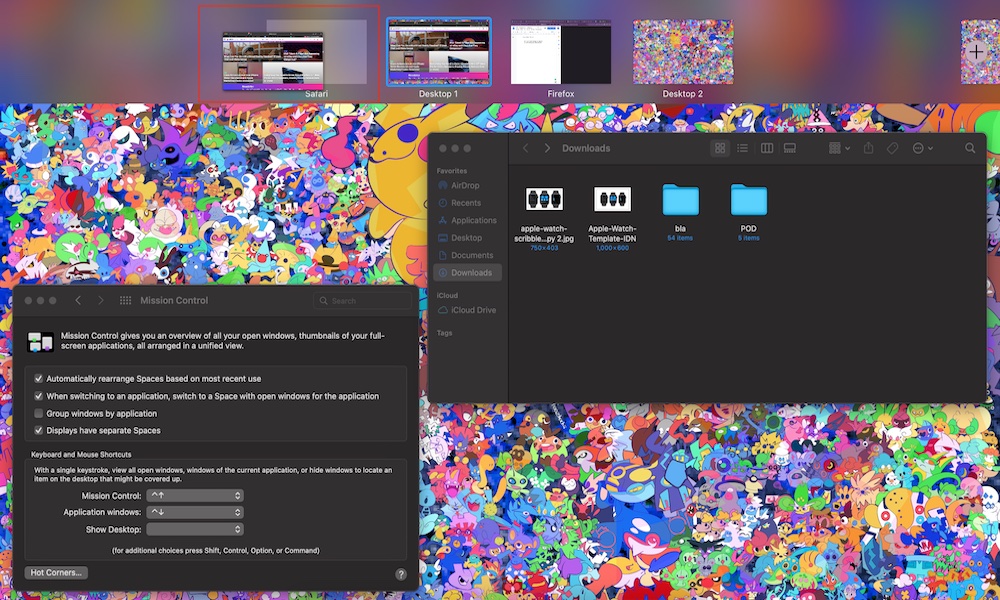
As we mentioned before, you can have an app in a new space just by putting it on full screen. Sure, you can go to the app and make the window full screen, but you can also do it from your Mission Control.
- Open Mission Control on your Mac.
- Long-Press the app you want to put in a new space.
- Drag it to an empty space on the Spaces bar at the top of your screen.
- Release the app.
Doing this will automatically turn the app into a full-screen window outside your current space.
Create a Split View from Mission Control
You can also put two apps together and put them into Split View without leaving Mission Control. Here’s how:
- Open Mission Control.
- Long-press one of the apps you want to put in Split View.
- Drag the app to the Spaces bar at the top of your screen and release it to put it in full screen.
- Long-press the other app you want in Split View.
- Drag the app on top of the other app you put in the Spaces bar.
You should see how the first app moves to the side so you can release the second app in a Split View.
Get a Preview of Your Spaces Without Leaving Mission Control
When you’re on Mission Control, if you click in one space, you’ll be automatically redirected to it, which can get pretty annoying.
Fortunately, you can just preview all your spaces without leaving Mission Control. All you need to do is press and hold the Option key and click on the space you want to preview.
You’ll only switch to the new space without exiting Mission Control. You’ll go to the new space if you exit it, but you can always go back to your previous one.
Assign Dock Apps to a Specific Space
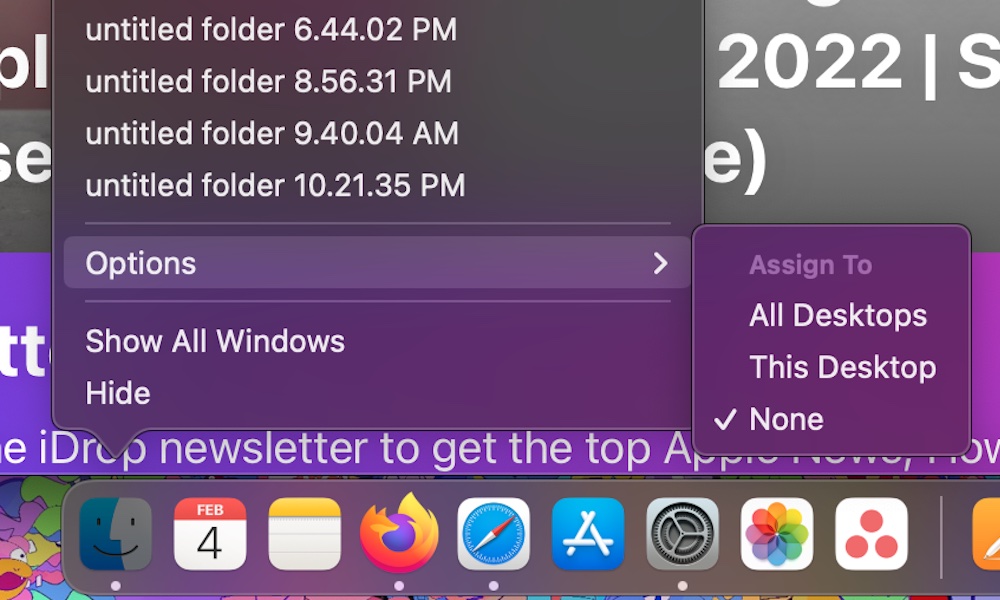
Another cool feature you can try is adding specific apps to specific spaces. You can assign apps you have on your Dock to a specific space, which comes in handy when you want to create spaces for different parts of the day.
- Go to the desktop space you want to assign an app to.
- Right-click an app from the Dock.
- Click on Options.
- Under Assign to, choose this desktop.
Keep in mind that you’ll need to have two or more desktop spaces available to see the Assign to option.
What does this do? Well, if you go to another space, you’ll notice the app is still available on the Dock. So what this does is that every time you open the app, it’ll redirect you to the space you assigned it to.


