
3 Pro Tips to Make Your Mac Easier to Read

Toggle Dark Mode
One of the great things about iOS and macOS is that they share many of the same core features, UI elements, and accessibility settings. We’ve already shown you how to make your iPhone, iPad, or iPod Touch running iOS 10.3 or later easier to read using Apple’s accessibility settings.
Today, we’re going to show you how some of those same settings can also be implemented on your iMac or MacBook running macOS High Sierra.
(NOTE: most of these features are unfortunately not available to Mac mini users.)
Scaled Resolution
The latest version of macOS High Sierra allows you to scale the entirety of the in-built display, making all onscreen content larger, easier to read and discern, or smaller and more spaced-out, depending on your preference.
Start by opening System Preferences from your desktop, then select Displays, at which point you should see the menu of options shown below.
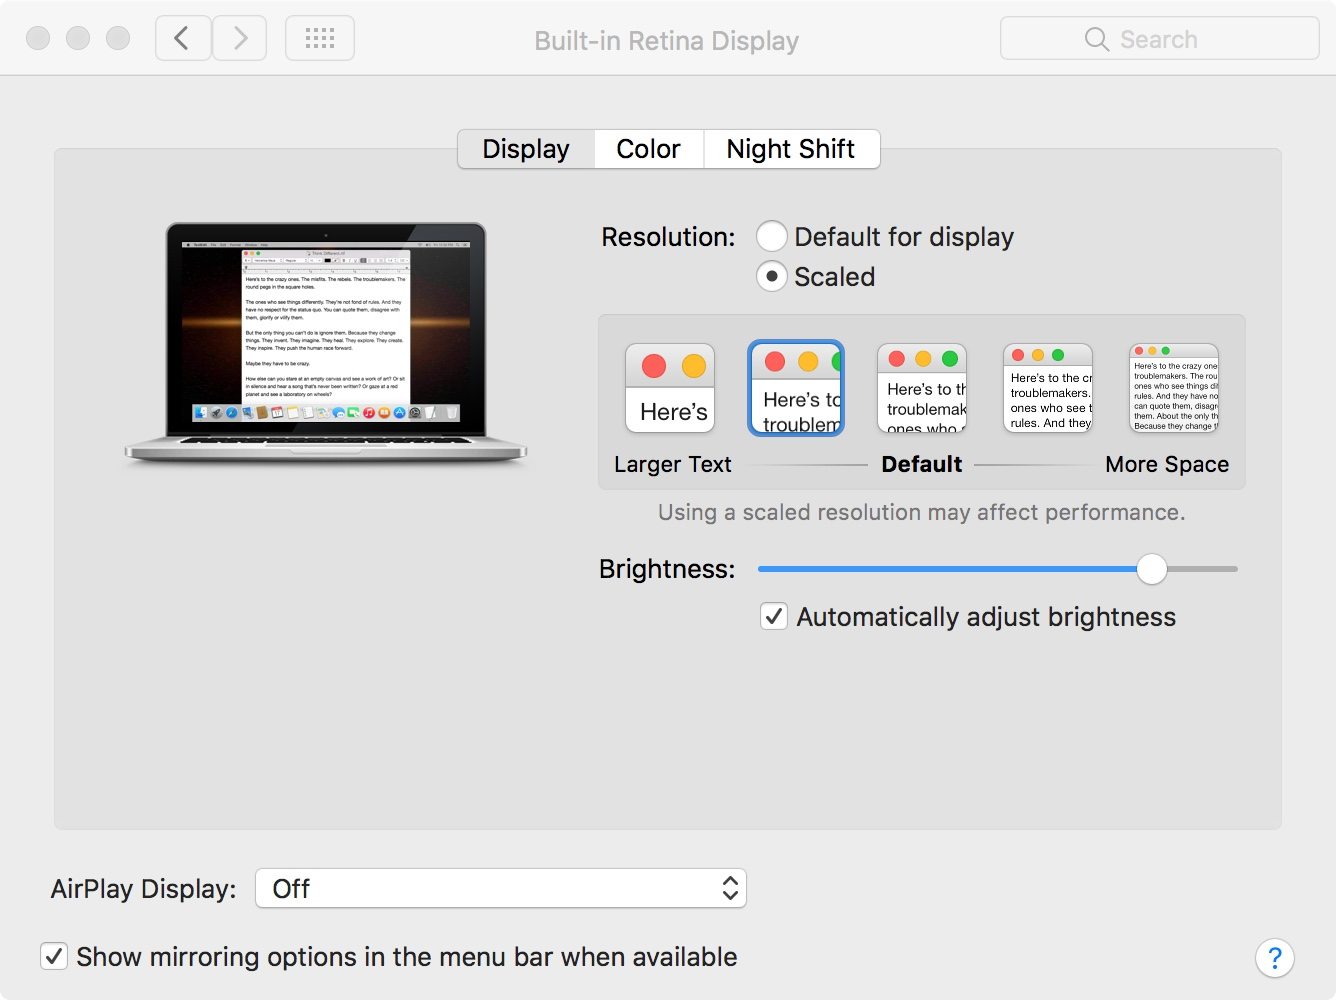
To make changes, select Scaled under Resolution, and then choose from the available options to apply larger text or more space on the screen.
While you’re there, you can also adjust and enable or disable automatic brightness settings.
Display Zoom
While iOS allows you to zoom in and out of onscreen content using a variety of touch gestures, macOS offers up a slightly more practical, keyboard and mouse-assisted mechanism.
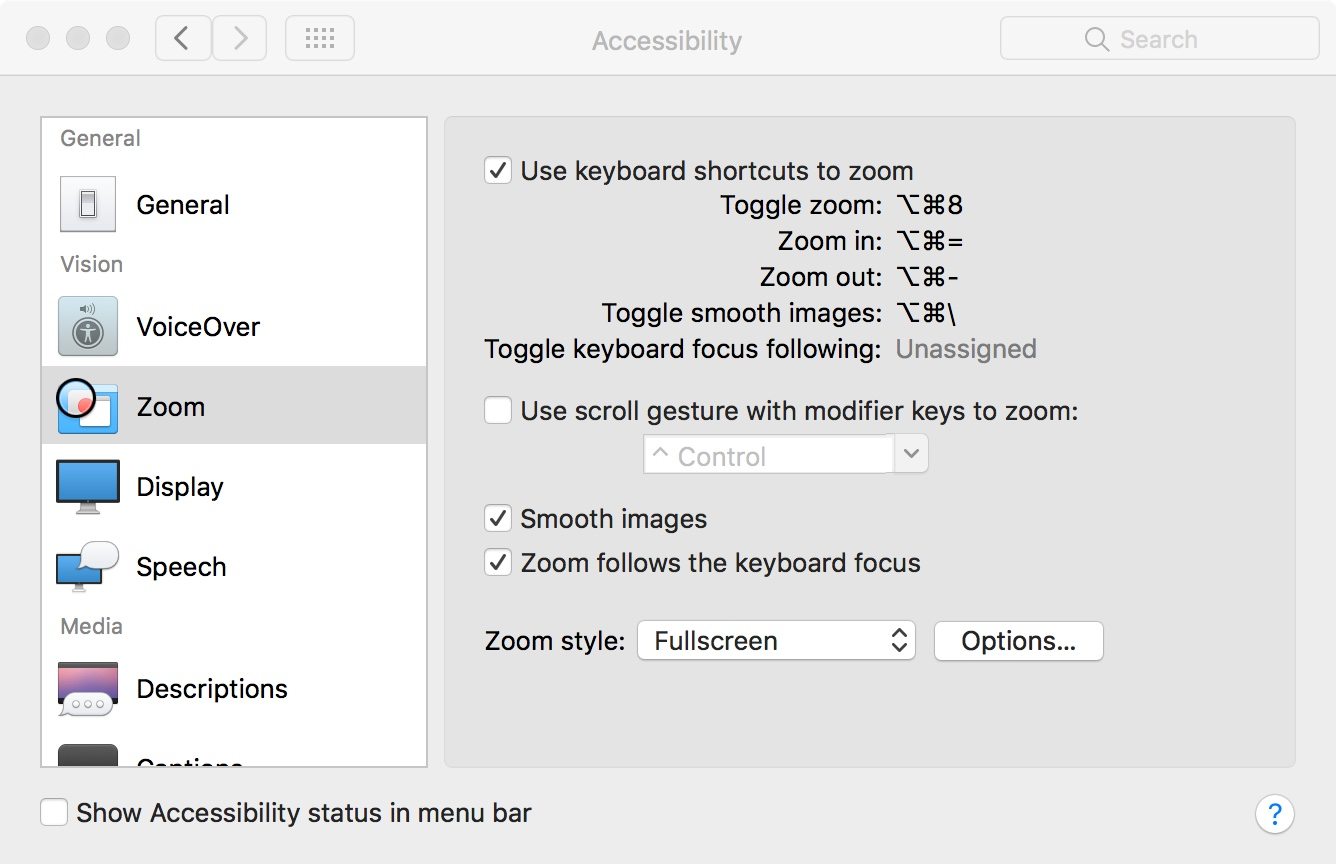
- To enable zooming of onscreen content, navigate to System Preferences and click Accessibility.
- From the side panel of options on the left-hand side, select Zoom.
- From this menu, shown below, you have a few different options for tweaking zoom settings; but to save you time and confusion, I’ll be walking you through how to configure the most useful and easily accessible option.
- In the right-hand menu, simply check the second box, Use Scroll Gestures with Modifier Keys to Zoom.
- Then, from the dropdown menu directly below, select which keyboard key you’d like to use as a modifier: Control, Option, or Command.
- Finally, select Smooth Images to optimize image quality and clarity when zooming.
With these settings enabled, return to the desktop and, whenever you’d like to zoom in or out, simply press-and-hold your selected modifier key while swiping up or down with one finger on your Magic Mouse, or two fingers on your Magic Trackpad, to zoom in or out, respectively.
Notice how the screen will zoom following the cursor’s focus, meaning you’ll be able to zoom in/out of the exact point at which the mouse cursor is positioned onscreen.
Additional Display Settings
From the same macOS Accessibility menu you can tweak a number of additional display settings.
- Start by selecting Display in the left-hand column; then, in the right-hand sub-menu, you’ll notice a variety of display settings such as the ability to invert colors, reduce contrast and more.
- To increase or decrease display contrast, simply click and slide the meter between Normal and Maximum until your viewing preference is met.
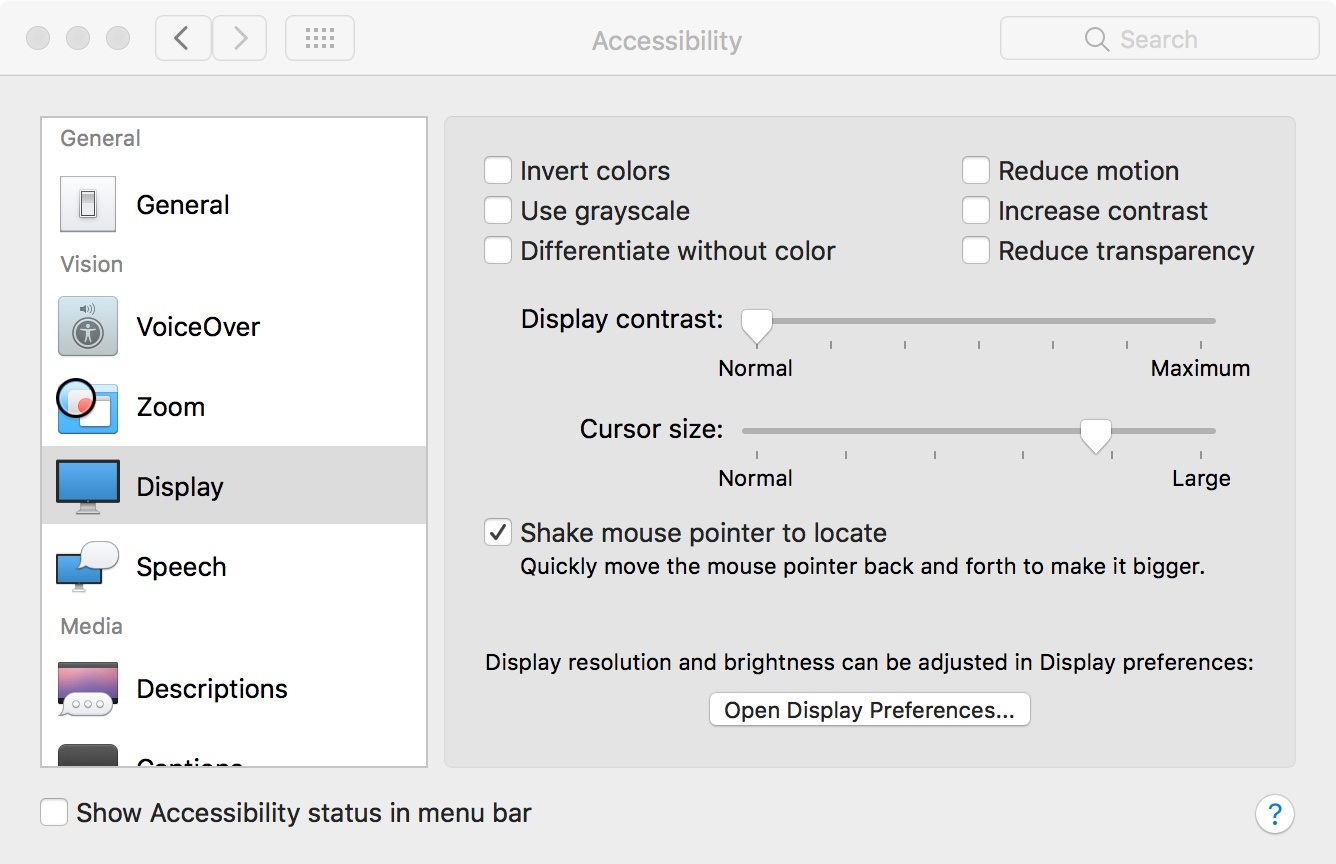
You can also make the mouse cursor, itself, easier to find by sliding to select a variable between Normal and Large on the Cursor Size meter and then checking Shake Mouse Pointer to Locate.


