
10 Simple Ways to Secure Your New iPhone

These days, your iPhone is more than a phone — it’s your digital identity, holding your money, messages, and memories. Most of us use it for pretty much everything from banking and shopping to having important and private conversations with friends and family.
And in today’s world, that makes it a pretty valuable target. If you’re not careful, hackers — and even legitimate companies — can still collect or exploit your personal data.
The good news is that Apple packs in plenty of security features that can help protect your personal data. These features will make your iPhone harder to crack, although most of us don’t enable all of them. Still, if you want to take your digital security to the next level, read on for 10 of the best privacy tips you need to start using on your iPhone.
Set Up Face ID or Touch ID
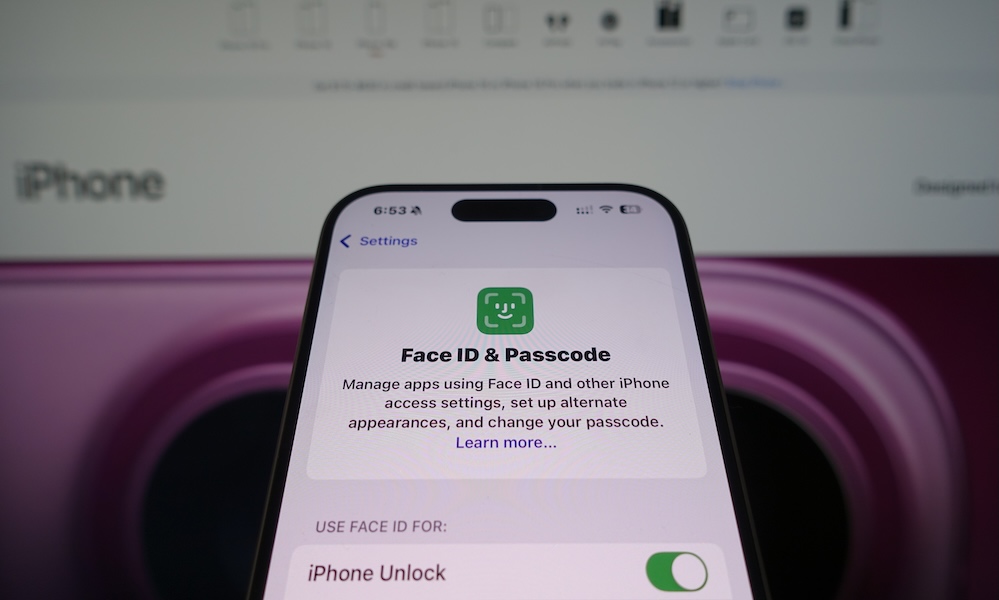
Biometric authentication is one of the first lines of defense for your iPhone. Not only is it faster than typing a passcode every time, but it also prevents others from easily unlocking your iPhone when you aren't around.
When you first set up your iPhone, you'll be asked if you want to set up Face ID or Touch ID, depending on the model you have. However, if you skipped that at the time, you can still set it later. Here's how:
- Open the Settings app.
- Scroll down and go to Face ID & Passcode (or Touch ID & Passcode).
- Tap on Set Up Face ID (or Touch ID) and follow the instructions on your screen.
Now, unless someone gets a hold of your passcode, you'll be the only one capable of unlocking your iPhone. If you have an iPhone with Face ID and want a bit of extra security, make sure to turn on Require Attention for Face ID. That way, you'll need to be looking at your iPhone in order to use Face ID. Just be aware that you may need to keep this off if you wear certain sunglasses or accessibility eyewear.
Upgrade to a Strong Alphanumeric Passcode
While the iPhone's default six-digit passcode might seem like enough, you can take it one step further for even better security.
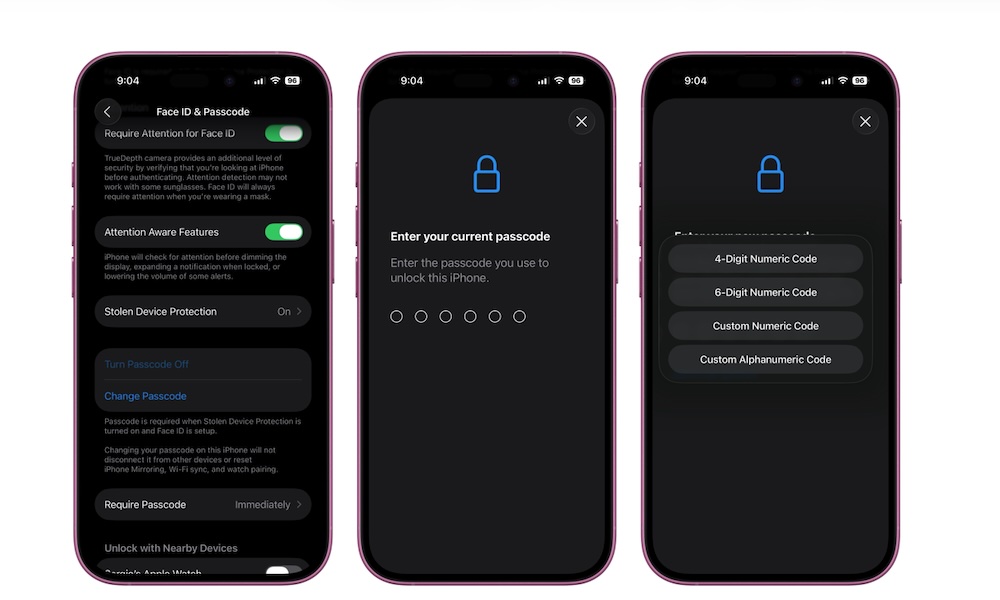
Six-digit passcodes are better than nothing, but they can still be guessed or cracked. For even better security, your iPhone lets you set up a custom alphanumeric code that will let you create a stronger passcode that's harder to guess and makes brute-force attacks far less effective. Here's how to set up an alphanumeric passcode:
- Open the Settings app.
- Scroll down and go to Face ID & Passcode (or Touch ID & Passcode).
- Enter your passcode when prompted.
- Scroll down and tap on Change Passcode.
- Enter your current passcode again.
- Tap on Passcode Options.
- Select Custom Alphanumeric Code.
- Enter the code you want to use as a new passcode.
Sure, it might be more difficult to remember your new passcode, but it will also be much harder to crack. Just in case, your iPhone will give you a 72-hour window where you can use your old passcode to reset your new one if you forget it. Still, try to make your alphanumeric passcode memorable so you avoid any issues.
Add Your iPhone to the Find My Network
Losing your iPhone is stressful enough. Not only is your thousand-dollar investment gone, but you're also at risk of losing all your data.
Fortunately, Apple’s Find My network can locate most newer iPhone models — the iPhone 11 or later — even when they're powered off, so you can still try to find it. Not only that, but if your iPhone is gone for good, you can use the Find My app to erase your iPhone remotely.
Here's how to add your iPhone to the Find My network:
- Open the Settings app.
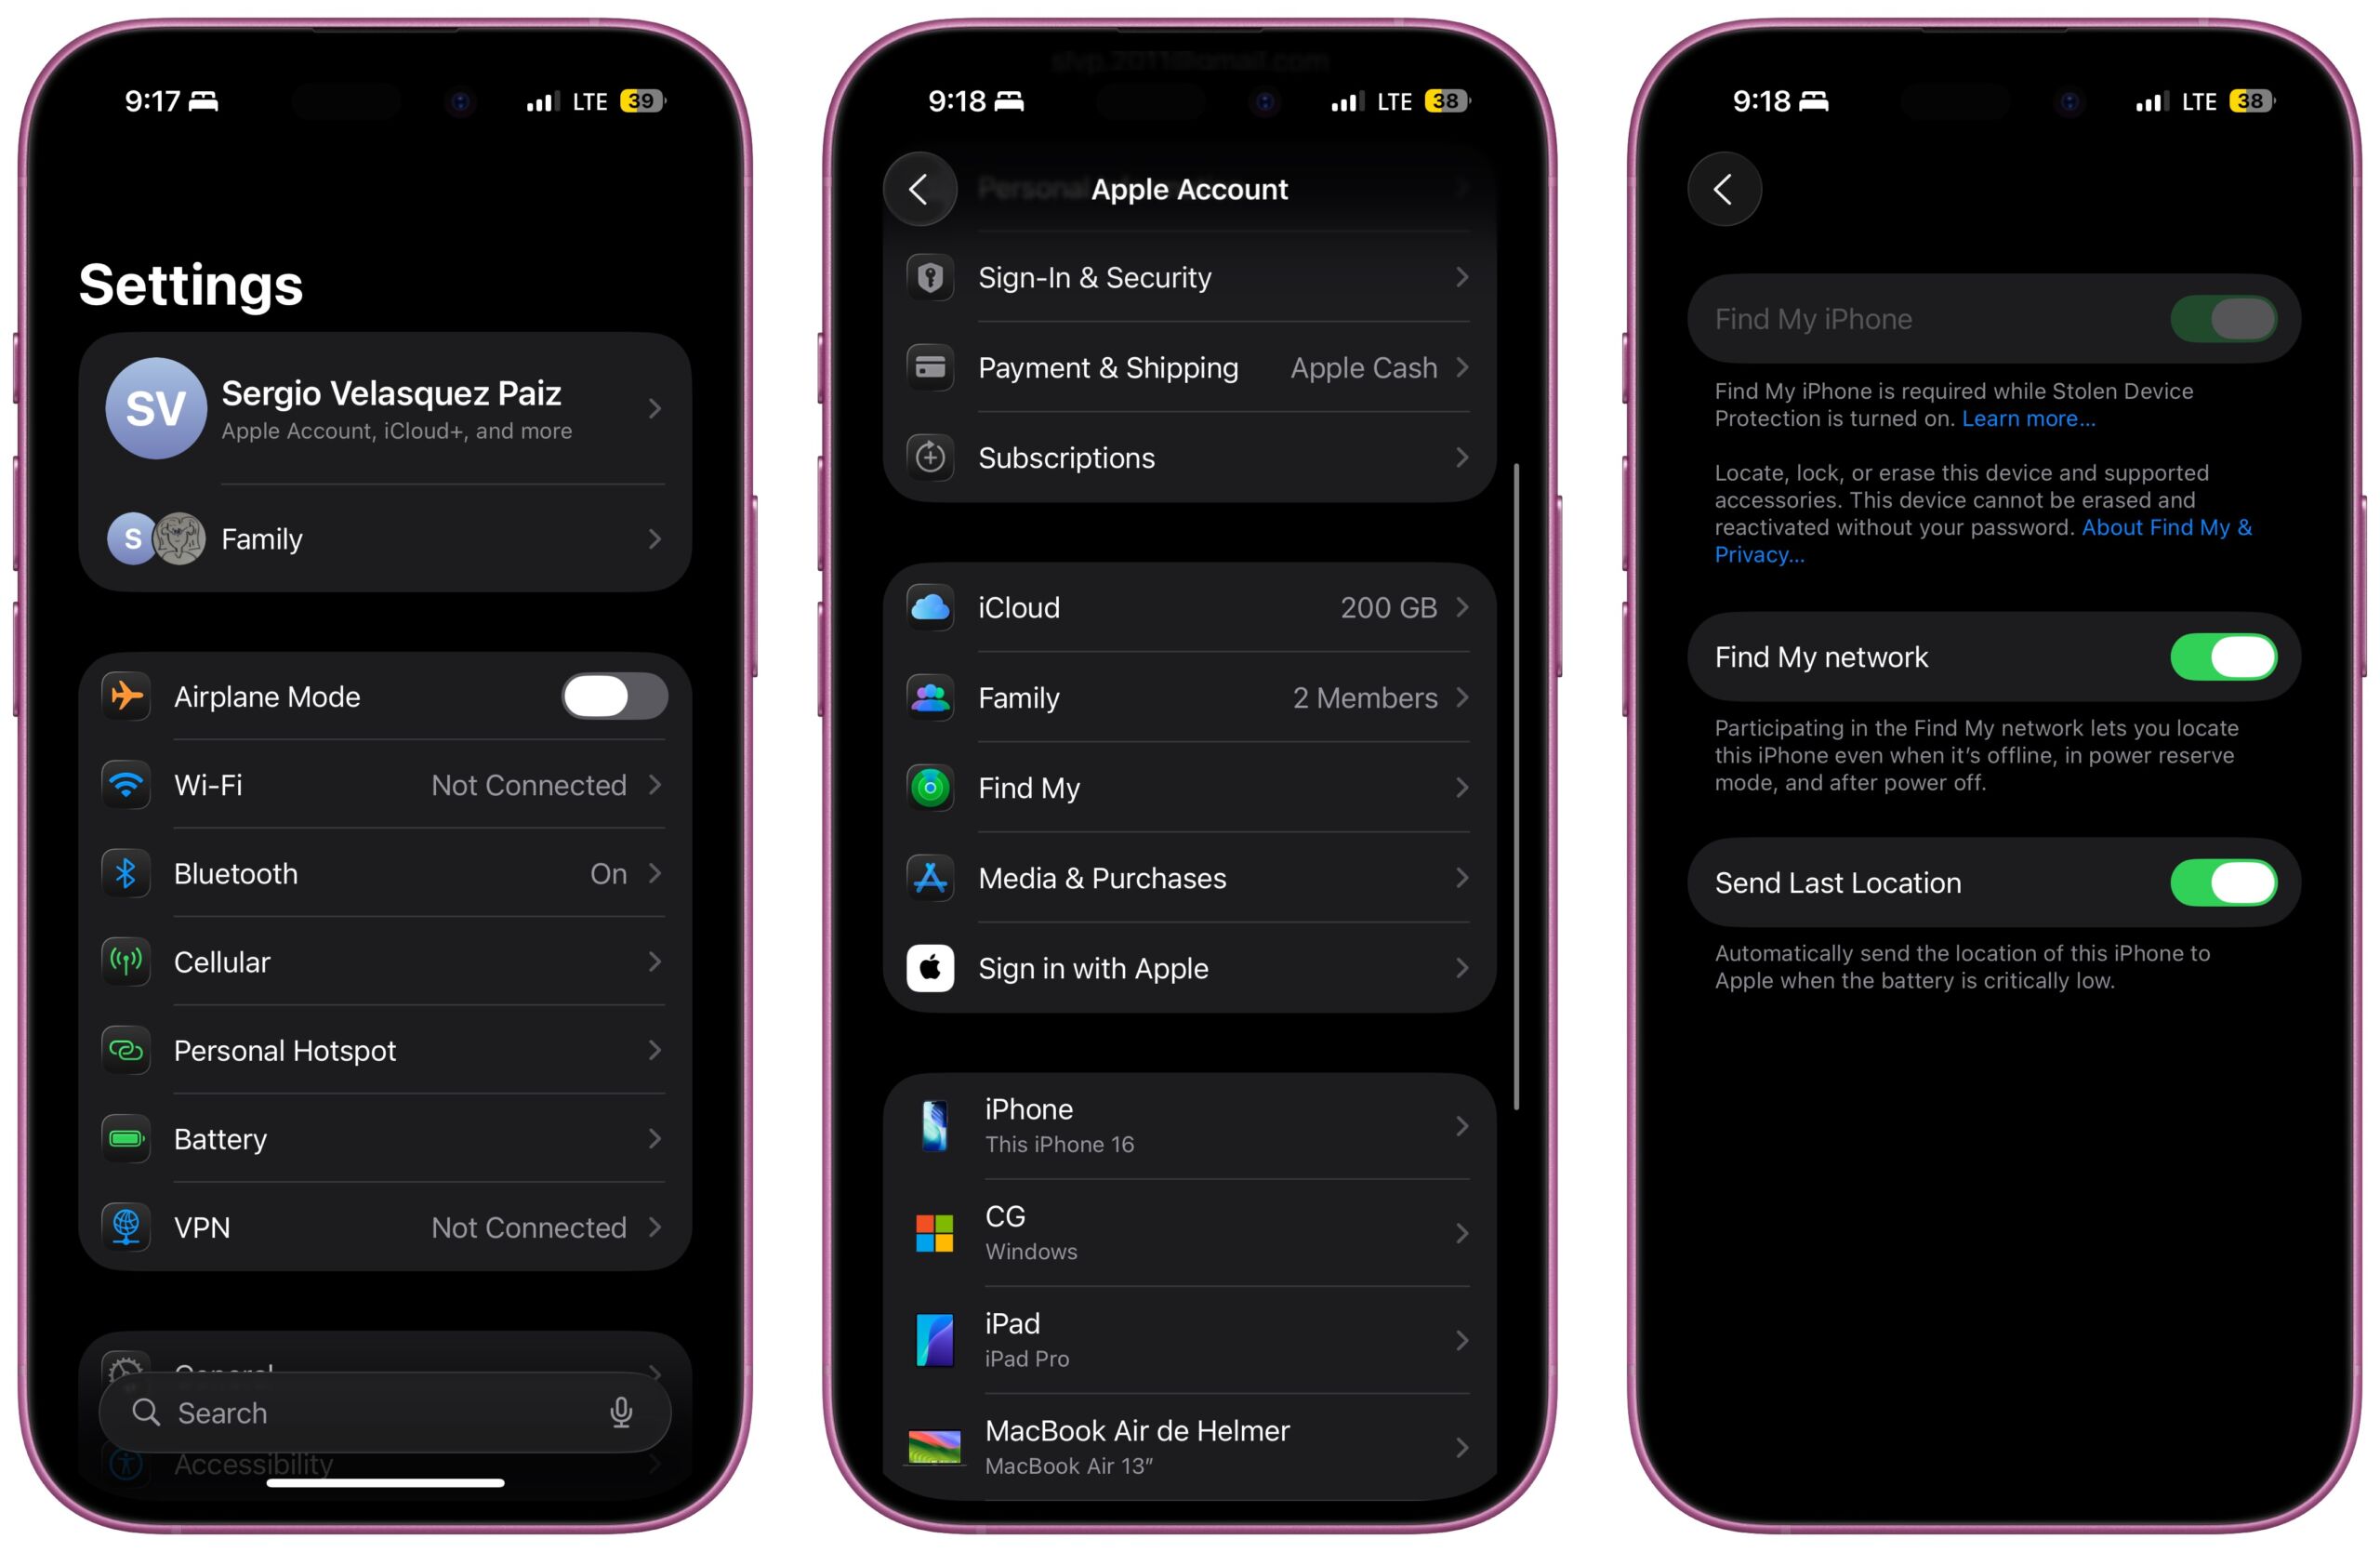
- Tap on your Apple Account (Apple ID) at the top of the page.
- Go to Find My.
- Tap on Find My iPhone.
- Turn on Find My iPhone.
You should also consider turning on Find My Network and Send Last Location. Now, you can log in to your other Apple devices or through the web and access the Find My app. From there, you can try locating your iPhone or deleting all its data if you think you're never getting it back again.
Choose What You Can Access From Your Locked iPhone
Even if your iPhone is locked, there are still some features that anyone can access. For the most part, these features are harmless, but there are a few that you might want to lock down, like Apple Wallet or the Control Center.
Instead of being worried about people snooping around your Lock Screen, you can simply manage which features can be accessed when your iPhone is locked to give you some peace of mind. Here's where to check these settings:
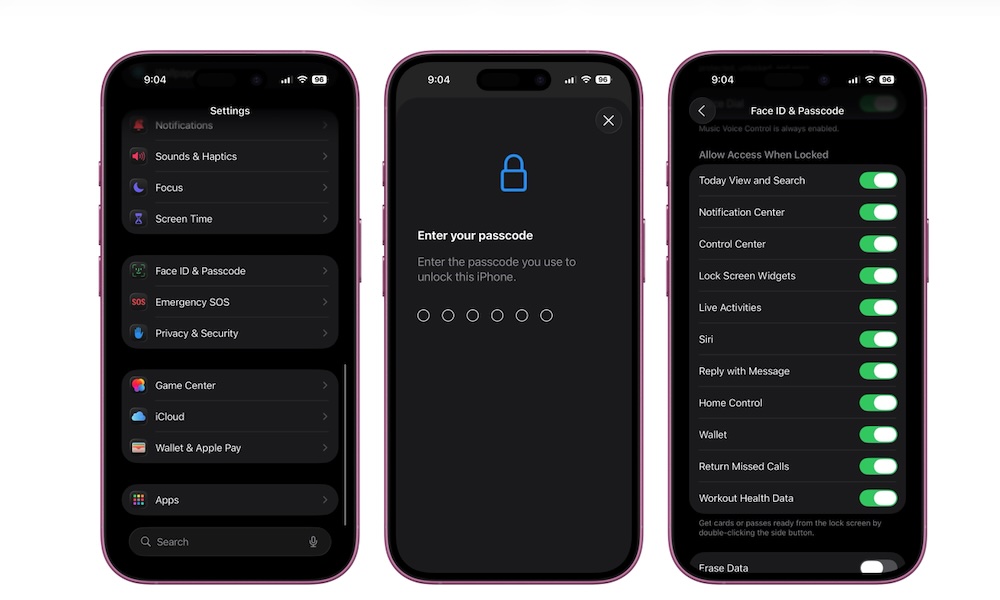
- Open the Settings app.
- Scroll down and go to Face ID & Passcode.
- Enter your passcode.
- Scroll down and, under Allow Access When Locked, choose which features you want to disable.
There's no right answer here, but if you want things to be really private, you can disable every option available. Keep in mind that if you're using a Face ID-equipped iPhone, it will still unlock as soon as you look at it, even before you're swiped away from the Lock Screen, so you may find disabling some of these to be less of a hassle than you think.
Enable Two-Factor Authentication (2FA)
Your Apple Account or Apple ID is the key to your complete Apple ecosystem. With it, you can access your iCloud files and backups, use the Find My network, and even check all apps and services you're subscribed to. Needless to say, it's a pretty important account that you should protect as much as possible.
Because of this, adding a second layer of protection helps prevent anyone from hijacking your account, even if they know your password. That's where Apple's Two-Factor Authentication comes in. With it, someone will need to have access to one of your Apple devices in order to log in to your Apple Account. That makes things more complicated for them — and much safer for you.
Here's how to turn on 2FA on your iPhone:
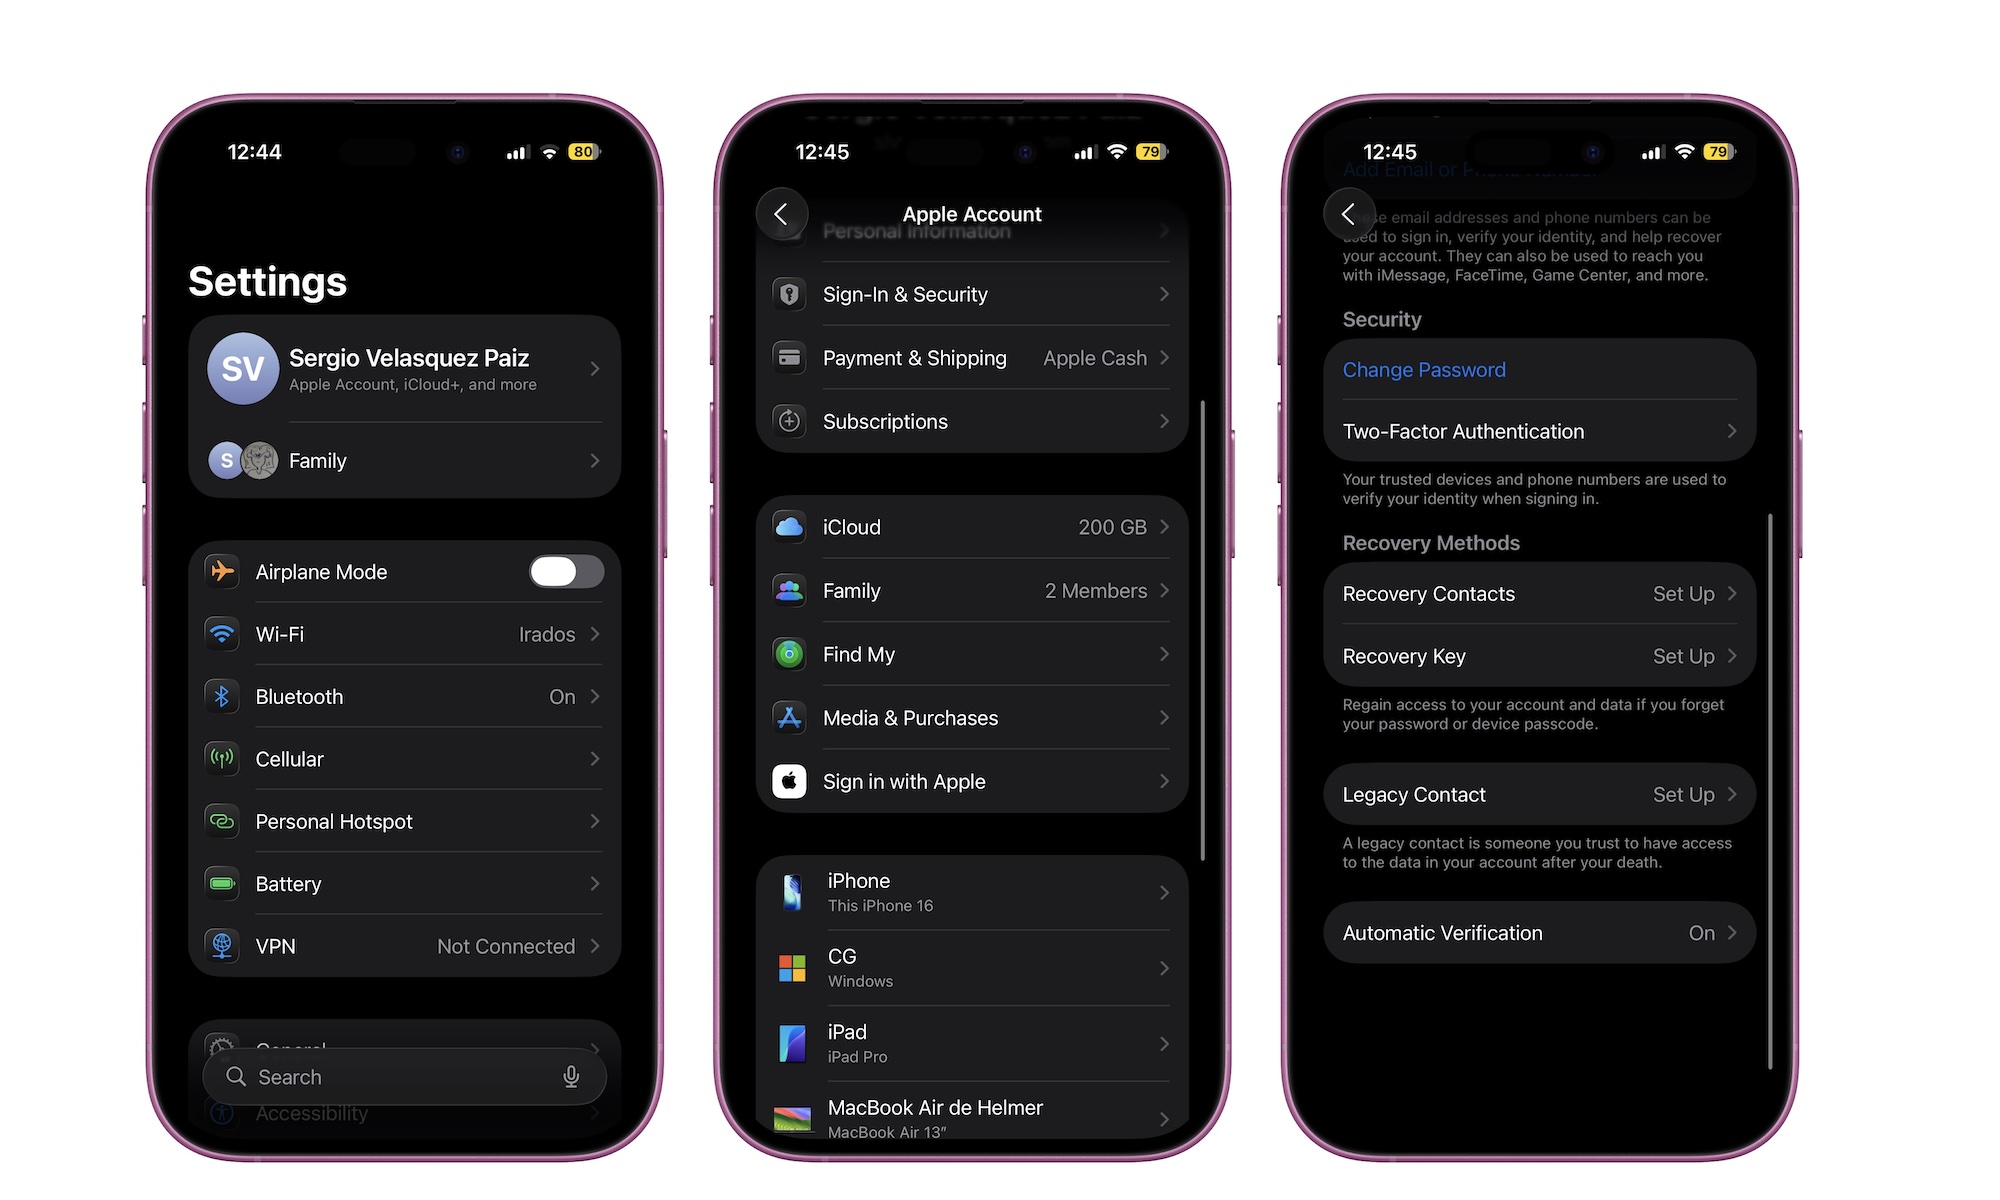
- Open the Settings app.
- Tap on your Apple Account at the top of the Settings page.
- Go to Sign-In & Security.
- Tap on Two-Factor Authentication.
- Turn on Two-Factor Authentication and follow the instructions on your screen to complete the setup.
If you want to go one step further, you can even add a hardware security key to your account if you're using iOS 16.3 or later.
Turn Off App Tracking Requests
Many apps try to track your activity to build ad profiles and profit from your preferences. Fortunately, Apple lets you opt out of most of this cross-app tracking.
First, when you first launch a newly installed app, it will ask you if you want to allow your activity to be tracked when using different apps. Regardless of the app, you should probably always deny it. However, if you're tired of seeing the same message pop up, Apple lets you prevent apps from asking in the first place. Just follow these steps:
- Open the Settings app.
- Scroll down and go to Privacy & Security.
- Go to Tracking.
- Turn off Allow Apps to Request to Track.
Now, apps will immediately be denied any requests to track you by default, and you won't even see the message pop up on your screen. Just be aware that this won't completely prevent apps from tracking you — it's only designed to prevent one app from easily finding out what you're doing in another one.
Turn Off Apple Analytics Sharing
It's not just third-party companies that want to collect your data; Apple also wants to track your analytics. The reason? The company says it's to help "improve" all its products, like iOS, Siri, and Apple Pay.
Apple promises that this data is as anonymized as possible, so it's never associated with you. However, you may still question whether a trillion-dollar company really needs your data to improve its products. Fortunately, Apple lets you decline and turn off analytics sharing with a couple of taps:
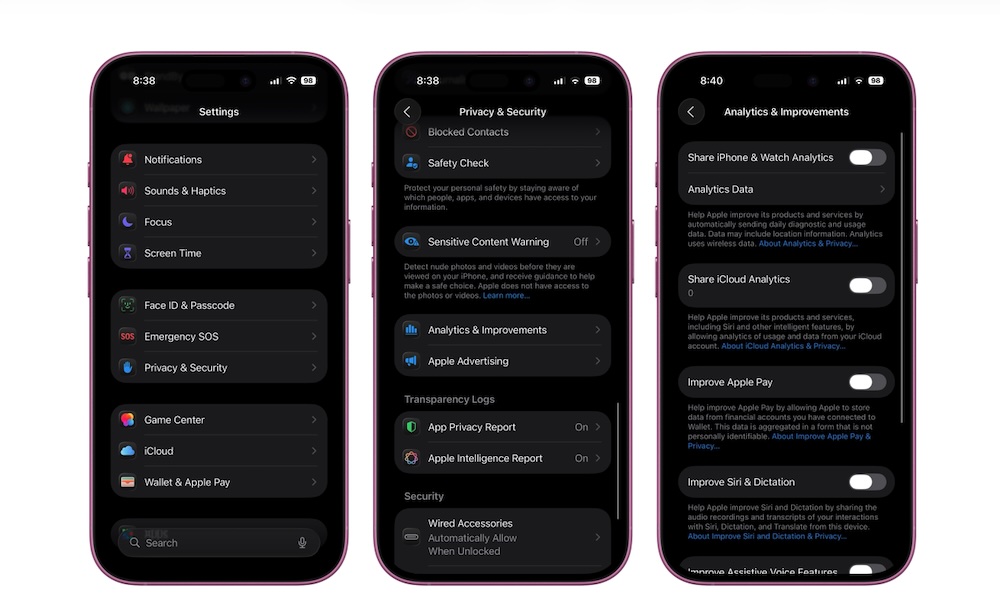
- Open the Settings app.
- Scroll down and go to Privacy & Security.
- Scroll down to the bottom and tap on Analytics & Improvements.
- Turn off all the options available.
Keep in mind that Apple will ask you if you want to turn on analytics after every major software update, so you might need to repeat these steps in the future.
Make Sure to Keep Your iPhone Updated
Apple occasionally pushes out software updates that mostly focus on security fixes and patches for some iOS bugs the company might have found.
For the most part, you won't experience any security issues, but that doesn't mean they're not a threat. So it's best to update your iPhone as soon as possible — especially since Apple lists the security flaws fixed in each update — which means if attackers didn’t know about them before, they might now.
On the other hand, you can simply enable automatic updates, so your iPhone updates itself whenever it's charging and connected to Wi-Fi. You can find that option here:
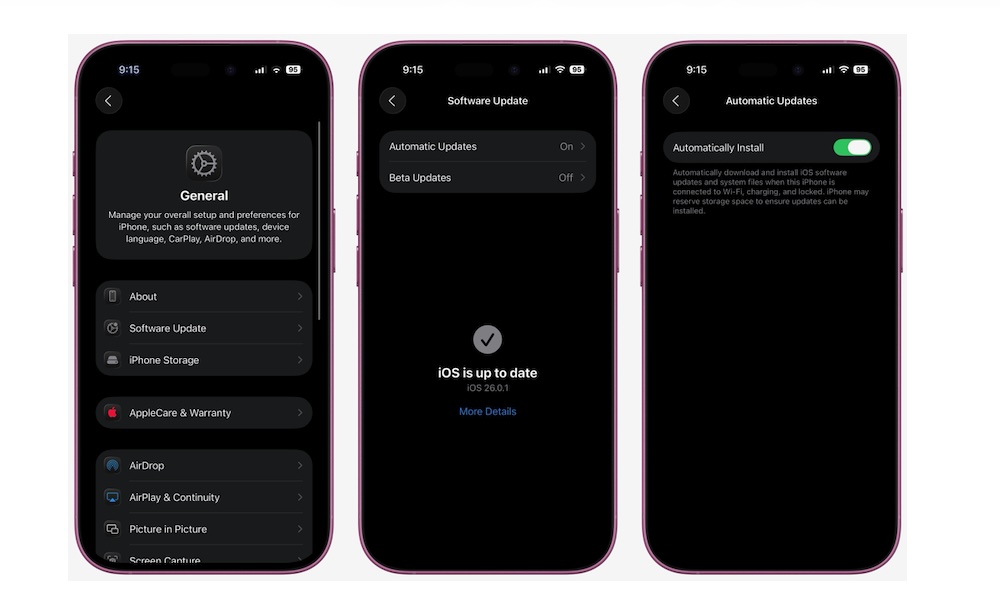
- Open the Settings app.
- Scroll down and tap on General.
- Go to Software Update.
- Tap on Automatic Updates.
- Turn on Automatically Install.
Just keep in mind that updates aren't always installed as soon as they're released, so it's still a good idea to check manually from time to time, especially if you're having problems or you hear about a new security threat.
Use iCloud's Hide My Email
Thanks to constant cyber attacks, your data isn't safe even on the biggest online platforms. Many companies, like Meta, have had security breaches in the past, which leaves its users at risk of being targeted for scams or other cyber attacks.
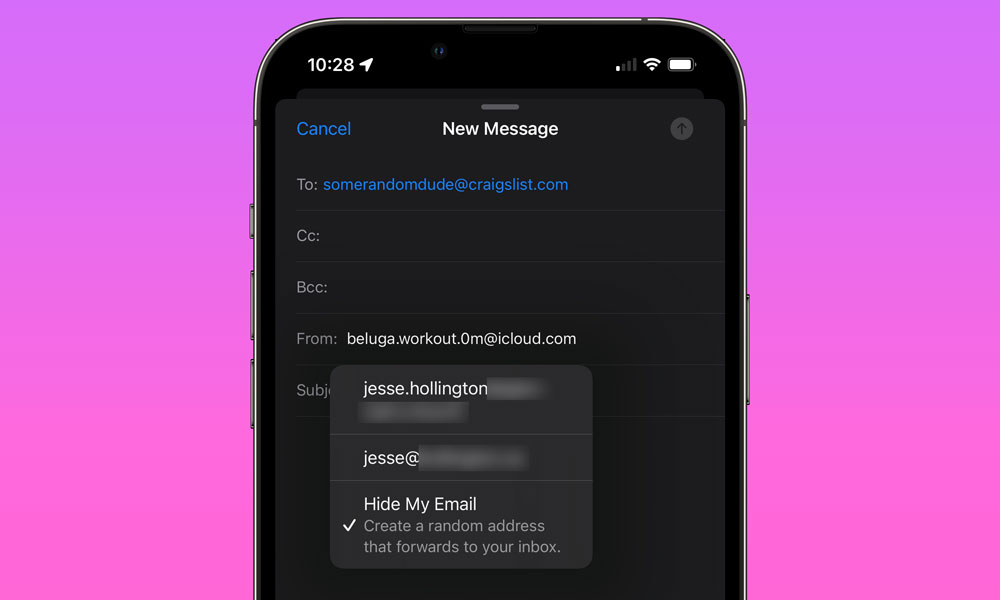
This is why Apple added a cool feature to iCloud+ called Hide My Email. As you can guess by its name, this feature will basically create a fake email address to mask your real email when you sign up to any online platform. That way, you'll still get updates and notifications, but other people won't be able to see your actual email address.
Keep in mind, though, that in order to use this feature, you'll need to be subscribed to iCloud+. Yes, unfortunately, it's not free, but you can get it for $0.99 per month, and you'll get a bunch of benefits, so it might be worth considering.
If you're already subscribed, you'll simply need to go to any website using the Safari app. When you tap on an email field, you'll receive the option to use Hide My Email.
This feature will also work on other apps, like Mail, Apple Pay, and third-party apps that support it, and you can even generate addresses manually by going to Settings > Apple Account > iCloud > Hide My Email > Create new address.
Enable Private Relay
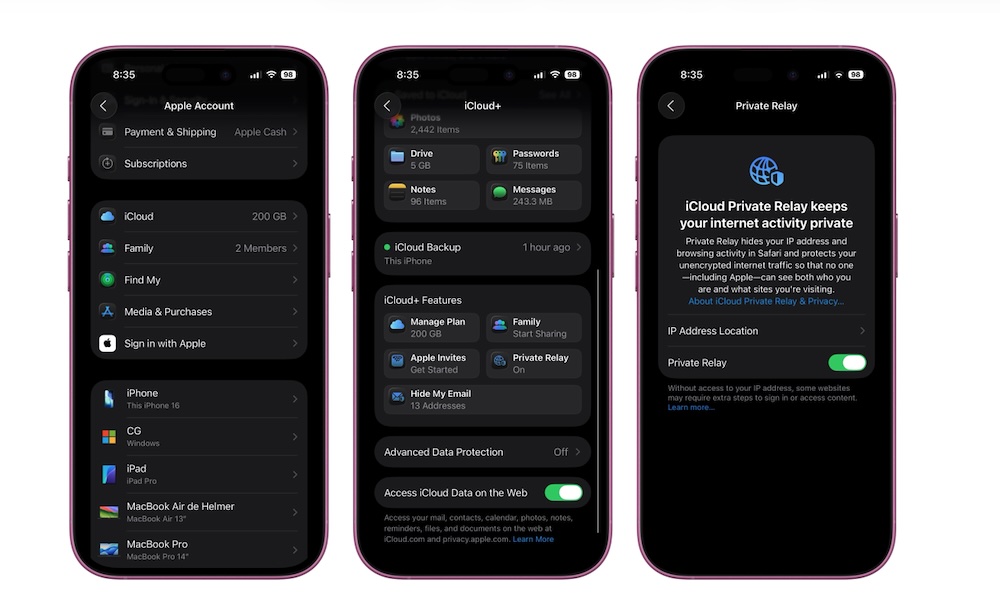
Besides Hide My Email, iCloud+ also lets you use a feature called Private Relay. This feature works similarly to a VPN, automatically hiding your IP address and your online activity so companies — including Apple — can't track you while you browse the web.
After you're subscribed to iCloud+, here's how you can turn on Apple's Private Relay.
- Open the Settings app.
- Tap on your Apple Account (Apple ID) at the top of the page.
- Go to iCloud.
- Scroll down and under iCloud+ Features, tap on Private Relay.
- Turn on Private Relay.
Keep in mind that it's possible to have Private Relay enabled on only some Wi-Fi networks, so be sure to also check to ensure that Limit IP Address Tracking is enabled for your individual network under Settings > Wi-Fi.
iCloud Private Relay is a great built-in way to protect your privacy, but it's important to remember it's not quite as sophisticated as a VPN as it only works for browsing in Safari, and not third-party apps, and also doesn't support bypassing geographic restrictions. So, you may still want to consider a proper VPN if you need more than just basic browsing protection.
Take a Few Minutes of Your Day to Stay Safe for Months
All of these tips might seem like a lot, especially if you're still getting the hang of iOS as a whole. However, they'll only take you a few minutes to set up, and they can dramatically reduce your risk online or offline.
Plus, you don't have to try them out all at once. You can start by trying a few of them and then go back and keep securing your iPhone whenever you have the chance. If you're lucky, you might never need these features, but it's always better to be safe than sorry.