
You Can Now Scan Documents Using the Google Drive App | Here’s How

Toggle Dark Mode
Although Android users naturally get some of Google’s best features right away, many of them do eventually make their way over to the iPhone versions of Google’s apps. Such was true with Google’s Magic Eraser, which came to Google Photos for iPhone earlier this year, and now Google is doing the same with a very helpful feature in its Google Drive app.
Considering that Google Drive for Android has offered this capability for nearly a decade, this one has taken an exceptionally long time to make its way to the iPhone. However, this week Google announced some nice upgrades to the Android version; in the process, the company presumably figured it was about time it opened it up to iOS users. Better late than never, we suppose.
As with most Google updates, this feature is controlled from Google’s servers on the back end, so it may not appear on everyone’s iPhone right away. Still, as long as you’re running the latest version of the Google Drive app, it should appear over the next few days if you don’t already have it available.
How Google Drive Scanning Works
First, Google Drive’s scanning feature is designed primarily to capture documents, not photos. For those who want to digitize their old prints, Google Photos has long offered a similar feature that’s better focused on handling images.
As a result, Google Drive will only scan to a PDF format, not JPEG or other image formats. It also runs optical character recognition (OCR) on scanned documents, so you can extract text from the result or convert it to Google Docs or Microsoft Word for further editing. However, as with most OCR systems, your mileage may vary on accuracy.
Here’s how to take advantage of the new scanning feature in Google Drive for iPhone:
- Open the Google Drive app on your iPhone.
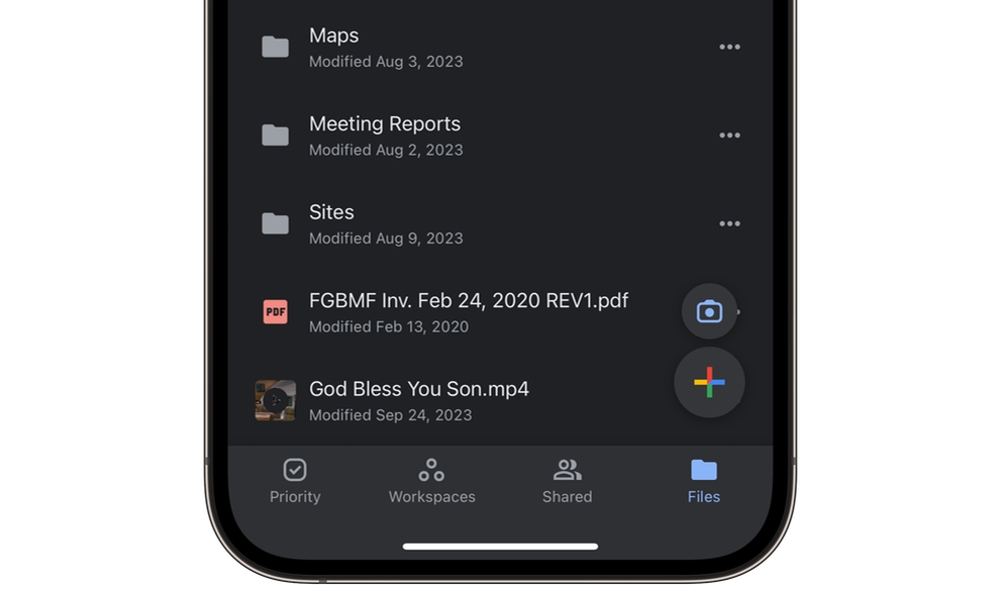
- A camera button should appear above the standard plus button used to create a new document or upload a file. You should also see a Scan button on the new document menu that slides up when you press the Plus button. If neither of these appears, the feature hasn’t made it to your device yet.
- Select the Scan button.
- If this is the first time you’ve used the feature, you’ll need to grant permission for Google Drive to access your camera by selecting Allow.
- Point your iPhone camera at the document you want to scan, align it in the viewfinder, and hold steady.
- After about a second, Google Drive should automatically capture an image of the document, with an animation showing it minimizing into the bottom-left corner.
- You can tap this thumbnail image to preview the scanned page. From here, you can select Retake if you’d like to try capturing it again or the trashcan icon to remove it entirely. There are also additional buttons here to crop and rotate your scan or switch between color modes. Select Done in the top-right corner to return to the camera screen.
- You can continue scanning additional pages and repeat step 7 as needed.
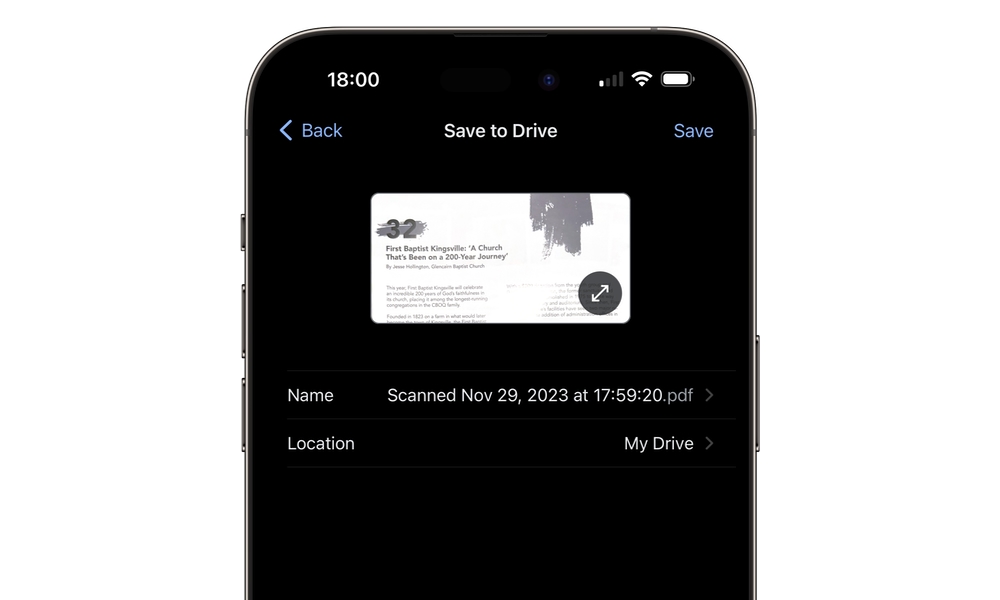
- Choose Save when you’re finished scanning.
- Enter a name and location for your scan and choose Save in the top-right corner.
While the camera is open, you can also select from the options at the top to toggle off the automatic scanning mode — in which case you’ll have to tap the shutter button manually for each scan — as well as adjusting the color mode and flash setting.
In its announcement, Google also said that it’s bringing a new title suggestion feature to both Android and iOS/iPadOS devices, which will use machine learning to provide “relevant title suggestions.” However, this feature is only available in the US and may be on a separate rollout schedule, as it doesn’t appear to be working for everyone yet.


