
Make Your Mac Easier to Read and Use with These 7 Hidden Tricks!
 ShiftDelete
macOS Mojave (10.14) is arguably Apple's most feature-packed and feature-enhanced software update for modern Macs. It brings to the table a host of new features, security and privacy controls, stability enhancements and the long-awaited Dark Mode theme!
It also represents the most "Accessibility-friendly" and easy-to-use macOS release. But whether you’re limited in sensory capacity like me, and actually require these innovative features — or even if you’re simply looking to simplify and streamline the ways you interact and engage with your Mac — these useful tools are 100 percent free to use and baked right into macOS settings. Continue reading to learn about 7 tricks to make your Mac's display easier to read and use!
7 Go Easy on the Eyes with Dark Mode
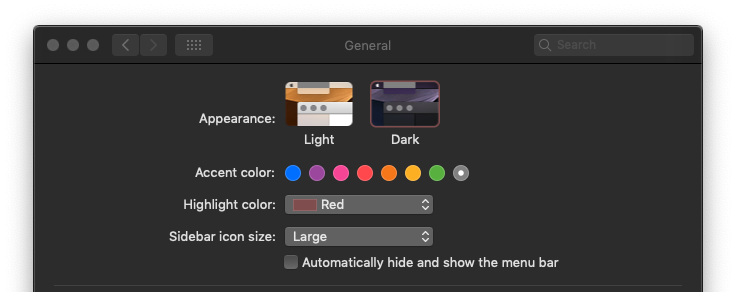
One of macOS Mojave’s most anticipated new features is the introduction of an official Dark Mode, which, when applied, essentially reverses the traditional white interface in macOS apps, system and menus with a softer, two-tone black/charcoal background.
If you’re running macOS Mojave (10.14) and haven’t already given Dark Mode a try, I personally recommend spending a few minutes with it and seeing for yourself: I find the white text over black much easier on the eyes, but your experience may vary.
To enable Dark Mode on Mac running macOS Mojave, simply open
- ? > System Preferences from the desktop.
- Select General
- Under Appearance, select Dark.
6 Tell Your Mac What to Type and Do with Dictation
Dictation on macOS allows you speak text and dictate commands to your Mac in over 40 different languages, when and where you’d otherwise have to type by hand.
You can carry-out basic and even advanced tasks using Dictation, like reply to an email, browse the web, or even “write” a monologue using just the sound of your voice, if you so desired.
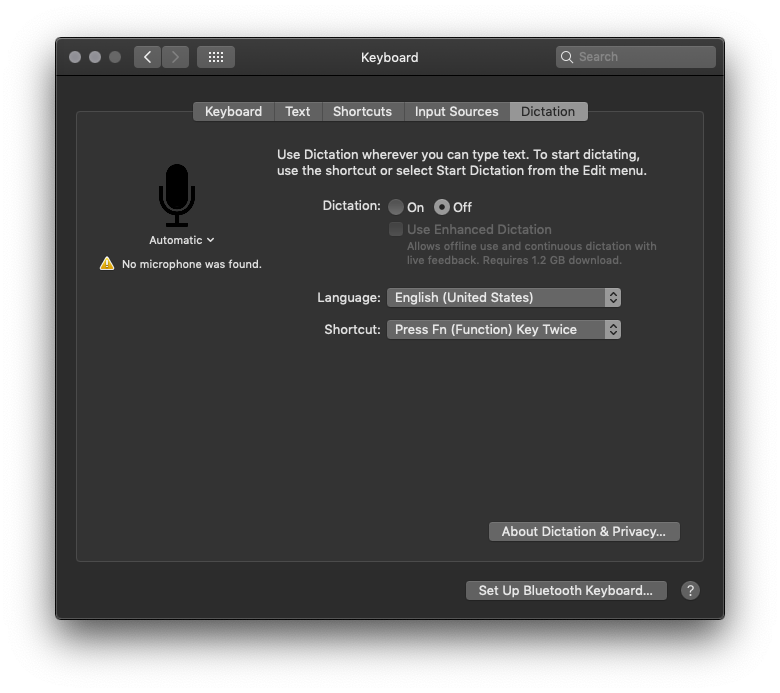
Built on industry-leading voice-to-text software from Nuance Communications, Apple’s desktop and laptop Macs boast Dictation functionality straight out-of-the-box. To turn the feature on and test it for yourself, navigate to:
- ? > System Preferences from the macOS desktop
- Select Keyboard
- Select Dictation from the top row of menu options
- And finally, under Dictation, click On.
(Note: you’ll need a microphone to use these features, which are built-into most modern Macs except the Mac mini).
For even more advanced Dictations features, head back to:
- ? > System Preferences
- Select Accessibility
- Then scroll in the left-hand column, select Dictation. From here, you can pre-set and configure specific Dictation commands, and tweak related settings, accordingly.
5 Never Squint or Strain Your Eyes Again with Smart Zoom
For years, OS X and macOS has featured the most advanced in-built utilities for Zooming In and Out of onscreen content. But macOS Mojave brings by far the most robust suite of options to the table for quickly and effortlessly zooming around your desktop, apps and more.
“Zoom is a powerful built-in magnifier that lets you enlarge your screen up to 20 times, so you can better see what’s on the display,” Apple says, noting that “You can zoom using full screen or picture-in-picture, allowing you to see the zoomed area in a separate window while keeping the rest of the screen at its native size.”
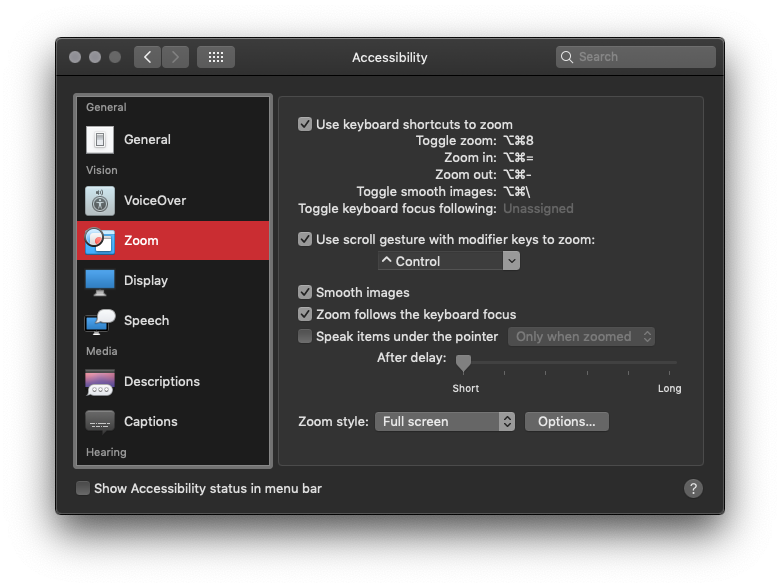
To configure Zoom settings, head to:
- ? > System Preferences
- Accessibility
- From the left-hand column, select Zoom.
From here, you can select the Keyboard shortcut you’d like to use to initiate Zoom, and by selecting “use scroll gestures with modifier key to zoom,” you can quickly and easily pan in and out by pinching or scrolling with two fingers on Apple’s ForceTouch trackpad or Mighty Mouse.
4 Enlarge and Make Your Cursor Easier to Find
With modern computer monitors boasting larger display areas and more pixels than ever before, sometimes locating and maintaining focus of your on-screen pointer can be a frustrating feat.
Luckily, macOS allows you to not only increase the size of the cursor icon, itself, but also make it easier to spot when you need it most by simply shaking your mouse or swiping swiftly across your ForceTouch trackpad.
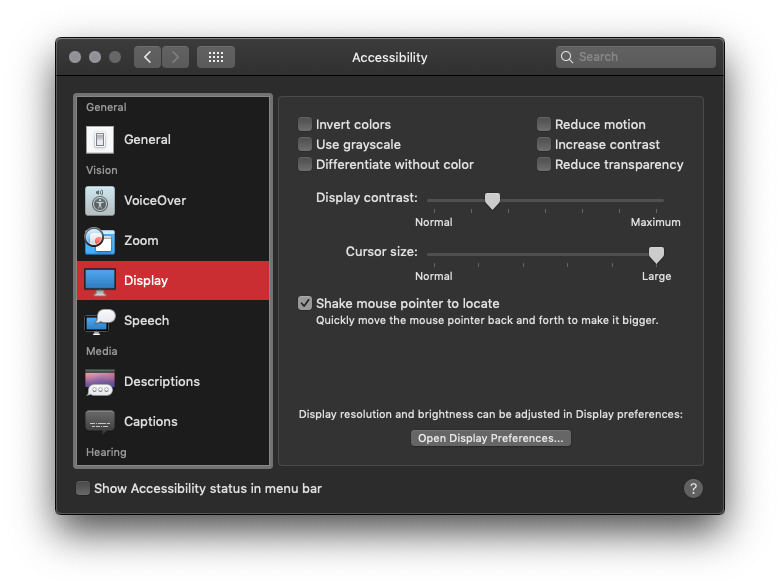
To magnify your mouse pointer, navigate to:
- ? > System Preferences
- Accessibility
- From the left-hand column, select Display
- And then click and slide along the Normal > Large meter located next to Cursor Size.
- Directly underneath, check the “Shake mouse pointer to locate” box to enable shake to locate and quickly bring your pointer into view.
3 Adjust Contrast for an Optimum Viewing Experience
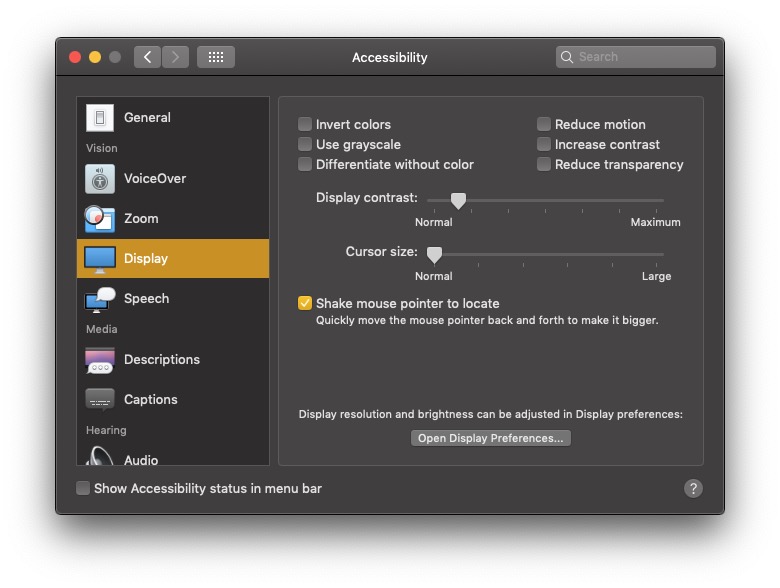
One of the easiest but often most undervalued ways to enhance your viewing experience, regardless of whether your display is built-in or third-party, is by adjusting macOS’ Display Contrast settings to make text sharper and easier to read.
To find your perfect balance, navigate to:
- ? >System Preferences
- Select Accessibility
- From the left-hand menu, select Display.
- Click and drag your cursor along the Normal > Maximum meter next to Display Contrast.
- Try checking the “Increase Contrast” box directly above the meter to sample Apple’s default high-contrast setting.
2 Sit Back, Relax and Speak Your Way Around macOS With Siri
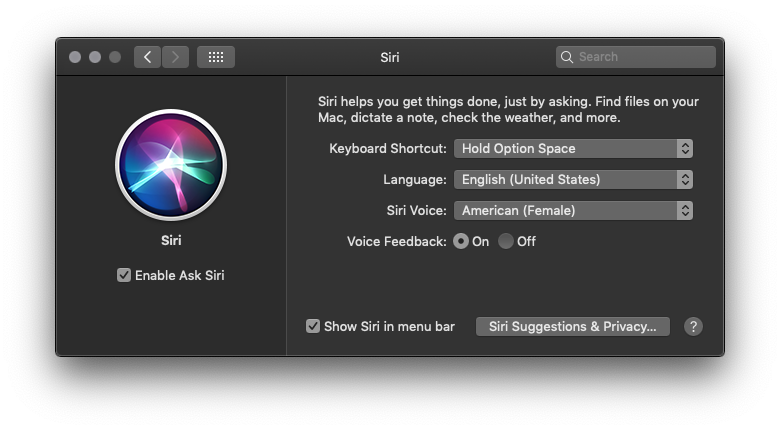
While macOS Dictation offers a wealth of voice-assisted and voice-programmable commands to simplify your user experience, it also features Siri baked right in for even more advanced and hands-free interaction.
Siri on macOS allows users to carry out tasks like composing an email, send an iMessage or locate and open files using the same “Hey Siri" commands available to iOS users.
- ? >To configure Siri, navigate to:
- System Preferences from the macOS desktop
- Click Siri and, if you haven’t already, configure Language, Siri voice and keyboard shortcut options to your preferences.
You can also check the “show Siri in menu bar” box to keep Siri on and accessible whenever you’re interacting with your Mac.
1 Never Miss a Notification with Screen Flash
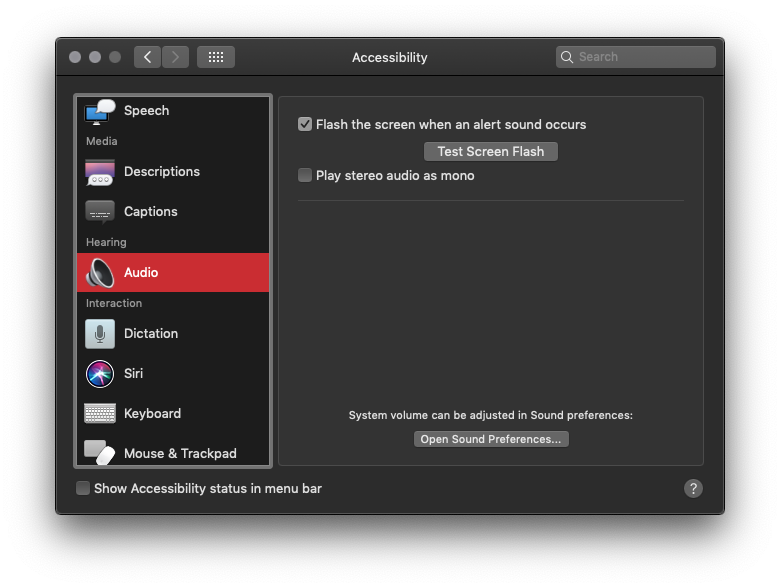
Designed as an Accessibility feature for the deaf and hard-of-hearing, Screen Flash is a rather useful tool which will make your Mac’s screen literally flash whenever an email, Message or notification comes through, or an app otherwise needs your attention.
To configure Screen Flash, head over to:
- ? > System Preferences
- Select Accessibility
- From the left-hand column, scroll down and select Audio. From here, you can either check the first box to enable – or test the Screen Flash first to see if it works for you.