
What Are Safari Profiles and How to Use Them
Toggle Dark Mode
If you’re an Apple user, chances are you prefer browsing the web with Safari. After all, thanks to the Apple ecosystem, Safari works smoothly on all your devices, from your iPhone and iPad to your Mac.
Besides performance, Safari comes with many different features to make your browsing experience even better. Whether you use Safari for work or school, there are definitely features and extensions that you’ll want to try.

One of those features is the Safari Profiles, which is perfect if you use your Mac for different areas of your life, such as work, school, or community projects. With Safari profiles, you can keep your browsing separate and private, so you can keep the different roles in your life separate.
If you’re just getting started with profiles in Safari, here’s everything you need to know about them.
What Are Safari Profiles?

As you can guess by its name, this feature lets you create different profiles in Safari. For instance, you can create one profile for work and another one for school and keep all your browsing separately contained in each one.
At its core, this sounds similar to the Safari tab groups, but using profiles gives you so much more than a Tab Group.
For starters, each Safari profile keeps all your history, cookies, and favorites separate from the others. You can also create specific Tab Groups in each profile.
This is a great feature if you want to keep your browsing separate or if you share your Mac with a friend or family member.
Keep in mind that in order to use profiles in Safari, you’ll need to have Safari 17 installed. To have that version of Safari on an iPhone or iPad, you’ll need to be running at least iOS 17 or iPadOS 17, respectively. For Mac users, Safari 17 comes with macOS Sonoma and is also included in the latest updates for macOS Ventura and macOS Monterey.
How to Create Multiple Safari Profiles
To get started with profiles, you’ll first need to create a new one. You can create as many as you want, as well as customize them to fit your needs.
First, let’s go over how to create a Safari profile on Mac and iPhone.
How to Create a Safari Profile on Mac
- Open Safari on your Mac.
- In the menu bar, click on Safari in the top left corner of your screen.
- Click on Create Profile.
- Click on Start Using Profiles at the bottom of the page.
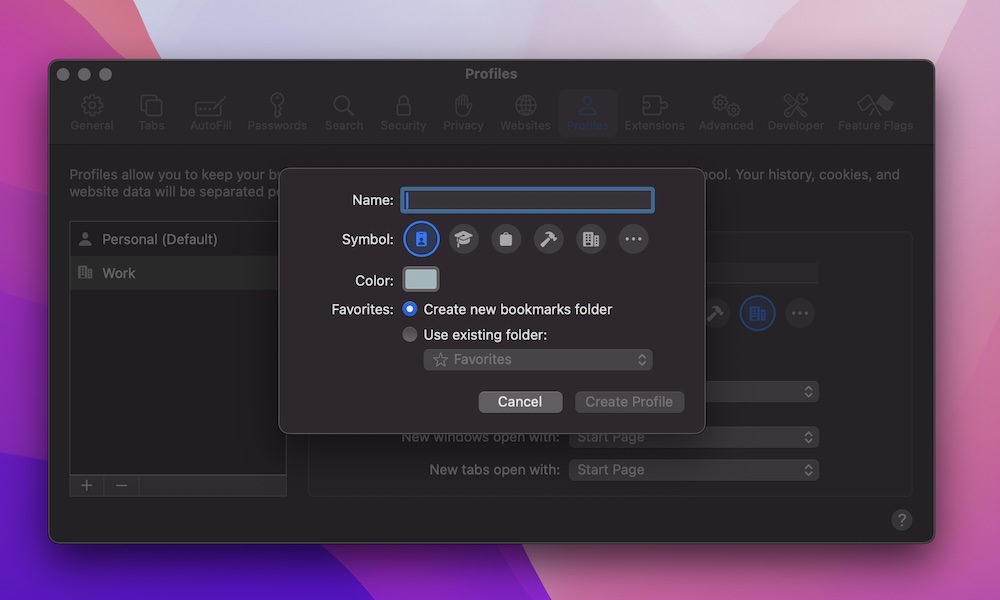
- Enter a name for your profile.
- Also, if you want, you can change the icon and color and choose if you want to create a new bookmarks folder or use an existing folder.
- Once you’re done, click on Create Profile.
And that’s it. Your Mac should automatically open a new tab with your new profile.
How to Create a Safari Profile on iPhone
You can also create a profile right from your iPhone. Here’s how:
- Open the Settings app.
- Scroll down and tap on Safari.
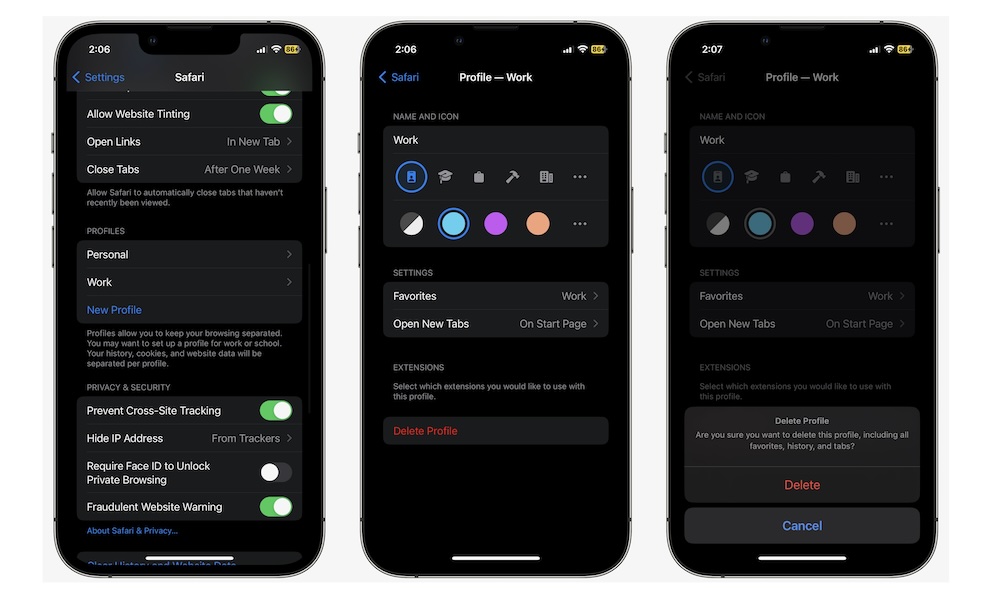
- Scroll down one more time, and under Profiles, tap on New Profile.
- Enter a name for your profile.
- Also, change the icon and color of your profile if you want.
- You can also tap on Favorites to choose if you want to use a different favorites folder and Open New Tabs to know which tabs you might want to have open.
- Tap on Done in the top right corner.
Now you have a new Safari profile on your iPhone, too. You’ll notice that as soon as you create a profile, your iPhone or Mac creates a new Personal profile. This profile is created by default, and you can’t delete it.
How to Edit and Delete Safari Profiles
Now that you’ve created your first profile, you can start browsing the web separately. But what happens if you want to change or get rid of a profile when you no longer need it?
Well, Safari will also let you edit your profiles or completely delete them on both Mac and iPhone. Here’s how:
How to Edit and Delete Safari Profiles on Mac
- Open Safari.
- Click Safari in the top left corner of your screen.
- Select Manage Profiles.
- On the left side menu, click the profile you want to edit or delete.
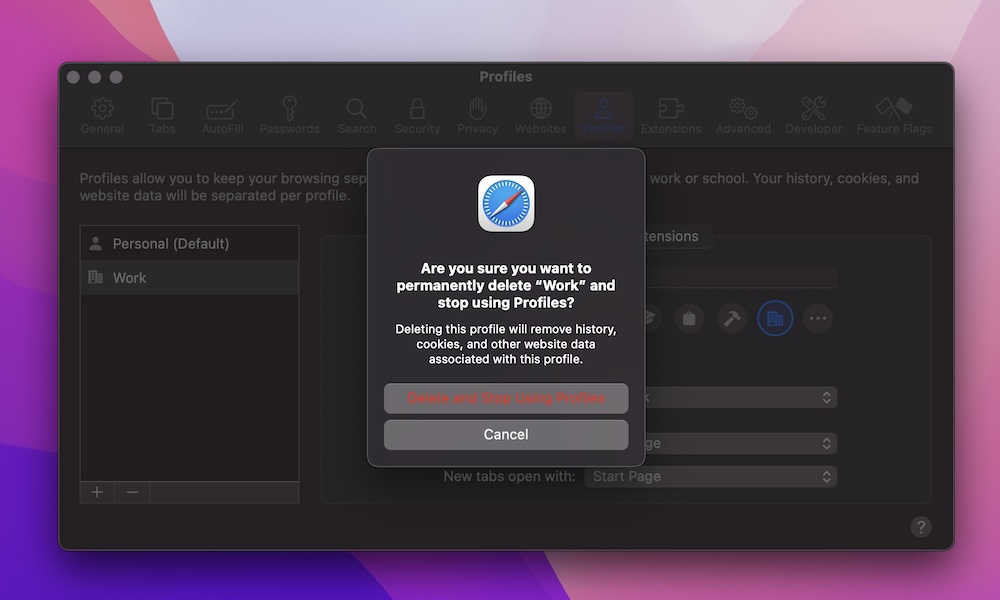
- To delete the profile, click the minus (-) button in the bottom left corner of the window. Then, click on Delete Profile.
- To customize your profile, simply start changing the name, color, symbol, and anything else you want to change.
How to Edit and Delete Safari Profiles on iPhone
- Open the Settings app.
- Scroll down and tap on Safari.
- Scroll down one more time, and under Profiles, tap on the profile you want to edit or delete.
- To delete a profile, simply tap on Delete Profile at the bottom and then tap on Delete again to confirm your decision.
- To edit your profile, simply start changing whatever you want to change and then exit the Settings app.
How to Switch Between Safari Profiles on iPhone and Mac
After you’ve created your new profiles, you’re probably going to want to use them right away. By default, you should see your Personal profile when you open Safari, but you can almost instantly switch to any profile on both iPhone and Mac.
On your Mac, simply click the profile icon in the top left corner of your screen. It’s right next to the Tab Group icon. Then, you should see an option to Switch to [your profile’s name] Window. You can go back and forth as often as you want.
If you don’t see the option to switch to a new profile, chances are it’s because that profile doesn’t have a tab open. If that happens, you can click on New [your profile’s name] Window.
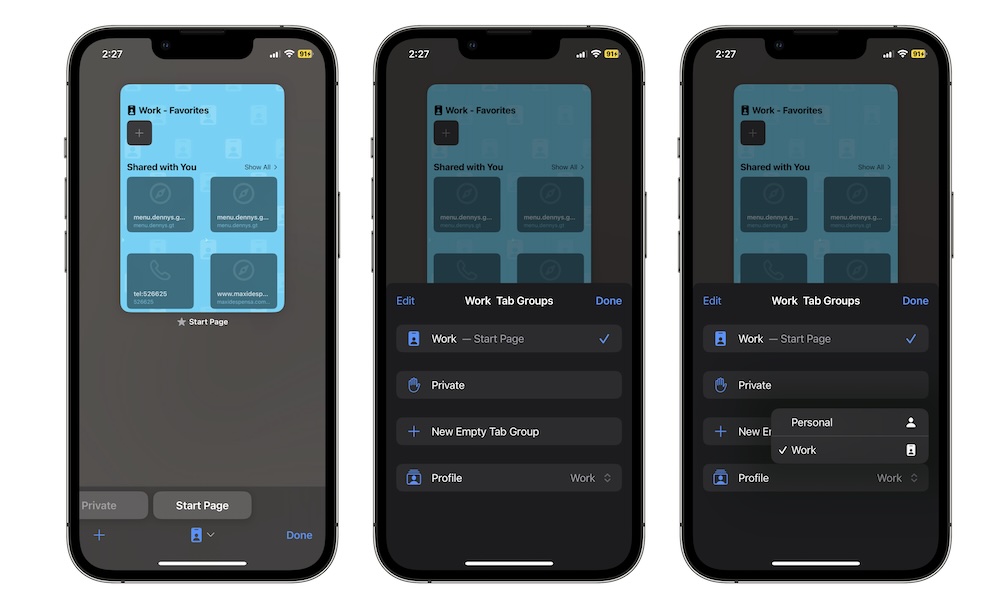
On iPhone, all you need to do is open Safari and swipe up from the address bar to open all your tabs. Then, tap on the profile icon at the bottom of your screen and select Profile at the bottom of your screen. Then select the profile you want and start browsing the web.
Choose Which Extensions You Want to Use Which Each Safari Profile
Besides being able to have an exclusive browsing history and favorites between profiles, you can also choose which extensions will be available in each profile.
In order to choose which extensions go with each profile, you need to do the following:
Choose Which Extensions You Want to Use Which Each Safari Profile on Mac
- Open Safari.
- Click on Safari in the top left corner of your screen.
- Select Manage Profiles.
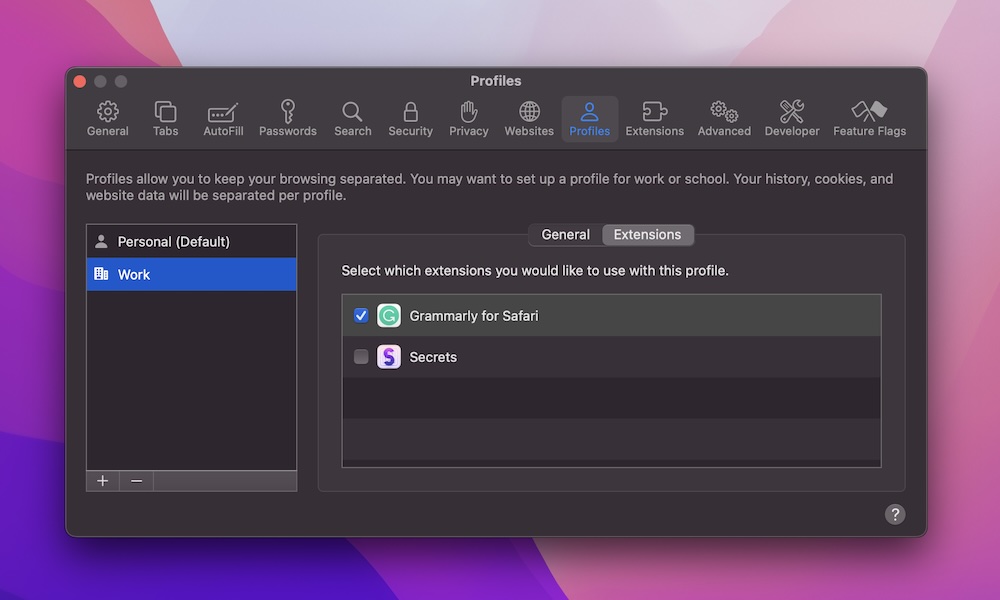
- On the left sidebar, click the profile you want to change.
- Click on the Extensions tab right above your profile’s name.
- Tick the box next to the extension you want to have available on that profile.
And that’s it. If you go to a different profile, you’ll notice that the extensions you already enabled for the previous profile won’t be available on this one. So you’ll need to tick them yourself.
Choose Which Extensions You Want to Use Which Each Safari Profile on iPhone
- Open the Settings app.
- Scroll down and go to Safari.
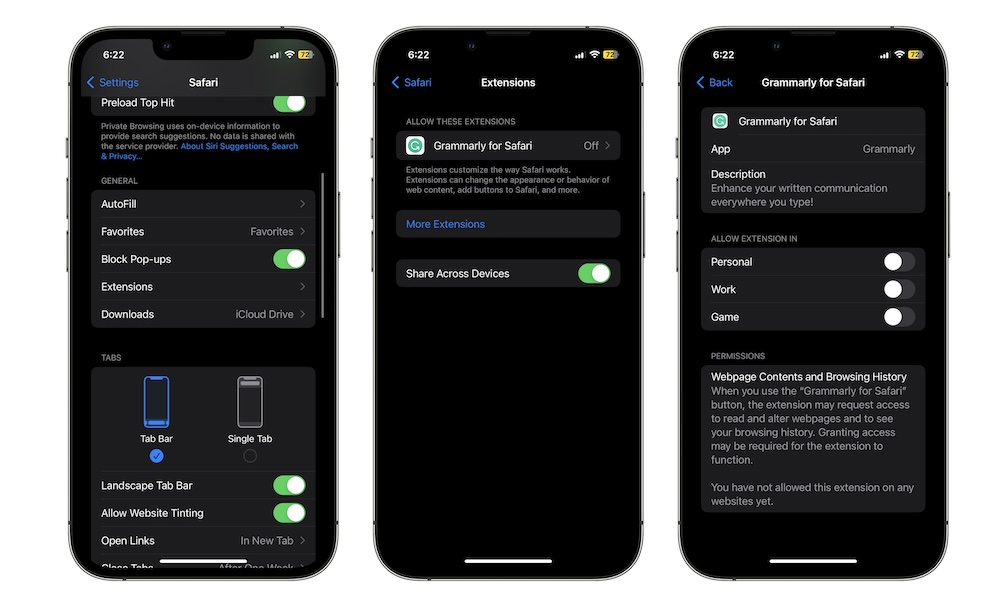
- Scroll down again and tap on Extensions.
- Tap on the extension you want to add.
- Under Allow Extension In, select the profiles you want to be able to use the extension in.
You can go back to the previous page and repeat the steps above for each extension you want. And if you don’t want to repeat this on your Mac or iPad, be sure to enable Share Across Devices.
Master Profiles in Safari
Using Safari profiles is a perfect way to keep all your browsing separate and organized. Granted, it might take you a while to set all your profiles up, but it’ll be worth it in the long run.
The best part is that you only need to do this on your Mac or iPhone, and then it’ll automatically sync across your devices as long as they have Safari 17 installed—meaning you need to have iOS 17, iPadOS 17, or macOS Monterey or later with the latest updates installed.


