Tips to Take Better Selfies With Your iPhone
 Credit: Kicking Studio / Shutterstock
Toggle Dark Mode
One of the best features on an iPhone is its camera. While it might not have as many pixels as some of its competitors, the iPhone always takes amazing pictures, even in low-light situations.
That goes for selfies too. Thanks to the iPhone’s filters and settings, you can take an amazing selfie (or tens of them) in a matter of seconds.
Of course, if you want your selfies to truly stand out, you still need to help it by making a few tweaks for yourself. Here are five powerful tips to make sure your next selfie looks as stunning as possible.
1. Use Burst to Take More Selfies in a Second
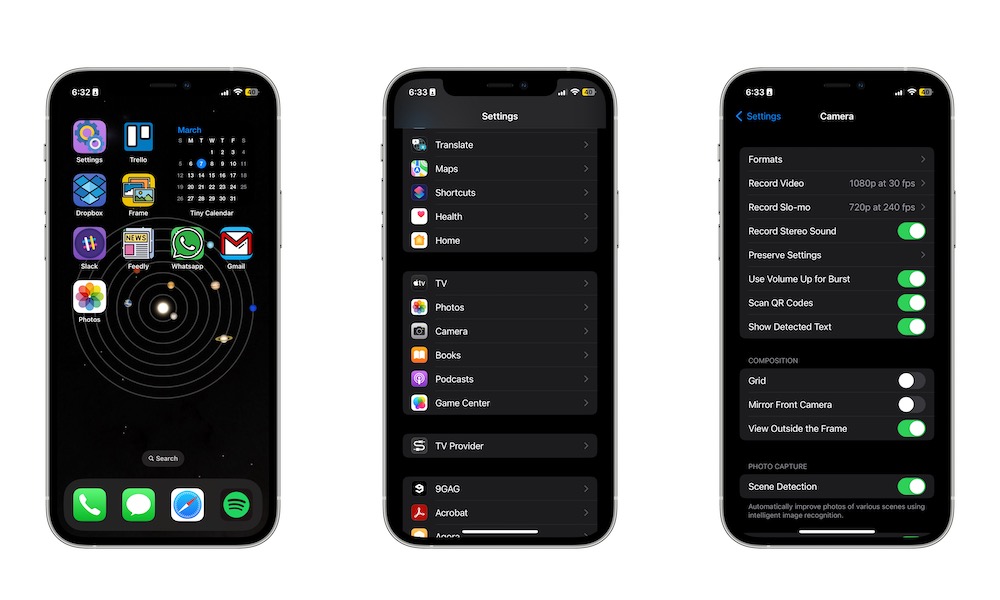
If you love to quickly change poses when taking a selfie, you might want to start using Burst when you take photos. Burst is a mode that lets you take up to 10 photos in one second.
This works with both the back and front-facing cameras, so you’ll be able to take the best pictures in seconds. This is how you can enable Burst on your iPhone:
- Open the Settings app.
- Scroll down and select Camera.
- Toggle Use Volume Up for Burst.
And that’s it! Next time you want to take a bunch of selfies in one second, all you need to do is press the volume up button, and your iPhone will do the rest.
2. Edit Your Photos After You Take Them
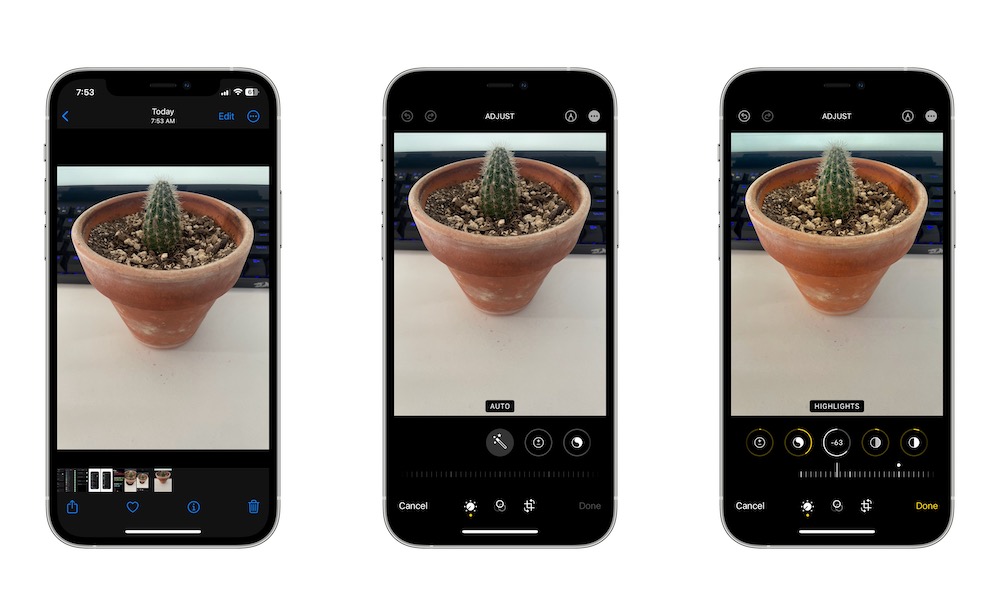
Okay, so you took a great selfie, but you feel like the light, or the colors could be better. Don’t worry; it happens. The good news is that your iPhone can help you adjust how your selfie looks before you can share it with your friends and followers.
- Open the Photos app.
- Select the photo you want to change.
- Tap Edit in the top right corner of your screen.
- At the bottom, select what you want to change. Each button represents something different, like exposure, brilliance, and shadows.
- Choose what you want to change and then swipe to the left or right with your finger until you get the result you want.
- When you finish, tap Done in the bottom right corner of your screen.
3. Clean Your Camera Lens
This one might seem like a given, but a lot of us need to remember to clean our front-facing camera lens more often before we snap a selfie. Remember that we put our faces right on the front-facing camera when we answer a call or listen to audio from Whatsapp or any other app.
The result? Our selfies might look blurry, or we may not take full advantage of the natural light or our natural beauty as much as we want.
If you know you’ll want to snap a couple of selfies during the day, it’s best to clean your iPhone’s front—and back—camera. Believe it or not, there are a lot of bacteria living in your iPhone, so cleaning it is more important than you think.
4. Use Grids to Snap a Photo From the Perfect Angle
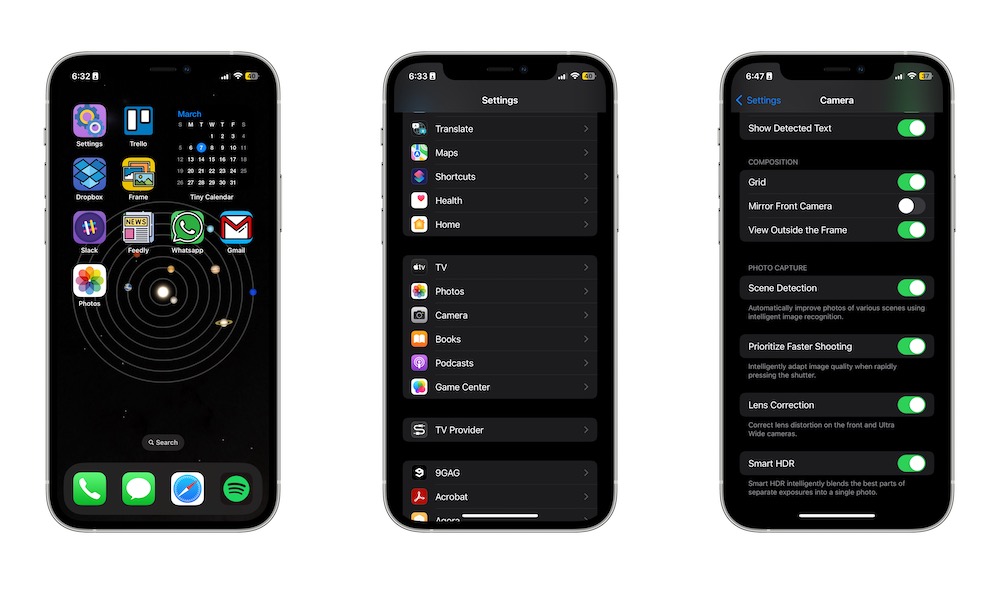
You can add a grid layout to your iPhone’s camera so you know where you should position yourself before snapping a selfie. To use grids, you need to:
- Open the Settings app.
- Scroll down and select Camera.
- Scroll down again and enable Grid.
Next time you open the Camera app, you’ll notice a grid right on the camera. Try to use it to your advantage, and if you don’t like it, you can always disable the grid again.
5. Don’t Be Afraid to Use the Back Camera
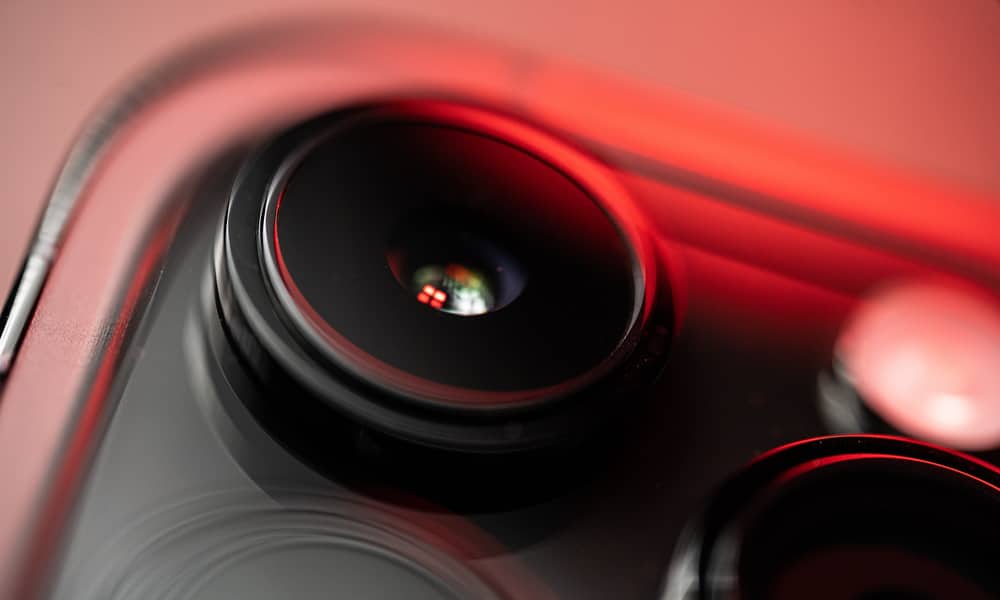
The back camera on the iPhone is significantly better than the front-facing one. So, even though you can’t really see yourself when taking the selfie, you should totally try using the back camera every once in a while.
It might take a few tries, but you’ll get the hang of it and manage to take amazing photos in a flash. Pro Tip: If you want to take it one step further, and you have an Apple Watch, you can control your iPhone’s camera from your wrist.
All you need to do is press the Digital Crown on your Apple Watch to go to your Home Screen. Then, search for the camera app (as you can guess, it’s the one with a camera icon).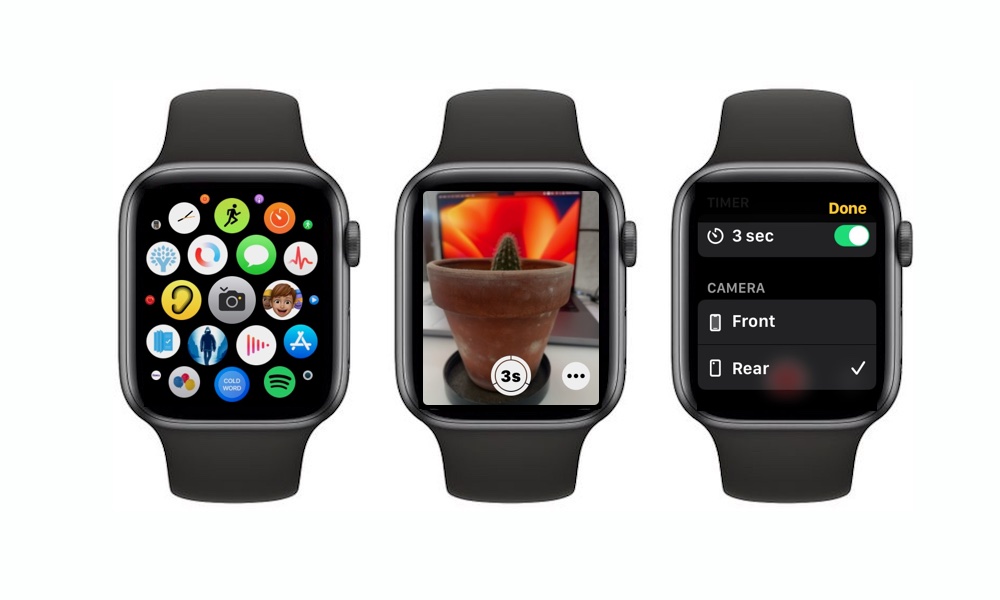
You’ll be able to see what you look like from the back camera and snap a selfie with your Apple Watch.
Take Your Selfies to the Next Level
Taking great pictures on your iPhone is already pretty easy to do. For most of us, the current iPhone settings are more than enough to snap a great photo. But if you want to take your pictures to another level, try these tips and take the best photo you can.


