
New iPhone under the Tree? Here Are Ten Cool Tips to Get Started
 Netrun78 / Shutterstock
If you were lucky enough to find a new iPhone under your Christmas tree this year, you’ve probably already dived right in to setting it up — which isn’t hard, since of course the iPhone is famous for being easy to use.
That doesn’t mean that there aren’t some other tips and tricks that are more hidden, however, and Apple wants to make sure that new iPhone users are aware of some other cool things that you can do with your iPhone that you might not realize at first glance.
Even if you’ve had an iPhone for a while, there may be some tricks here you don’t know about, and a new video from Apple Support covers “10 helpful iPhone tips you should now.”
Of course, we’ve also shared tons of tips and tricks here at iDrop News, not only for the iPhone, but for the Apple Watch and other Apple products too, so be sure to check out our full section of How To guides if you want to dig even deeper.
The tips that Apple shares in its video are still noteworthy, though, especially for their relative simplicity. These are things that you might not easily discover otherwise, which is fair, as there’s always a tradeoff between making a device easy to use and filling the screen with buttons and guides to expose every single feature. Read on for an overview of the ten helpful tips that Apple shares, while we also offer some more insight on each of them.
Search from your Home Screen

Spotlight search has been around for years, although iOS 15 makes some nice enhancements to it, including the ability to start a search right from your Lock Screen.
As Apple explains, just swipe down, and start typing. Before you type anything in, however, you may also want to review the suggestions Apple offers up. You’ll get up to eight suggested apps based on your usage history, which includes not only how frequently you open apps, but when and where you typically open them. iOS will also offer up some other suggested shortcuts for other things, such as sending a text message to somebody you regularly communicate with, handing off from another device, running a shortcut, or starting a workout.
Once you start typing, the results will be filtered automatically to match whatever you’re typing in, whether that’s a contact, calendar appointment, email, message conversation, note, file, web page, or an app. Spotlight makes a great app launcher, too, since it’s often faster to pull it up and start typing the name of an app than it is to go and look for the icon — especially if it’s hidden away in your App Library.
You can choose what appears in these search results by going into Settings > Siri & Search, so if there’s anything you’d rather not see here, you can simply switch it off entirely. There’s also no need to worry about privacy and security — even though iOS 15 lets you call up Spotlight from the Lock Screen, it will only be available once Face ID has recognized you and unlocked your iPhone.
Jump to your first photo

In its ninth tip, Apple highlights how to jump to the first photo in a given view — whether that’s your entire timeline or a specific album — by tapping the top of the screen. However, this feature goes well beyond just the Photos app, and it’s actually been in iOS for years.
Want to go to the top of a webpage in Safari? Tap the top of the screen. Top of an email? Tap the top of the screen. Top of a long note? Tap the top of the screen. You get the idea.
The Photos app does have another trick up its sleeve, however, since Apple recognizes that you may also want to get back to the most recent photo. To do this, just tap the appropriate button at the bottom of whatever screen you’re on — Library, For You, or Albums — to jump right back down. Pressing For You or Albums when you’re already at the bottom will take you back to the main listing for those categories, but if you’ve scrolled up even a bit, you’ll be taken to the bottom of the current album first.
Use Live Text with Camera

This next tip goes hand-in-hand with scanning a document, although in this case, Apple is highlighting how iOS 15’s new Live Text feature can work in real-time right through the camera — there’s no need to take a picture first.
Point your camera at a block of text, tap the Scan Text button in the bottom-right corner, and you’ll be able to interact with the text as if it were a note, including selecting text, copying text, and even linking directly to addresses in Maps, websites in Safari, or phone numbers in the Phone app.
You can even use live text to scan QR codes from screenshots without having to print them out to display them on a second screen.
In fact, the Live Text feature is so great that Apple has expanded this scanning to nearly any text field that you could paste into. Tap and hold in a blank text area, and you’ll see the same Scan Text button appear in the pop-up menu, right alongside the Copy and Paste buttons.
Tap this, and the keyboard will be replaced with a camera window that you can point at some text to insert it right into whatever you’re working on. It’s an especially handy way to pull in the numbers of all those gift cards that you likely found in your stocking this year without having to punch them in by hand.
Scan a Document

Apple added the ability to scan documents in the Notes app back in iOS 11, and while Apple’s video highlights how to do that, it doesn’t mention some of the other improvements that have been added in more recent iOS versions.
The process of making the scan is relatively straightforward: Just tap the Camera button in the Notes app and choose Scan Documents. However, it’s what happens afterwards that’s considerably more interesting.
Thanks to Apple’s advanced machine learning techniques and features like Live Text in iOS 15, your scans are fully indexed and completely searchable, not only from within the Notes app, but even from the systemwide Spotlight search on your iPhone. Even handwritten will be searchable, although that obviously depends on how well iOS recognizes your chicken-scratch.
This means you can scan anything from a menu or phone bill to a post-it note, and you’ll easily be able to find it later. In fact, iOS 15 even goes beyond that to make objects in a photo searchable, and surface that content in search results.
Open Camera from the Lock Screen

As quickly as Face ID works to unlock your iPhone, sometimes even an extra split second is too long when you’re hoping to capture that perfect photo. Plus, even when you unlock your iPhone, you still have to find the Camera app and open it separately.
You’ve probably already noticed a Camera button on your iPhone’s Lock Screen. You can tap and hold this to open your Camera app directly — even while your iPhone is still locked — but there’s an even easier way to get at your camera: Simply swipe left from your Lock Screen, and the Camera will appear.
Note that although you can still open the Camera app in this way if your iPhone is locked, your photo library remains protected. The button in the Camera app that normally lets you open your last photograph will only work for photos that were taken during the time that the Camera app was open.
In other words, open the Camera app from the Lock Screen, snap five photos, and you’ll be able to review and delete those, but only as long as the Camera app remains open. Return to the Lock Screen and they won’t be there the next time you open the Camera app while your iPhone is locked — you’ll have to actually unlock your iPhone to see them.
Save time typing with text replacement

Apple shares another pro tip that we outlined last month that could save you a ton of typing time — and it’s not even a new feature.
Apple has supported text replacement on the iPhone for years. So long, in fact, that we can’t even remember off-hand when it was introduced — it may have even been a feature of the original iPhone.
The feature is pretty straightforward — just head into Settings > General > Keyboard, and you’ll find a Text Replacement section where you can fill in as many abbreviations as you like. Type in an extended phrase like “On my way” and then a shorthand abbreviation like “omw” and then iOS will happily expand that whenever you type the shorter version.
Best of all, if you’re using iCloud these will also sync to your Mac and your iPad, and you can even use it for special characters that are otherwise tricky to type, like symbols and the Apple logo. Check out our detailed tip for a list of suggested phrases and abbreviations to get you started.
Select multiple photos to add to other apps

Apple’s video highlights another hidden feature that went viral over the summer: the ability to save or share multiple photos using the new drag-and-drop capabilities in iOS 15.
Basically, now that you can drag items between multiple apps, you can also use this to quickly save a bunch of photos. For instance, bring up a Google image search results page, and you can use multitouch gestures to “pick up” a bunch of photos and hold on to them while navigating to another app. Once you’ve opened the second app, just release your finger to drop them in. This could be your Photos app to save them to your photo library, or your Mail app to attach them to an email message, or even the Notes app to drop them into a note.
We’ve outlined how to this is another article, but there is one critical thing to remember: this only saves the displayed images, which may not be the full resolution ones. For example, if you’re doing this from the results of a Google image search, you’re going to be getting a bunch of thumbnail-sized images.
Lastly, it’s worth noting that the new drag-and-drop capabilities are useful for a lot more than just photos. For example, you can drag an email message or note into the Reminders app to create a task that links back to the original item.
Stack widgets on your Home Screen

Apple introduced support for Widgets in iOS 14 last year, and of course, it’s also made some improvements in iOS 15, including making it easier to manage stacked widgets.
Stacking widgets allows you to have more than one widget occupying the same space on your Home Screen. You’ll be able to swipe through these manually, or even tell iOS to intelligently bring up the appropriate widgets at the right times, such as showing you a weather report before you head out the door in the morning.
In iOS 14, stacking widgets required carefully dragging and dropping them on top of one another, which is how Apple’s video explains it. This is fine if you already have both widgets on your Home Screen and simply want to combine them, but if you’re adding a new widget, iOS 15 provides an easier way.
You’ll have to start with an existing stack, which means you do need to use the drag-and-drop method to combine two widgets in the first place, but once you have a stack of at least two widgets, you can add more by editing the stack. Here’s how:
- Tap and hold on the existing widget stack.
- Tap Edit Stack from the menu that comes up. The widget view opens to show you the widgets that are already in your stack.
- Tap the + button in the top-left corner.
- Choose a new widget to add to the stack. You can also search through your widgets to find the right one. Note that you’ll only be shown widget sizes and designs that fit the current stack.
- Tap on a widget to preview it. If multiple layouts are available, you can swipe left or right to decide between them.
- Tap Add Widget to add the widget to your stack.
While in editing mode, you can also remove widgets from your stack by tapping the small “–“ button in the top-left corner of the widget you want to remove. You’ll also find options at the bottom for Smart Rotate and Widget Suggestions. Turn Smart Rotate off if you don’t want iOS automatically changing the widgets in your stack throughout the day. Widget Suggestions will offer up an additional suggested widget in the stack from time to time, so turn this one off if you’d rather stick with only the widget you’ve specifically added.
Pin shared content in Messages

This new iOS 15 feature offers a great way to keep track of all the stuff that your friends and family members send you via Messages. Whether that’s a bunch of cat videos from YouTube or their post-holiday wish list, you’ll be able to see the whole collection, collated and organized in a Shared With You section.
As we've previously explained, and Apple outlines in its video, you can also pin shared items to make them easier to find later on. This puts them at the top of the Shared with You section in their respective apps, while also elevating them when searching for stuff in Messages.
Items must be pinned from their respective places in the Messages app, so the best time to do this is when you first receive an item you want to mark for easy retrieval later. However, you can also use the search feature to find older items, and you can also jump right back to them in Messages by tapping the person’s name from a Shared with You listing. Once you’re looking at the item in Messages, you can pin it by tapping and holding on it and choosing Pin from the pop-up menu that appears.
Swipe to erase a digit in Calculator
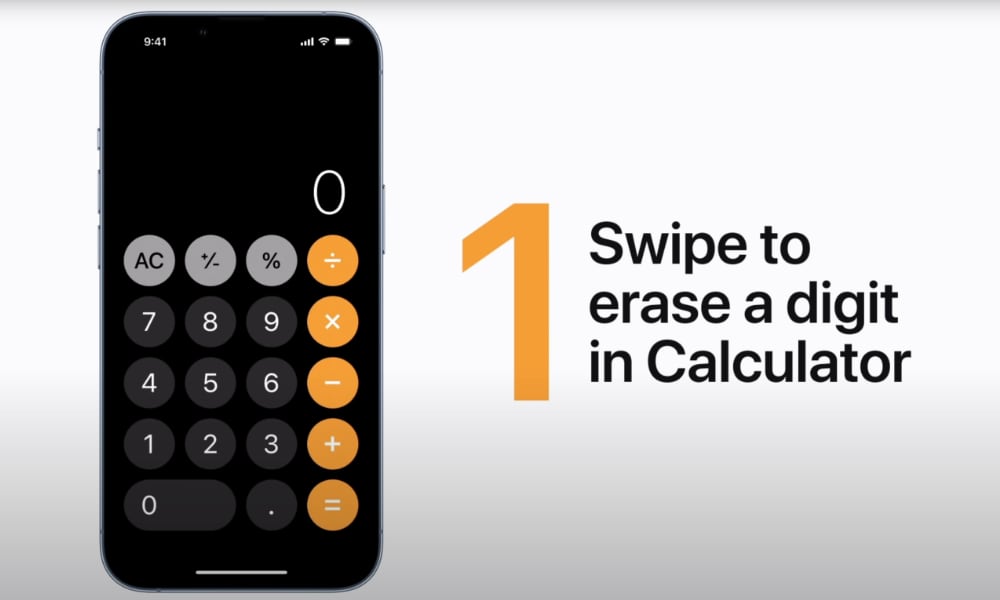
There’s no backspace or delete button in the Calculator app, but as Apple explains, there’s still a way to clear a wrong entry without having to go for the “C” button.
Simply swipe left or right to erase the last digit entered. You can repeat this as many times as you like if you want to clear out multiple digits.
You may not realize that you can also use copy and paste in the Calculator app. Apple’s video explains how you can tap on a number to copy it, which works just like it does in any other app. However, you can also paste any number from your clipboard in the same way. This can be helpful when you want to pull in a large number from an email or website to use in a calculation. Tap and hold in the Calculator’s display area to bring up the context menu, and then tap Paste, the same as you would anywhere else.
For obvious reasons, you can only paste numbers in here, of course. If the Paste option doesn’t show up when tapping, it’s most likely because your clipboard contains something other than just a numeric value.