
iPhone ‘Reminders’ App Has Features You Didn’t Even Know About
 Jesse Hollington
Toggle Dark Mode
Whether you’re a forgetful person or not, having a good process for getting things done can be your “edge” in life. It can be something you can be proud of. Keeping the edge sharp means that you work on it continuously, with the idea of constantly improving it.
With that said, there is a good chance you’re not using your iPhone’s Reminders app to the fullest of its ability. Almost none of us are so read on to learn how you can get better.

This native iOS app is smartly designed and comes free with any iPhone you have.
By using any of the tips we list below, you’ll take your experience with the Reminders app to the next level.
1. Ask Siri to Add Reminders for You
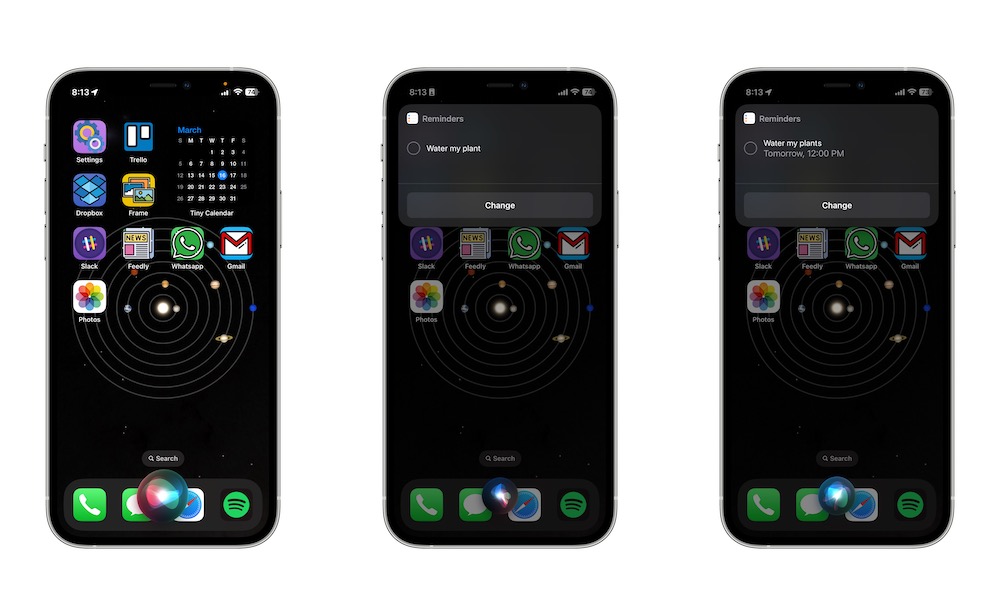
The best way to never miss an important task is to write it right away. But if you have your hands full, you can use Siri instead.
If you say something like, “Hey, Siri, remind me to do…” and then say the task you want to be reminded of, Siri will add it to your Reminders instantly.
You can take it one step further and add the time and day you want to be reminded. For instance, say something like, “Hey Siri, remind me to walk the dog tomorrow at five in the morning,” and Siri will take care of everything.
2. Add Links, Photos, or Locations to Your Reminders

You don’t have to just create reminders. You can also add photos, URLs, or any other information you need to your reminders. To get started, first:
- Open the Reminders app.
- Select the reminder you want, or create a new one.
- Right below your reminder’s name, you can add any URL you want. Scroll down a bit further, and you can enable Location. Then, select your current location or customize the location however you want.
- Lastly, you can scroll down right to the bottom and tap on Add Image.
- Then select if you want to add an image from your library, scan a document or take a photo.
3. Add Subtasks to Your Reminders
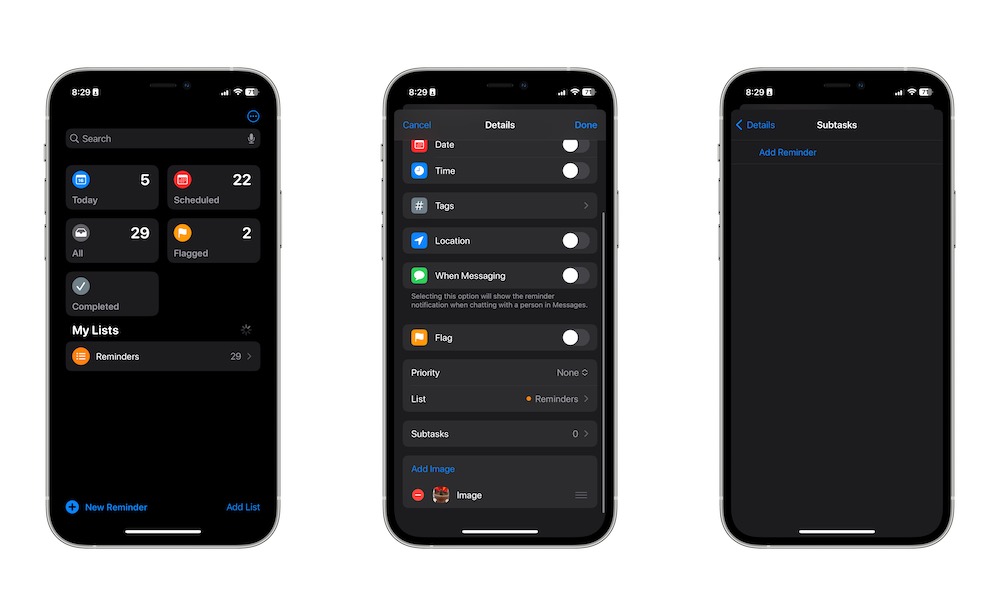
You don’t need to create different reminders for different tasks from the same project. Instead, you can create one big task and add smaller subtasks to keep yourself organized. It basically works like a to-do list but with a lot more features.
- First, Go to the reminder you want or create a new one.
- Scroll down and tap on Subtasks.
- Add all the subtasks you want.
And that’s it. You can access your subtasks and add more whenever you want. You can quickly complete your subtasks by tapping the circle on the left side.
4. Give Your Reminders the Right Priority
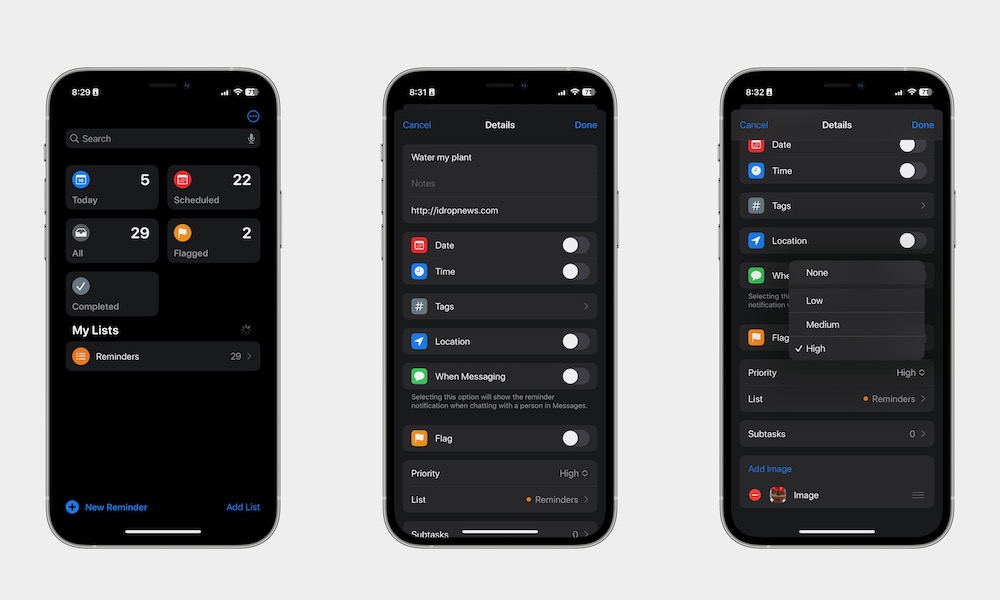
You can highlight your most important tasks by giving them a priority level. This is how:
- Open any reminder you want.
- Scroll down and tap on Priority.
- Choose the priority level you want.
And how do you know your reminders have priority? You’ll notice one, two, or up to three exclamation marks on the left side of it.
As you can guess, one exclamation mark is for low-priority tasks, two exclamation marks are for medium-level priority tasks, and three exclamation points are used for the highest-level priority tasks.
5. Add Tags to Your Reminders

When you have too many reminders, you can organize them by adding tags to them. For instance, you can create a tag for work, another one for school, and another for your personal life. To add or create new tags, you need to:
- Go to the reminder you want.
- Scroll down and select Tags.
- Choose any tag you want. Or, if you have never added a tag, you can tap Add New Tag and then enter the tag’s name you want to use.
- Once you have added all the tags, tap Done in the top right corner of your screen.
6. Create Different Lists for Different Reminders
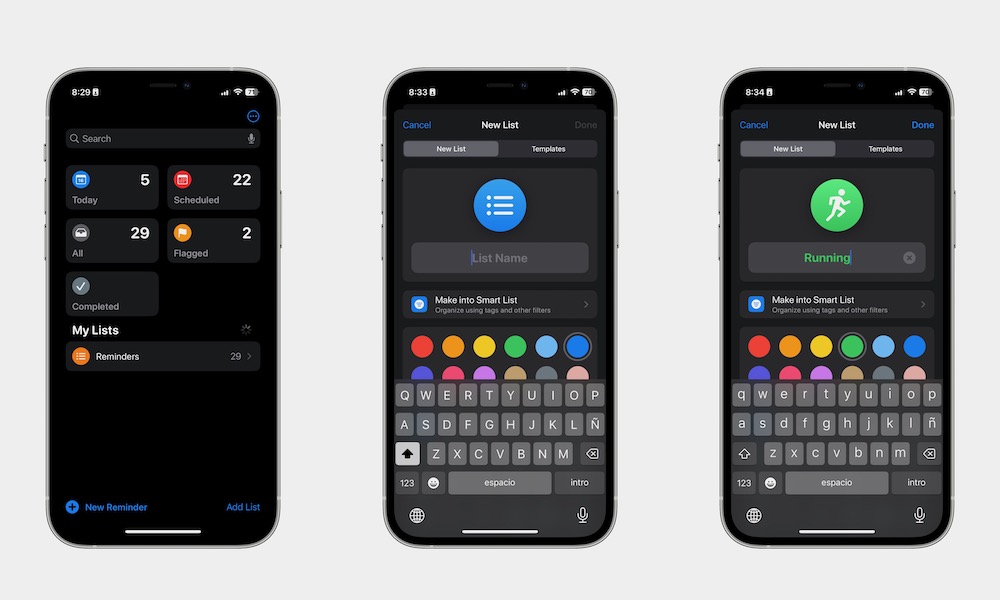
If you love adding reminders for work and personal life, you’re better off creating different lists for different tasks. To get started, you’ll need to:
- Open the Reminders app.
- Tap Add List in the bottom right corner of your screen.
- Choose your List’s name.
- Change the color and shape of the icon to whatever you want.
- Tap Done in the top right corner of your screen.
You’ll probably notice that your list is completely empty, but you can start filling it up by adding reminders inside the list. Or, you can move an existing reminder to your new list by opening the reminder, going to the bottom, and tapping List. Then, just select the list you want.
7. Make Use of Smart Lists
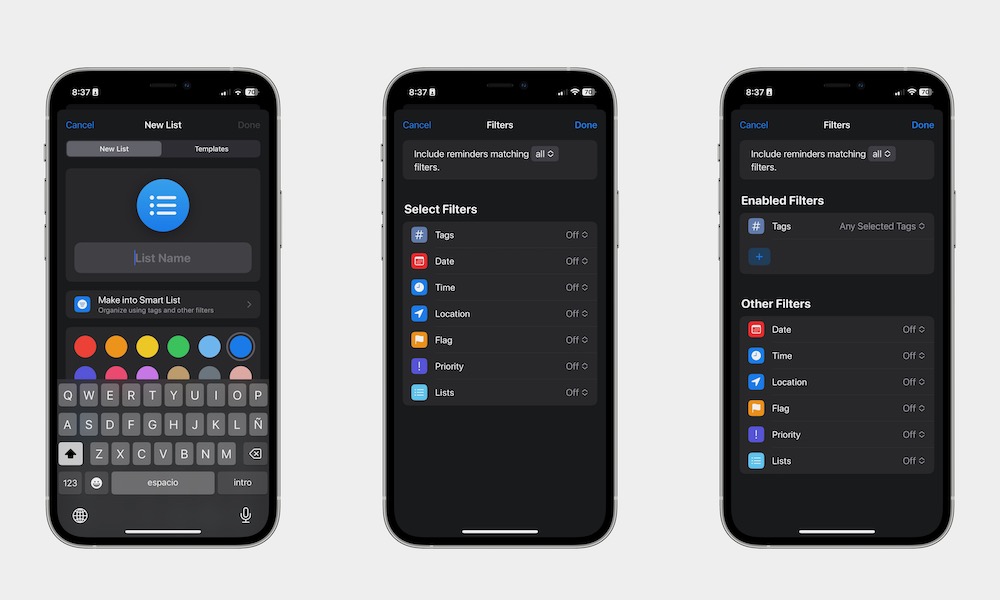
Now that you know how to create lists, it’s time to take it up a notch. You can use something called Smart List, which will automatically fill itself with all the reminders that meet certain filters you choose.
- Open the Reminders app.
- Tap Add List in the bottom right corner of your screen.
- Tap Make into Smart List.
- Choose any filters you want.
- Tap Done in the top right corner of your screen.
- Continue giving your list a name and an icon, and then tap Done in the top right corner of your screen.
Depending on the filters you choose, you’ll see how your list gets automatically filled with any of your reminders that meet those criteria. Remember that if you use two or more filters, the Smart List won’t choose one filter or the other; reminders need to match all your filters to appear on your list.
Master the Reminders App, Get Things Done Better and Faster, and Never Forget About Anything Again
Your turn! You can master the Reminders app by following some or all of these tips. Just remember to play around with the app and find what works for you.


