
How to Manage Your Contacts on iPhone
 MichaelJayBerlin
Toggle Dark Mode
Your iPhone makes it extremely easy to see and manage all your contacts in the same place. But let’s be honest: most of us don’t even bother doing much with our contacts once we’ve created them.
Moreover, if you’re just getting started with iOS, you probably don’t even know how to create a brand-new contact.

Luckily, the Contacts app makes it extremely easy to create, customize, and manage your contacts with just a few taps.
If you don’t know how to get started, here’s everything you need to know about managing your contacts on your iPhone.
How to Add New Contacts on Your iPhone
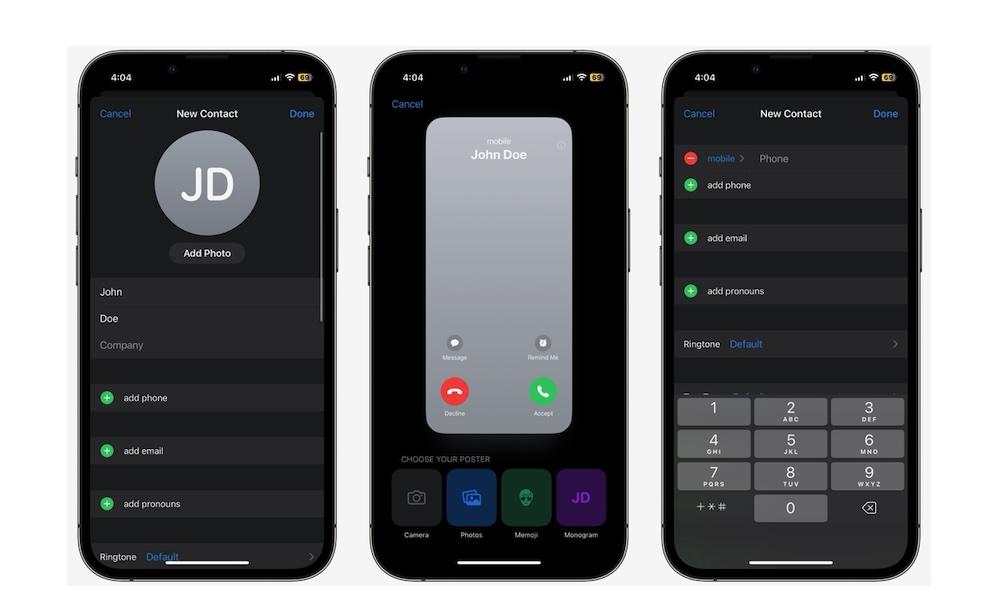
The first thing you need to learn is how to add your own contacts. There are a couple of ways to do this, but this is the fastest way to add a new contact:
- Open the Contacts app. If you don’t have the app, you can open the Phone app and then tap on the Contacts tab at the bottom.
- Hit the plus icon in the top right corner.
- Enter the first and last name of your new contact.
- You can also tap on Add Photo to personalize your contact even more. You can use actual photos, emoji, or a monogram.
- Scroll down and add all the information you want. For instance, you can add phone, add email, or add address.
- When you finish, tap on Done in the top right corner.
Add Contacts From Your Accounts
Adding one contact at a time is great if you just have a handful of new contacts, but if you already have a bunch of contacts saved in your email accounts, you’re better off importing them into your iPhone.
Don’t worry; it’s actually easier than it sounds. Here’s what you need to do:
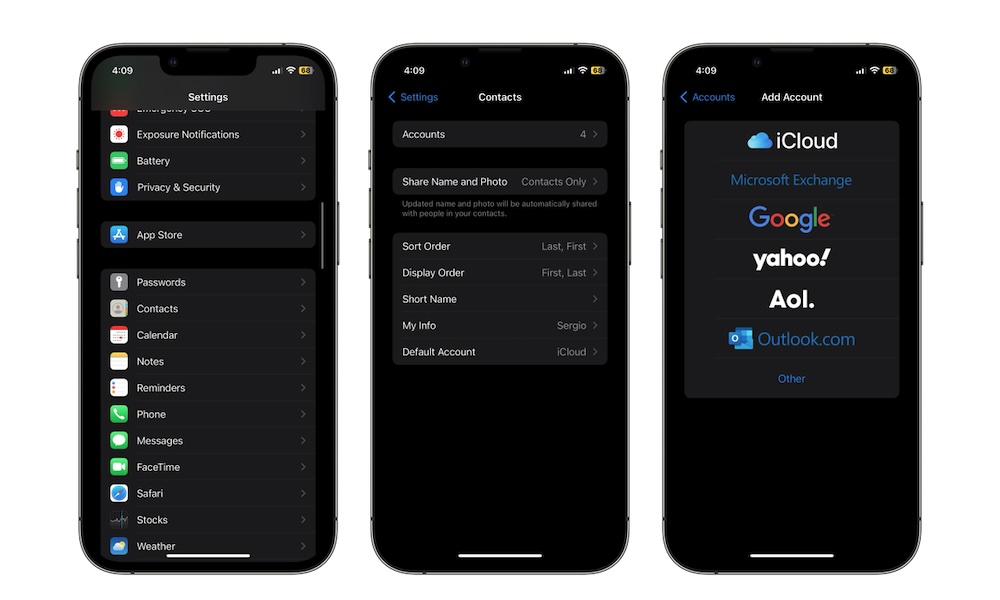
- Open the Settings app.
- Scroll down and tap on Contacts.
- Go to Accounts.
- Select Add Account.
- Select the service that you use. If you want to add a different type of account — like an LDAP or CardDAV account, for example — tap on Other.
- Enter your password.
- Log in to your account and then tap on Next.
- If necessary, authorize your iPhone to connect to your account.
And that’s it. If you already have an account added but still can’t see your contacts, make sure to go to Settings > Contacts > Accounts and select the account you want. Then, toggle Contacts on.
How to Edit or Customize Your Contacts
After you create a new contact, you can easily edit all the information you have about them or add new information that you think is necessary.
The Contacts app lets you keep information like the company a person works for, their pronouns, birthdays, and even important notes about them.
Here’s how to edit your contacts:
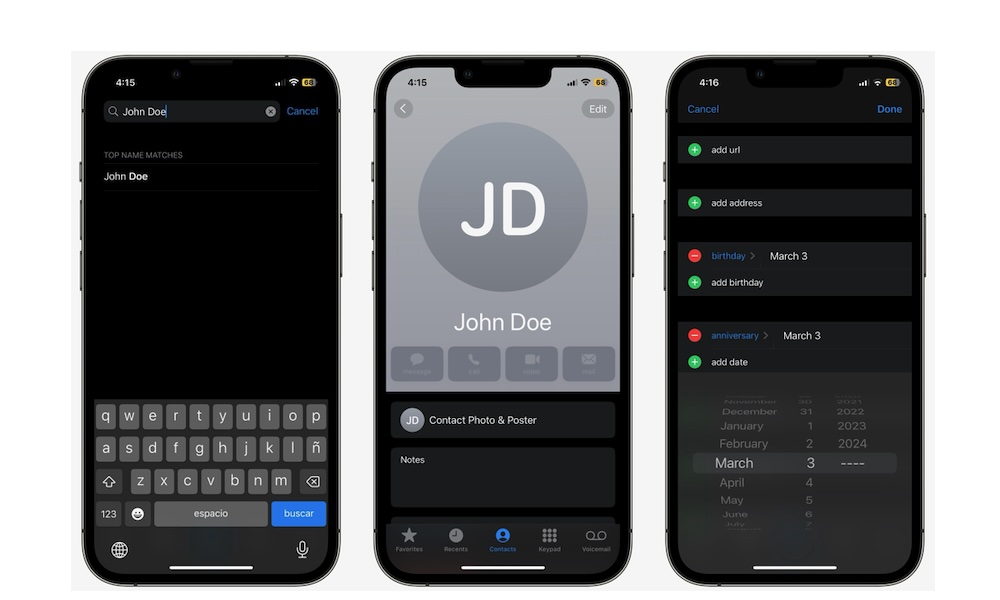
- Open the Contacts app. If you don’t have the app, you can open the Phone app and then tap on the Contacts tab at the bottom.
- Use the search bar to find the contact you want to edit.
- Tap on Edit in the top right corner of your screen.
- Change all the information you want, and when you finish, tap on Done.
How to Add a Contact to Your Favorites
We all have special people in our lives, and you’ll surely want to keep their contacts handy when you need to reach out to them. There are a couple of ways to make one of your contacts a favorite, and here’s what you need to do:
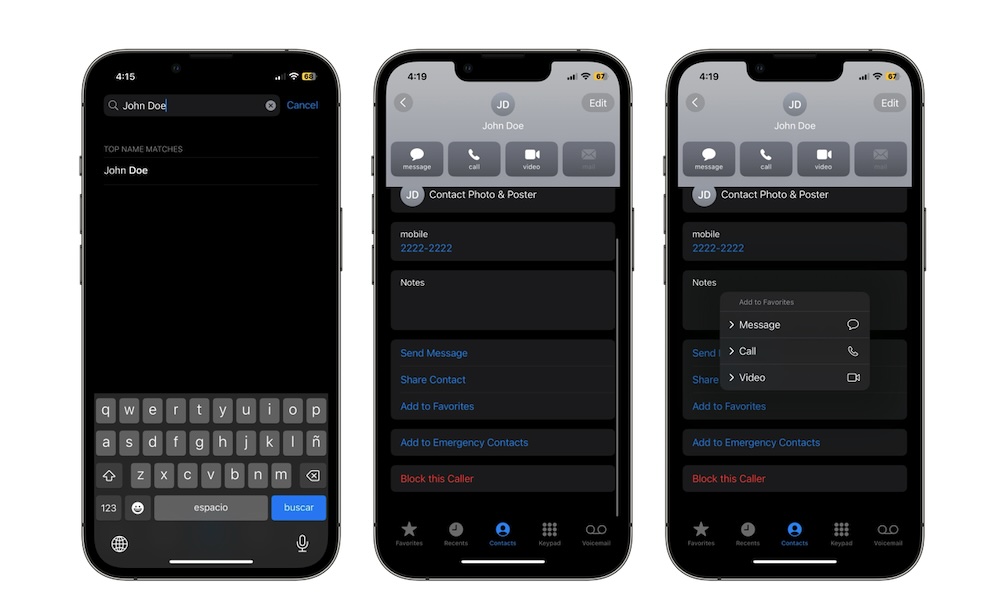
- Open the Contacts app. If you don’t have the app, you can open the Phone app and then tap on the Contacts tab at the bottom.
- Search for your contact’s name and tap it.
- Scroll down and tap on Add to Favorites.
- Choose Message, Call, or video, and select the phone number you want to favorite.
And that’s it. You’ll find a Favorites tab in your phone app with the list of all your favorite contacts. Another way to favorite a contact is to tap the plus icon in the Favorites tab and search for the contact you want.
Allow Notifications From Specific Contacts in a Focus Mode
When you’re using a Focus mode, your iPhone will not notify you of any app notification, message, or phone call you receive. But if you want to still be available for specific people, like important friends and family, you can allow their contacts to bypass your Focus mode so you get notifications right away. This is how:
- Open the Settings app.
- Scroll down and go to Focus.
- Tap on Choose People.
- Tap on Allow Notifications From.
- Tap on Add People.
- Search for all the contacts you want and then tap on Done in the top right corner.
- Tap on Next in the top right.
- Select if you want to allow calls from the contacts you added.
- When you finish, tap on Done in the top right corner.
You can repeat these steps with all your Focus modes and as many people as you want. Of course, if you want to avoid distractions, we recommend you keep it to a minimum.
How to Block a Contact on an iPhone
Of course, not every contact we have is a pleasant one. Maybe you’ve been getting a lot of spam messages from this person and you want to make it stop.
If that happens, you can block a contact. When you block them, any message you send or receive won’t go through, and you won’t get any notifications when they call you — although they can still leave a voicemail.
On the other hand, if you’re blocking an email address, their messages will go straight to your trash folder.
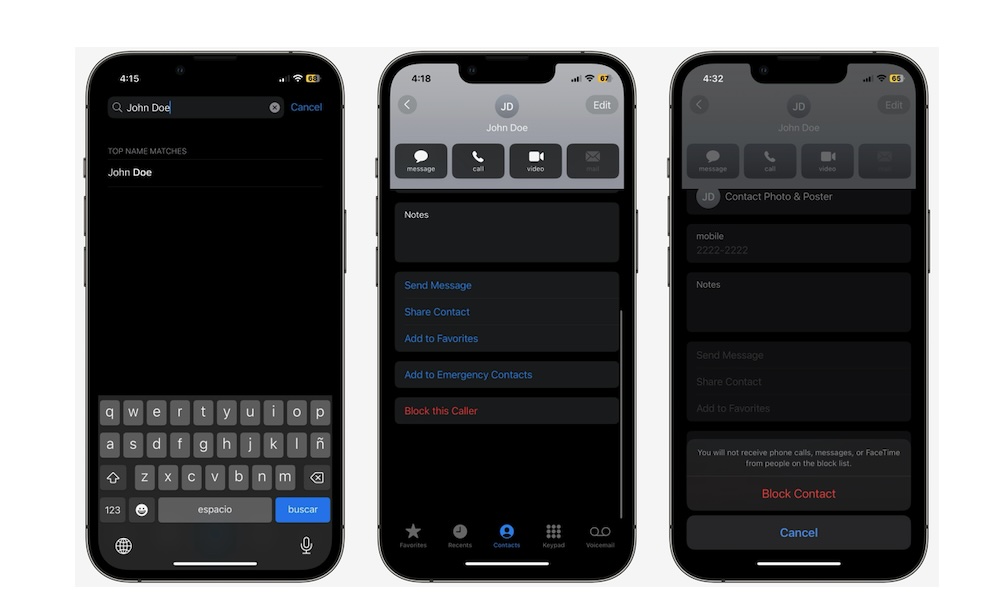
Here’s how to block a contact on iPhone:
- Open the Contacts app. If you don’t have the app, you can open the Phone app and then tap on the Contacts tab at the bottom.
- Search for the contact you want to block.
- Scroll down and tap on Block this Caller.
- Tap on Block Contact to confirm your decision.
If you block the wrong number or decide to unblock them, all you need to do is follow the same instructions and select Unblock this Caller.
How to Delete a Contact on Your iPhone
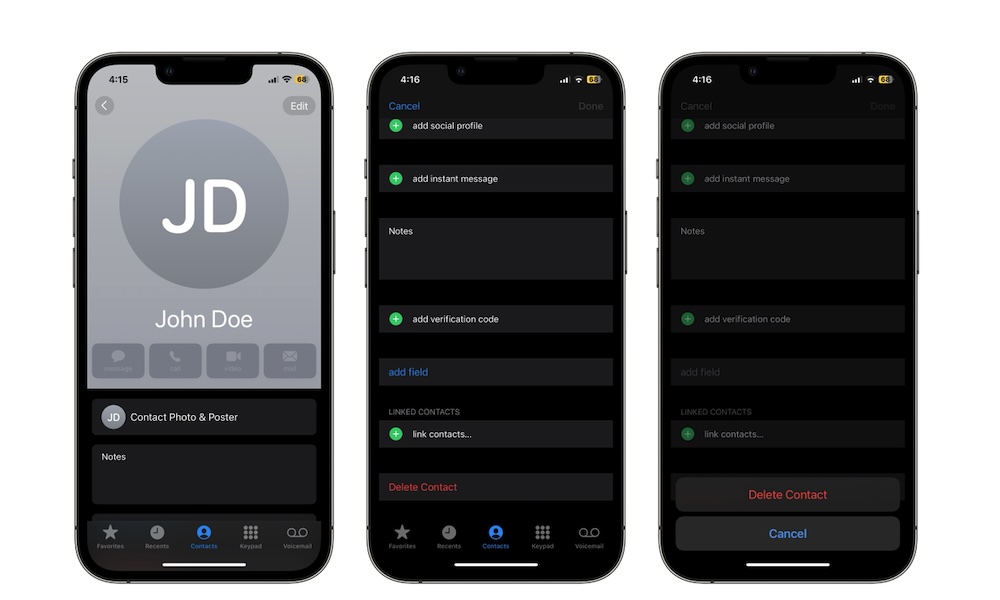
On the other hand, if you just want to get rid of a contact, you’re better off removing it from your contact list entirely. To do this, you need to:
- Open the Contacts app. If you don’t have the app, you can open the Phone app and then tap on the Contacts tab at the bottom.
- Search for the contact you want to delete.
- Tap on Edit in the top right corner.
- Scroll down to the bottom and select Delete Contact.
- Tap Delete Contact to confirm your decision.
Remember that there’s no way to undo this action once you delete a contact, so make sure you’re getting rid of the right one before you continue.
How to Merge Duplicate Contacts on iPhone
Whether you added the same contact twice or there was an error when importing your contacts from your account, you may face a few duplicate contacts along the way.
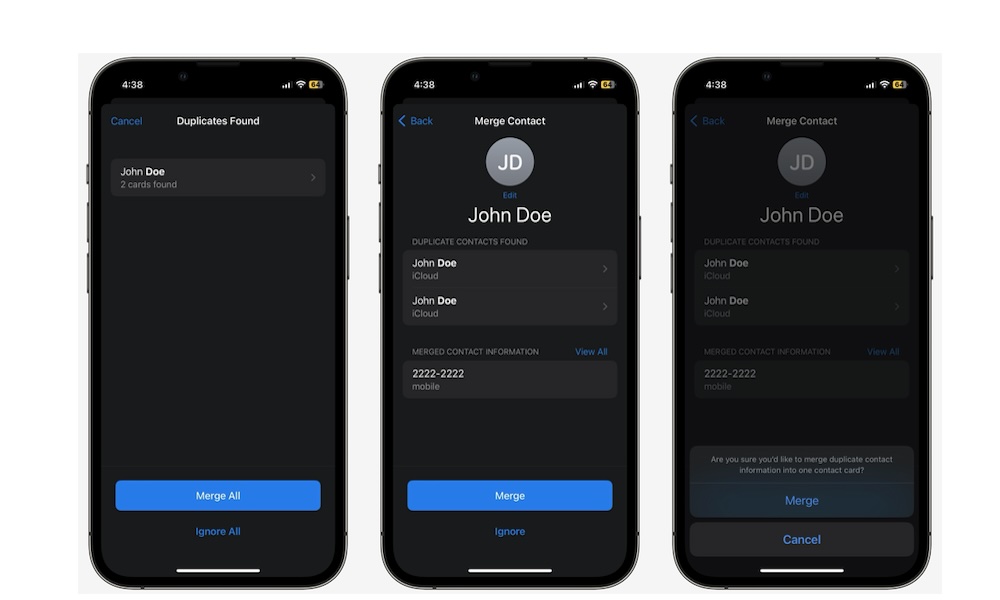
If that happens, your iPhone will let you know that there are two similar contacts on your list, and recommend that you merge them. This is how you do it:
- Open the Contacts app. If you don’t have the app, you can open the Phone app and then tap on the Contacts tab at the bottom.
- Right below My Card (that is, your contact information), you’ll see a message saying that you have duplicates. Tap on View Duplicates.
- You’ll see a list of all your duplicate contacts and how many times they were found.
- You can tap the contacts’ names to check their info or select Merge All to merge them together.
And that’s it. Keep in mind that this option will only exist if the contacts have the same name and contact information. But if you have two different contacts that belong to the same person, you can also link them together manually.
To do this, you need to go to your contacts and search for one of the two contacts you want to link. Next, tap on Edit in the top right and scroll down to the bottom. Select Link Contacts and choose the other contact you want. Finally, tap on Link.
Keep Your Contacts in Check
Most of us have had our iPhones for years and have collected dozens of contacts. If that’s the case, you can use these tips to make sure your contact list is only filled with important and relevant contacts that actually mean something to you.


