How to Give Your Loved Ones Peace of Mind with iOS 17’s Check In Feature
 Credit: Apple
Toggle Dark Mode
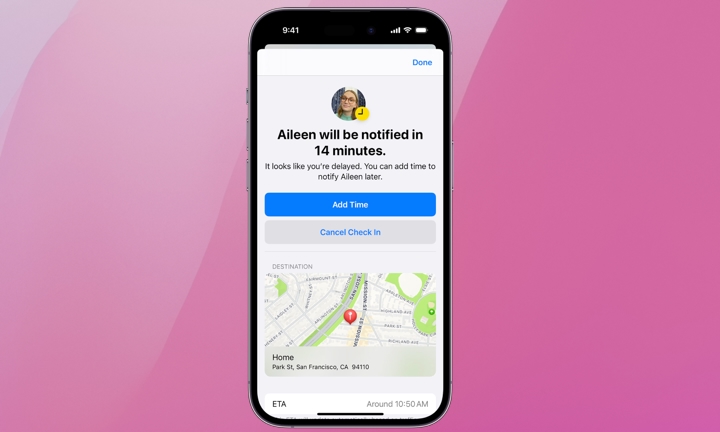
One of the small but useful improvements in iOS 17 is a new Check In feature designed to enhance user safety and peace of mind by allowing you to notify friends or family of your safe arrival at a destination directly through the Messages app.
Check In requires both the sender and the recipient to have updated to iOS 17 or later. It will automatically notify your intended recipient of your arrival (more specifically, your iPhone’s arrival) or if you’ve failed to arrive at your intended destination when you should have. You can also customize what information is shared with the recipient if you fail to complete your check in.
Here’s how to set up iOS 17’s new Check In feature.

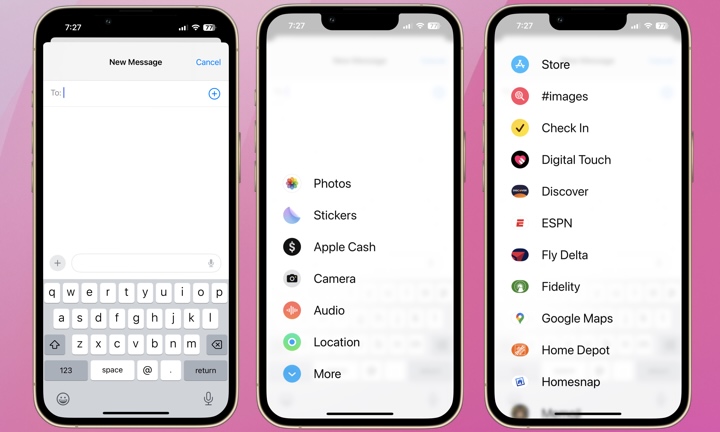
- Open the Messages app.
- Add a recipient or choose an existing conversation.
- Tap the plus (+) icon.
- Tap More.
- Find Check In and tap it.
- Tap Edit.

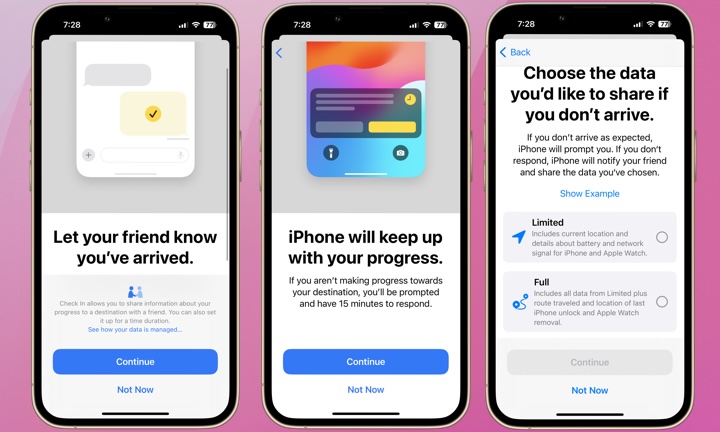
If you’re setting up Check In for the first time, you’ll be shown a series of prompts to walk you through an initial setup process. The first asks you to confirm you’d like to share information regarding your progress to your destination. The second prompt informs you that if you aren’t moving toward your destination, your iPhone will automatically ask you to respond. Lastly, you’ll be asked what information you want to share with the recipient if you don’t respond with your progress or don’t arrive at all. You can choose between one of two options:
- Limited: Includes current location and details about battery and network signal for iPhone and Apple Watch.
- Full: Includes all data from Limited plus route traveled and location of last iPhone unlock and Apple Watch removal.
If you want to modify your Check In information sharing, you can switch between Limited and Full in the Settings app by going to Messages > Check In Data.

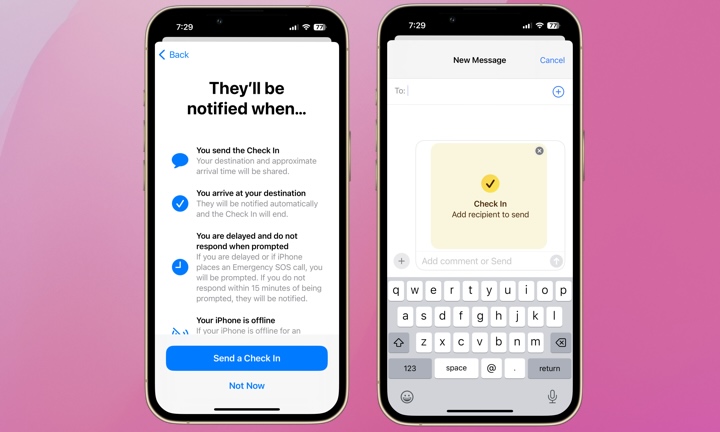
Once you’ve selected and reviewed your information-sharing options, you’re ready to send your first Check In!
Within your Check In you can select either When I Arrive or After a Timer.
- When I Arrive allows you to specify how you’re traveling and add time if needed. When you arrive, the Check-In is complete, and the recipient is notified automatically.
- After a Timer allows you to specify your arrival time. The recipient will be notified if you don’t end the Check In prior to the expiration of the time you set.
The Check In feature is a handy tool that allows users to easily share their whereabouts with trusted contacts in a secure and privacy-conscious manner. The timer option is useful for situations like first dates or meetings with new people. The When I Arrive option reveals a bit more information, like your mode of transportation. Either way, Check In is a welcome safety and convenience feature.


