
How to Clear Cache on macOS

Toggle Dark Mode
Are you running short of disk space on your Mac? Are macOS and the applications you use on your Mac running slower than they used to? Cache files could be the culprit. In this article, I’ll show you how to clear your Mac’s caches, both manually and by using an excellent utility, CleanMyMac X.
What’s a Cache?
Why Does Your Mac Need Cache?
Your Mac accesses multiple cache files that are used to store temporary data files that the operating system and applications access as your Mac runs system tasks, applications, and background tasks. Caches are used because they make it easy for your Mac to access frequently used data, speeding up processes.

What Types of Cache Does macOS Use?
macOS uses several types of caches as you go about your daily Mac-related tasks. Let’s take a quick look at the various types of caches.
System Cache
The Mac’s System Cache are temporary storage files that acts as a go-between for the Mac’s main memory and its CPU (Central Processing Unit, the brains of your Mac). The cache allows the CPU to quickly retrieve data used to execute instructions, without the need to load the data bit-by-bit. This allows the CPU to execute instructions much quicker than if it had to manually retrieve the instructions over and over.
Browser Cache
There are several web browsers available for the Mac. These include Safari, Chrome, Firefox, Bing, and several others. No matter which browser you use, they all have their own cache. A browser cache stores files like web pages, CSS, files, cookies, images, and much more. The browser uses these cached files to display websites without needing to retrieve each file over the internet every time it displays a webpage.
Since the browser can retrieve the files locally instead of having to load them from the website, this speeds up the display and operation of webpages.
User Cache (Includes App Cache)
Just like a web browser many applications also use cache files. These cache files can include search history, images, important data, and other required information. This allows the app to perform better, as it does not need to request or create these files, since they are readily available in the cache.
Why Do Caches Need to be Cleared?
While the macOS cache system. is efficient, the cache files gradually grow larger, filling up precious disk space.
While macOS is supposed to manage caches so they do not clog up your hard drive, you may need to manually delete these cache files from time to time to keep your Mac running efficiently.
How Do You Clear Cache Files on Your Mac?
In these first two sections, we’ll discuss clearing your System and User caches. Before following the steps below, you may want to err on the side of safety and copy the files in the cache directories to an external drive or a folder on your Desktop, just in case anything goes wrong.
The following steps are for the latest version of macOS Sonoma. However, the steps will be similar for any recent version of macOS.
Clear System Cache Manually
You can manually clear your Mac’s cache with a few keystrokes. Here’s how to do it:
- If possible, exit as many applications as you can.
- Open a Finder Window. You can do this by double-clicking on your Mac’s hard drive icon or you can make sure you’re on the Mac Desktop (you’ll see “Finder” in the zipper left-hand corner of your Mac’s Desktop) and click “File” -> “New Finder Window.”
- With the Finder window open, press Shift-Command-G on your keyboard.
- Enter the following into the search box: “/Library/Caches” (without the quotation marks) and hit Return.
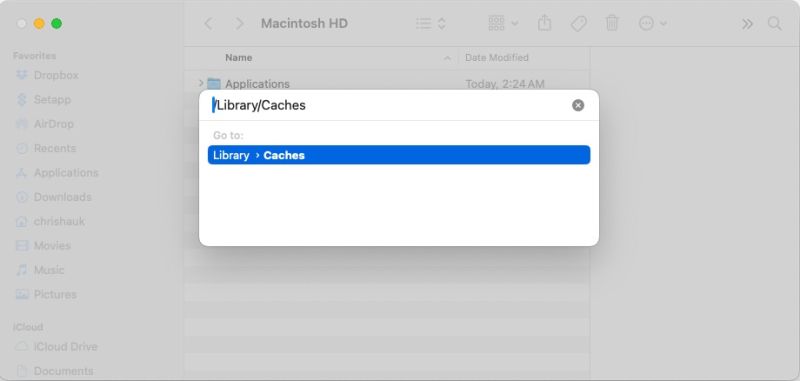
- You’ll see your system cache folder.
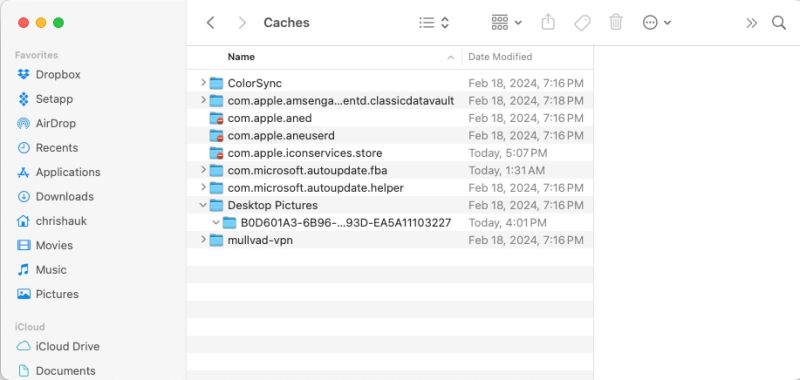
- Press Command-A to select all of the folders.
- Press Command-delete.
- You will see a dialog telling you that Finder wants to move the selected items to the trash. You’ll either have to enter your Mac’s password or use Touch ID to confirm you wish to delete the selected files.
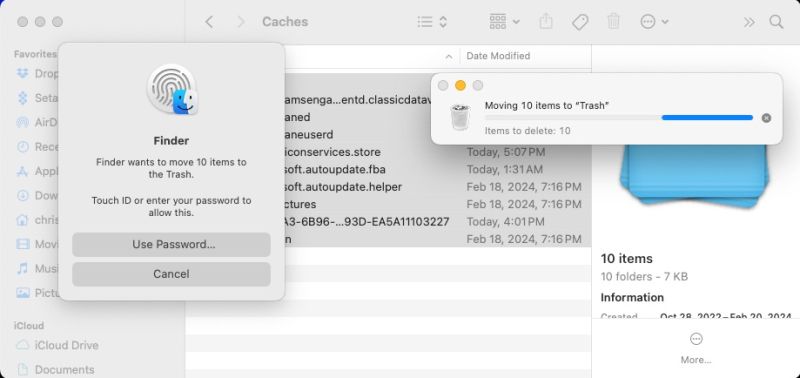
- Empty the Trash
Clear User Cache Manually
- If possible, exit as many applications as you can.
- Open a Finder Window. You can do this by double-clicking on your Mac’s hard drive icon or you can make sure you’re on the Mac Desktop (you’ll see “Finder” in the zipper left-hand corner of your Mac’s Desktop) and click “File” -> “New Finder Window.”
- With the Finder window open, press Shift-Command-G on your keyboard.
- Enter the following into the search box: “~/Library/Caches” (without the quotation marks) and hit Return.
- You’ll see your user cache folder.
- Press Command-A to select all of the folders.
- Press Command-delete.
- You will see a dialog telling you that Finder wants to move the selected items to the trash. You’ll either have to enter your Mac’s password or use Touch ID to confirm you wish to delete the selected files.
- Empty the Trash
Clear Browser Cache
You can also manually delete your browser’s cache with a few clicks of the mouse. Keep in mind that you’ll likely have to re-enter your login info, as it will be removed along with auto-fill details.
Safari
Deleting cache files in Safari is fairly straightforward, although it is different from other browsers.
- Open Safari and click on “Safari” -> “Settings” in the Safari menu bar.
- Go to the “Advanced” tab and make sure that the box next to “Show features for web developers” is checked. (It’s at the bottom of the Advanced tab.)
- Close Settings.
- Now, click on “Develop” -> “Empty Caches” in the Safari menu bar.
- Restart the Safari browser.
- If you also want to clear your browsing history, click on “History” -> “Clear History” in the menu bar.
Chrome
- Open Chrome and click on “Chrome” -> “Settings” in the menu bar.
- Go to the “Privacy and security” section and click “Clear browsing data.”
- Click the checkbox labeled “Cached images and files”
- Click the “Clear data” button.
Note: you can also clear your browsing history, download history, cookies and other site data, and passwords and passkeys. Be careful though, as if you delete your passwords and passkeys, you’ll have to manually re-enter your passwords by hand to log in to websites.
Firefox
- Open Firefox and click on “Firefox” -> “Settings” in the menu bar.
- Go to the “Privacy & Security” section.
- Scroll down to the “Cookies and Site Data” section in the right-hand pane and click “Clear Data.”
- Click the “Cached Web Content” checkbox and click “Clear” to confirm.
Note: You can also click the “Cookies and Site Data” checkbox, but you’ll be signed out of websites if you do.
How To Clear Your Caches Safely and Easily
While you can delete cache files manually, there are easier and more efficient ways to perform cache housekeeping. CleanMyMac X from MacPaw is an excellent way to do it.
To clean your Macs caches follow these easy steps:
- Download and install CleanMyMac X (it’s free to download).
- Open the app and click on “System Junk” from the left-hand sidebar.
- Click the giant “Scan” button at the bottom of the app window.
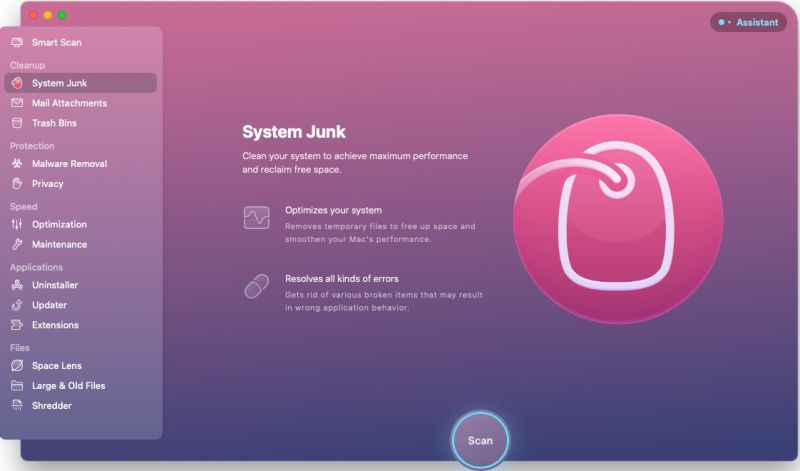
- Once the scan has finished, click Review Details to see what system junk CleanMyMac has found.
- You can see everything that will be cleared, including user and system caches, browser caches, app caches, and more.
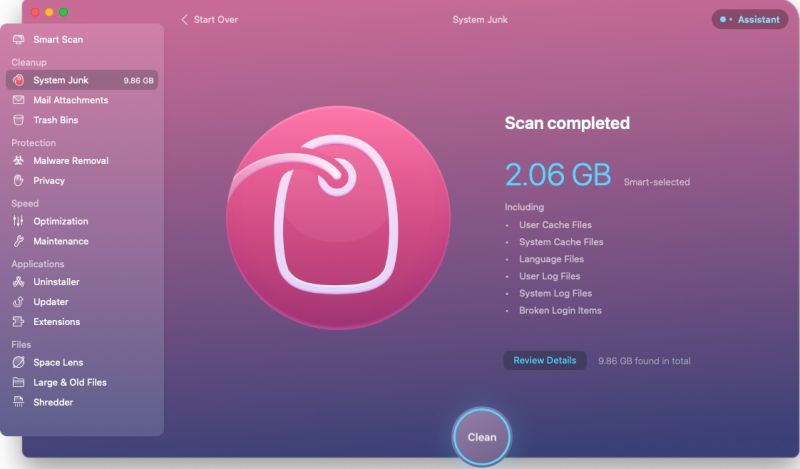
- Click the big round “Clean” button to clean all of the selected system junk. In just a few moments all of that system junk clogging up your hard drive and slowing your system.
Should You Clear Your Mac’s Caches Regularly?
Absolutely! I have been a regular user of CleanMyMac for several years. I usually run the app once a week or so. It only takes a few minutes to clean all of the gunk and junk from my Mac’s hard drive, regaining disk space and keeping my Mac humming.
In Closing
As we can see, clearing your Mac’s caches regains disk space while also ensuring your Mac runs strong. As we can also see, CleanMyMac X offers the best way to quickly clear your Mac’s caches, including your app caches, browser caches, and even junk files that you no longer need.
For more information about CleanMyMac X and to take advantage of a 7-day no-limits free trial, visit the MacPaw website.


