How to Check Your Blood Oxygen Level on the Apple Watch
 Credit: Apple
Toggle Dark Mode
Your Apple Watch is packed with a lot of useful health features. With it, you can track your heart rate, your sleep, and even your menstrual cycles.
Not only that but every now and then, Apple adds another great health feature that we didn’t even know we needed.
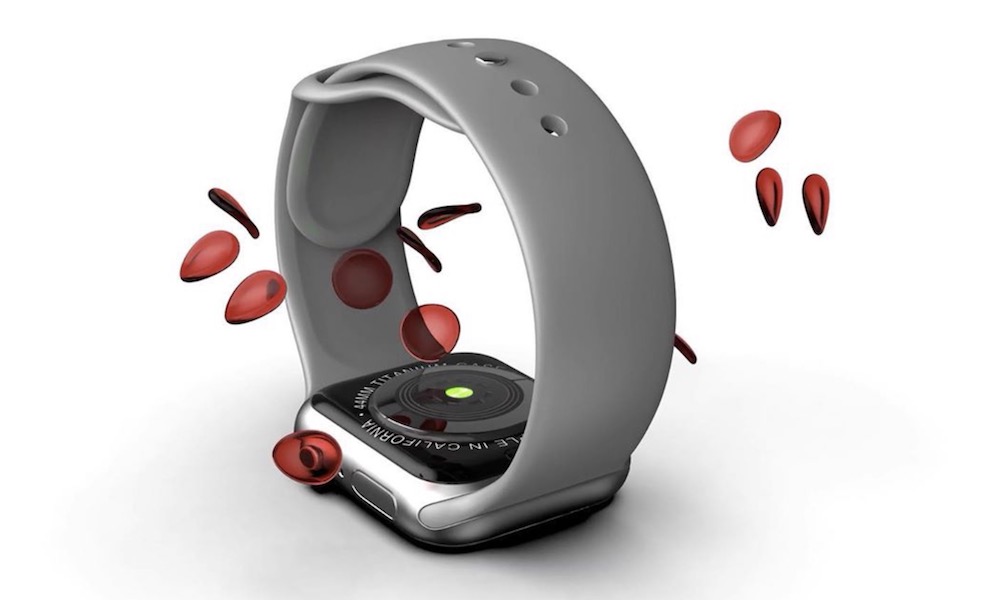
For instance, a few years back, Apple added the ability to track the levels of oxygen in your blood. While this might not seem that important, it’s actually a parameter health providers can use to determine how healthy you are.
Here’s everything you need to know to start tracking your blood oxygen,
What You Need to Know About Blood Oxygen
Blood oxygen levels determine how much oxygen is in your blood. Yes, there’s oxygen in our blood, and the higher the level, the better. Overall, the closer to 100% you are, the better, but the average person’s oxygen levels are typically around 95%.
The blood oxygen levels go up and down during the day, and your percentage will depend on where you are and what you’re doing. For instance, some people tend to have a lower blood oxygen level when they’re sleeping.
As a rule if your blood oxygen level is below 90% and you don’t have a specific medical condition that you know could be affecting it, you should talk to your health provider.
Knowing your blood oxygen levels is a great way to know how your body is doing and how well your blood is actually working.
Everything You Need to Use the Blood Oxygen App
In order to start tracking your blood oxygen levels, you’ll need to check a few things first:
- First, make sure the Blood Oxygen app is available in your region. Unfortunately, even if your Apple Watch supports the Blood Oxygen app, you might still not be able to use it. Fortunately, the Blood Oxygen app is available in a lot of places. You can go to Apple’s website and find out if your country or region supports it.
Note that while the United States is no longer on this list, that only affects Apple Watch models sold by Apple after January 18, 2024, when a ban on the technology came into effect. Earlier US models still have the Blood Oxygen app available, and you may even have it on models purchased after that date from third-party retailers like Amazon and Best Buy. You can check this by looking at the model number on the packaging. - Next, you need to make sure you have the right iPhone and Apple Watch. For the iPhone, you’ll need at least an iPhone 6 or a later model. For the Apple Watch, you’ll need an Apple Watch Series 6 or Apple Watch Ultra, or any later version of either of those. Unfortunately, the Blood Oxygen app isn’t available on the Apple Watch SE, as it’s not equipped with the necessary sensors.
- Then, be sure you’re running the latest software updates on your iPhone and Apple Watch. You can do this by going to the Settings app on each device and selecting General > Software Update. If an update is available, it will appear here, and you can choose Install Now to install it.
- Last but not least, you must be at least 18 years old to use this feature. The Blood Oxygen app isn’t available for people under 18 years old, so you won’t be able to use it if your Apple Health profile says you’re underage.
Once all of that’s out of the way, you can move on to setting up the Blood Oxygen app.
How to Set Up the Blood Oxygen App
Now that we’ve covered the basics, you need to set up your Blood Oxygen app for your Apple Watch. Don’t worry; this is extremely easy to do. Just follow these steps:
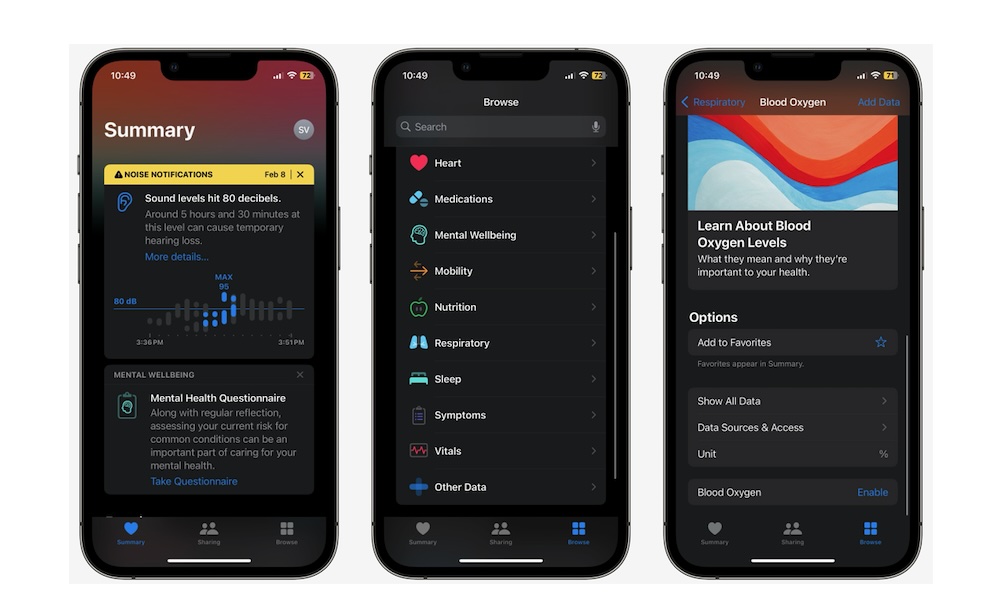
- Open the Health app on your iPhone.
- Tap on the Browse tab in the bottom right corner of your screen.
- Scroll down and tap on Respiratory.
- Select Blood Oxygen.
- Tap on Enable.
- Follow the instructions on your screen to complete the setup.
After you’re done with the setup, you should be able to see the Blood Oxygen app on your Apple Watch. If you don’t see it, be sure to open the App Store on your Apple Watch and search “Blood Oxygen,” and you should find it.
How to Measure Your Blood Oxygen Levels With Your Apple Watch
Now that you have the Blood Oxygen app installed on your Apple Watch, it’s time to measure the levels of oxygen in your blood. This is just as easy as tracking your heart rate, and this is all you need to do:
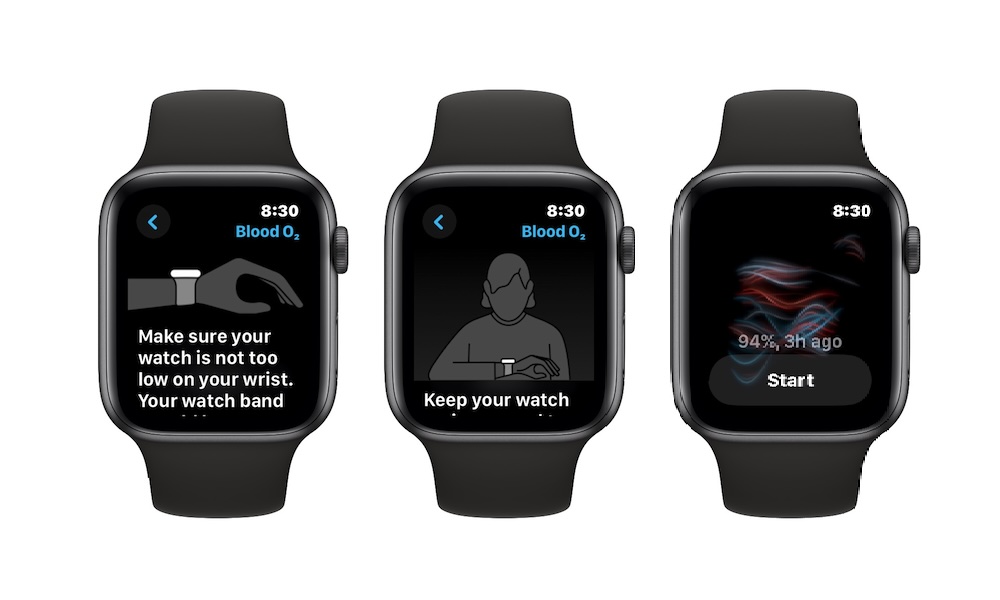
- With your Apple Watch on your wrist, press the Digital Crown.
- Open the Blood Oxygen app (it’s the icon of a red and blue line forming a circle.
- If this is the first time you open the app, you’ll get a few tips to take a better measurement. Scroll down and tap on Next.
- Tap on Start.
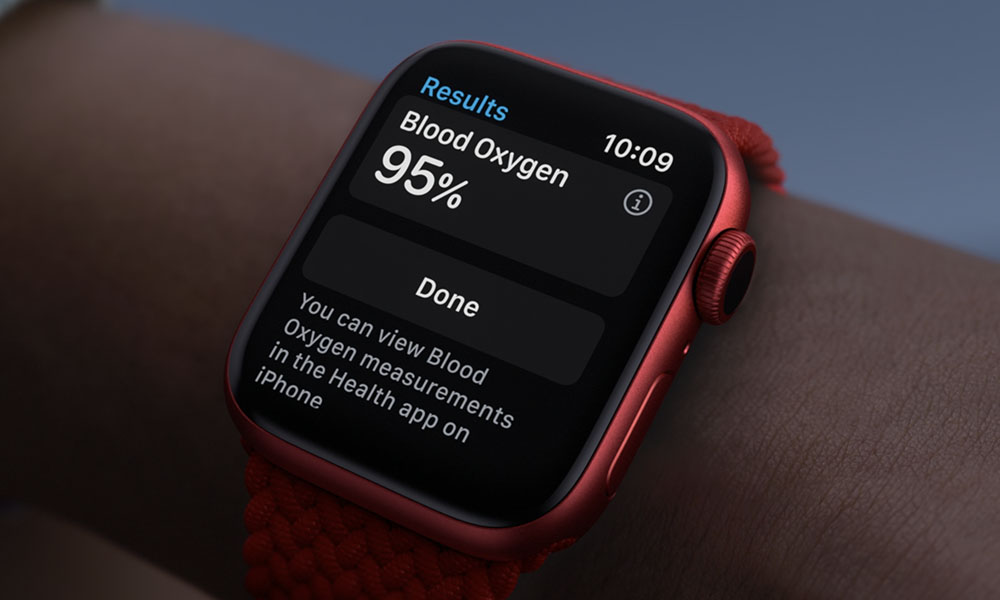
Wait a few seconds, and you should see the result on your screen. You can also tap on Learn More to get more information about blood oxygen measurements as a whole.
Tips to Get Accurate Results
Unlike the heart rate sensor, the blood oxygen sensor has a couple more requirements to get a better result. You probably read about it when you first opened the app, but here is what Apple suggests you do.
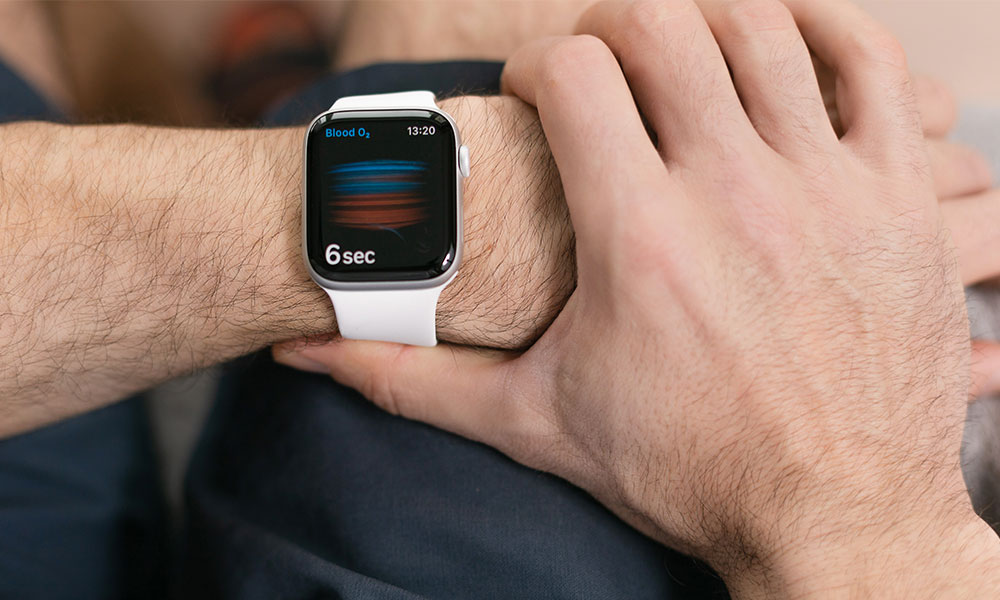
- Put your arm on a table or your lap while you’re taking the measurement.
- Try to keep your palm down and flat.
- Hold your hand as still as you can.
- Your Apple Watch must not be too loose or too tight. It should be snug and comfortable.
- Make sure to keep the back of the Apple Watch on top of your wrist. If your wrist bones are interfering, you can move your Apple Watch a couple of inches away from your wrist bone.
Track Your Blood Oxygen in the Background
Besides being able to actively check your blood oxygen levels, your Apple Watch can also keep track of it in the background.
Your Apple Watch will automatically take blood oxygen readings occasionally whether you’re awake or sleeping, but it will only do so when you aren’t moving.
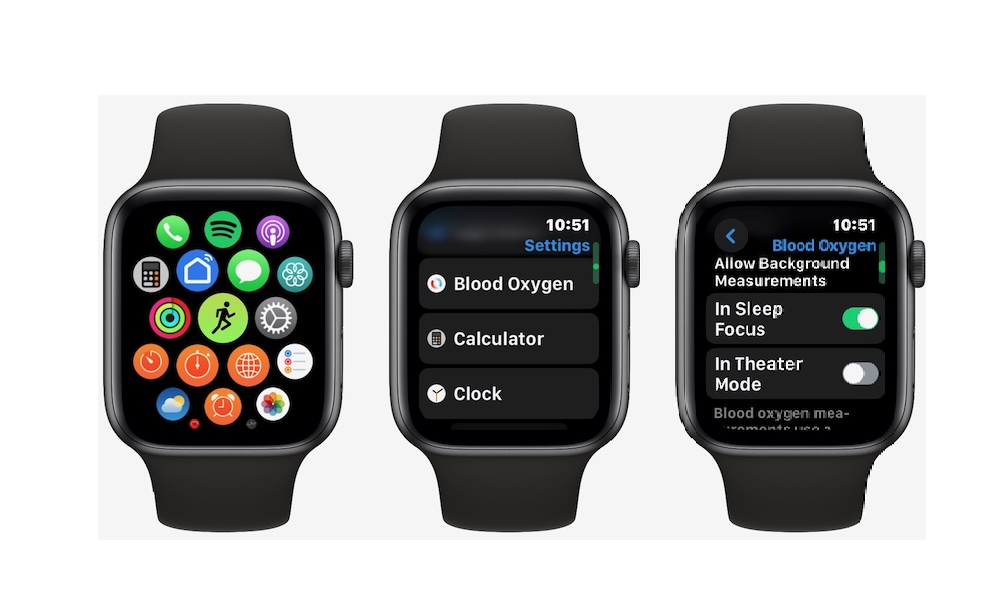
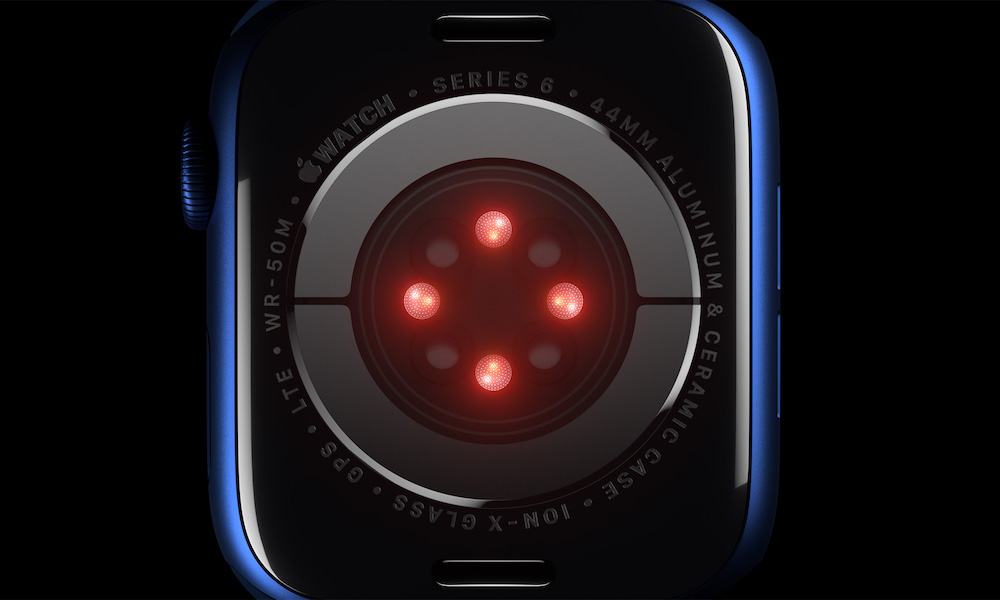
So, if you’re standing still, you should be able to see a red light appear right on your wrist, which can be distracting in the dark. If you want to enable or disable background measurements in the situations, here’s what you need to do.
- Press the Digital Crown on your Apple Watch.
- Go to Settings.
- Scroll down and tap on Blood Oxygen.
- Scroll down again, and under Allow Background Measurements, toggle In Sleep Focus and In Theater Mode on or off.
How to Check Your Blood Oxygen Data
Now that you’ve been checking your blood oxygen levels, you can see how different they are every day, week, month, or year. This will help you determine if your blood oxygen has improved or not.
To check your blood oxygen data, you need to:
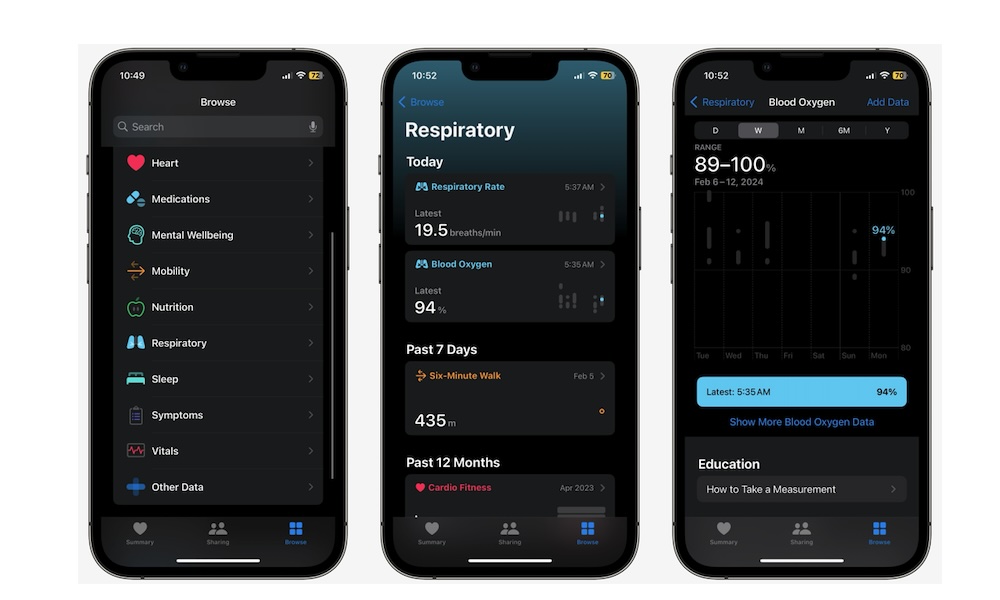
- Open the Health app on your iPhone.
- Tap on the Browse tab in the bottom right corner.
- Scroll down and go to Respiratory.
- Tap on Blood Oxygen.
Here, you can select the time frames at the top to see your blood oxygen levels for the past days, weeks, months, or years. You can also Add Data yourself if you took measurements with another device.
You can also tap on Show More Blood Oxygen Data to get some extra bits of information, like your daily average and your common range.
And if you want to learn more about blood oxygen levels or how your Apple Watch takes measurements, you can scroll down and check the Education section.
Stay Healthy With Your Apple Watch
Taking the oxygen levels of your blood is pretty easy with your Apple Watch, and it will help you live a healthier life.
As long as you have the Blood Oxygen app available, you should set it up and use it occasionally. If not, you can at least allow your Apple Watch to track it in the background. You never know when this type of data can come in handy.


