
How to Add Your Driver’s License to Your iPhone
 Apple
Apple
Toggle Dark Mode
Sure, paying with your iPhone is fun, but do you know what’s really handy? Being able to use your iPhone to show your driver’s license.
While not everyone can use this feature yet — it’s US-only for now and has to be setup by each individual state government — if you’re fortunate enough to live in an area where it’s available you can store your driver’s license on your iPhone and show it to anyone right from your device. We’re clearly living in the future. Here’s everything you need to know to get started.

What Do You Need to Add Your Driver’s License to Your iPhone?
There are a few requirements that you need to meet if you want to add your IDs to your iPhone. Let’s get started:
First, You Need the Right Equipment
Firstly, you’ll need a relatively modern iPhone; specifically, an iPhone 8 or later model. This includes the second and third-generation iPhone SE.
You can also carry your driver’s license on your Apple Watch, in which case you’ll need at least an Apple Watch Series 4 or newer.
You’ll also need to ensure your iPhone or Apple Watch is running the latest version of iOS and watchOS that are available. Make sure to check your current version by going to Settings > General > Software Update.
You Need a Driver’s License From the Right States
As we mentioned, not every state has access to this feature. To get started, you’ll need a driver’s license from one of these states:
- Arizona
- Colorado
- Georgia
- Maryland
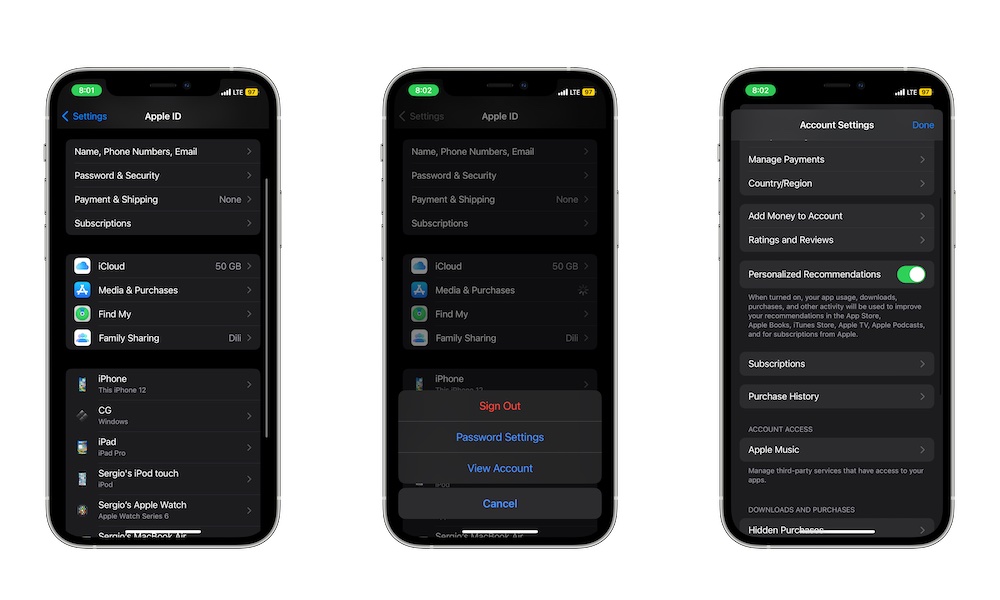
Not only that but your iPhone’s region should be set in the US. Granted, you probably already have it set up this way, but you can check by going to Settings > Apple ID (Your Name) > Media & Purchases > View Account > Country/Region.
If you have any store credit balance, you won’t be able to change your region, so be sure to spend it before changing it if you have to.
You Need to Secure Your iPhone
Last but not least, you need to make sure your iPhone has all the security measures Apple requires.
This includes enabling Face ID or Touch ID if you haven’t already. You can do this by going to Settings > Face ID & Passcode and then tapping on Set Up Face ID.
Your Apple ID also needs to have two-factor authentication enabled. To do this, you need to go to Settings > Apple ID (Your name) > Password & Security and then tap Two-Factor Authentication to turn it on. Hit Continue, and then follow the steps on your screen.
How to Add Your Driver’s License to Your iPhone
Once you have all the requirements in check, it’s time for the fun stuff. Here’s how to add your driver’s license to the Wallet app on your iPhone.
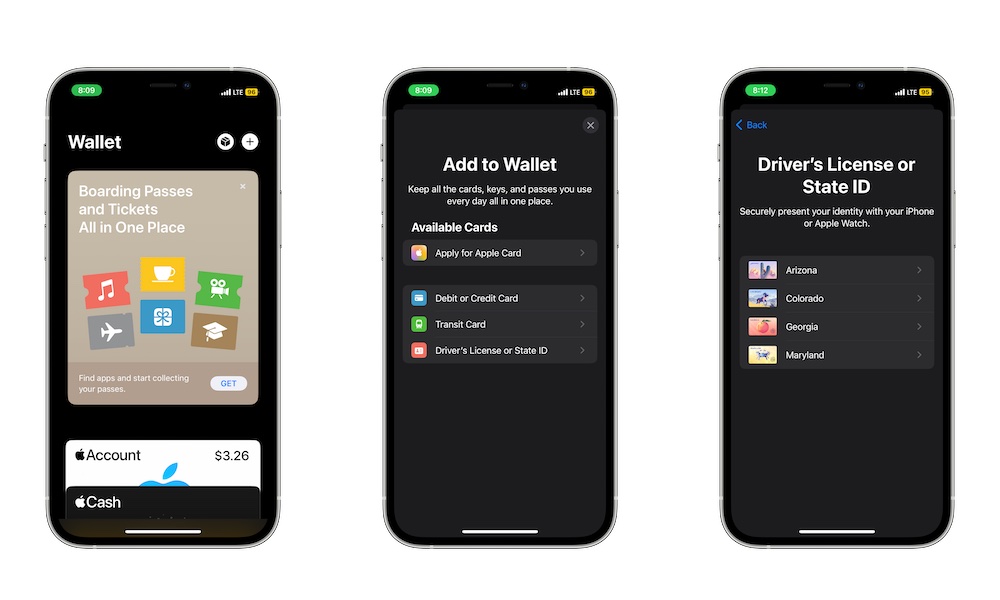
- Open the Wallet app.
- Select the Add button in the top right corner of your screen.
- Select Driver’s License or State ID.
- Next, choose your state.
- Choose if you want to add your driver’s license to just your iPhone or if you want to add it to your Apple Watch too.
- Now, you’ll need to scan the front and back of your ID and then follow the instructions on your screen.
And that’s the first part done, but you’re not done yet. You’ll also need to confirm that you match your ID.
How to Confirm Your Identity
Your iPhone will ask you to make some head movements to confirm you match the photo on your physical ID card. You might need to turn your head, smile, or do other movements. If you can’t complete any movement your iPhone asks you, you can select Try a Different Movement.
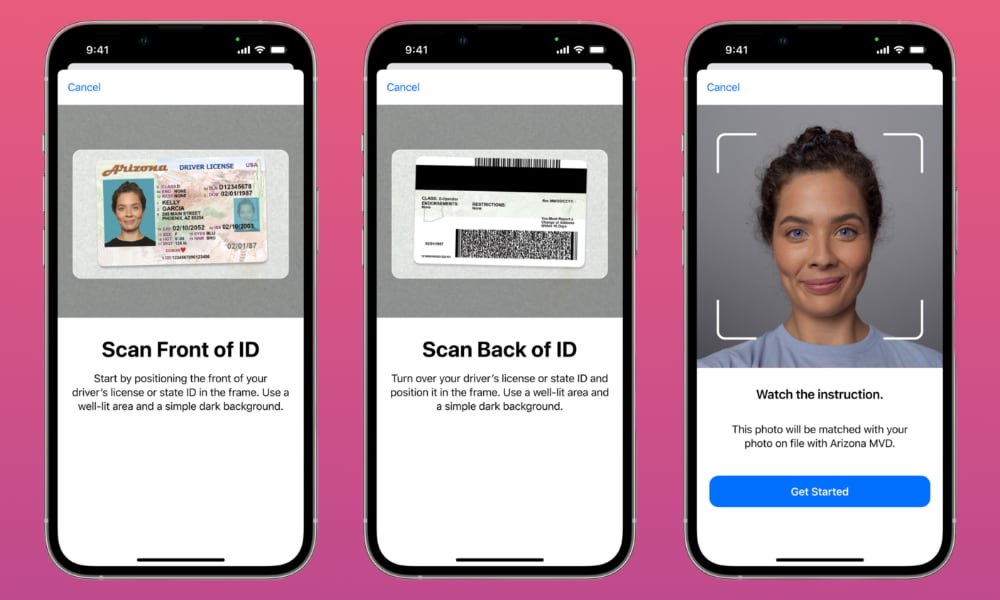
Afterward, you’ll also need to take a selfie. To help you with the process, Apple gives these suggestions:
- Stand in front of a plain background. Ideally, you’d want to use a wall with neutral paint.
- It’s better to be in a well-lit area. Make sure that all of your face is visible and well-lit when taking a selfie and confirming your identity.
- Remove any accessories that cover your face, including hats, facemasks, scarves, or sunglasses.
- Hold your iPhone as steady as you can. If possible, try using a tripod.
- Keep holding and facing your iPhone until your iPhone sends off a vibration.
After you’ve done all this, your iPhone will ask you to confirm that you want to submit your license by using your Touch ID or Face ID. Doing this will also link your driver’s license to your Face ID or Touch ID, making sure that you’re the only one who can access it.
What Happens After You Add Your Driver’s License?
After you’ve sent your driver’s license, your state issuing authority will take a look at all your data. If needed, they may ask you for additional information. If that happens, you’ll receive a notification, and you’ll need to visit their website to provide any information they need.
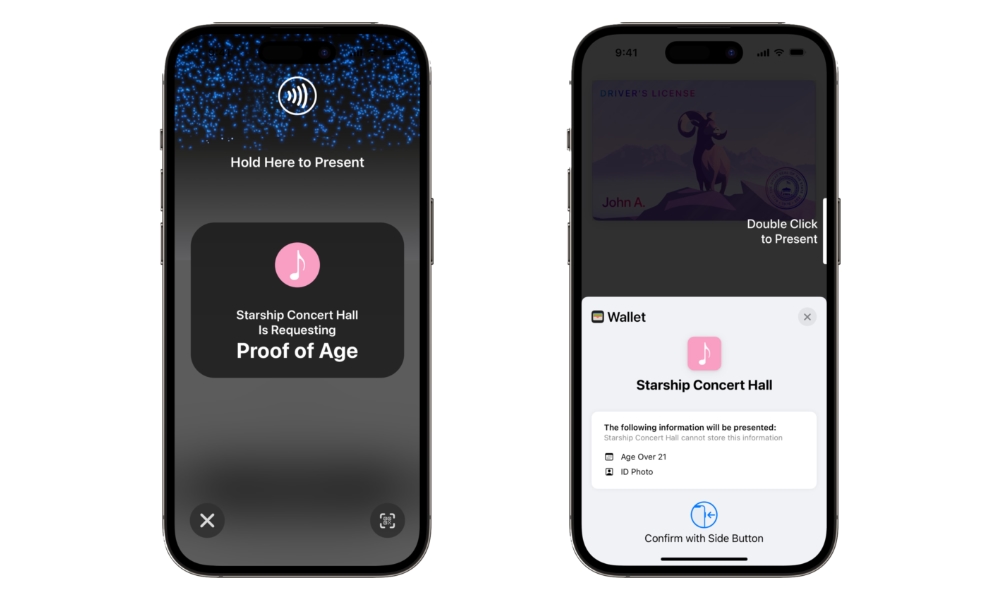
If everything goes according to plan, you should see your driver’s license appear in your Wallet app. All you’ll need to do is open the Wallet app and tap on your license. You can get more information by tapping the Info button (the one with the i icon) and then selecting Driver’s License Info.
What if You Can’t Add Your Driver’s License?
There are several reasons why you may not be able to add your driver’s license to your iPhone. First, make sure you meet all the requirements we mentioned at the beginning. If you’re missing one, you probably won’t be able to use this feature.
Next, if you have a system error, you’ll need to try again. This might be an issue on Apple’s side, so try again later and check the Apple System Status page to make sure everything is working properly.
If your license seems to be the problem, you’ll need to contact your state issuing authority. They’ll give you more information about the issue.
On the other hand, you might have already added your driver’s license to a separate Apple ID. If that’s the case, you’ll need to remove your driver’s license from that Apple ID in order to add your license to the new Apple ID. You need to do this on your iPhone and Apple Watch if necessary.
Keep Your Driver’s License With You At All Times
Over to you. Now that you see how easy it is to add your driver’s license, you can use these steps to get you started. As long as you meet all the requirements, you should be able to use your driver’s license at airport checkpoints for now and, hopefully, quite a few more places when iOS 17 adds support for businesses to scan digital IDs from their iPhones later this year.
Note that the functionality of the driver’s license on your iPhone will depend on where you live and the places you visit. Be sure to check your state regulations before leaving your physical driver’s license at home, as it may not yet be considered a suitable replacement by law enforcement officials.


