
Eight Most Useful ‘Finder’ Tips and Tricks for Your Mac
 tinhkhuong / Shutterstock
Toggle Dark Mode
If you own a Mac, you know how easy it is to navigate and find any file or app you desire.
Even if you’ve been a Windows user your entire life, Apple has made it really easy to just pick up a Mac and start using it.

And this is partly due to Mac’s Finder. This quick and powerful “smiling face app” is Apple’s file manager, and you can use it to find and manage all your files or apps.
However, there are many more things Finder can do — that you probably haven’t even tried. Here are a few tips and tricks to get you started.
1. Use Your Keyboard to Navigate More Quickly
When you open Finder, you can start opening any folder you want by simply double-clicking it. Likewise, if you want to go back, all you need to do is click the back arrow near the top of the Finder’s window.
But there’s an even faster way to navigate your folders with your keyboard. All you need to do is select the folder or file you want and press the Command + down arrow keys.
This will automatically open the folder or file you selected. Moreover, if you want to go back to the previous page, all you need to do is press the Command + up arrow keys.
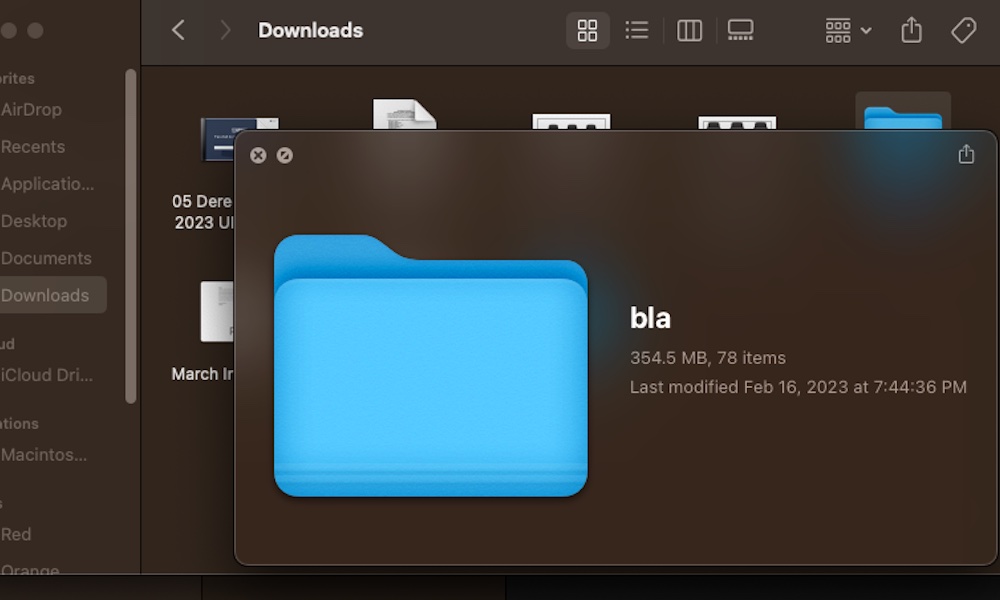
Of course, there are other keyboard shortcuts you should know about. For instance, if you want to quickly preview a photo or document, all you need to do is select it and press the space bar.
A new window will pop up with a small preview of the file or with some basic information about the folder you selected. To close that window, all you need to do is press the space bar one more time.
Last but not least, if you want to rename a file, you can do it almost instantly by pressing the return key on your keyboard.
2. Create Your Own Shortcuts in Finder
Finder makes it pretty easy to find all the folders or documents you want, but if you have some folders you’re always looking for, you can add them as a shortcut to your Finder’s toolbar.
All you need to do is press and hold the Command key and drag the file or folder with your mouse to the toolbar at the top of the Finder’s window. After you release it, you’ll see an icon representing your new shortcut.
If you want to remove it from the toolbar, all you need to do is press and hold the Command key, drag the folder or file out of the toolbar and then release it.
3. Quickly Preview Your Files Before Opening Them
As we mentioned before, you can get a preview of any file before actually opening it. There are actually two ways you can do this.
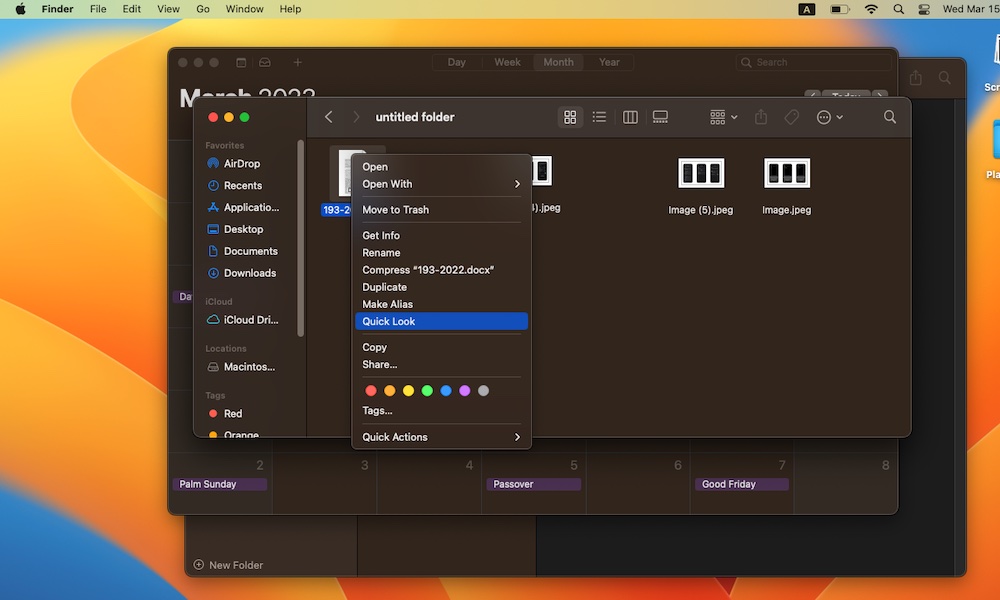
First, all you need to do is select the file and press the space bar. Or, if you want to use your mouse, you can control-click (right-click if you’re more of a Windows user) and then select Quick Look. If you want to open the file, you’ll see the option Open with in the top right corner of the preview window.
4. Instantly Convert Any Image
There are many image formats, and not every platform or website accepts them all. For instance, you might need to upload a PNG image, but you saved it as a JPEG file. Or, maybe you want to share this image as a PDF instead.
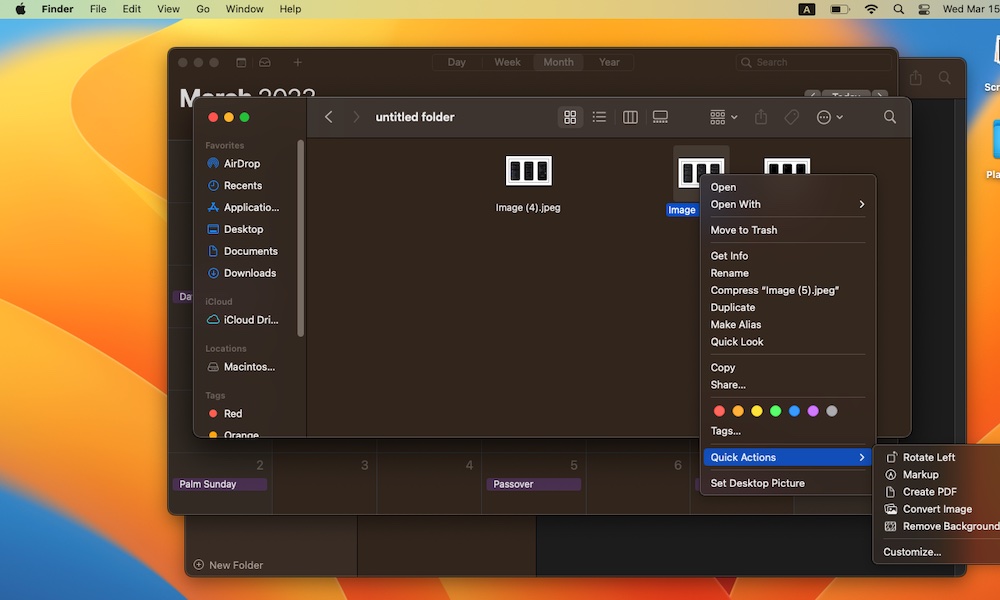
Whatever the case, your Mac’s Finder has a quick solution for you. All you need to do is select the image you want and control-click (right-click) it. Then, select Quick Actions near the bottom of the options menu, and finally, select Create a PDF or Convert Image. If you select the former, you’ll instantly see a new PDF file with your image.
If you select Convert Image, you’ll see a new window where you need to select the format and image size you want. Once you’re done, click Convert to followed by the format you chose.
5. Remove the Background of Any Image Instantly
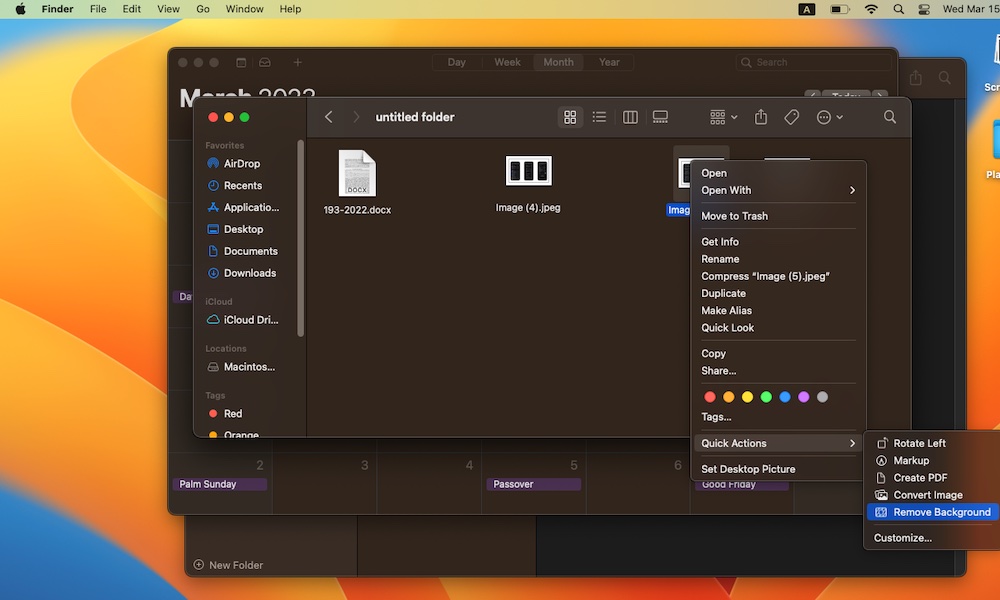
Another cool trick you can try with your images is removing their background. Finder can help you remove the background of any image with just a few clicks. This is what you need to do:
- Select the image you want and control-click (right-click) it.
- Select Quick Actions.
- Click Remove Background.
And that’s it. And don’t worry about messing up your image; instead of removing the background of the original image, your Mac will create a copy with the background removed.
6. Customize Your Finder’s Sidebar
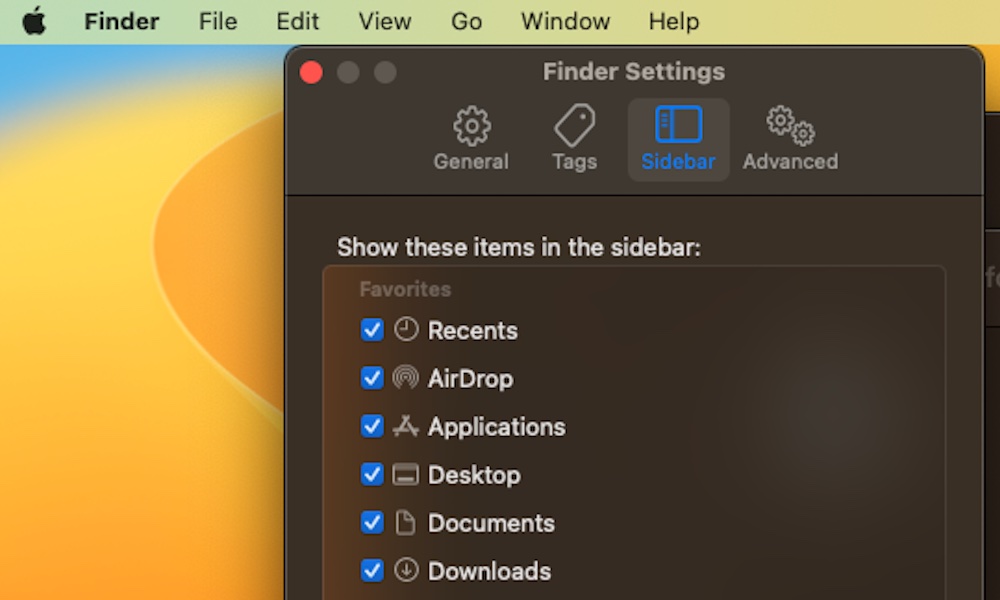
By default, the Finder’s sidebar already has a lot of shortcuts to get you started, but you can further customize it to show other useful folders and locations by doing this:
- Open Finder.
- Click Finder in the top left corner of your screen.
- Go to Settings.
- Click the Sidebar tab at the top of the window.
- Select all the items you want on your sidebar.
7. Customize Your Finder’s Toolbar
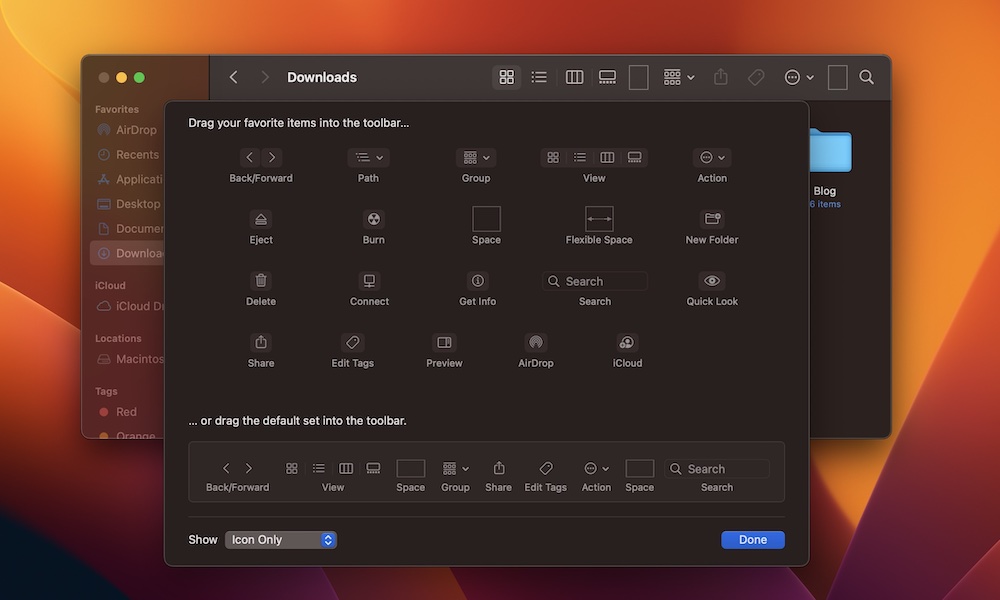
Adding shortcuts to your sidebar isn’t the only way to customize it; there are also many other action buttons and items you can add to your toolbar in a flash.
- First, open Finder.
- Control-click (right-click) the Finder’s toolbar and select Customize toolbar.
- You’ll see a new window with all the items you can add. All you need to do is drag and drop them on your toolbar. Likewise, if you want to remove an item, you’ll need to drag it out of the toolbar.
- Once you finish, click Done in the bottom right corner of your screen.
You can try as many combinations as you want, but if you decide you want to go back to the original look, you can drag the default toolbar from the bottom of the screen and add it to your toolbar to go back to the beginning.
8. Use Tags to Organize Your Files
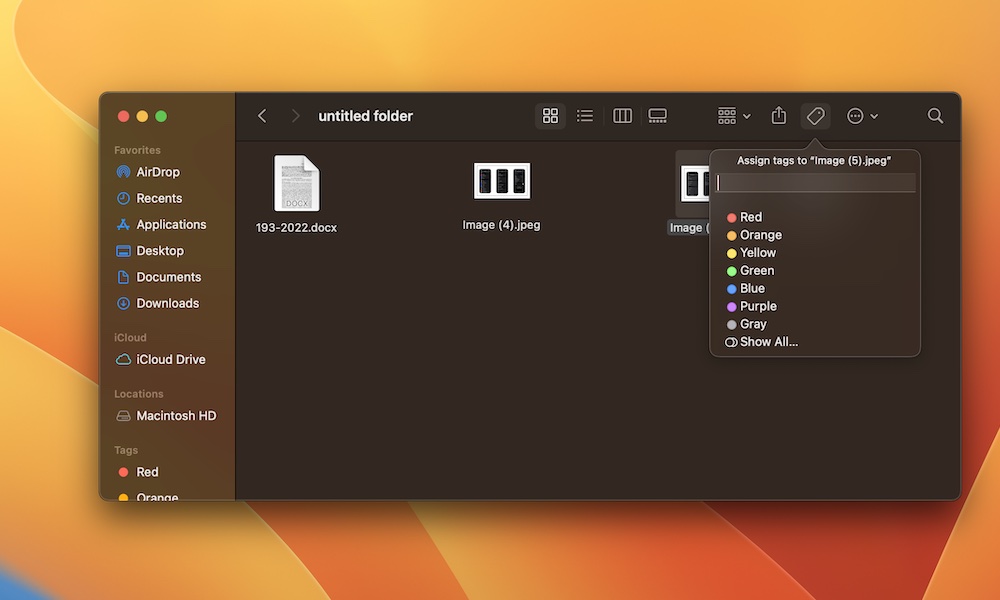
Finder has a list of many different tags you can use to organize your folders and files. When you open Finder, you can find the list of default tags at the bottom of your sidebar. This is pretty useful if you manage too many files at once, and it’ll help you keep yourself organized.
But, to make the most out of tags, you’ll need to add them to your files manually. Start by selecting a file in Finder, and then click the Tag button in the top right corner of the Finder’s window.
Finally, select the tag you want to use. You can use color tags or click Show All to see the other Home, Important, and Work tags.
Lastly, as we mentioned before, you can scroll down on your sidebar and select the tag you want to find the files that have that tag.
Master Your Mac’s Finder
At first glance, Finder might look like any other file management tool, but it’s got a lot of different tricks up its sleeve to help you stay organized and change your files in a matter of seconds.
These tips will help you use Finder properly, and once you start making the most out of it, you’ll never want to go back to just using it to find and view your files.
If you want to learn more tips for your Mac, visit our macOS dedicated how-to section here.


