
5 Best Adjustments to Make to Your Mac’s Display Right Now
 The Wire Cutter
Toggle Dark Mode
We bet you want your Mac’s display to look the best it can, whether you’re at work or just using it for entertainment. But you may not be sure what to do, or what settings can help you achieve the best look for your situation. Good news! We’ve collected the five top things you can do to improve your display and customize it to your liking. Run through these tips, and enjoy the new look! Continue reading to learn about the 5 Best Adjustments to Make to Your Mac’s Display Right Now.
Run the Display Calibrator Assistant
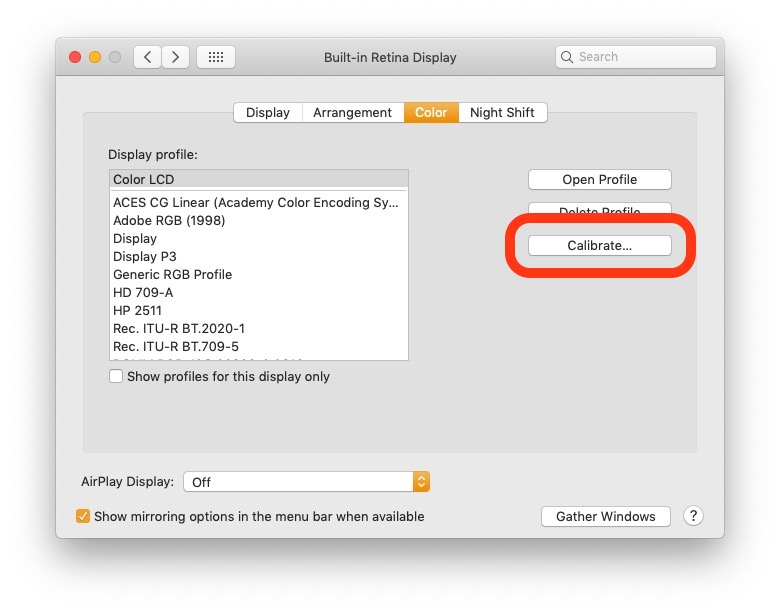
MacBook display colors can be frustrating if you need precise color profiles for work, or if for some reason your MacBook colors don’t seem as accurate as other screens that you’re used to working on. You can reprogram the colors manually, but this takes a lot of work and could make things worse if you don’t know what you’re doing. A better option for the typical user is to use the Display Calibrator Assistant.
- First, get into an area where you most often use your Mac, with a normal level of ambient light and some free time on your hands.
- Then head to the Displays section in System Preferences.
- Open the Color tab.
- Look to the right side choices and choose Calibrate. This will open up the Display Calibrator Assistant.
- Run through the assistant, following all the directions it gives you, and it should improve your Mac’s color, adjusting everything from contrast to white points while letting you make the key changes that you need.
Use Night Shift
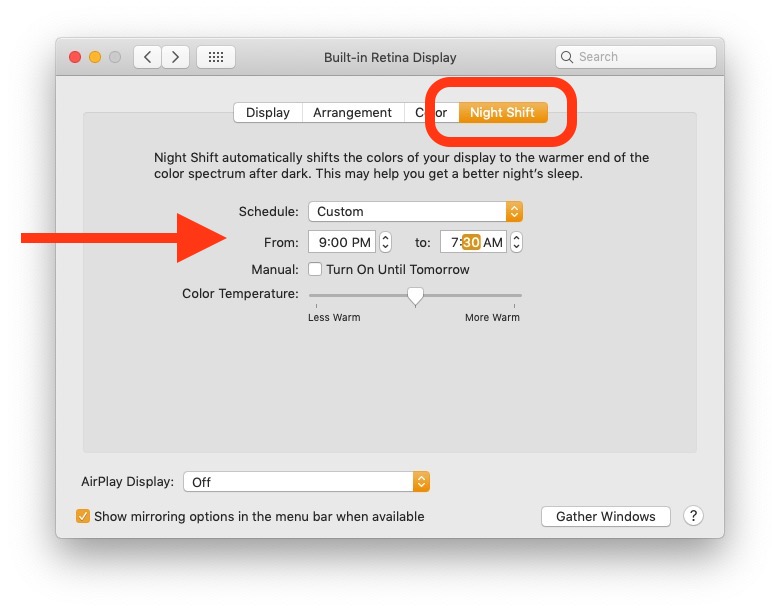
Night Shift is an option that came to MacOS during the Sierra update, and works with all Mac screens from 2012 onward. You may have also noticed it in the Displays option in System Preferences. It’s the final tab in that window: If you select it, you will be able to set a schedule and adjust the color temperature for the Night Shift effect.
Basically, Night Shift is a blue light filter native to your Mac. You enable it to run in the evening and night during the times when you use your Mac. It lowers the amount of blue light that comes through the display. While blue light makes everything look crisper, it can also be irritating to your eyes and may disrupt your sleep patterns. Reduce it to make your eyes feel better.
Check Your Transparency
There’s another surprisingly important part of Mac screen quality – the transparency level of objects (and you can adjust them).
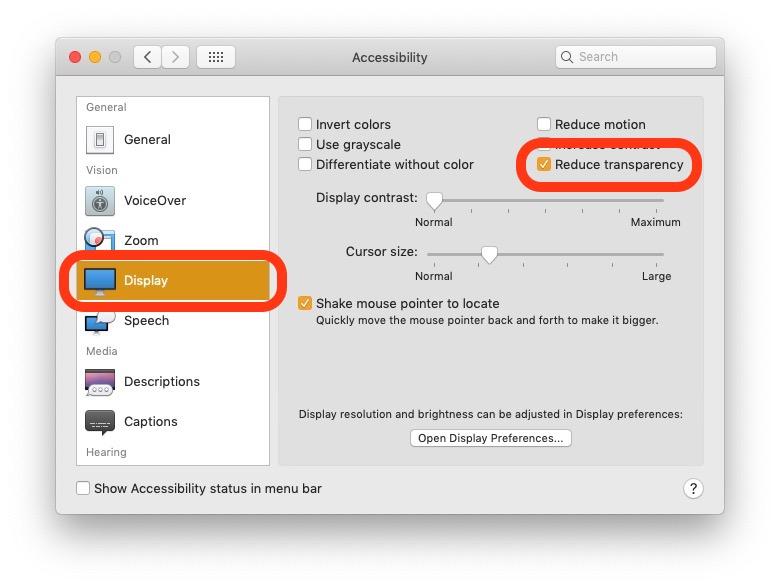
- Open System Preferences and go to Accessibility.
- In the left side menu, look for an option that says Display and select it.
- Here you should see a number of checkboxes and a slider. The Reduce transparency checkbox is an easy way to immediate add some solidity. You should easily notice the difference in your window headers when you apply it.
- For more specific adjustments, you can use the Display contrast slider below to adjust how “see-through” things are to your satisfaction.
Automatically Adjust Brightness
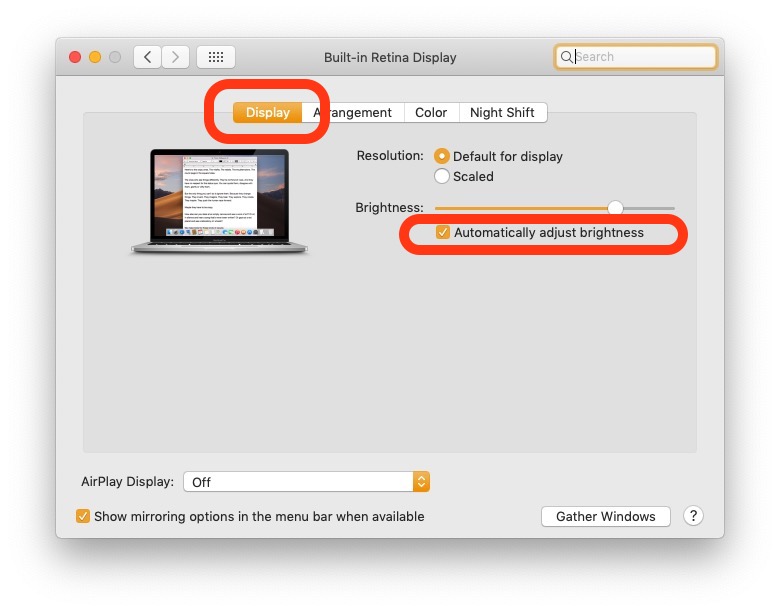
Automatic brightness an option on all newer Macs that will automatically adjust the brightness based on ambient light readings. In other words, the Mac will use its sensors to measure how much light is around, and will automatically dim or brighten the display as necessary. This is a great way to make sure your Mac is bright enough when you are working in the middle of the day, but dimmed down to a comfortable level when you are working at night without switching the brightness level yourself.
Head to System Preferences on your Mac, and choose Displays. From here, you can see an option for Automatically adjust brightness. Make sure it’s selected.
Bonus Tip: If you have a 2018 MacBook Pro, you may also see an option here to enable True Tone. This helps make colors on your screen look more realistic based on your surroundings. Give it a try and see if you like it.
Lower Brightness Manually If Necessary
The “automatically adjust brightness” option is nice, but it’s not perfect for everything. If you want to save as much battery life/electricity as possible, you may become annoyed at how your display brightens up significantly in the daylight. If you’re especially sensitive to screen light, it may not get dim enough at nighttime.
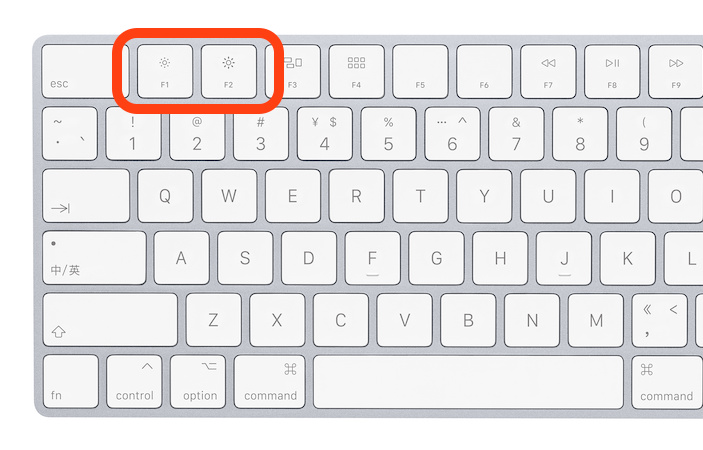
If this is the case for you, you should also know how to adjust the screen brightness manually. The easiest way is through keyboard commands that you can use to make brightness changes instantly. The brightness keys are typically the F1 and F2 keys, although on some keyboards they may be the F14 and F15 keys. Look for the “little sun” and “big sun” icons so that you know which keys do the job. A few quick presses should get your display adjusted correctly.


