
4 Easy Steps to Create and Order Beautiful Holiday-Themed Greeting Cards Using ‘Photos’ for Mac

Toggle Dark Mode
The holiday season is a festive and joyful time of year for most of us — made all the more joyful, of course, thanks to the sheer outpouring of love and well wishes we often receive from friends, family, and even strangers. And what better way to say “wishing you and your family the best,” or “have yourself a holly jolly holiday season,” than a good old fashioned holiday-themed greeting card, right?
Did you know you can save a whole lot of time (and money) by simply creating your own, custom greeting cards at home? If you use a Mac, that is.. Apple’s Photos app allows you to create beautiful, full-color greeting cards, which you can both print yourself from home or have Apple print and ship to you upon request.
Here’s how to get started making your own holiday-themed (or any themed) greeting cards using Photos on your Mac.
Step 1
Open Photos on your Mac > Click the Projects tab from the initial app navigation menu > click on the + icon to view your options > and finally, select Card.
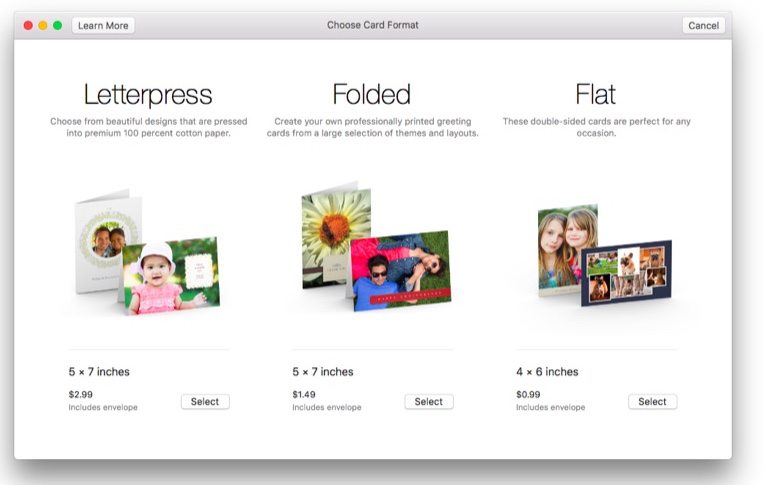
NOTE: Photos will allow you to create three different formats of cards, including Letterpress, Folded, or Flat — the least expensive of which is the lattermost of those options, clocking in at a full-color, double-sided 4 x 6 print that Apple will send to you for less than $1/apiece — plus shipping, of course — with an envelope, to boot. Alternatively, you can also choose the standard, folded card format, at 5 x 7 inches, which sells for around $1.49/apiece, and includes the envelope. Or, if you’re looking to go all out this year, you can choose Apple’s most premium option — one of the company’s Letterpress designs — which, at $2.99/apiece, represent “beautiful designs that are pressed into premium 100 percent cotton paper,” according to Apple.
Step 2
Click Select under your desired category to get started creating your card. You’ll then want to choose a template for your card; and for your creative pleasure, Apple offers several options — including holiday, children’s, flowers, and other themes.
Step 3
Once your template is selected, all you’ll have to do is fill in the blank placeholders with your own written content. You’ll also be able to drag and drop photos directly into the card.
TIP: By clicking on Add Photos on the right-hand side of the app window, you’ll be able to import pictures from your Photos library. This should save you a considerable amount of time, since you won’t have to go back and scroll through your entire library every time you want to add a photo to the card. You can also change the font, font weight, or other characteristics of the text by highlighting it on the card and then selecting Font from the Edit menu.
Step 4
Once you’re happy with how your card has turned out, you can click on the Buy Card option at the top of the page to order as many copies as you’d like.
Shipping is relatively inexpensive, too, and Apple offers the option to have your cards shipped via expedited service for time sensitive orders. All in all, Photos on Mac provides a simple, straightforward option for you to make custom, cost-effective greeting cards that all your friends and family are bound to adore.


