
The Ultimate Photo Editing Tips on iOS

Toggle Dark Mode
iOS 8 gives you endless options for taking photos and editing them. All of these features are aimed to make your photos and videos better than ever. From composition tools to color editing, your iOS device can be your own professional camera package. This week, we review the ultimate tips for photo editing on your iOS device.
Straighten Photos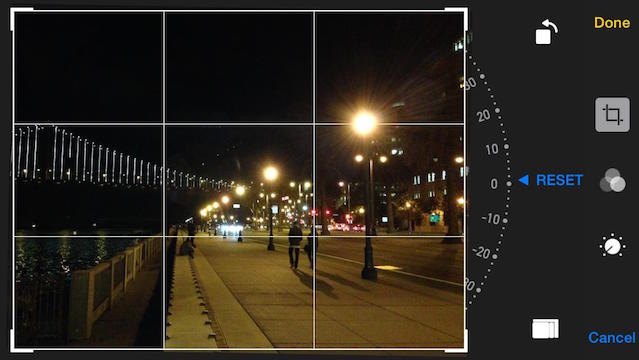 Photo Composition tools in iOS are designed to help tweak your photos to perfection. You can use these tools to straighten or change the aspect ratios of your photos. If you want to straighten your photos..
- Go to the Photos app.
- Tap on the photo you want to edit and click on the Edit button in the upper right hand corner.
- Then, tap on the crop icon (the square) in the bottom corner of the navigation panel and iOS will adjust the photo to where it thinks the crop should be.
- At this point, you can drag your finger on the dial to change it or leave it as is.
- After you are finished click “Done” in the bottom right and it will save the changes to the image.
Aspect ratio is the ratio of the width of an image to its height. Sometimes we would prefer the image to be a rectangle or a square, and this can be done easily. To edit the aspect ratio..
- Go to the Photos app and find the photo you want to change.
- Tap on Edit.
- To change the aspect ratio, tap on the crop icon (square).
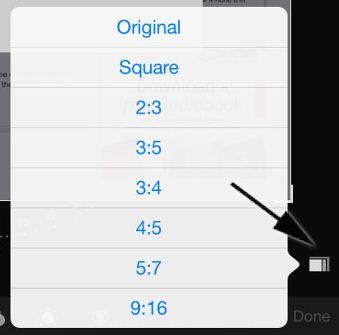
- Then tap the aspect ratio button underneath the dial, to the right.
- Choose whatever ratio you would like (options range from 2:3-9:16).
- You can also drag your finger on the dial to center the photo how you would like. Once you are finished, click on “Done” in the bottom right hand corner.
You also have the option to revert your photo back to its original size if you’re unhappy with the changes you made. Tap on the photo, tap edit, and find Revert in red color at the bottom right.
Light Adjustment
Sometimes the pictures we take look better in person because we don’t have the right lighting. No worries! You can fix this by automatically adjusting the light with smart adjustments. To do this..
- Go to the Photos App and select the photo you would like to edit.
- After you tap on Edit in the top right corner, make sure you tap on the adjustments button in the bottom navigation, which looks like a dial with dots around it.
- After that, tap on Light and move the slider to either lighten or darken the photo.
- You can hold your finger on the Photo to view to original for comparison.
- When you like what you‘ve done, just tap on the “Done” icon at the bottom right hand corner and your changes will be saved.
Color Adjustment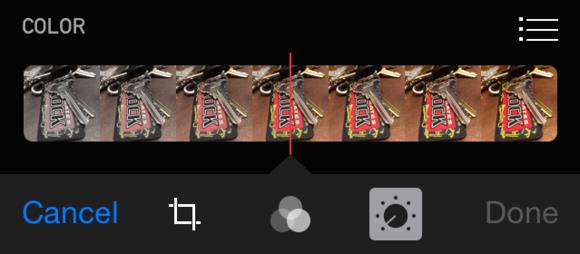
If you want to automatically adjust the color on your photos..
- Go to the Photos app and find the photo you want to edit.
- Select Edit in the top right corner and tap on the adjustments button in the bottom navigation (this will looks like dial with small dots around it).
- Tap on Color and move the slider to make any changes to your photo.
- If you want to view the original in order to compare, just hold your finger on the photo.
- When you are satisfied with the results just tap on “Done” and voila!
After editing all of these photos, you probably want to keep them somewhere where you will always have them. If you have enough space on your service, you can keep all of your iPhone photos in your iCloud account. In order to do this..
- Go to Settings
- Then tap iCloud
- Then tap Photos
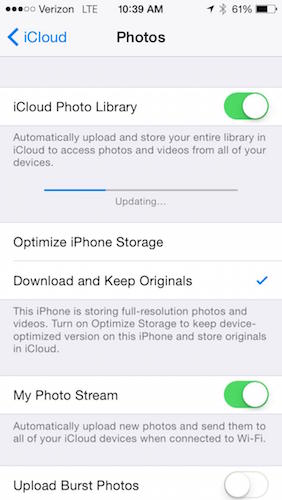
- Then turn on iCloud Photo Library.
This is different from Photo Stream which will sync all of your photos across your iOS device for 30 days or for 1000 photos. The iCloud Photo Library will sync everything as well as allow you to sync with OS X on your MacBook or iMac. If you turn on iCloud Photo Library your Photo stream will actually “disappear.” This doesn’t mean that it is gone forever; it is just not visible in your Photo app. Since images you upload to the iCloud library gets downloaded to all of your iOS devices, you get extra options in settings to Optimize iPhone Storage (you can use smaller, lower-quality images) or Download and Keep Originals (high quality, but will take up more space). It is up to you to decide which you choose depending on how much space you have available.


