
How to Set Up and Use Siri and Apple Intelligence on Your New Mac

Toggle Dark Mode
If this is your first time using a Mac, you’re probably still learning the ropes. After all, you’re probably experiencing a new operating system for the first time. Luckily, macOS is intuitive and easy to understand, so you’ll have no trouble mastering your new Mac in no time.
However, before you start testing your Mac, you might want to enable some things. For starters, you might want to start playing around with Siri.

Apple’s virtual assistant might not be the smartest, but it’s still very helpful in certain situations. Moreover, thanks to macOS Sequoia, M-series Macs now have access to Apple Intelligence, a new AI technology that makes Siri better than before, even if just a little bit.
Since Siri and Apple Intelligence are free and ready to use on your Mac when you first boot it up, there’s no reason not to enable them if you want to make the most of your new Mac. Here’s everything you need to know.
How to Turn on Siri and Apple Intelligence on Your Mac

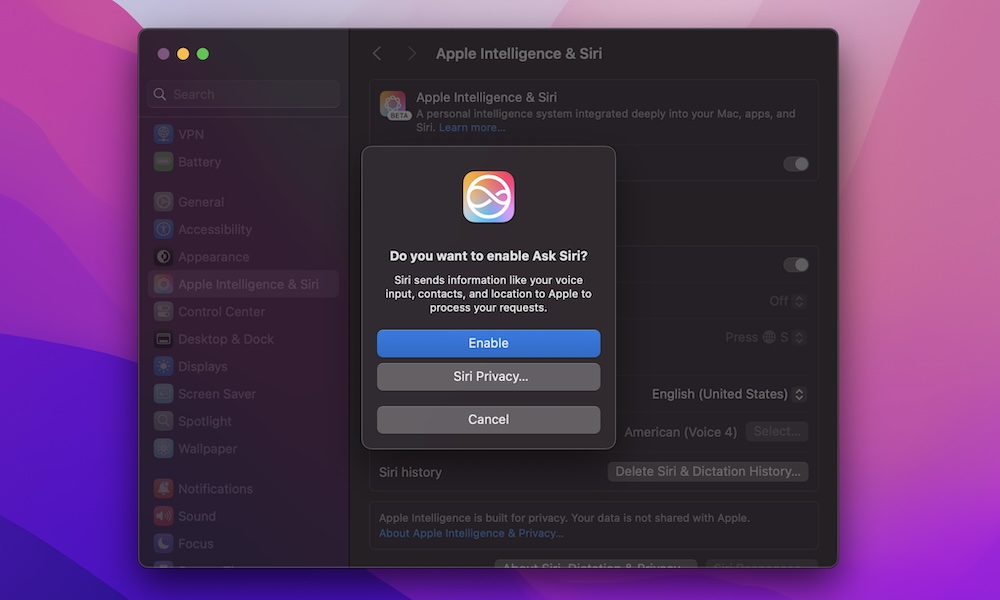
If you want to start using Siri and Apple Intelligence on your Mac, you need to enable them first. Chances are you already did this when you first set up your Mac, but here’s how to check that and turn them on manually if they’re not already enabled:
- Click the Apple menu (the Apple logo icon) in the top left corner of your screen.
- Go to System Settings.
- On the left sidebar, click on Apple Intelligence & Siri.
- Turn on Apple Intelligence at the top of the window.
- Under Siri Requests, turn on Siri.
And that’s it. Now you’re almost ready to start using Siri on your Mac.
How to Trigger Siri With Your Voice
Turning on Siri on your Mac is one thing, but you also need to be able to call for it whenever you want. Luckily, you can set up Siri so it triggers when you say “Hey Siri,” or just “Siri.” This is how:
- Click the Apple menu (the Apple logo icon) in the top left corner of your screen.
- Go to System Settings.
- On the left sidebar, click on Apple Intelligence & Siri.
- Under Siri Requests, click Off next to Listen for to reveal the drop-down menu.
- Select “Siri” or “Hey Siri.”
- Click Continue in the new window that popped up, and then follow the instructions on your screen.
After you’re done, you can say “Hey Siri,” and the virtual assistant will pop up in the top right corner of your screen. Ask Siri for anything, and it will use Apple Intelligence to try to fulfill your request.
Create a Keyboard Shortcut to Type to Siri
Additionally, you can also trigger Siri with your keyboard. With this option, you can type your requests to Siri instead of saying them out loud, which might be less embarrassing if you’re at work or a coffee shop.
There’s already a default keyboard shortcut for you to use, but you can customize it by doing the following:
- Click the Apple menu (the Apple logo icon) in the top left corner of your screen.
- Go to System Settings.
- On the left sidebar, click on Apple Intelligence & Siri.
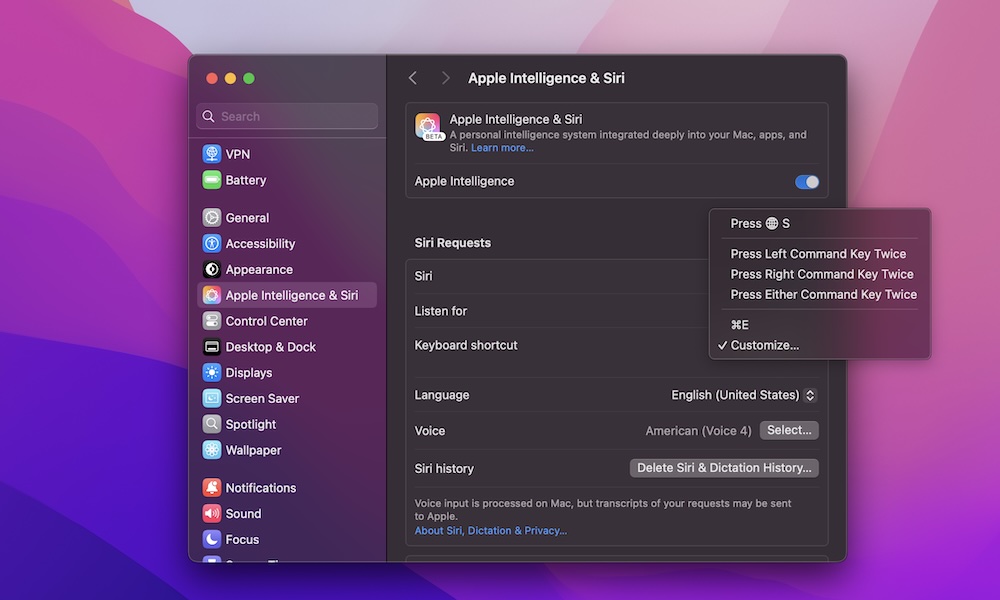
- Under Siri Requests, click Press next to Keyboard shortcut.
- Choose the default keyboard shortcut you want to select Customize to create your own unique keyboard shortcut.
- Enter the shortcut you want to use. It must be a new shortcut that your Mac is not using already.
After you’re done, you can start using your keyboard shortcut in two different ways. You can press and release it to type to Siri, or you can long-press it for a couple of seconds to speak to Siri.
How to Use ChatGPT on Your Mac
As we hinted before, Siri isn’t as smart as it should be with Apple Intelligence. Unfortunately, the technology just isn’t there yet.
The good news is that Apple knows this, so it added a ChatGPT extension to Apple Intelligence and Siri. With this extension, you can ask Siri for anything, and if it can’t fulfill your request, it will ask if you’d like to use ChatGPT instead, which will have an answer for pretty much anything.
Using ChatGPT on your Mac is completely free, and you don’t even have to create an account. However, if you’re a ChatGPT Plus or Pro subscriber, you might want to connect your account so you can enjoy all the benefits of your subscription.
Here’s how to use ChatGPT on your Mac:
- Click the Apple menu (the Apple logo icon) in the top left corner of your screen.
- Go to System Settings.
- On the left sidebar, click on Apple Intelligence & Siri.
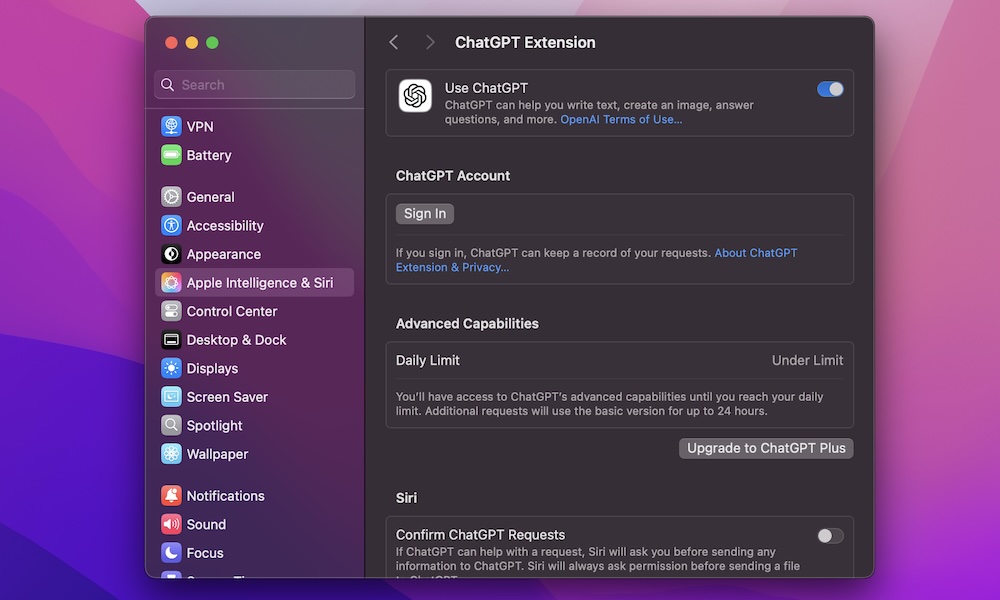
- Scroll down to the bottom of the right side menu and, under Extensions, click on ChatGPT.
- Turn on Use ChatGPT.
- If you want, you can also click on Sign In to use your account, or Upgrade to ChatGPT Plus, to subscribe to the service.
- Also, you can scroll down to the bottom and disable Confirm ChatGPT Requests. When this feature is turned on, Siri will ask for confirmation before it uses ChatGPT. When you turn it on, Siri will only ask for confirmation to use ChatGPT before sharing a file with the AI chatbot.
And that’s it. Now, whenever Siri doesn’t have an answer for you, it will work with ChatGPT to help you out. Additionally, if you don’t want to deal with Siri every time, you can start your request with something like “Ask ChatGPT to…” so it starts working with ChatGPT from the start.
Master Siri on Your Mac
Now it’s time to put all of this to the test. Start using Siri by asking any type of request you can think of. For the most part, Siri will handle all the most basic requests you have, like setting up an alarm or starting a timer.
If you want something a bit more complicated, like a recipe for a strawberry cake, Siri won’t have the answer; it will instead ask ChatGPT to help you with your request. Try it out for yourself and make the most of Apple Intelligence, Siri, and ChatGPT on your new Mac.


