Did You Know Your iPad’s Keyboard Can Do These 6 Things?
 Credit: Apple
Apple has gone out of its way to make the iPad a powerful competitor against PCs and laptops. Even if you don't have the iPad Pro, every iPad is an excellent tool for students and professionals alike. Not only do you get a powerful device capable of editing video and photos just as well as some other computers on the market, but you can also carry it around anywhere at any time. With the Magic Keyboard's addition, Apple turned the iPad into an actual laptop replacement. Of course, not everyone wants or needs a Magic Keyboard. Sure, having a physical keyboard is wonderful, but the iPad's digital keyboard is just as great. All you need to do is learn a few tricks to make it really work for you. If you want to take your iPad to the next level, continue reading to learn six keyboard tricks you need to try.
Split in Half
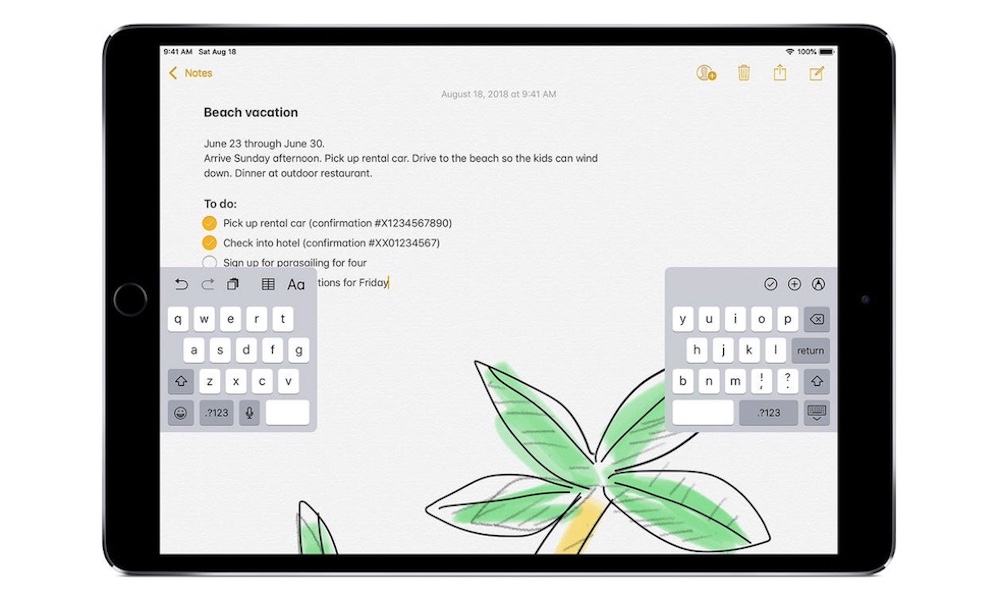
Granted, you might have come across this feature by accident while using your iPad, but it's still worth mentioning. You can actually split your iPad keyboard in half to type easier. You can make sure this feature is enabled by following these steps:
- Open the Settings app on your iPad.
- Tap on General.
- Select Keyboard.
- Make sure Split Keyboard is enabled.
Here's how to split or undock your keyboard.
- Open any app you want to type in.
- Once your keyboard appears, press and hold the keyboard key located at the bottom right of your keyboard.
- Tap on the word Split.
If you want to go back to normal, just tap the same keyboard button one more time and tap on Merge.
Keep in mind though the Split Keyboard feature isn't readily available in the 12.9" iPad Pro models. Why I hear you ask? Beats me. But there may be an easy workaround.
Use Hidden Keys When Using a Split Keyboard
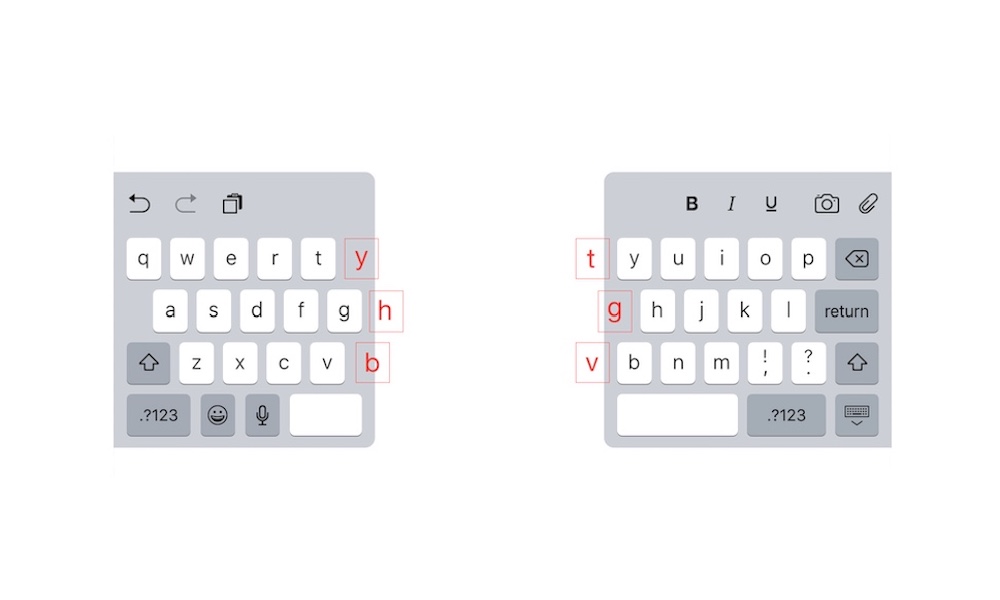
Now that you tried using the Split Keyboard on your iPad, you're probably having some issues typing certain letters. You might want to type the letter T with your right hand, but the key is on your left side.
Pretty annoying, right? Well, Apple actually thought of this and added some extra hidden keys on the Split Keyboard to make it easier to type.
When you're using the Split Keyboard, try pressing next to the letter Y with your right hand, and you should see that you actually type the letter T in the text field. The same goes if you try to type the letter Y by pressing next to the letter T on your left side. How cool is that?
You Can Also Make Your Keyboard Float
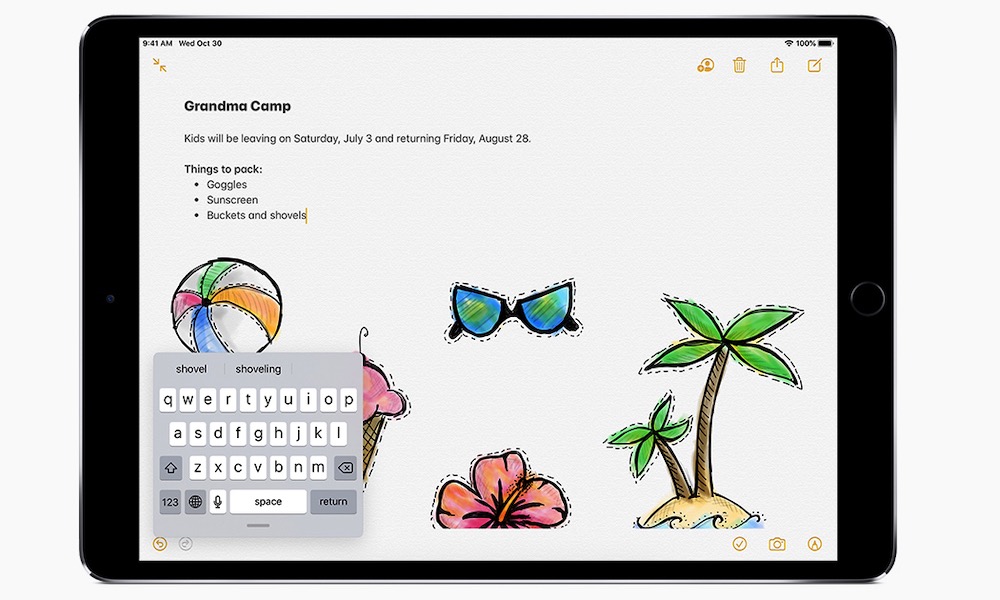
Not only can you split your iPad keyboard, but you can also make it float as a smaller keyboard that's better to write with one hand.
To try using the floating keyboard, just do the following:
- Tap on any text field until your keyboard appears.
- Put two fingers on the keyboard and pinch it to make it smaller.
- Drag your keyboard anywhere you want.
Pro tip: You can also slide your finger on the floating keyboard to write without actually tapping. Your iPad will help you by auto-correcting what you write.
If you want to make it go back to normal, just put two fingers on your floating keyboard and spread them apart to enlarge it back again to its full size.
Use Your Keyboard as a Trackpad
As you can already tell, the iPad keyboard is packed with features to make your work as easy as possible, but the great news is that it can also work as a trackpad.
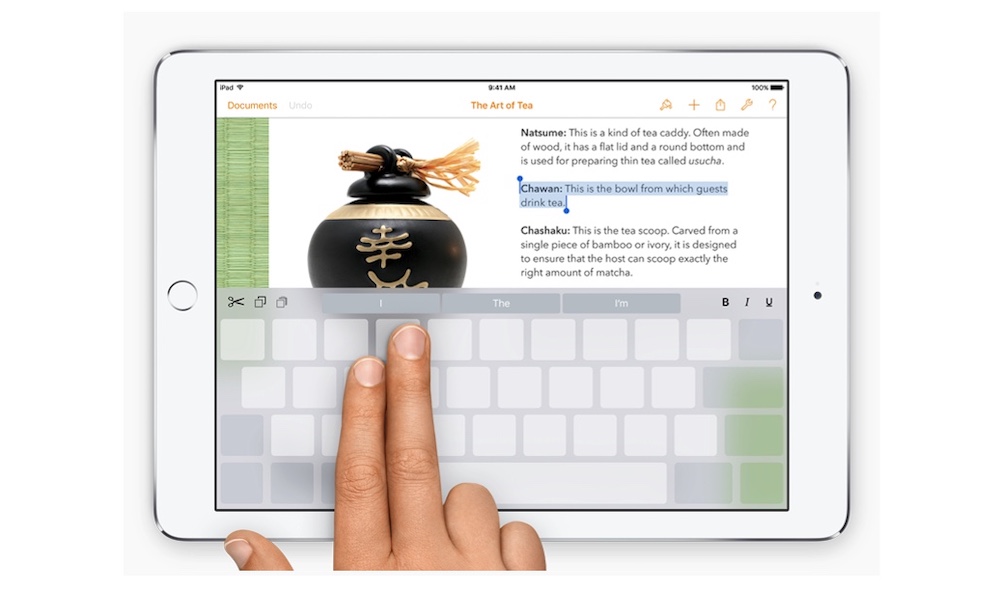
That's right! You don't need to get a fancy new Magic Keyboard or another Bluetooth mouse for your iPad. All you need to do is place two fingers on your keyboard when it appears. Your iPad's keys will disappear, and you'll be able to navigate any chunk of text by sliding your fingers.
Using this method also makes it easier to select text with your keyboard. Just tap twice with two fingers and immediately hold. You should see the iPad highlights one word from the text. You can slide to the left or right to keep selecting more text.
Use Key Flicks to Type Faster
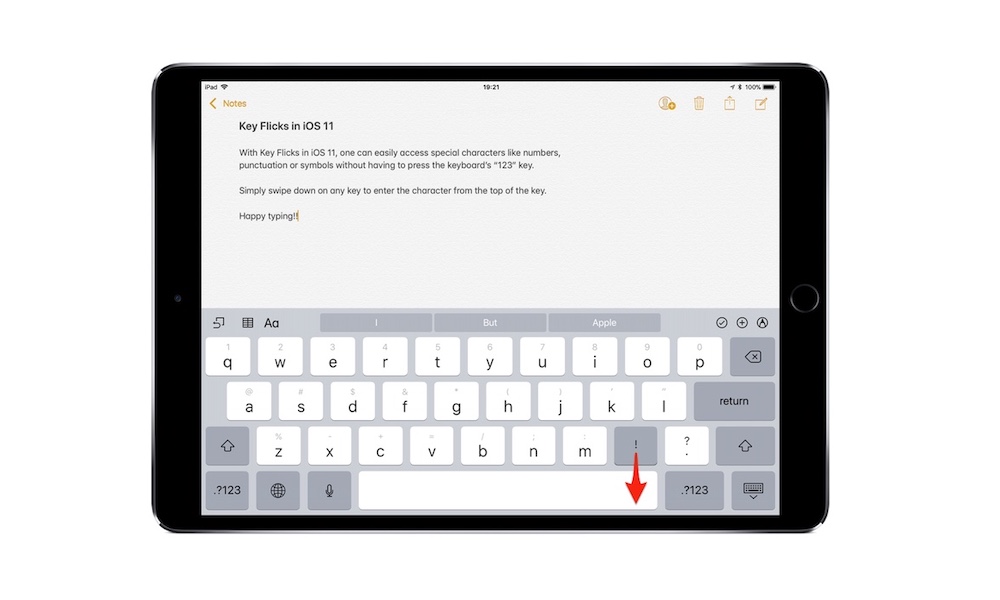
Key Flicks is an underrated iPad feature. If you want to save time typing on the iPad, you need to master it.
To use Key Flicks on iPad, all you have to do is drag any key down on your keyboard and then release it. You'll see that the "second key" from your keyboard immediately appears.
The iPad's Key Flicks are enabled by default, but if you want to make sure you haven't disabled it, or in case you want to, here's what you need to do:
- Open the Settings app on your iPad.
- Go to General.
- Tap on Keyboard.
- Make sure Enable Key Flicks is turned on.
Undo and Redo with Three Fingers
If you're used to typing each day, one of your favorite keyboard shortcuts might be Command + Z or Control + Z.
Unfortunately, the iPad's keyboard doesn't have a Command key, although that would be a game-changer. Instead, you need to use a different way to Undo or Redo a misspelled word.
The good news is that it isn't hard at all, and there are different ways to do it.
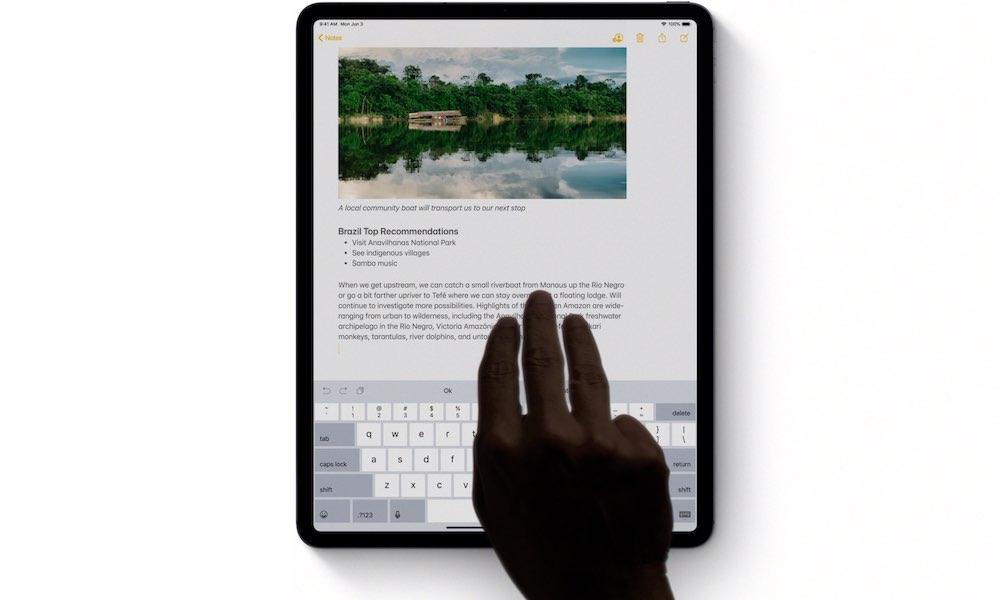
If you want to undo something you just typed, instead of deleting it, you can simply place three fingers on the iPad's display (it doesn't have to be on the keyboard itself), and swipe to the left. This will undo your most recent text.
Pro Tip: There's another way to undo what you just wrote. All you need to do is shake your iPad, and a pop-up message will appear asking if you want to undo the last thing you wrote.
Now, if you want to redo something you just undo, you can use the same trick, only instead you have to do it the other way. That is, to redo, all you need to do is place three fingers on your iPad's screen and then swipe to the right. A small message will appear at the top saying "Redo" or tell you that there's nothing to redo at the time.

