
7 Ways To Download Your iCloud Photos
Apple's iCloud Photo Library is a convenient online storage solution for your photos and videos, but it has a bothersome flaw: you need an internet connection and an Apple ID to view your memorable moments. Forget your Apple login or lose your network connection and your photos and videos become inaccessible.
To preserve your media library for life, you should download your iCloud image library and store it locally on a hard drive or flash drive. Let's look at some ways to move your photos and videos out of Apple's ecosystem.
How Apple's iCloud Photo Library Works
Before we explore how to download content from your iCloud Photo Library, it's worth reviewing how the online photo repository works.
Apple's iCloud Photo library is available on all Apple devices and online via a web browser at iCloud.com. It works seamlessly with your device's Camera and Photos apps, and once configured, your iPhone or iPad will automatically upload new photos or videos to this online album.
After your content has been added to the library, the media is available to view or share from any connected Apple device. You can also access your content from non-Apple devices like a Windows PC.
Whether you want to move to another photo storage service or simply have a local copy of your photos for backup, read on for five ways to download your photos and videos from iCloud Photos.
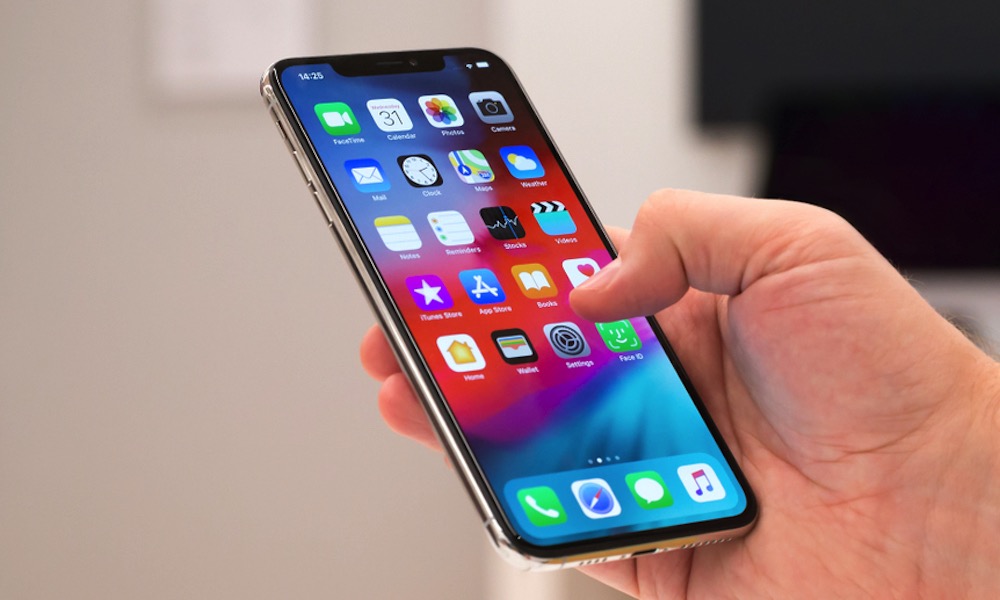
Download from iCloud.com to an iPad, iPhone, or iPod touch
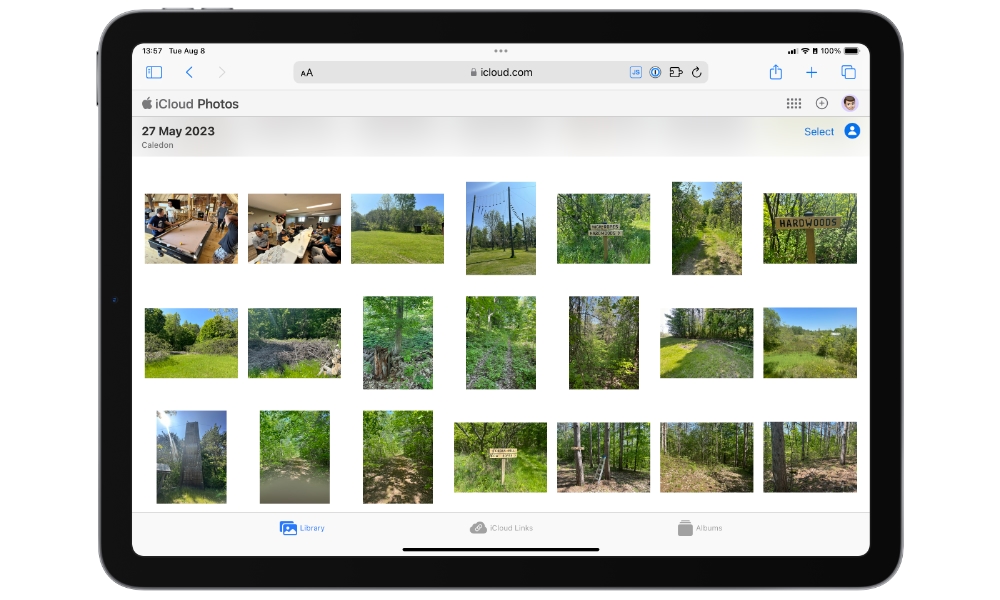
Here's how to download your photos to local storage on an iOS or iPadOS device:
- Using Safari, open iCloud.com and log in with your Apple ID.
- Select the Photos icon to access your online library.
- Once in Photos, choose the Select button in the top-right corner.
- Select the images you want to download. Depending on how large your library is, a Select All button may also be available to let you choose all photos.
- Once you've finished making your selections, choose the three dots, aka the more button, in the top-right corner to display a dropdown menu.
- Select Download on the menu and follow the prompts to download your photos.
Your photos will be downloaded as a ZIP file to the folder you've designated for Safari downloads in Settings > Safari > Downloads. You can move it from there to another folder using the Files app or another cloud service app such as Google Drive or Dropbox.
Download from iCloud.com to a Mac or Windows PC

Downloading your photos onto a Mac or Windows PC is very similar to doing it on an iOS device. You use a web browser, but the interface is slightly different for the desktop.
- Start by opening iCloud.com on your web browser and logging in with your Apple ID.
- Use your mouse to choose photos or videos to download. You can use the command key on a Mac or the control key on the PC to select multiple images or videos.
- Click the download button in the upper corner and follow the prompts to download your images.
- You can also click and hold the download button to change the file format to select from "Unmodified Originals" or "Most Compatible," which saves the photo with your edits.
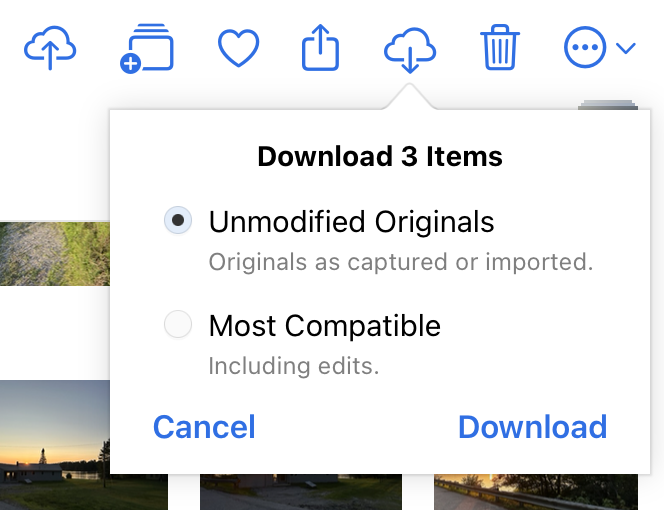
As with downloading photos to an iPhone or iPad, the selected images will be combined into a single Zip file and saved to your browser's downloads folder by default.
Keep Your Original Photos on Your Mac
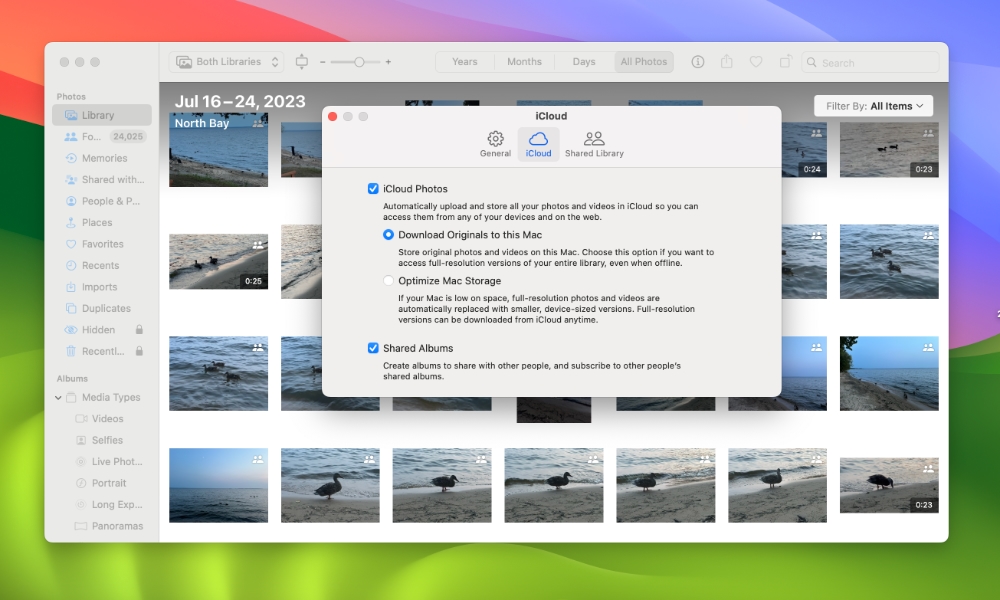
If you have a Mac with a relatively large hard drive, you can create a local copy of your entire iCloud Photos library for offline access.
- Open the Photos app on your Mac
- Select Photos > Settings from the menu.
- Choose iCloud
- Check the circle next to Download Originals to this Mac.
This creates a full copy of your iCloud Photos library on your Mac. It will remain synced with iCloud, downloading full original copies of all new photos as you add them from your iPhone, iPad, or other devices.
However, since it's stored locally on your Mac hard drive, you can make a copy and save it to an external hard drive for long-term storage. By default, you'll find it in a file called "Photo Library" in your Mac's Pictures folder.
Create a Backup Library on Your Mac
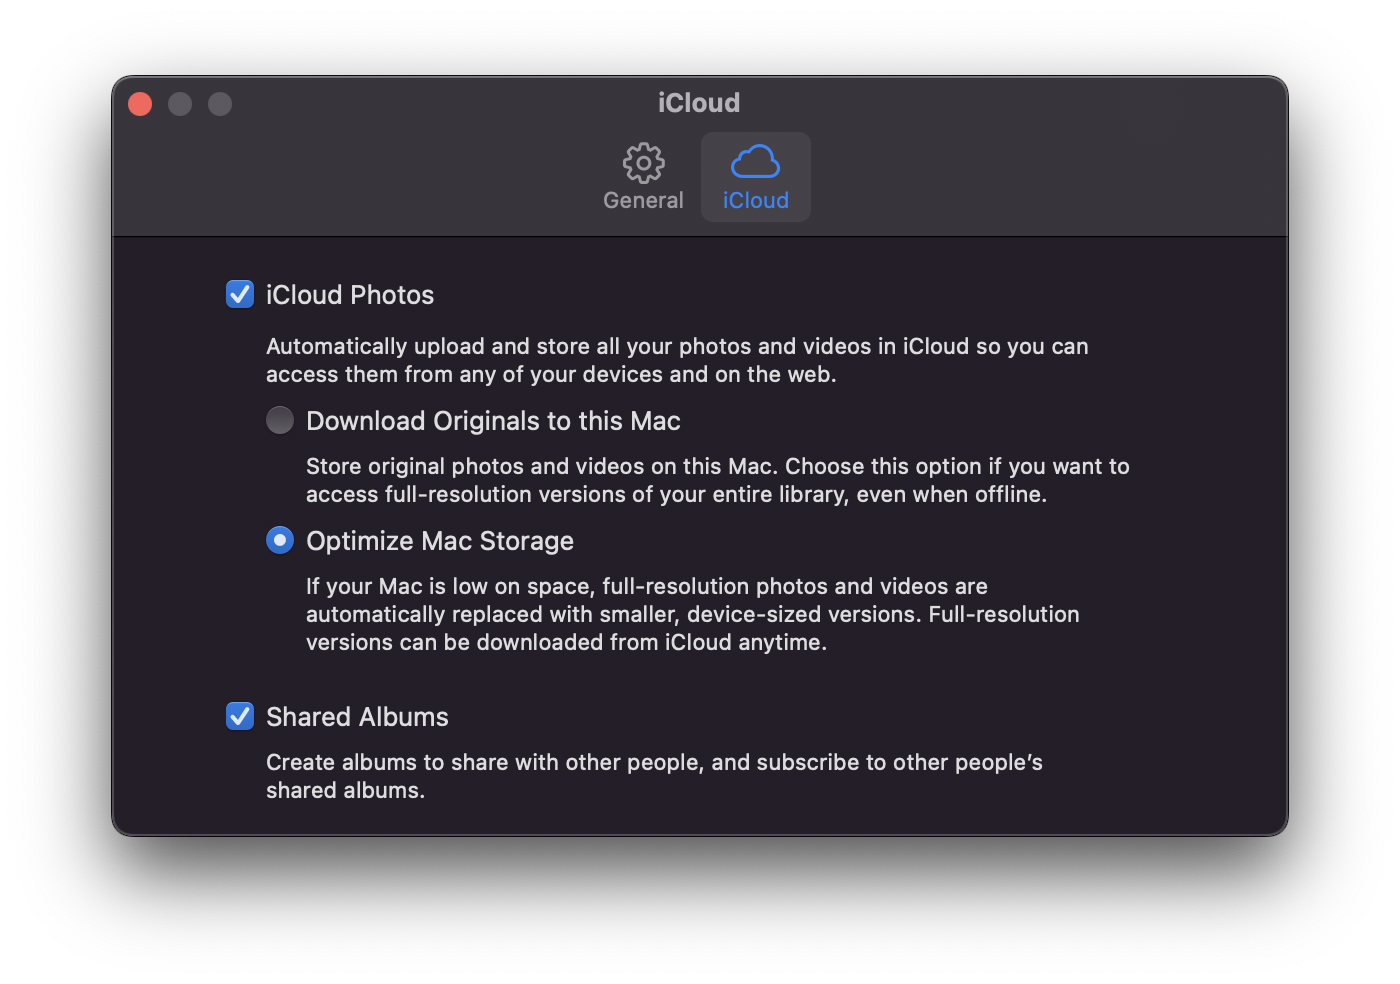
Not everyone has abundant storage on their Mac to store a full copy of their iCloud Photos library. Instead, those folks with limited storage likely use "Optimize Mac Storage" to keep their photos in the cloud and only download thumbnails.
However, even when living with storage limitations, it's still possible to create a backup. You only need an external drive and some know-how on which Photos settings to change.
- Start by opening the Photos app on your Mac
- Go to Photos > Settings.
- Select the iCloud tab.
- Make sure that Optimize Mac Storage is selected, as shown above.
- Quit the Photos app to save this setting.
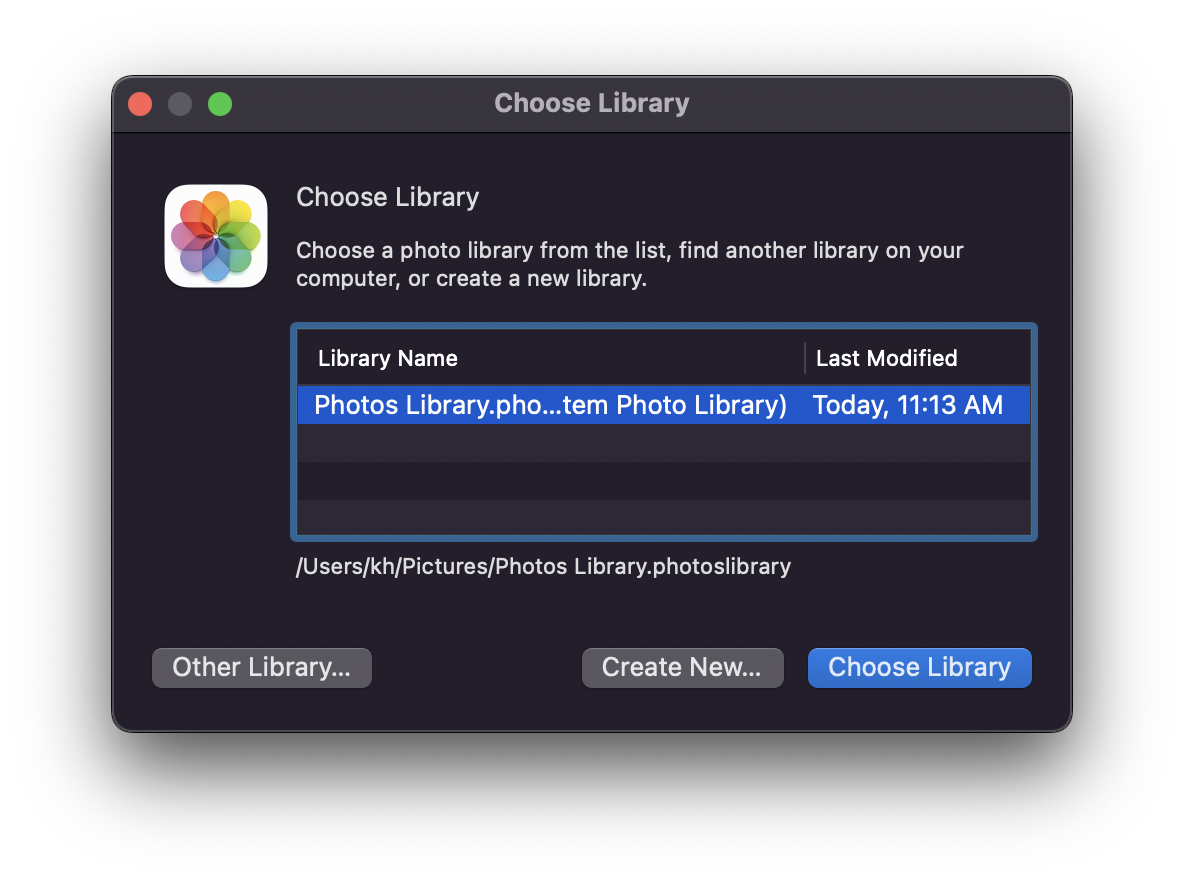
- Now open the Photos app again, but this time hold down the Option key while you open the app.
- This will show you a "Choose Library" dialog box that lets you choose an existing library or create a new one.
- In this scenario, you want to create a new library, so click Create New...
- Name the library something meaningful like "backup," and select your external hard drive for its location.
Now that you have a backup library, you can populate it with your photos.
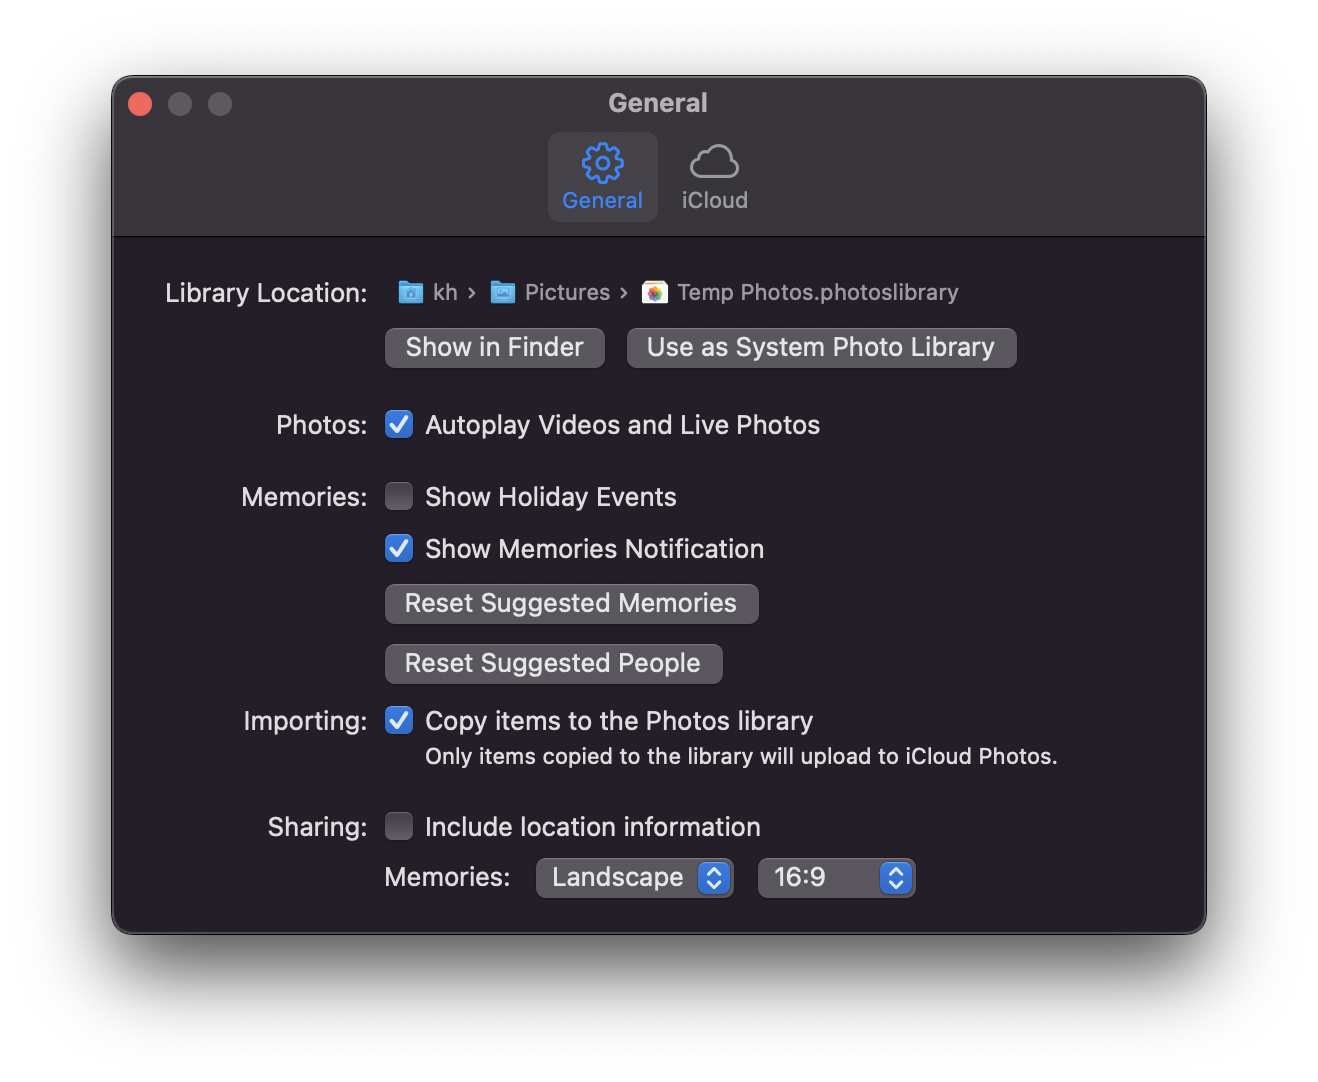
- Open the Photos app's preferences again by selecting Photos > Settings from the menu
- Select the General icon.
- Click the Use as System Photo Library button to make your new backup library the primary library for iCloud Photos.
- Click OK to confirm. This will turn off syncing with your main photo library for now, but that's okay.
The last step is to turn on the iCloud Photo Library settings again to download all of your photos to the new backup library.
- Select the iCloud tab in the preferences window.
- Check the circle next to Download Originals to this Mac.
This will initiate a download of all your photos into your backup library. Once all your images have finished downloading, you can reset the default photo library by repeating the steps above, opening the Photos app while holding the Option key to select your original Photos Library, going into Settings > General to designate it as the system photo library and then to the iCloud tab to ensure iCloud Photos is properly enabled
Download a Copy Of Your Library From Apple
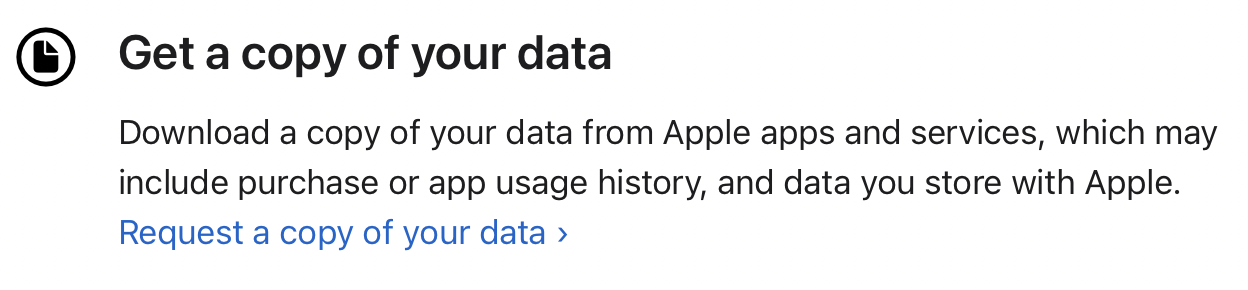
Apple has a unique feature that lets you download a copy of the data directly from Apple's apps and services like iCloud.
- Point your browser to https://privacy.apple.com and log in using your Apple ID.
- Click the link to Request a copy of your data.
- Follow the prompts to select the data you want to download.
It may take a day or two, but Apple will send you download instructions when your data is ready.
Use Apple to Transfer Your Photos to Google Photos
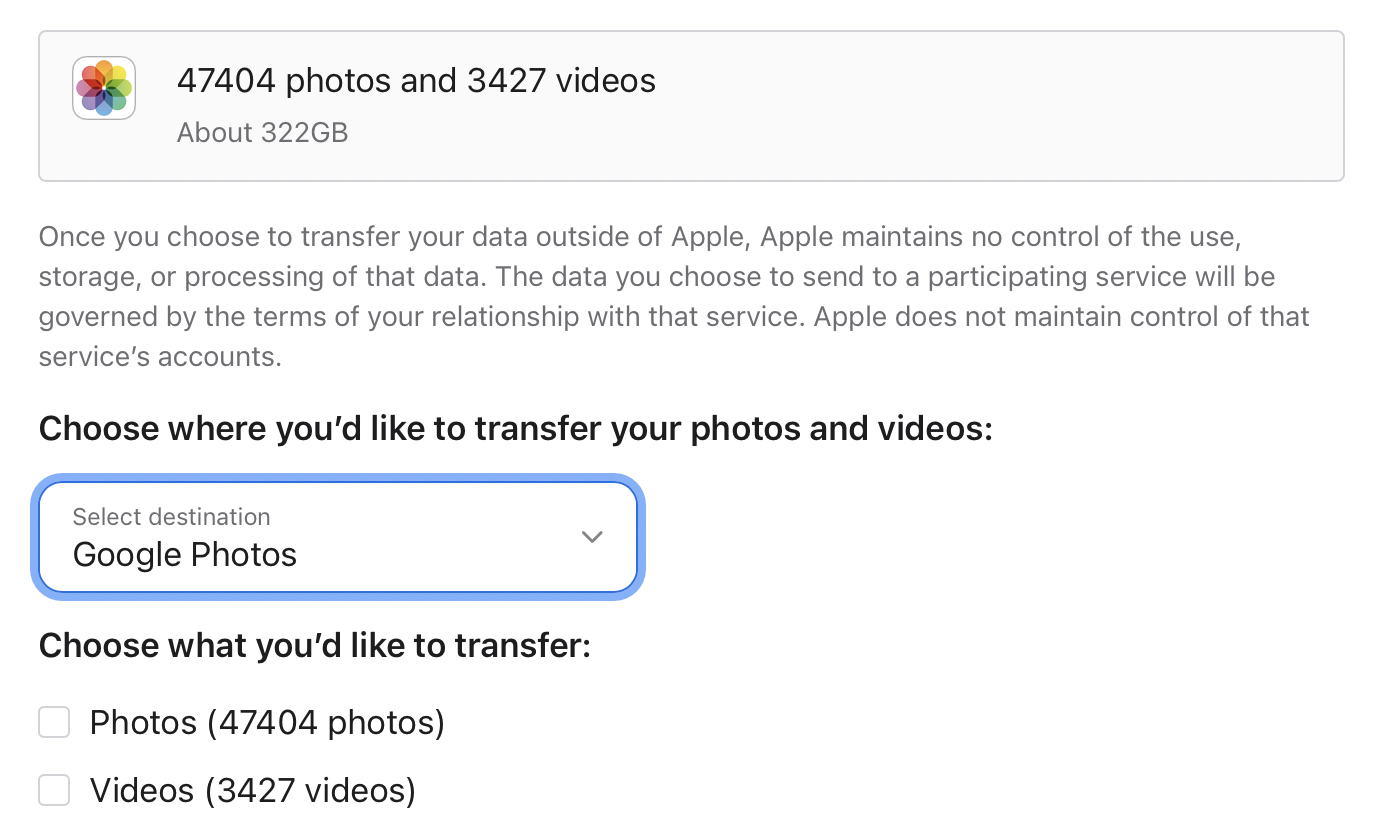
As an added bonus, you can also use the privacy.apple.com website to transfer your photo library automatically to Google Photos.
- Login into https://privacy.apple.com
- Scroll down until you see Request to transfer a copy of your data.
- Click on the link to request a transfer
- Select Google Photos as the destination for your photos.
- Check the boxes beside Photos and Videos, as appropriate.
- Select Continue and follow the prompts to sign in to your Google Account and begin transferring your photos.
The transfer will occur directly between iCloud Photos and Google Photos and may take anywhere from a few hours to a few days depending on the size of your library. You don't need to say on the transfer page; Apple will send you an email once it's done.
Use a Third-Party App
Lastly, there are a handful of third-party apps that you can use to tap into your iCloud Photos and shuttle selected images and videos between devices. Apps like Simple Transfer or Photo Transfer can make transferring media quick and easy.
If you're moving to another cloud storage service for your photos, then it's also worth checking out whether it offers its own import from iCloud Photos. Many apps for services like Amazon Photos and Dropbox have photo upload features that can transfer over your entire photo library via your iPhone or iPad.