10 Hidden AirPods Features You Should Know
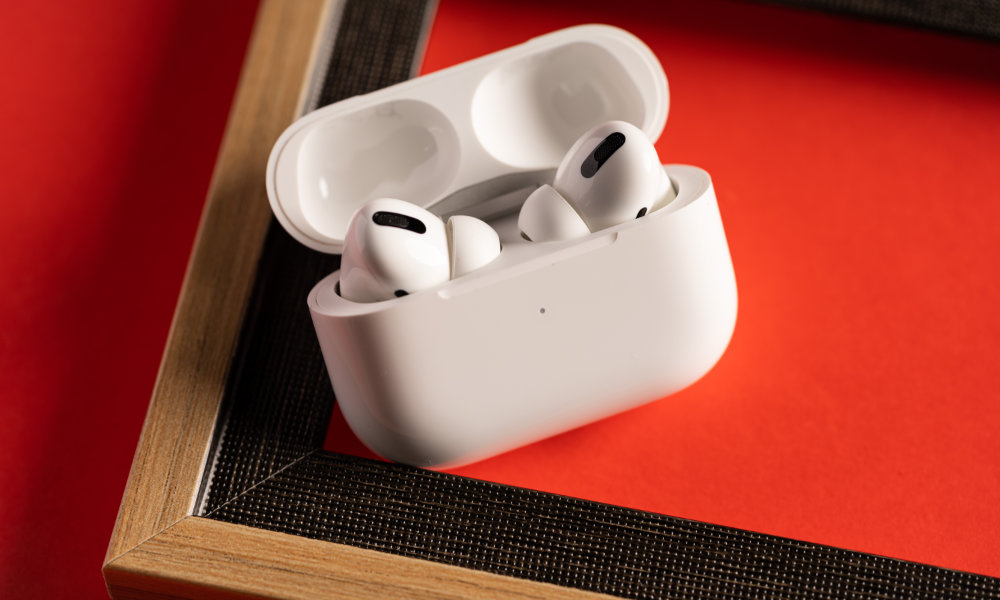 Credit: Fadhli Adnan / Shutterstock
If you've had your AirPods for a while now, you already know how great they are. As soon as you take them out of their charging case, they'll connect to your iPhone automatically and be ready to use whenever you want.
Besides the good sound quality or how easy they are to use, the AirPods offer a lot more than you may realize. Apple packed a bunch of features into the AirPods to make your experience even better.
Whether you want to listen to people from across the room or play music with a friend, read on for 10 of the best AirPods hidden features you probably didn't know existed.
Listen to Conversations in Other Places
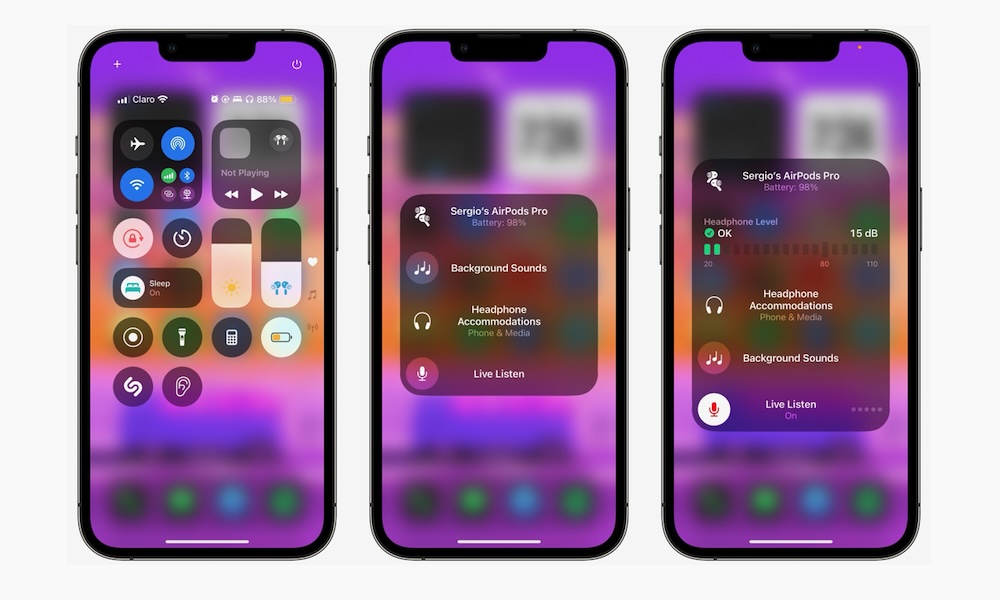
Whether you want to hear what your family is talking about in another room or just need to hear the people around you, your AirPods have a feature called Live Listen.
This feature will basically turn your iPhone into a microphone. More precisely, it will use your iPhone's mic to "listen" to its surroundings, and you'll be able to hear those sounds in your AirPods.
To use Live Listen, you'll first need to add it to your Control Center by going to Settings > Control Center and tapping the plus icon on the left side of the Hearing control.
Next, you can use Live Listen by doing the following:
- First, make sure you have your AirPods in your ears and that they're connected to your iPhone.
- Open the Control Center. If your iPhone has Face ID, you'll need to swipe down from the top right corner of your screen. If you have an iPhone with Touch ID, simply swipe up from the bottom of your screen.
- Tap the Hearing control, which looks like an ear.
- Select Live Listen.
And that's it. Now, you can leave your iPhone wherever you want, and you'll hear any sounds around it in your AirPods.
Play Music on Two Pairs of AirPods at the Same Time
If you have a friend you want to listen to some tunes with, you don't have to give them one of your AirPods. Instead, you can connect their AirPods to your iPhone, so you can both listen at the same time.
This is an extremely cool feature, but you do need to have at least an iPhone 8 that's running iOS 13 or later to make this work. Here's how you do it:
- Connect your AirPods to your iPhone and start playing some music.
- Open your Control Center by either swiping down from the top left corner (if your iPhone has Face ID) or swiping up from the bottom of your screen (if your iPhone has Touch ID.
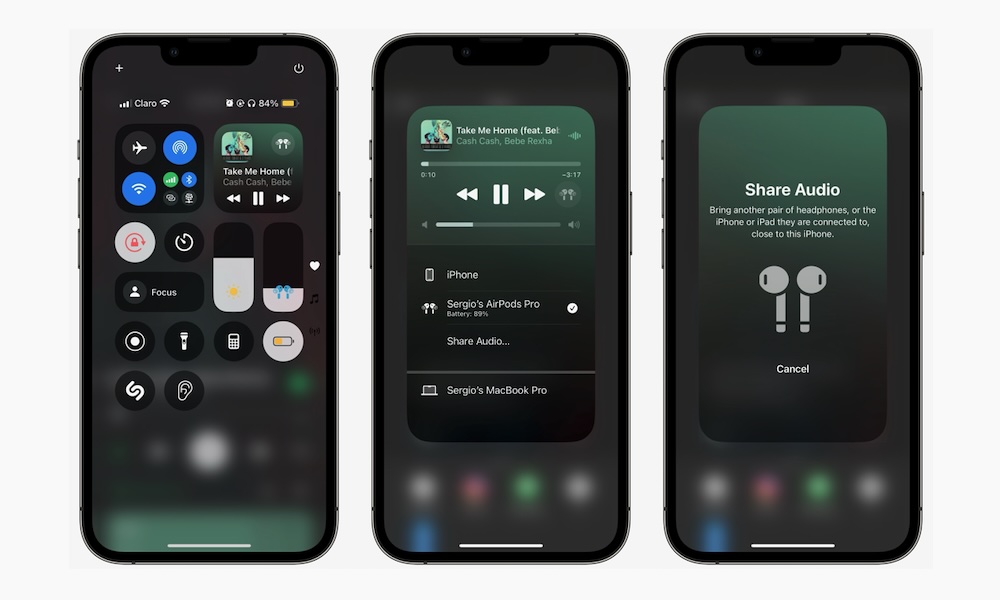
- Tap the AirPlay button near the top right corner of your screen. If you're playing music, it should have an AirPods icon.
- Tap Share Audio.
- Bring the other person's AirPods closer to your iPhone. They must be inside their case and with the lid open.
- After a few seconds, the AirPods should appear on your screen. When they do, tap on Share Audio.
Now, you can both listen to the same song or watch the same movie without compromising sound quality.
Keep Your Hearing Healthy and Safe
Apple has spent a lot of time trying to make the AirPods as safe as possible. Because of this, you can easily change a few settings to protect your hearing.
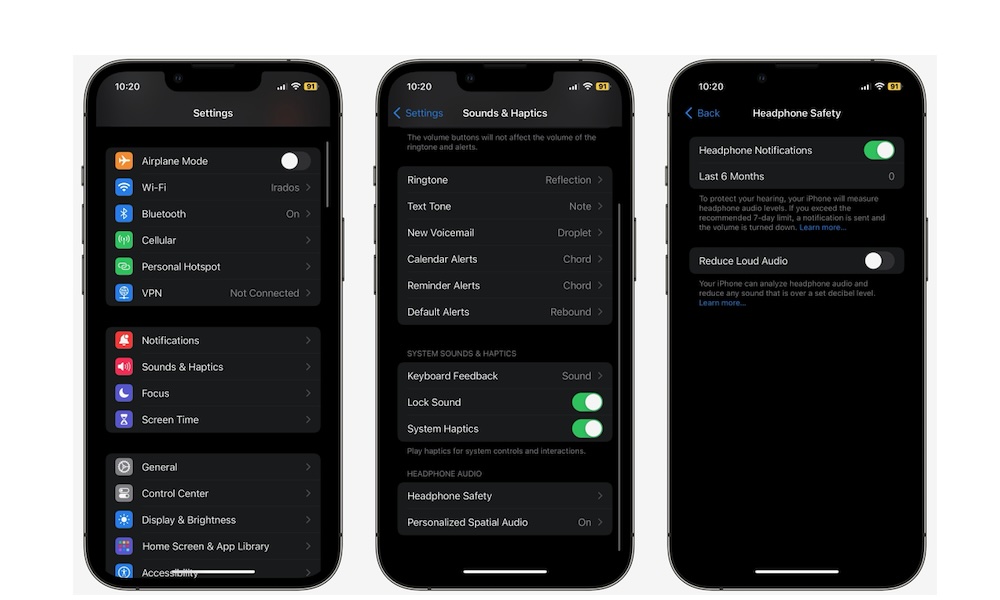
This is thanks to the Headphone Safety feature, which can notify you whenever you exceed the recommended audio levels during the seven-day limit.
You can also make your iPhone automatically reduce loud audio that's over a certain decibel level. Here's how:
- Open the Settings app on your iPhone.
- Scroll down and tap on Sounds & Haptics.
- Scroll down to the bottom and go to Headphone Safety.
- Enable Headphone Notifications.
- You can also enable Reduce Loud Audio.
You can then leave the audio settings the way they are. But if you want, you can also change the decibel level to whatever feels more comfortable for you. Of course, the higher the decibel level, the more risk you're taking, so we recommend you keep it as is or lower it.
Disable Automatic Ear Detection
Automatic Ear Detection is a useful feature you've probably noticed before. When it's turned on, your AirPods will automatically pause whatever you're listening to. whenever you take one of them out of your ear.
Your iPhone will resume playing the music or videos you were watching once you put your AirPods back in. While this can be useful, it can also be annoying at times, which is why you can disable Automatic Ear Detection with just a few taps. Here's how:
- Make sure your AirPods are connected to your iPhone.
- Open the Settings app.
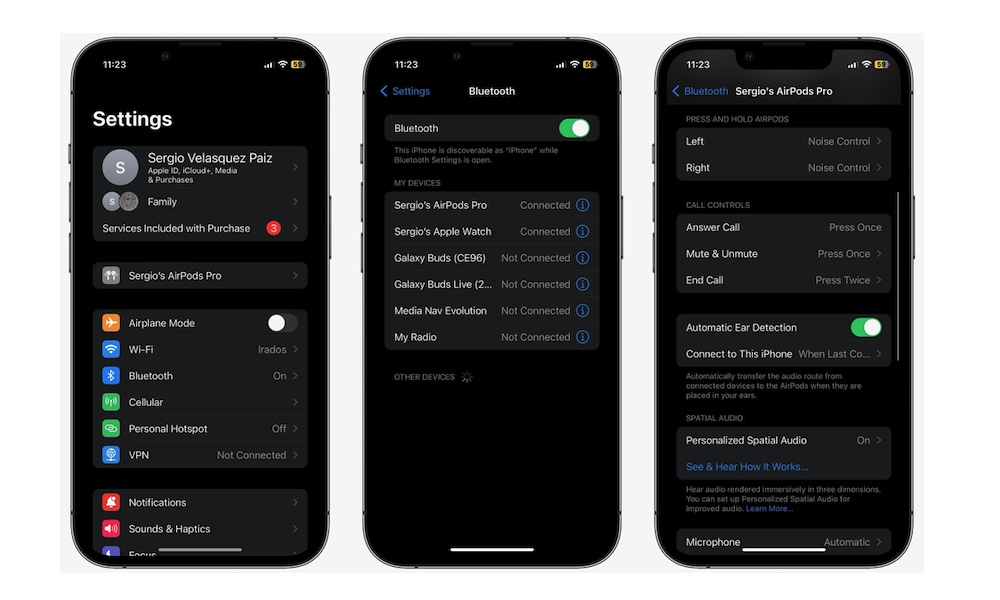
- Scroll down and tap on your AirPods' name or go to Bluetooth and tap the i icon next to your AirPods' name.
- Scroll down and enable or disable Automatic Ear Detection.
Switch Between Your Apple Devices Automatically
Your AirPods can switch between all your Apple devices almost effortlessly. So, for instance, if you're watching a movie on your iPad, your AirPods will automatically switch to your iPhone as soon as you get a phone call.
To do this, you'll need to do a few things. First, all Apple devices must be logged in with the same Apple ID. You can check the Apple ID by going to the Settings app on your iPhone and iPad or going to System Settings on a Mac.
You also need two-factor authentication enabled for your Apple ID. You can do this from any one of your devices that's already signed into your account.
- For iPhone or iPad, go to Settings > Apple ID Sign-In & Security > Two-Factor Authentication, and then turn on Two-Factor Authentication.
- For Mac, you'll need to go to the Apple menu > System Settings > Apple ID, Sign-In & Security > Two-Factor Authentication, and turn on Two-Factor Authentication.
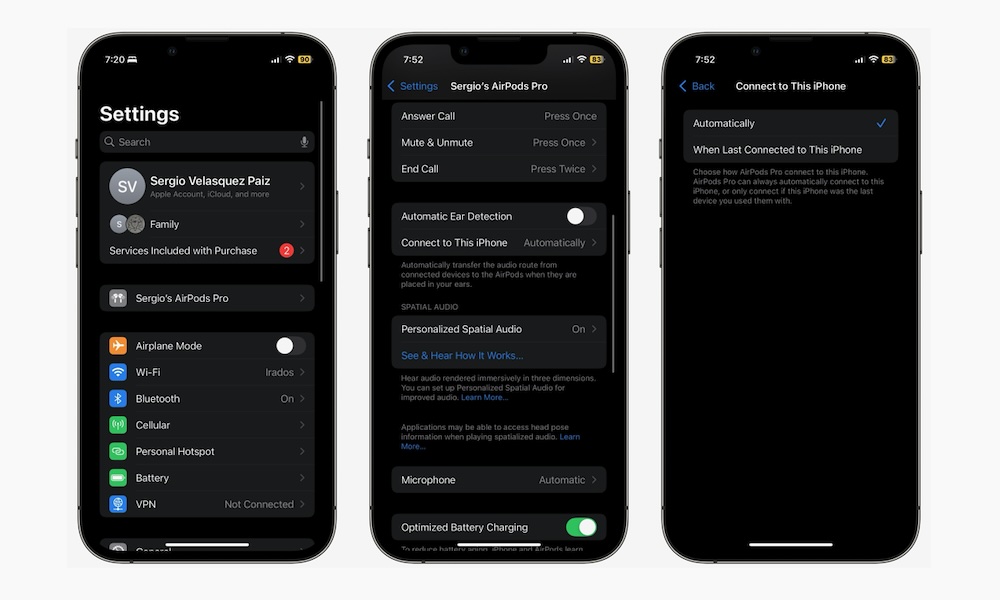
Last but not least, you must make your AirPods connect automatically to all your Apple devices. That way, your AirPods will automatically switch between devices depending on which one is playing something.
You should have your settings set to connect automatically by default, but you can check this by doing the following:
- Connect your AirPods to your iPhone or iPad.
- Open the Settings app.
- Tap on your AirPods' name right below your Apple ID.
- Scroll down and tap on Connect to This iPhone.
- Select Automatically.
For Mac, go to the Apple menu > System Settings > Bluetooth and tap on the i icon next to your AirPods' name. Under Connect to this Mac, select Automatically.
And that's it. If you decide you don't want to use this feature, simply follow the steps below and select When last connected to this iPhone/iPad/Mac, depending on the device you're using.
Improve Sound Quality
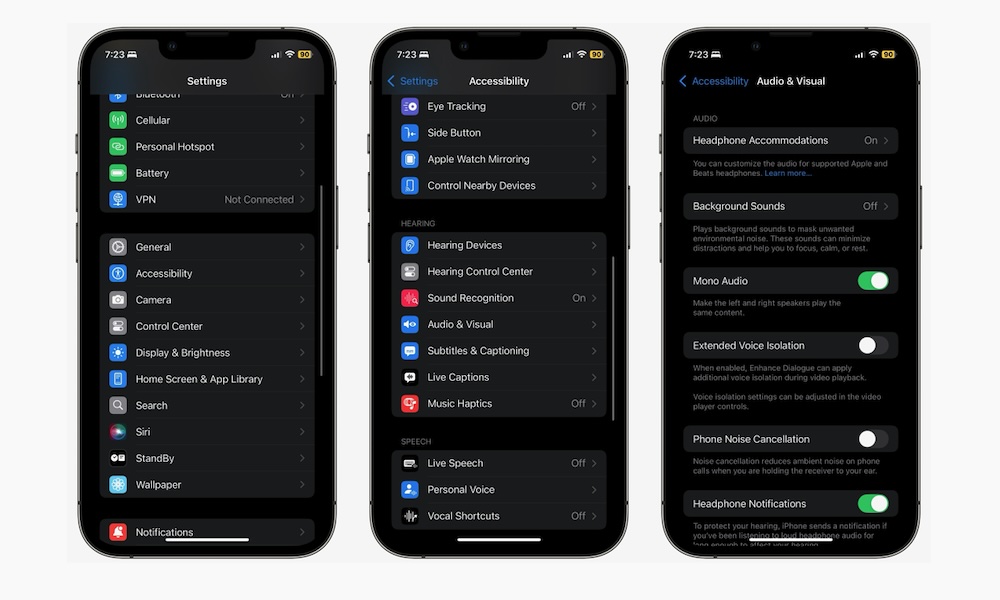
Your iPhone comes with a useful accessibility feature that's called Headphone Accommodations. This feature lets you improve the sound quality to fit your needs. You can also customize the audio to hear more details in dialogue in movies or during a phone call.
Here's how to set up and change your Headphone Accommodations:
- Open the Settings app.
- Scroll down and tap on Accessibility.
- Scroll down again and tap on Audio & Visual.
- Tap on Headphone Accommodations.
- Enable Headphone Accommodations.
- Change the settings you want. If you want to test your changes, tap on Play Sample.
- Tap on Custom Audio Setup to personalize your audio however you want.
Stop Siri from Announcing Notifications
By default, Siri reads your notifications out loud as soon as they come in. This can be helpful, but you may find it annoying sometimes, especially if you're busy watching a movie or listening to your favorite tunes.
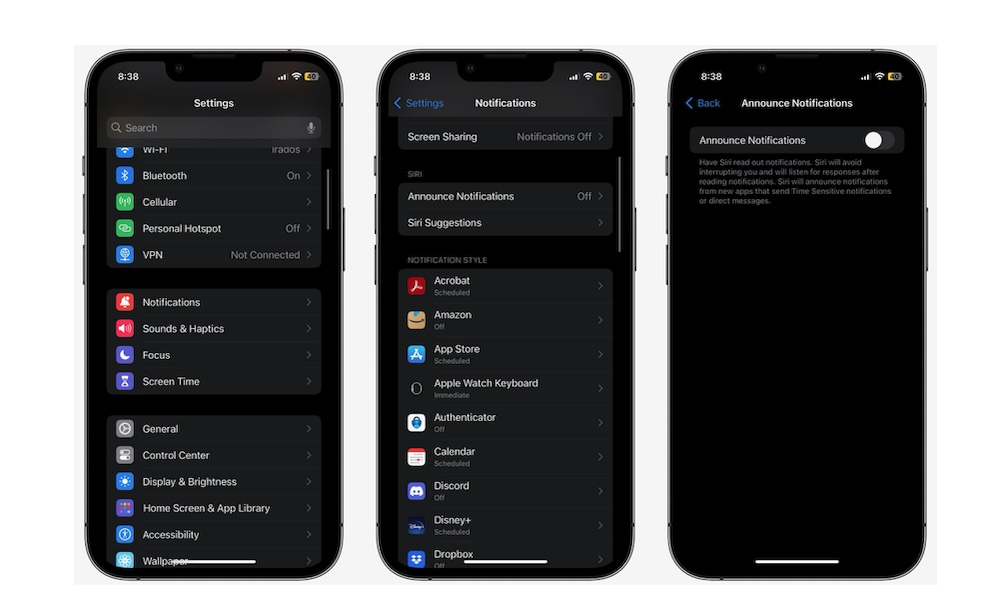
The good news is that you can stop Siri from announcing notifications. You can also select which notifications you want to be announced so you know you'll only receive the most important ones. Here's how:
- Open the Settings app.
- Scroll down and tap on Notifications.
- Go to Announce Notifications.
- Enable or disable Announce Notifications.
- If you want to use this feature, then be sure to turn on Headphones as well. You can even enable Reply Without Confirmation, so it's easier to reply to messages with your AirPods.
You can also scroll down and select which apps can use this feature.
Charge Your AirPods With Your iPhone
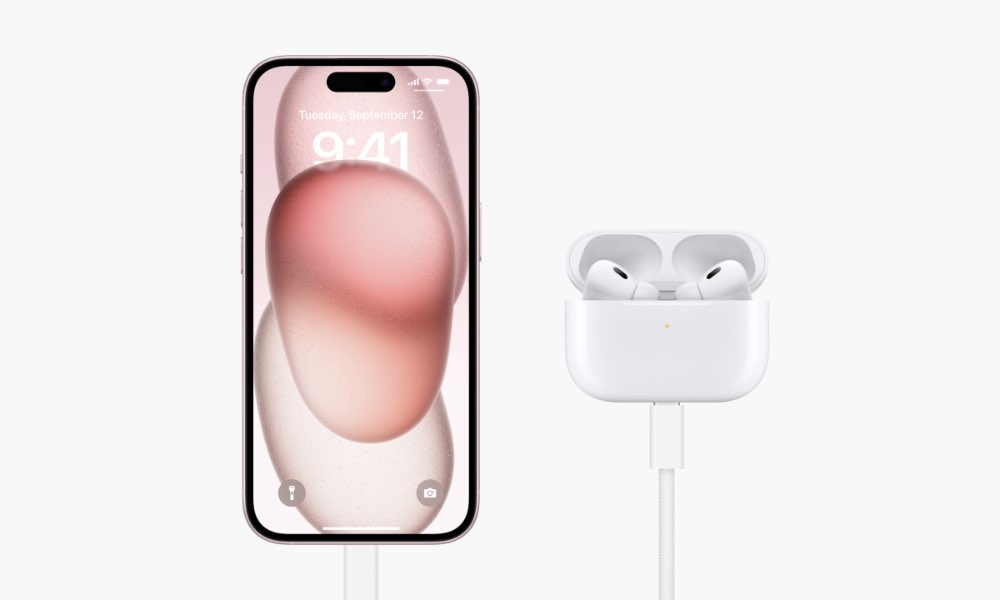
This is a fairly new feature that users with the most recent iPhones will enjoy. You can now charge your AirPods with your iPhone.
You'll need an iPhone 15 or a later model to do this, and only wired charging is supported, so you'll need an appropriate cable. However, the good news is that this works with charging cases with either a USB-C or a Lightning port.
To charge your AirPods, simply connect them to your iPhone 15's USB-C port. Wait a few moments, and they'll start charging.
Personalize Spatial Audio
Most AirPods now come with a Spatial Audio feature that lets you experience sound in 3D.
With Spatial Audio, your AirPods will track your head movement in correlation with your iPhone, and they will boost or lower sounds from one ear to make you feel like you're inside the movie or show you're watching.
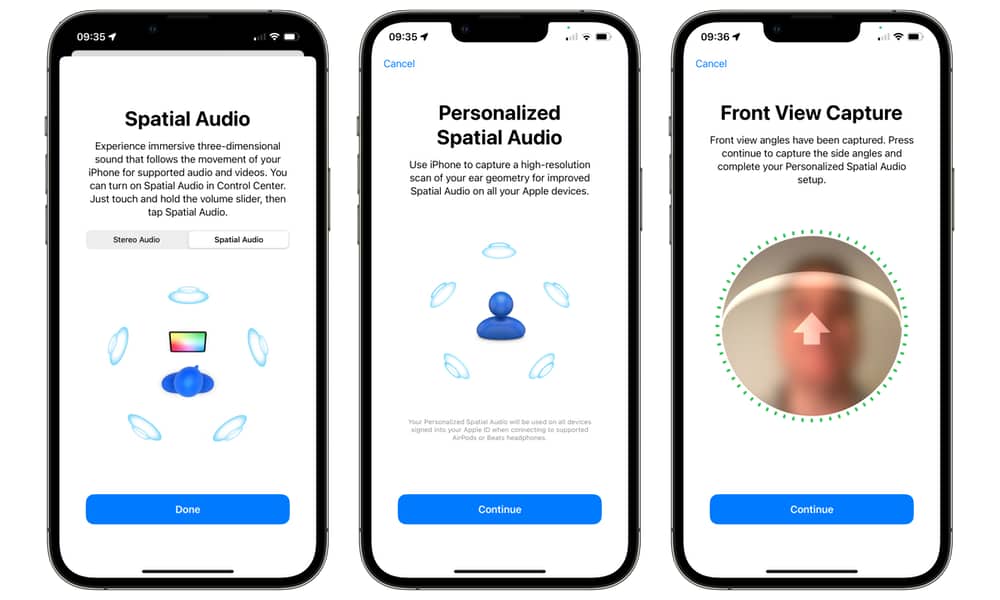
Granted, not every show supports Spatial Audio, but Apple created a personalized Spatial Audio feature that works great for the most part. Here's how to set it up.
- Connect your AirPods to your iPhone.
- Open the Settings app.
- Tap on your AirPods' name right below your Apple ID.
- Scroll down and under Spatial Audio, tap on Personalized Spatial Audio.
- Tap on Personalize Spatial Audio.
- Tap Continue and follow the instructions on your screen.
Your iPhone will finish setting up your Personalized Spatial Audio in just a few moments. You can then test it out by tapping See & Hear How It Works.
Manually Update Your AirPods' Firmware
Your AirPods don't get software updates like your iPhone does. Instead, they get firmware updates periodically to improve performance or security.
Your AirPods should be able to update themselves automatically by default, but if that doesn't happen, you can always do it manually.
Granted, saying that you can manually do it might be a stretch because there's no way for you to start the update process. Instead, what you do is set up the conditions so your AirPods can start downloading the update. This is how:
- Put your AirPods in their case and close the lid.
- Start charging your AirPods by connecting the charging cable to the case.
- Put your iPhone near your AirPods.
- Wait between five to ten minutes, and then start using your AirPods.
This should give your AirPods enough time to download and install the update.
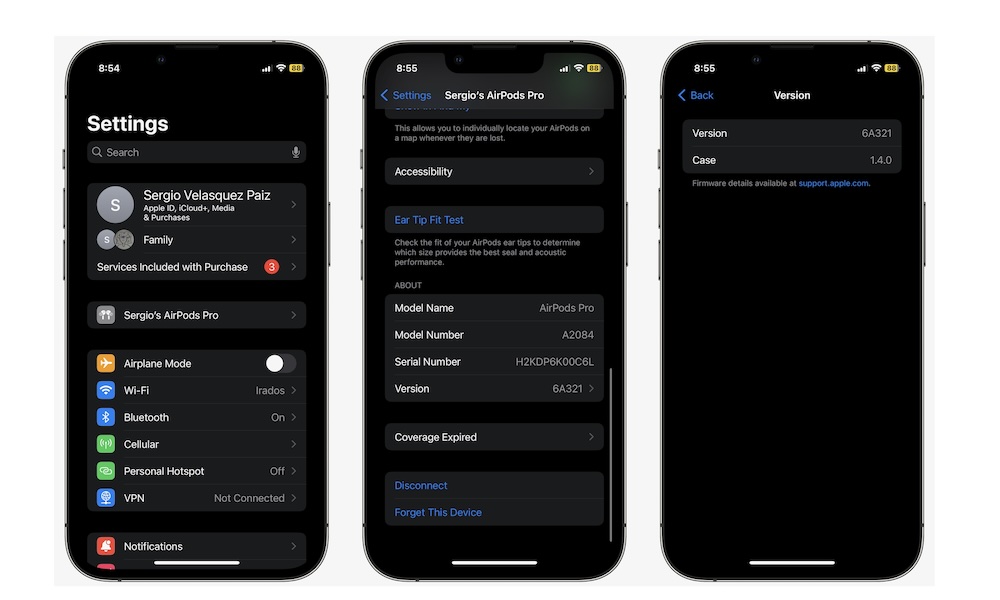
To check if your AirPods installed a new update, go to Settings > Bluetooth and tap the i icon next to your AirPods' name. Then, under About, tap on Version. You'll find your current firmware version shown there.
But how do you know if that's the latest update? You can check Apple's website to see the current version for your model.

