
12 Simple Tweaks to Make Your MacBook’s Battery Last All Day
 Apple
Apple
The MacBook is one of Apple's most powerful products. With it, you can do anything from watching TV shows to programming and video editing. Of course, your MacBook is only as good as its battery life. After all, if you can't use your MacBook unless it's charging, you're better off getting a desktop.
Apple claims the MacBook's battery should last all day, but real-world usage often tells a different story.
If your MacBook battery doesn’t last nearly as long as Apple’s marketing promised, you’re not alone. The good news is that there are many things you can do to make your battery last as long as possible. With a few smart tweaks, you can stretch each charge and slow long-term battery wear, so your MacBook stays usable for years. Read on for 12 ways to get the most out of your MacBook's battery.
Turn on Optimized Battery Charging
Some people plug their MacBook in at their desk and leave it there all day. That’s convenient, but it’s also how you end up with a battery that drops to 75% health after a couple of years.
macOS tries to counteract that with Optimized Battery Charging, which learns your charging patterns so your MacBook stays around 80%. It will only push to 100% when it thinks you’re about to unplug.
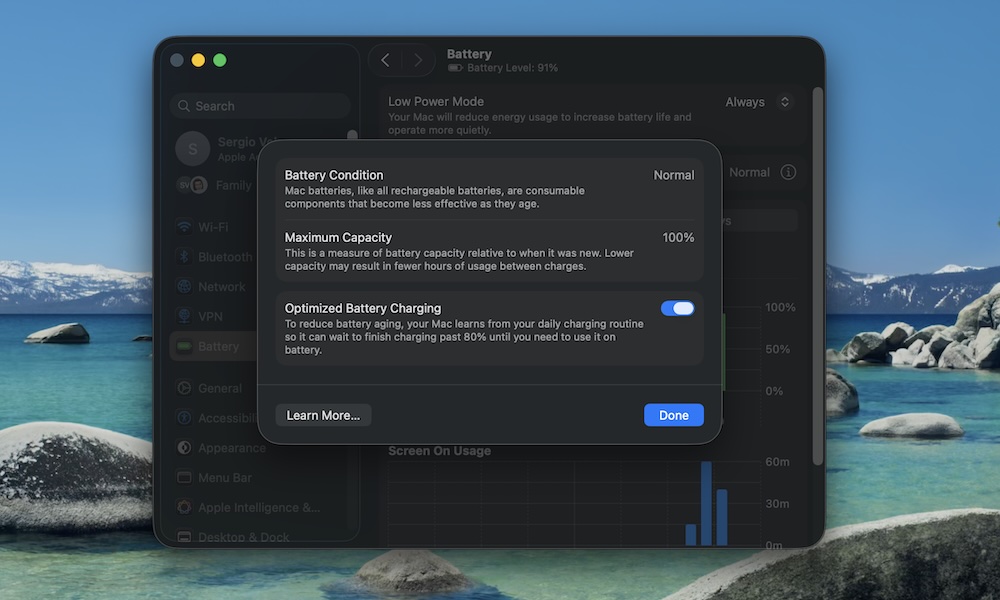
The catch? If Optimized Battery Charging isn't enabled, your battery might be aging more quickly. Here's where to find it — and turn it on, if necessary:
- Click the Apple menu in the top left corner.
- Go to System Settings.
- Click on Battery.
- Click the i icon next to Battery Health.
- Turn on Optimized Battery Charging.
If you almost always work with your MacBook plugged in, this feature is the best thing you can do for your battery. Leave the charger connected and let macOS learn your schedule. You’ll see the battery sit at 80% and then quietly go up to 100% when it thinks you're ready to set off with it.
Use Low Power Mode at the Right Times
Modern Apple silicon chips are already efficient, but they still ramp up when you're doing some intensive tasks. If you’re just writing, browsing, or answering email on the couch, you don’t need all that power. That’s where Low Power Mode comes in.
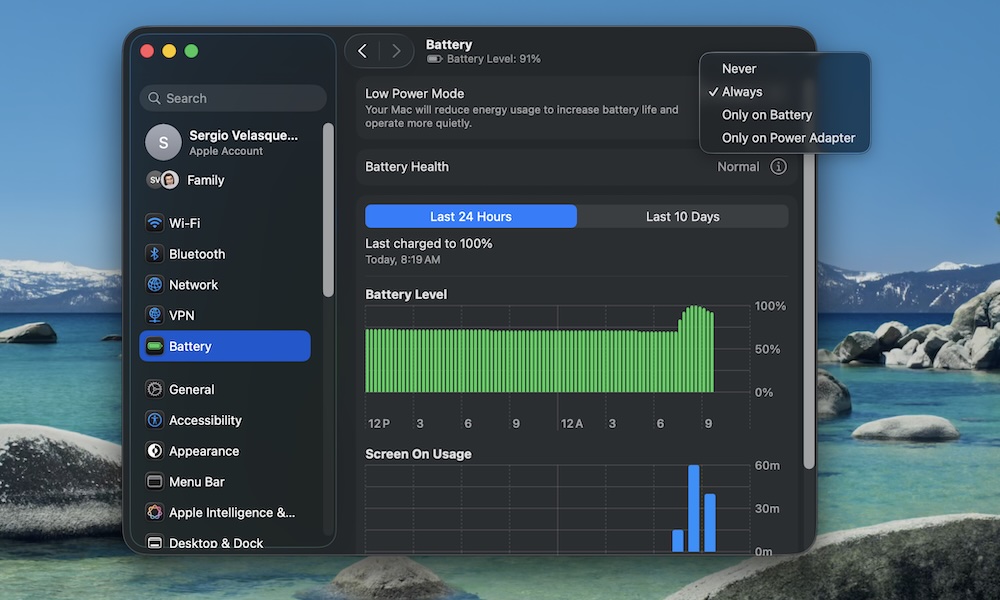
This feature is much more useful if you turn it on as soon as you unplug and know you’ll be away from a charger for a while. Here's how to turn Low Power Mode on:
- Click the Apple menu in the top left corner.
- Go to System Settings.
- Click on Battery.
- Click the dropdown menu next to Low Power Mode.
- Choose when you want to use Low Power Mode.
When you use Low Power Mode, your MacBook automatically reduces brightness and background activity, which means your battery will last longer.
For longer flights, conferences, or study sessions, getting into the habit of toggling Low Power Mode early can easily buy you one or two extra hours. Or you can always keep it on and let it do its thing whenever you're running on battery.
Manage Your Notifications
Notifications can be considered a silent killer for many devices. Not only are your devices constantly updating apps in the background, but they're also sending constant alerts, which will definitely shorten your battery life.
Having too many notifications on your MacBook might be why its battery doesn't last as long. Not only that, but they're also distractions that can affect your productivity, especially now that you can receive iPhone notifications directly on your Mac.
Needless to say, you should manage your notifications as much as possible. To do that, you can follow these steps:
- Click the Apple menu in the top left corner.
- Go to System Settings.
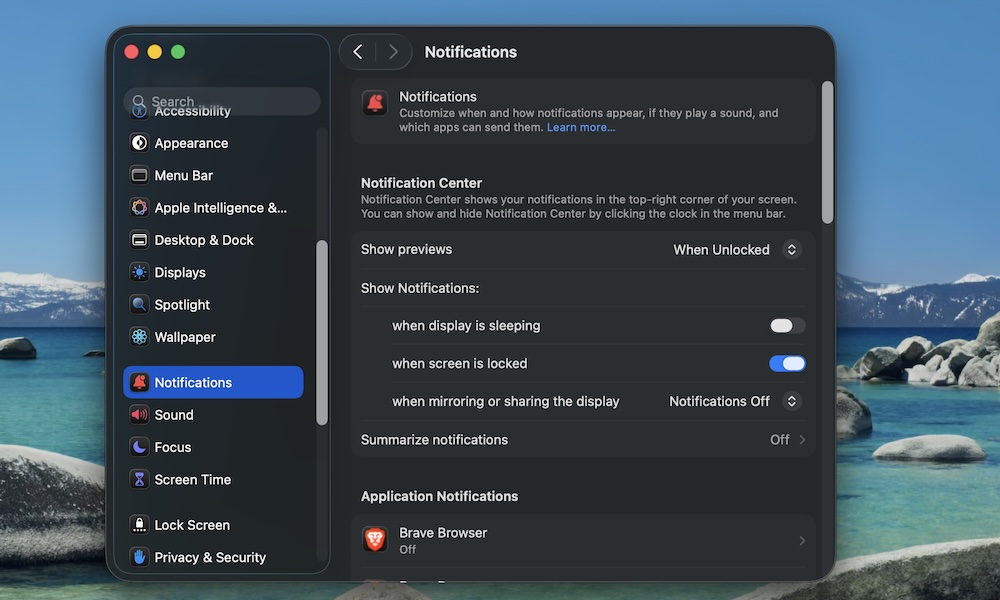
- Scroll down on the left sidebar and click on Notifications.
- Scroll down and under Application Notification, click on any app you want.
- From there, you can manage notifications from each app.
We recommend you turn off notifications for the least important apps on your Mac. Apps like Slack or Calendar are likely necessary, but most people don't need to receive notifications from Google Chrome or Game Center.
Additionally, you might want to disable notifications on your iPhone, as that will reduce the battery life of both your iPhone and your MacBook.
Turn Down the Display & Keyboard Brightness
Laptop displays are power-hungry, and MacBook panels — especially the brighter, HDR-capable ones — are no exception. If you tend to run your Mac at full brightness for purely aesthetic reasons, your battery will suffer the consequences.
Using max brightness indoors when you don’t actually need it is not necessary. Your eyes adjust to lower brightness, especially at home or in your office.
The same goes for your keyboard backlight, which not only doesn't need to be cranked up when you're watching a video, but can actually be a distraction.
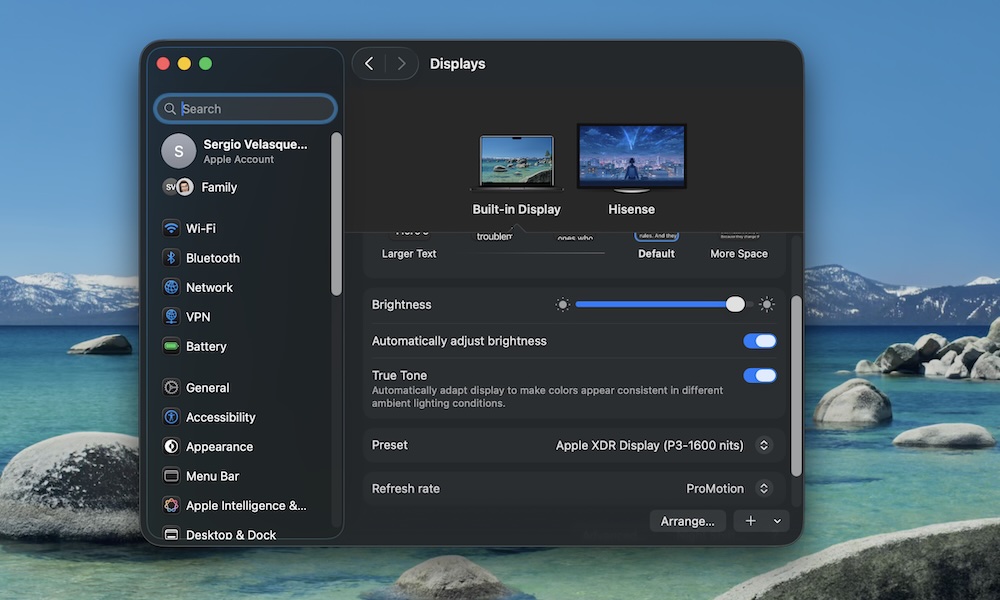
Reducing your brightness on your MacBook is pretty easy. For the display, simply press the F1 key to reduce the brightness one notch at a time until it reaches a comfortable level. If your keyboard has the icon, pressing F5 will do the same for the keyboard backlight. Alternatively, you can go to System Settings > Displays or Keyboard and drag the appropriate brightness sliders to the left.
Don't Keep Your Display On When You're Away
Many people never touch the default sleep settings, which means the screen can stay on far longer than necessary whenever you walk away for “just a minute.” That minute often turns into 10 or 20, and your battery pays the price.
The mistake is leaving the display set to sleep “after 15 minutes” or more on battery, especially if you’re constantly hopping between tasks around the house or office. Fortunately, it's an easy change:
- Click the Apple menu in the top left corner.
- Go to System Settings.
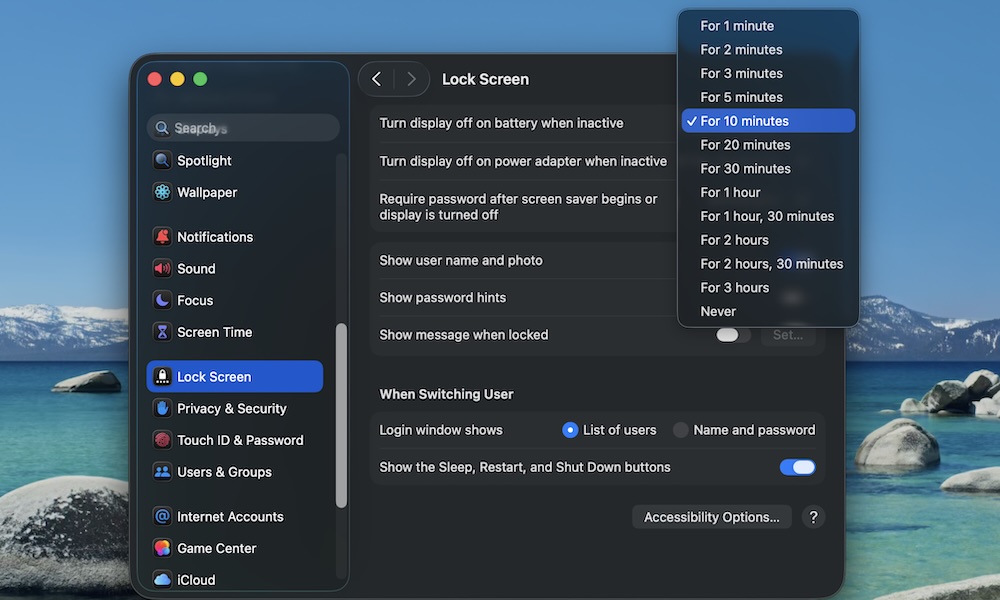
- Scroll down on the left sidebar and click on Lock Screen.
- Click the dropdown menu next to Turn display off on battery when inactive, and Turn display off on power adapter when inactive, and change the time to something shorter.
We recommend keeping this time between 2 and 5 minutes. Most of the time, it's not important to keep your Mac's screen active for more than that. Your battery will thank you.
Get Rid of (Most) Login Items

Some of the apps you install will ask whether they can start up as soon as you turn on your Mac. While that might seem useful, all of these apps will eat up your CPU and battery life, making your MacBook feel sluggish and reducing its run time.
To fix this issue, you can manage your Login Items by doing the following:
- Click the Apple menu in the top left corner.
- Go to System Settings.
- Click on General.
- Scroll down and click on Login Items & Extensions.
- Under Open at Login, click on any app you want to remove.
- Click the Minus button in the bottom left corner.
You don’t need to stop using this feature altogether, but trimming the list down to essentials can noticeably reduce the battery drain and the performance issues, especially on older MacBooks.
Turn Off Wireless Features You’re Not Actually Using
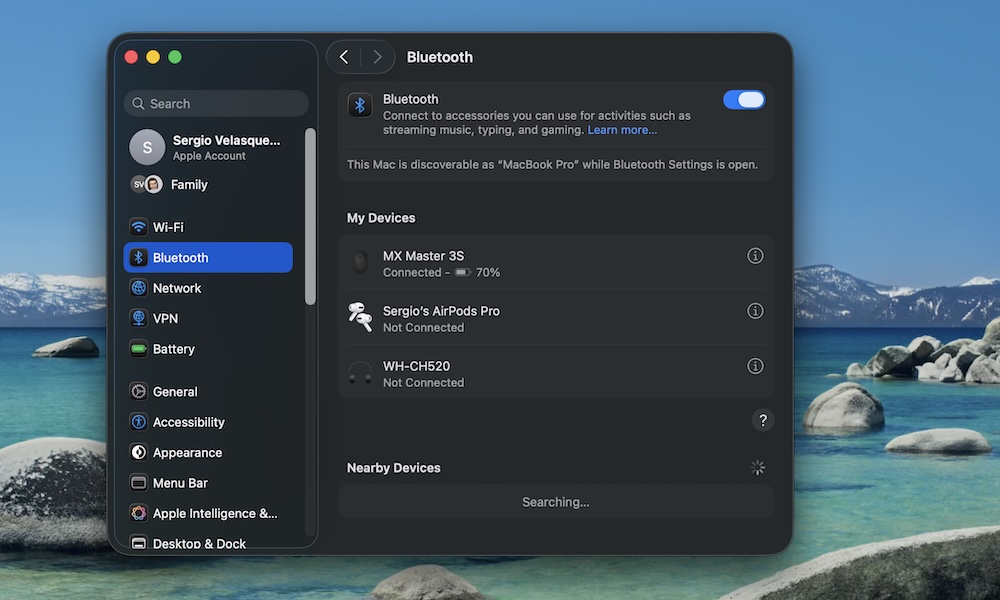
Wi-Fi, Bluetooth, AirDrop, and Personal Hotspot are all incredibly convenient. They’re also constantly trying to connect with the outside world, scanning for networks and devices.
The mistake is leaving everything on all the time out of habit, even when you’re offline or not using any wireless accessories, which will drain your battery. You may not notice it if your MacBook is new, but, over time, it will affect your overall experience.
When you’re trying to stretch your battery, click your Mac's Control Center in the top right corner of your screen. From there, you can turn off Wi-Fi, Bluetooth, and AirDrop.
Keep macOS and Your Apps Updated
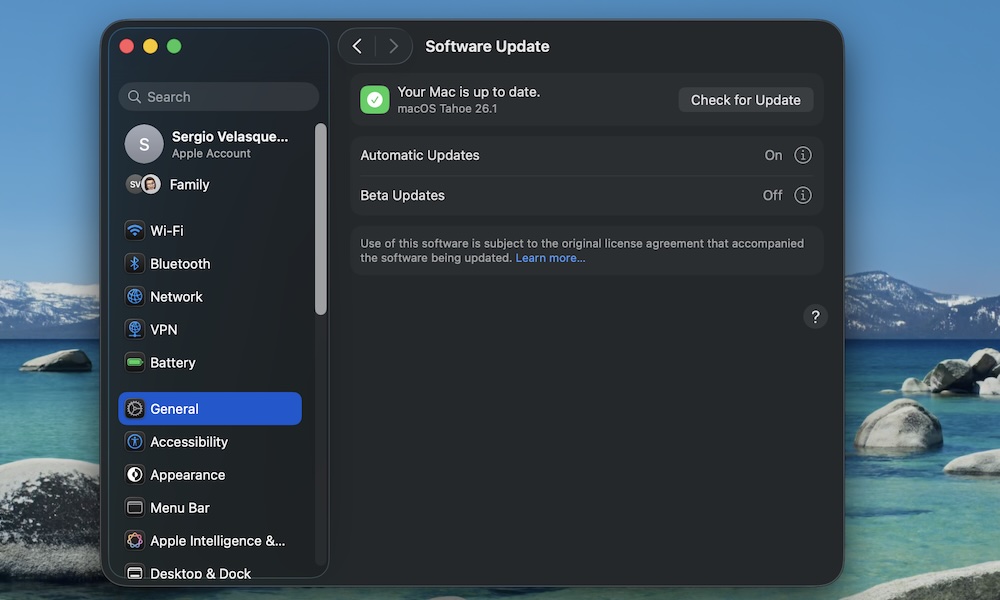
macOS updates aren’t just about new features and emojis. Apple regularly improves power management and performance, and fixes bugs that can affect both software and hardware. The same goes for third-party apps.
Most of us ignore updates as much as possible, but the truth is you might actually be wasting battery life when a fix is just a click away.
To update macOS on your Mac, simply go to System Settings > General > Software Update and install any available updates. You can also turn on Automatic Updates so your MacBook handles the dull stuff.
To update apps, go to the App Store, click Updates on the left sidebar, and update all the apps that you can.
Manage Your Storage Properly
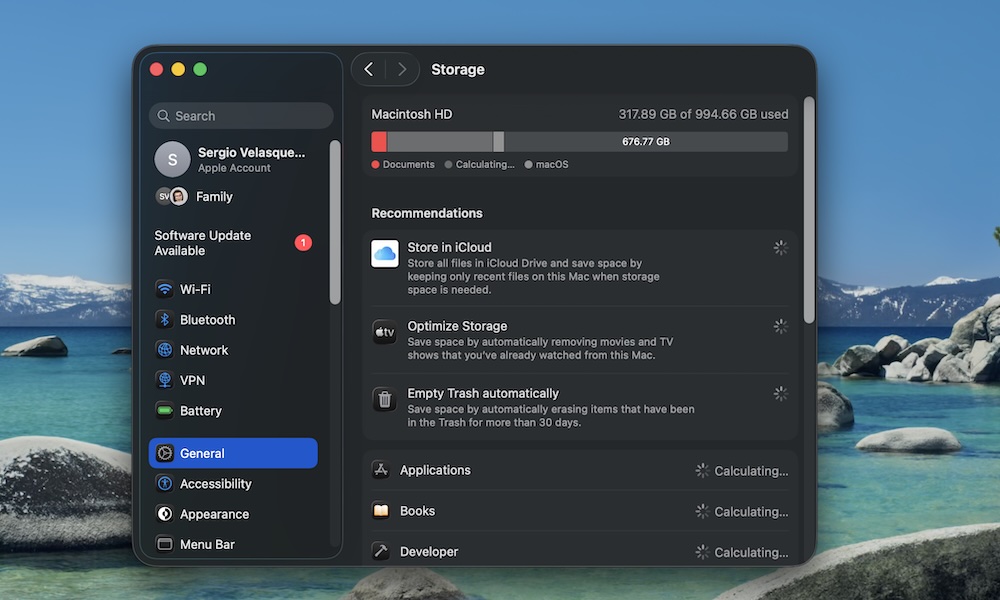
Solid-state drives don't like it when they’re almost completely full. macOS relies on free space to run background processes and maintain performance. When your drive is packed, everything slows down, and your Mac has to work harder, which doesn’t help battery life.
That's why it's important to manage your storage properly, keeping at least 10-20% of storage free. That gives your MacBook breathing room and helps everything from performance to power efficiency. Here's a quick way to see what's using up space on your MacBook and free some up:
- Click the Apple menu in the top left corner.
- Go to System Settings.
- Click on General.
- Go to Storage.
From there, you can delete files, apps, or books to free up some storage. You can also use the Recommendations you get from your Mac, which include emptying the trash and storing some of your files and images in the cloud.
Check Your Battery Health
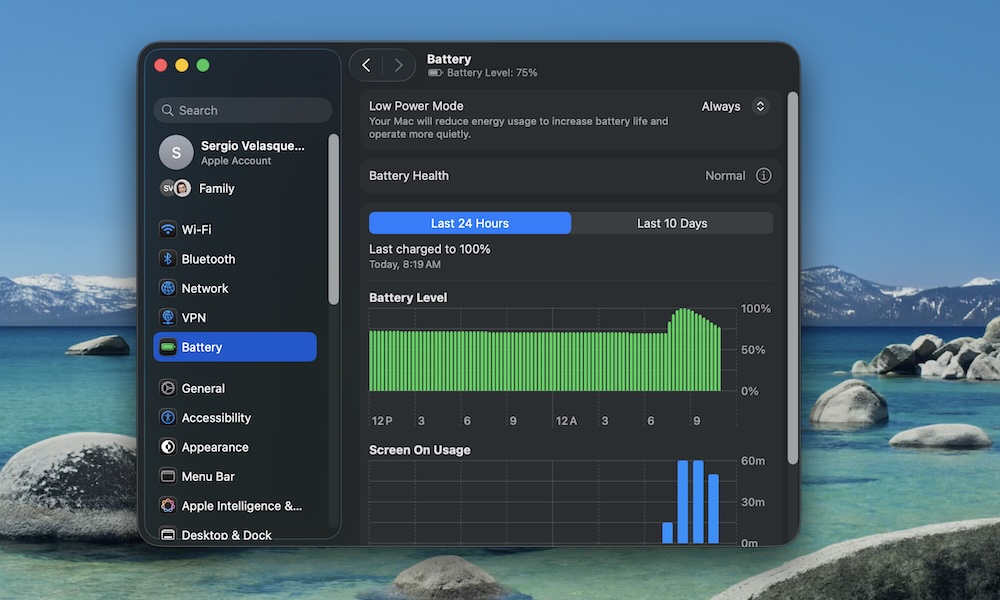
Sometimes, the problem isn’t your settings. It’s just age. All lithium-ion batteries wear down over time, and if your MacBook is a few years old, you might be dealing with a battery that simply can’t hold as much charge as it used to.
Before you do anything, make sure your MacBook still has enough capacity. You can do that by following these steps:
- Click the Apple menu in the top left corner.
- Go to System Settings.
- Click on Battery.
- Next to Battery Health, you'll see your Mac's current status.
- Click the i icon to the right of Battery Health to see your current Maximum Capacity.
If you’re below 80% and seeing 'Service recommended,' no amount of tweaking will restore the battery's original capacity. At that point, consider having the battery replaced by Apple or an authorized repair provider. You can still follow the other tips on the list, but keep in mind they will not fix the main issue.
Keep Your MacBook Cool and Give It Room to Breathe

Heat is the silent killer of batteries. Using your MacBook on a thick blanket, directly in the sun, or in a parked car on a hot day can push temperatures into ranges that accelerate the battery's wear and tear.
The same goes for charging your MacBook in a very hot room or in direct sunlight.
Whenever possible, use your Mac on a hard, flat surface for long or intensive tasks. Also, avoid leaving it in cars or near windows where direct sunlight can hit it for long periods.
If you like working from your bed or you use your MacBook for gaming, video editing, or programming, consider getting a laptop stand. It doesn't have to be anything fancy, but it does need to give your MacBook some breathing room.
On older Intel MacBooks, constantly loud fans can be a hint that dust has built up around vents. If airflow is blocked, both performance and battery health suffer. So consider cleaning your MacBook properly.
Unplug Power-Hungry Accessories When You're on the Go
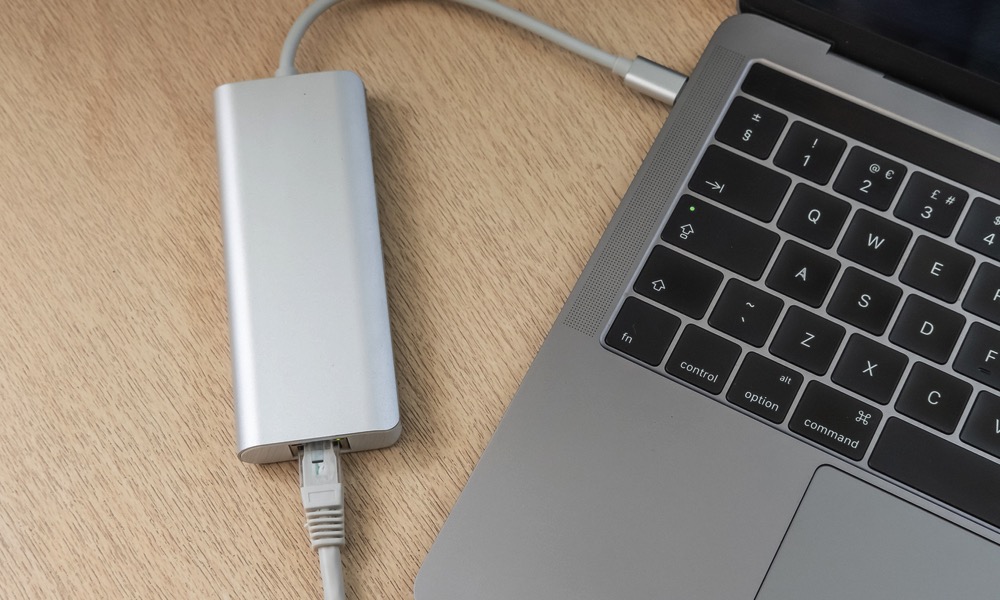
External hard drives, docks, capture cards, and high-refresh external displays all pull power from your MacBook. Even if they’re plugged into a wall, your Mac still has to work harder to drive extra pixels, move data, or power USB-connected gadgets.
So if you're on the go or your MacBook isn't connected, you might want to use these devices less. If you have to use them, do it, but if you aren't using your external drives or hubs, be sure to disconnect them. If battery life is a priority, rely on the built-in display rather than external monitors.
Also, be mindful of dongles with multiple devices connected, as each one adds more work to your MacBook.
Overall, you don’t need to baby your Mac, but trimming your mobile setup to only the essentials can give you extra juice when you're out and about.
Make Your MacBook Last Longer
Most of the things that quietly drain your MacBook's battery life don't have to be a mystery and are completely in your control. Combine smarter settings like Optimized Battery Charging and Low Power Mode with a few small habit changes, and you’ll get noticeably better battery life today while also keeping your hardware healthier for the long haul.