
How to Recover Lost or Deleted Data From Your Mac’s External Hard Drive

Toggle Dark Mode
If you’re like me, your Mac’s hard drive simply isn’t large enough for all of your files. So, I use a pair of external SSD drives to expand my storage. Unfortunately, with any hard drive, even SSDs, eventually losing data through a crash or accidental deletion is a matter of when not if. Luckily, it’s relatively easy to recover lost or deleted data on your Mac’s external hard drive(s).
At a Glance
While Time Machine is an excellent way to backup and restore files stored on your Mac’s internal hard drive, it does not by default backup and restore files that are stored on external hard drives. While you can tell Time Machine to back up your external drives, what happens if you didn’t change the settings? Or, what happens if your Time Machine drive itself develops issues?
In this article, I’m going to show you how you can use a piece of easy-to-use software to dig down into external drives, even if they’re encrypted, to restore missing files and directories. In this “how-to,” I am going to use an excellent piece of software called Stellar Data Recovery for Mac.
Stellar Data Recovery scans your Mac’s drives for deleted or otherwise removed files, then recovers those files, writing them to the directory of your choice. Stellar does a top-notch job of recovering lost files, and it works with internal and external drives and even USB sticks.
How to Recover Lost or Deleted Data From Your Mac’s External Hard Drive
Just a few years ago, data recovery apps were a confusing jumble of complicated commands and menus. Happily, things have changed over the years, and data recovery apps are quite easy to use, this is especially true for Stellar’s Mac data recovery.
Once you’ve purchased and downloaded the Mac installation file, double-click the file and when the installation window opens, simply drag the Stellar icon over to the Applications folder and wait a few months for the app to install.
Now, let’s recover some files from our external drive.
When you open the app, you’ll be presented with a straightforward menu screen that includes several toggle switches, which control the type of files you’ll be recovering.
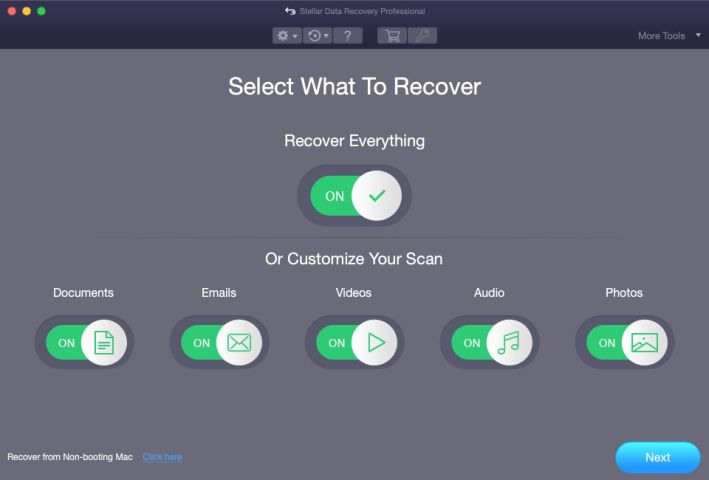
Your choices are:
- Documents
- Emails
- Videos
- Audio
- Photos
- Recover Everything
As you might expect, the first five toggle switches allow us to specify the type of files we’ll be recovering. We can set the switches in any combination, allowing us to recover exactly what type of files we want. They can be set in any combination. Clicking the “Recover Everything” switch toggle on or off the search for all five file type switches with a single click.
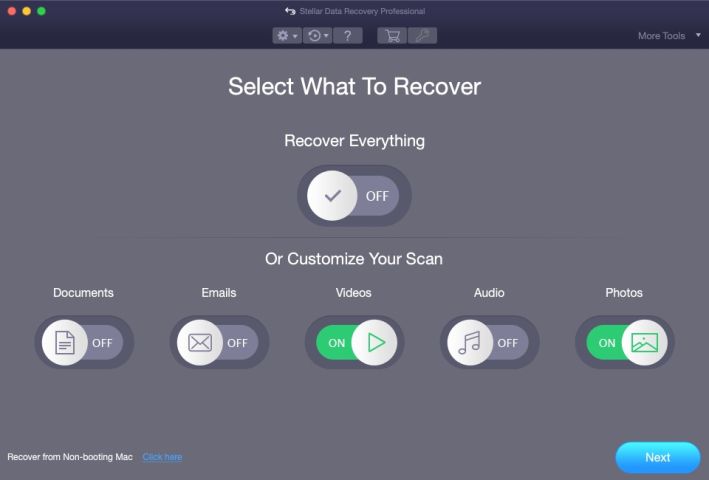
In this case, we’ll be recovering some videos and photos we accidentally deleted. So, we’ll set the Photos and Videos switches to the “On” position.
Now, we’ll click the “Next” button, which takes us to a screen where you are prompted to select the drive you wish to recover the files from. (Stellar Data Recovery has the ability to recover files from encrypted drives. However, you will need to provide the drive’s encryption password.)
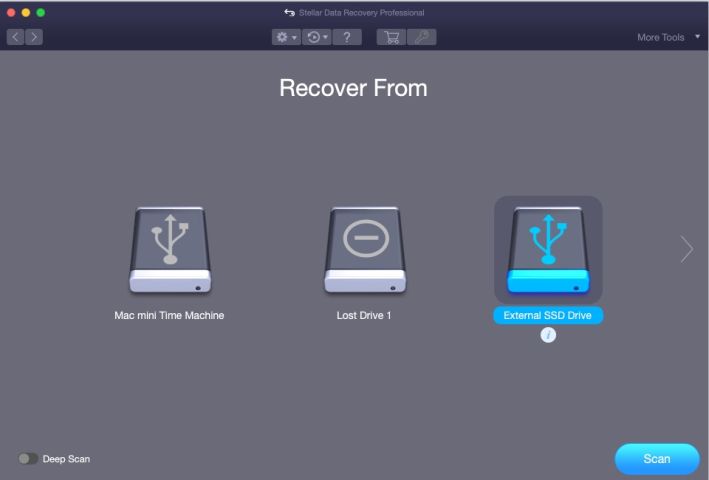
On this screen, the app shows all of your Mac’s currently connected drives. This includes your Mac’s internal hard drive, as well as any external drives you’ve connected. (USB sticks will also show up if you have one plugged into a USB port.) Here, we click on the drive that we want to scan and restore files from. As seen in the above screenshot, I’ve selected my External SSD Drive. (I know, I don’t show any originality when naming my drives.) I then click the “Scan” button to begin scanning the external drive.
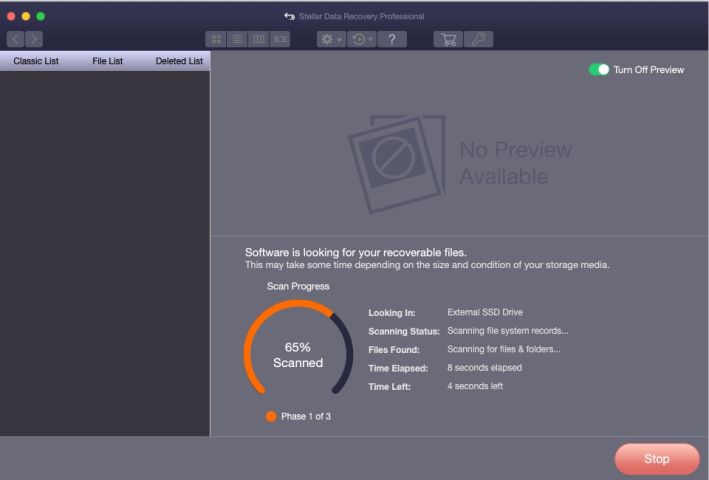
The Scanning screen then appears, displaying a progress indicator showing how much of the drive has been scanned. The app offers a preview function while it scans the drive, showing a thumbnail of each file as it is being scanned. The preview function can be turned off if you wish.
Once the drive has been scanned (which took under a minute for my 2TB external SSD drive), you’ll see a prompt appear, informing you of how many recoverable files were found, how many folders, and the total size of the recoverable data.
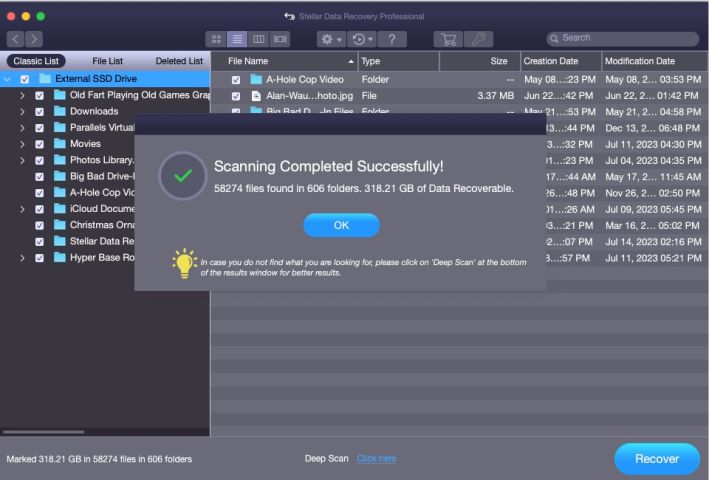
Keep in mind that your results will be different, depending on the size and type of drive you’re scanning. (My 2TB SSD drive takes longer to scan than my Mac’s 256GB internal drive and mechanical hard drives will take longer to scan than an SSD drive.)
Once we click the “OK” button, the app displays a list of the files and folders in the left-hand pane of the application window. By clicking “File List” at the top of the list, we’ll see a list of files mirroring my external drive’s folder structure.
Here, we can navigate the directory tree to browse for the data we want to recover.
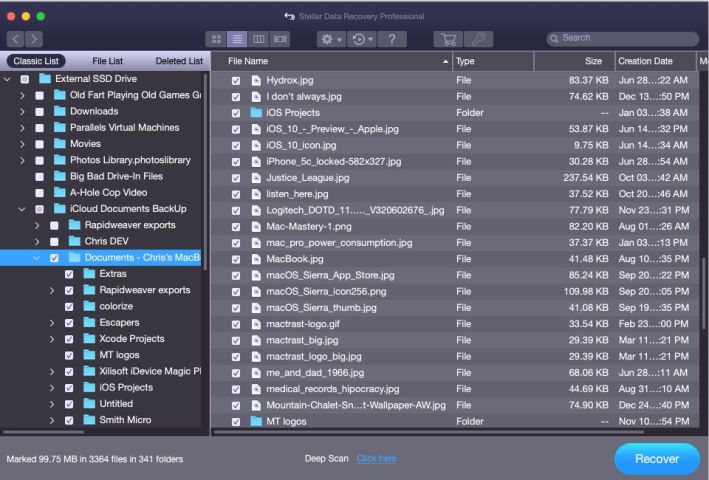
Once we have selected the files and folders we want to recover (in this case, I selected my Documents Backup folder) we press the “Recover” button, then select where we would like the data to be restored to and click “Save.”

The recovery process then begins.
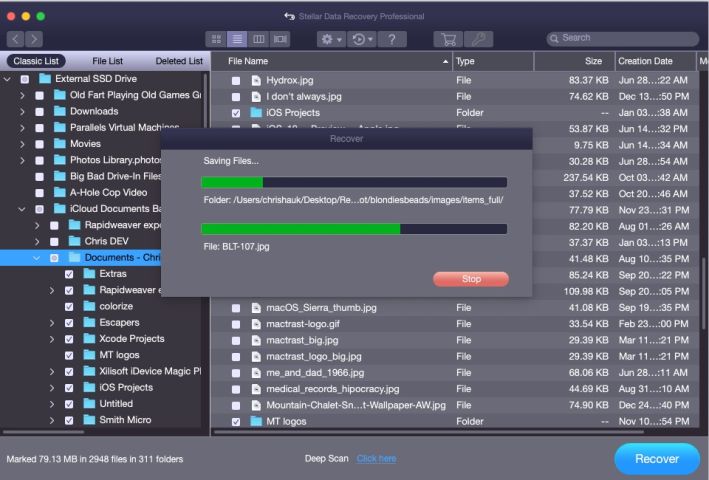
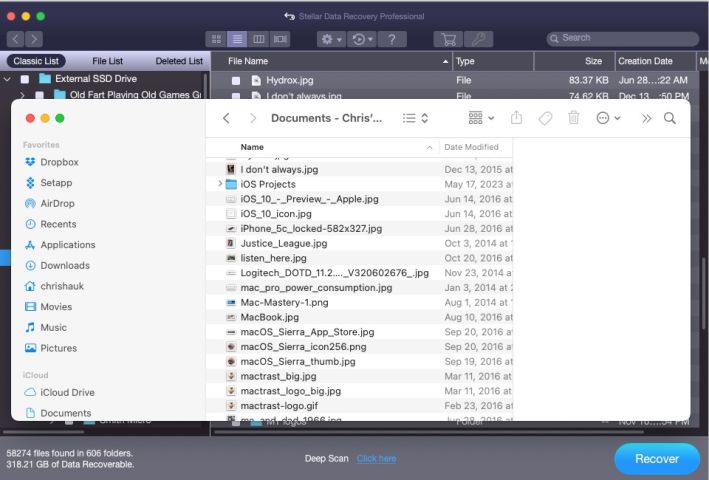
Once the recovery process is complete, you can open the destination folder to view the recovered files.
That’s it, that’s all it takes.
It should be noted that this particular data recovery app also includes a deep scan feature that can recover files that the normal scan may not find. However, when I used deep scan on my 2TB SSD drive, the scanning process stretched into the next day, and did not find any additional data of consequence, other than a few fragments here and there. Still, it’s nice to have that option if we need it.
While many Mac users (hopefully all Mac users) use Time Machine to back up their internal hard drive, many users may not know they can also back up their external drives with the Mac’s built-in backup feature. Mac data recovery software like Stellar Data Recovery allows users to restore lost files when they don’t have a backup. (Stellar can also recover Time Machine data, so we’re covered all around.)
In Closing
While I hope everyone that reads this has a recent backup of all of their drives, many of us do not take the time to make backups. Luckily, data recovery software, like Stellar Data Recovery, is available in our time of need.
Stellar Data Recovery, and other utilities like it, allow users to recover valuable files, documents, videos, photos, and other important information that have been inadvertently deleted from their Mac’s hard drive.
While I urge everyone to back up their Mac’s hard drives on a regular basis, I also urge them to have a utility like Stellar Data Recovery close at hand, ready for when they need to recover deleted data.
Stellar Data Recovery offers drag-and-drop installation, and the ability to restore data from internal and external hard drives (including Time Machine drives). The app quickly scans hard drives for deleted material, allowing users to scan for designated types of files, then displaying deleted files via a familiar Mac directory tree. With just a few clicks to select the files to be restored, Stellar’s app quickly restores the files with the click of a button.
Stellar Data Recovery is available from the company’s website, and a free trial download of the app is available, although its file recovery abilities are limited to restoring 1GB or less of data.


