
9 Camera Tricks to Improve Your iPhone Photos and Videos
 Apple
Apple
Toggle Dark Mode
If there’s anything Apple’s always trying to improve on the iPhone, it’s the cameras. The iPhone’s camera might not have the most pixels, but that doesn’t mean it isn’t one of the best ones in the market.
Apple does an excellent job combining both software and hardware to make the pictures the iPhone takes as crisp and clear as possible. And the best part is that the cameras also have many features and settings you can change to make it easier to use and take better pictures too.
Whether you’re a pro or you take pictures as a hobby, read on to discover 9 Camera Tricks to Improve Your iPhone Photos and Videos.
Quickly Change Your Video’s Resolution
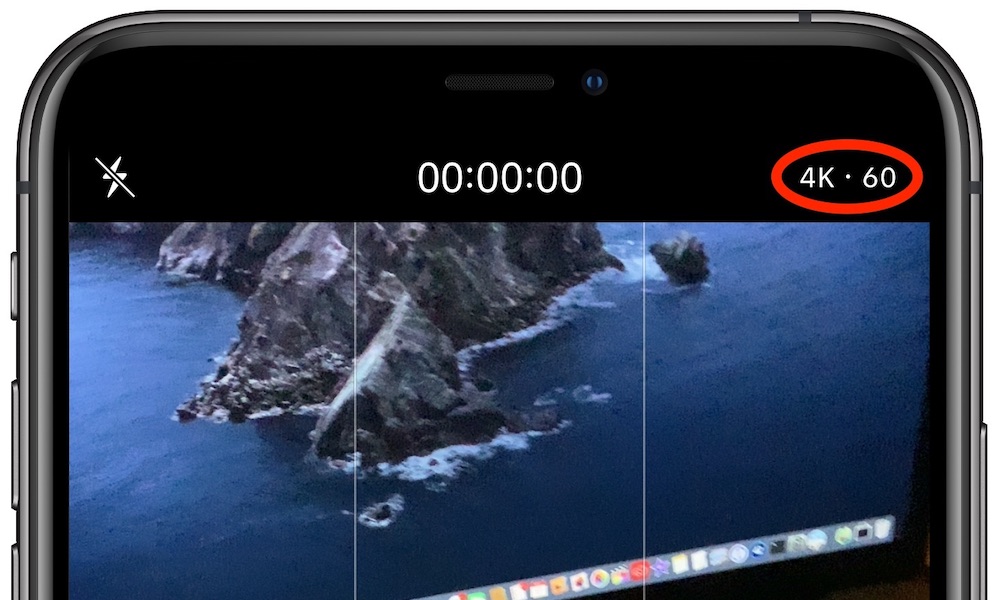
If you want to take the best resolution possible in your videos, you can change it right from the Camera app without missing the moment.
All you need to do is switch to video on the Camera app and then tap on the top right side of your screen. You can tap the HD to change the resolution to 4k and then switch between 25, 30, and 60 frames per second for a smoother recording.
Enable Grid to Take Better Pictures
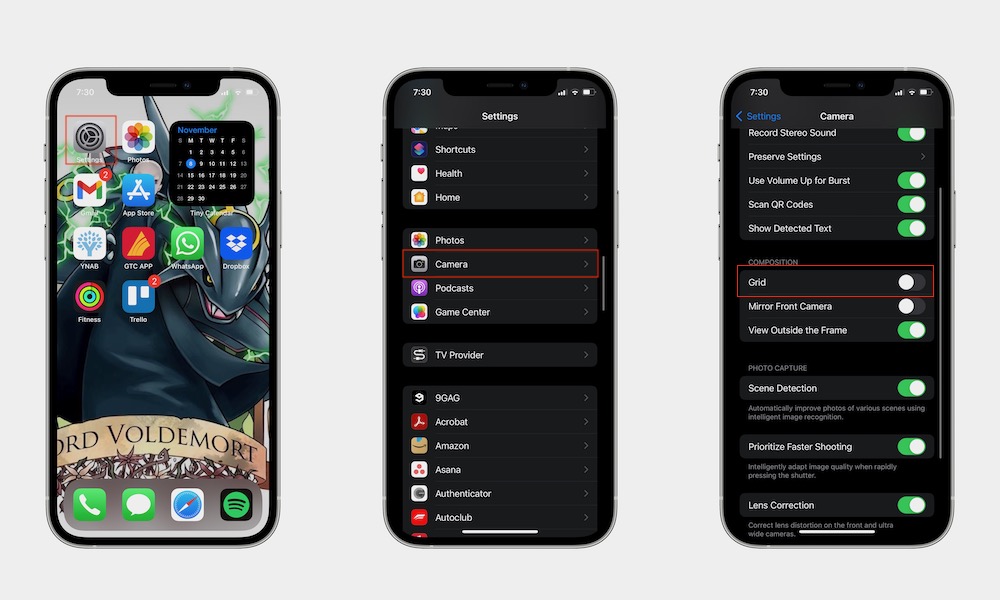
Your iPhone comes with grid lines that you can use on your camera to help you line up your pictures perfectly. This is also helpful for more experienced photographers that use the rule of thirds, which explains that the main subjects on a photo should be placed at the intersections of the gridlines.
It’s a really cool concept, and it’s even cooler that you can do this from your iPhone.
- Go to the Settings app.
- Scroll down and tap on Camera.
- Toggle Grid on.
Record a Video While Taking Pictures
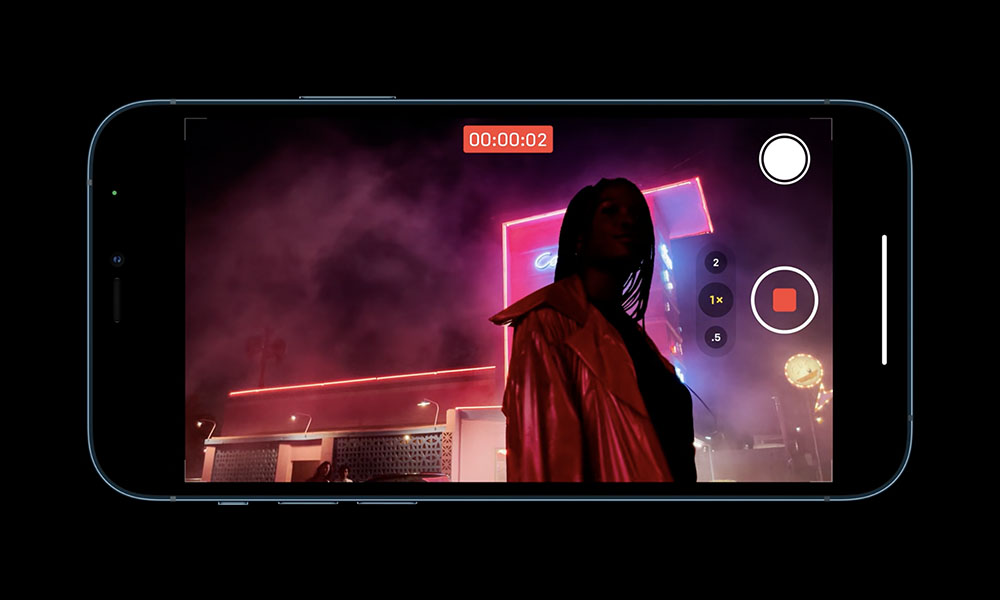
If you want to take a subject’s movements while taking pictures, you can quickly start recording a video from photo mode, so you don’t miss anything.
All you need to do is long-press the shutter button on camera mode, and your iPhone will start recording. You can record as long as you have your finger on the shutter button.
Use Burst to Take Multiple Photos
Burst is a cool feature from the Camera app that basically lets you take a bunch of pictures at once by long-pressing the shutter and then swiping to the left while on camera mode.
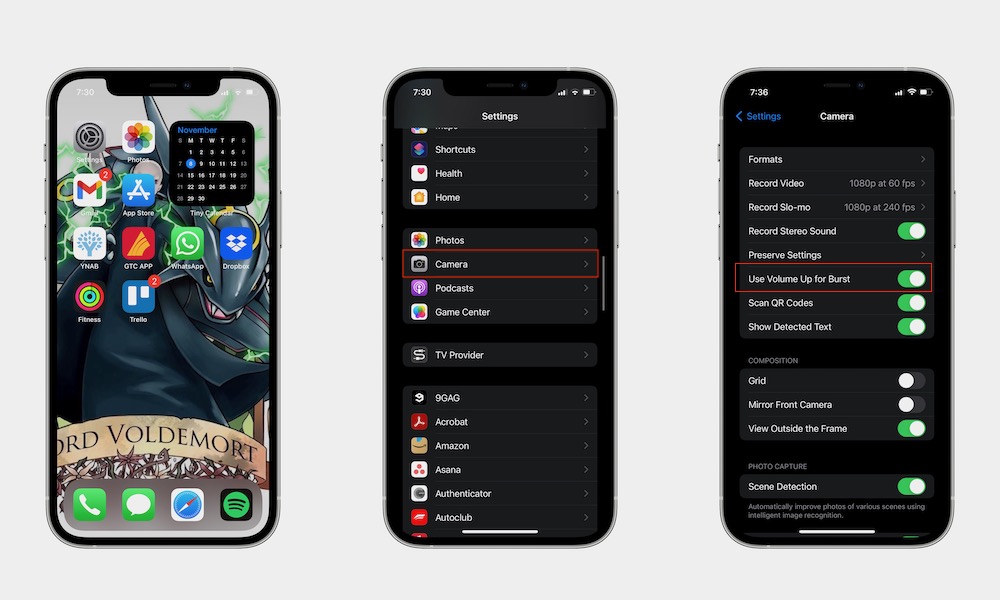
However, if you don’t do it right, you’ll end up recording a video instead. That’s why you can also use the volume up key on your iPhone to use Burst. But first, you need to enable it.
- Go to Settings.
- Scroll down and select Camera.
- Toggle Use Volume Up for Burst on.
Now all you need to do is open the Camera app and long-press the volume up button. Then you’ll start taking photos in burst mode.
Use Your Apple Watch to Take Pictures
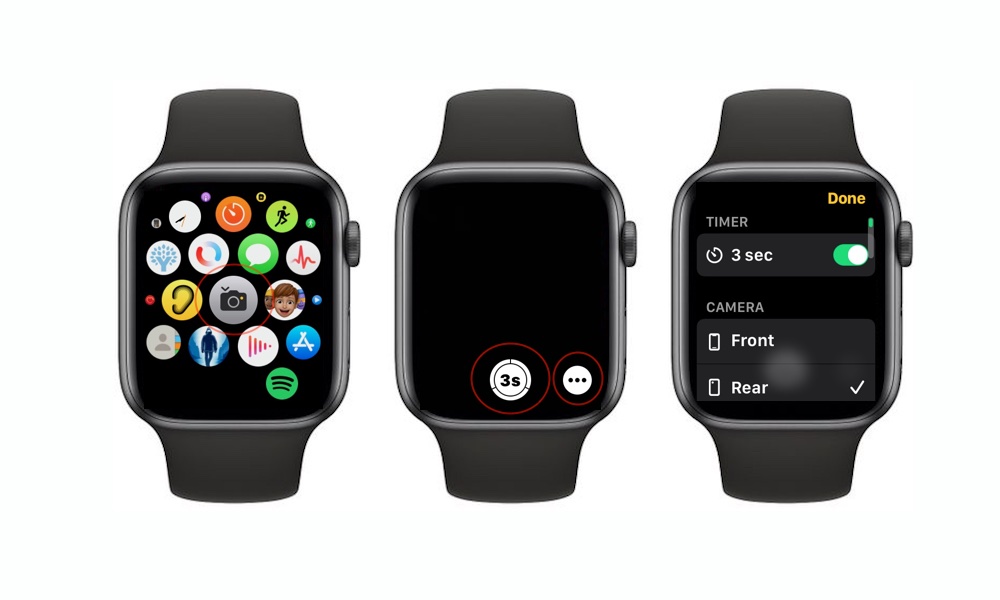
If you want to take the perfect selfie, all you need to do is place your iPhone anywhere you want and use your Apple Watch to control the shots. Just follow these steps:
- On your Apple Watch, press the Digital Crown.
- Go to the Camera app.
- Tap the button on the bottom of your Apple Watch to take a picture.
You can also do things like zoom in and out, switch to the front-facing camera, turn on the iPhone’s flash, and many more things. All you need to do is tap the options button next to the bottom right corner of your Apple Watch.
Master Cinematic Mode (iPhone 13)
If you have the iPhone 13, then you have access to a new set of camera features, including Cinematic mode. But what is that, exactly?
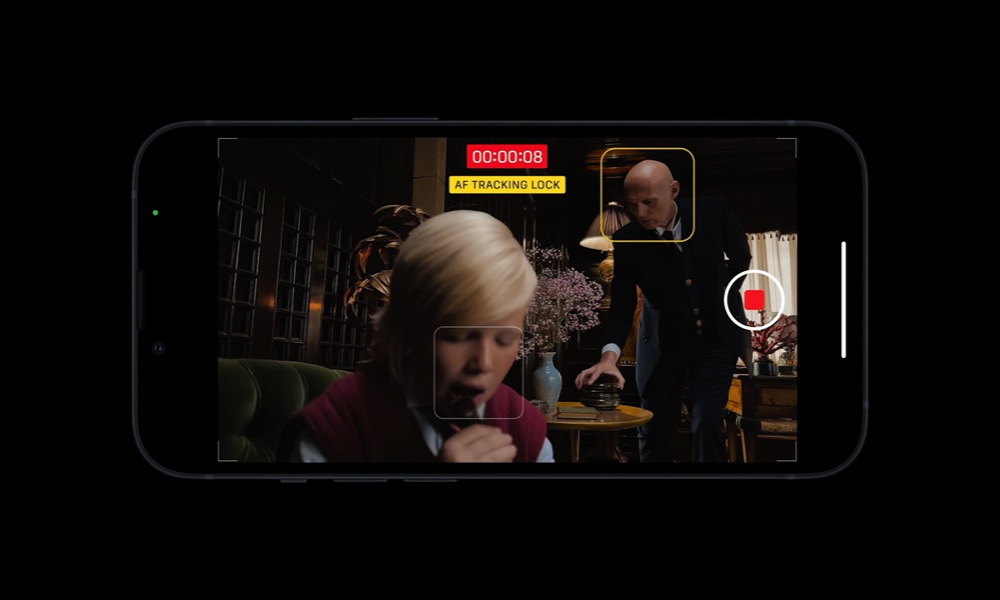
Cinematic Mode is a new feature that basically turns your iPhone into a professional camera used for movies. With Cinematic Mode, you can use dynamic focus to add depth of field to your videos, and you can even use it to get rid of objects that you don’t want on your shot.
All you need to do is open the Camera app and swipe to Cinematic Mode to enable this feature. You can change the settings by using your iPhone in landscape mode and tapping the arrow to the left to see all available options.
There are many more things you can do with Cinematic Mode; you can play around with it until you get the settings you want.
Use Photographic Styles (iPhone 13)
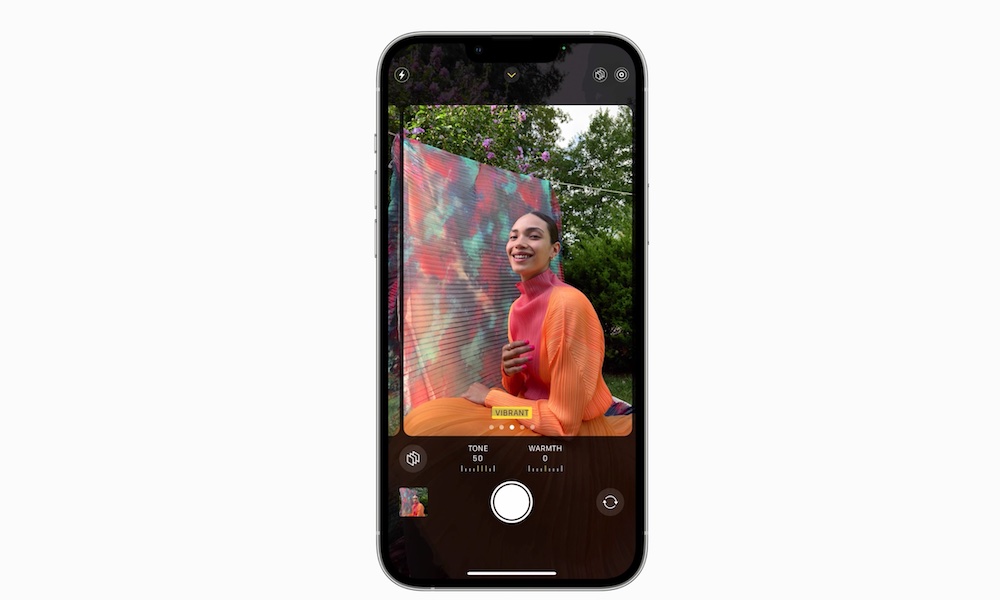
The iPhone 13 lineup also comes with a feature called Photographic Styles. At its core, this feature is pretty similar to using filters on your pictures. However, you’ll need to change the style you want to use before you take the picture. Moreover, after you take the picture, you can’t change to a different style.
As of right now, there are five different styles you can use, including Vibrant, Rich Contrast, Warm, Cool, and Standard. If you want to start using them, follow these steps:
- Open the Camera app.
- Tap on the three-square icon on the top right corner of your screen to enable Photographic Styles.
- You can swipe your finger above the shutter button to switch between the different styles available.
By default, your iPhone 13 will ask you which style you want to use when you first open the Camera app. If you didn’t do it at that moment, you’d need to go to Settings > Camera > Photographic Styles.
Prioritize Faster Shooting on your iPhone
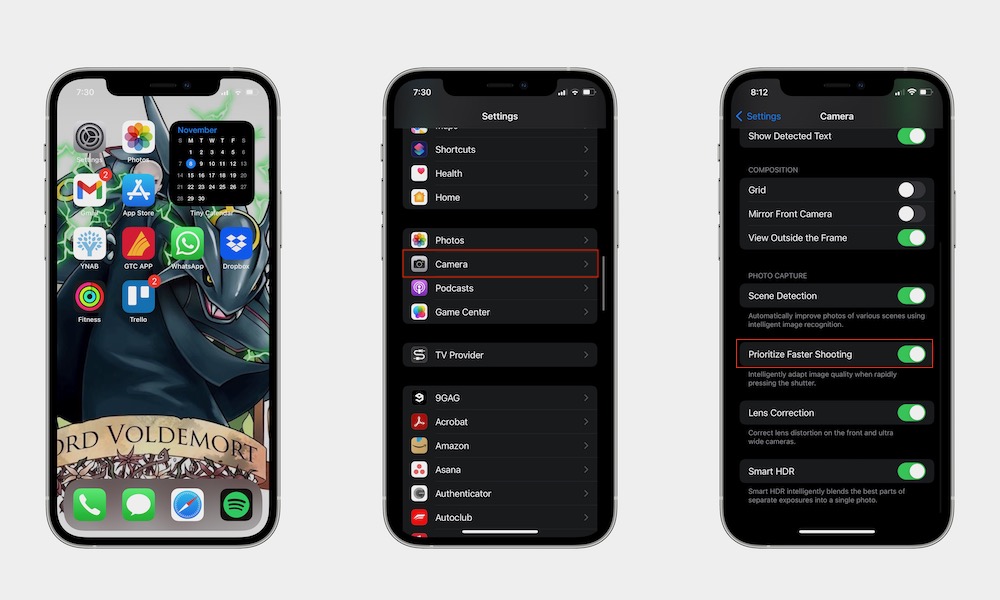
Faster Shooting is a feature available on every modern iPhone. As the name implies, this feature helps you prioritize faster shooting to take more photos. To enable it, follow these steps:
- Go to Settings.
- Scroll down and select Camera.
- Scroll down and toggle Faster Shooting on.
This will change how your iPhone processes the images, so you can always go back to normal if you feel like this change affected your pictures.
Use Scene Detection
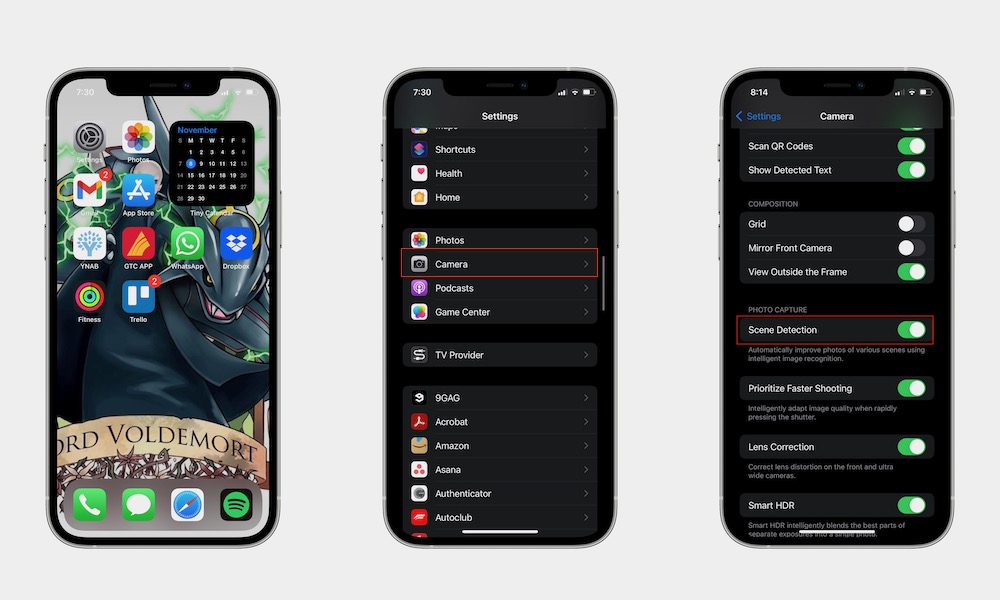
Scene Detection helps your iPhone recognize the subject on your photo and automatically improve the picture by using image recognition. This is great for casual pictures, but it can take away the essence of what you wanted your photo to be, so make sure to use it at times you think it would work best.
- Open Settings.
- Go to Camera.
- Scroll down and select Scene Detection.


