
4 Important Steps to Take When Your iPhone Storage Becomes Full
 Wachiwit / Shutterstock
Toggle Dark Mode
iPhone storage problems have a habit of sneaking up on you. One day you’ll see messages that say “Storage Almost Full” or “iPhone Storage Full.” If you continue with your storage drive this full, your iPhone may start crashing or showing error messages.
For those of us active on our phones and with lots of media stored, this is seriously annoying. Fortunately, four basic steps are all you need to give your iPhone more space and help prevent storage problems in the future.
Run Through Your Apps and Remove the Old Ones
This is an easy first step! Unlock your iPhone and go through your app pages. Pay close attention to each app, and think about how often you use it, or if you’ve ever used it at all.
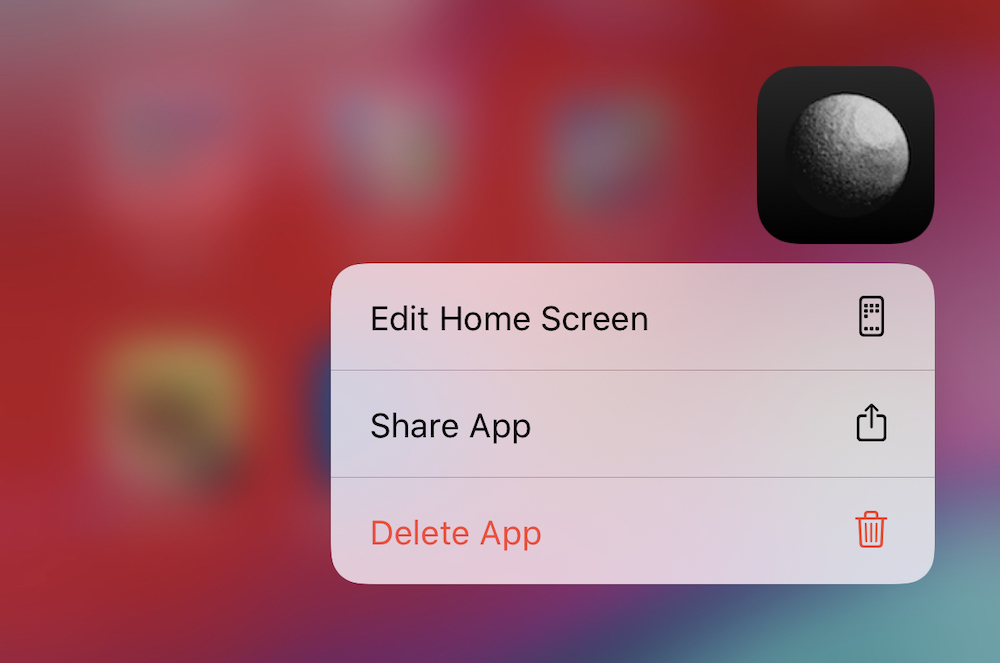
If your app library is a bit cluttered, you can release a lot of storage space by deleting these apps. Simply give the app a long press, and a menu will pop up with an option to delete the app at the bottom. Keep in mind you can also delete many of the apps pre-installed on your iPhone, like GarageBand, if you never plan on using them.
Now, head over to Settings, go to General and select iPhone Storage. Here you will see an option that says Offload Unused Apps. This will automatically delete apps you don’t use much when you are low on storage while preserving important data. Make sure that this is enabled for the future.
Cycle Through Your Photos and Video
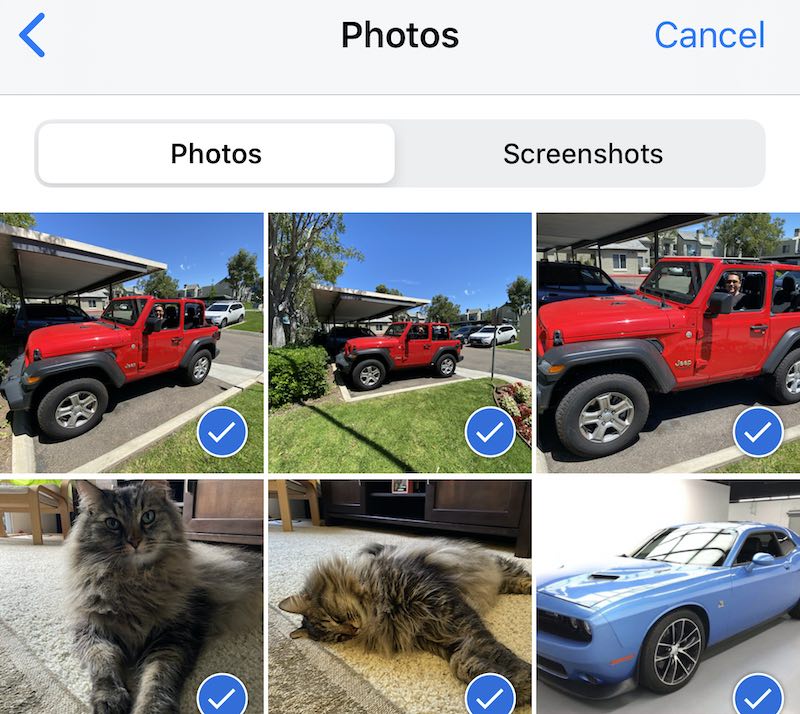
Now you will want to focus on the Photos and Clips apps in particular. You may have built up a large catalog of photos over time that are all taking up storage space. Go back to the very beginning, and delete the photos you no longer want. It’s actually not hard to delete photos or video, you just give them a long press while in grid view, and select Delete. You can also use the Select button to select a lot of photos at once and trash them all at the same time. While it may be a bit time-consuming the first time, it’s an important step to opening up more space. Which leads us to our next step…
Enable iCloud Photos
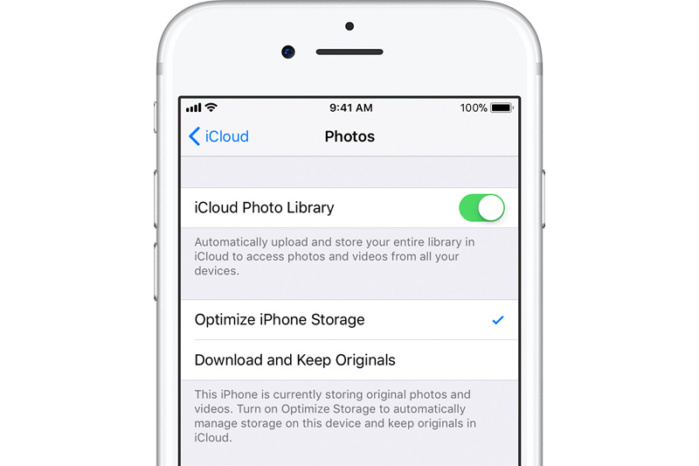
iCloud Photos will automatically upload photos into iCloud, where they are still easy to access but won’t take up storage directly on your iPhone. If you haven’t already turned this on, now is the time! Start by going to Settings, selecting your name at the top, and going to iCloud (log in again if necessary). Now go to Photos, and make sure that iCloud Photos is enabled.
Then look for the feature that says Optimize iPhone Storage, and make sure it’s selected so that iCloud knows you are using it to try and save on space. Likewise, make sure the Download and Keep Originals is not selected.
Clear iCloud Space and Add More Storage If Necessary
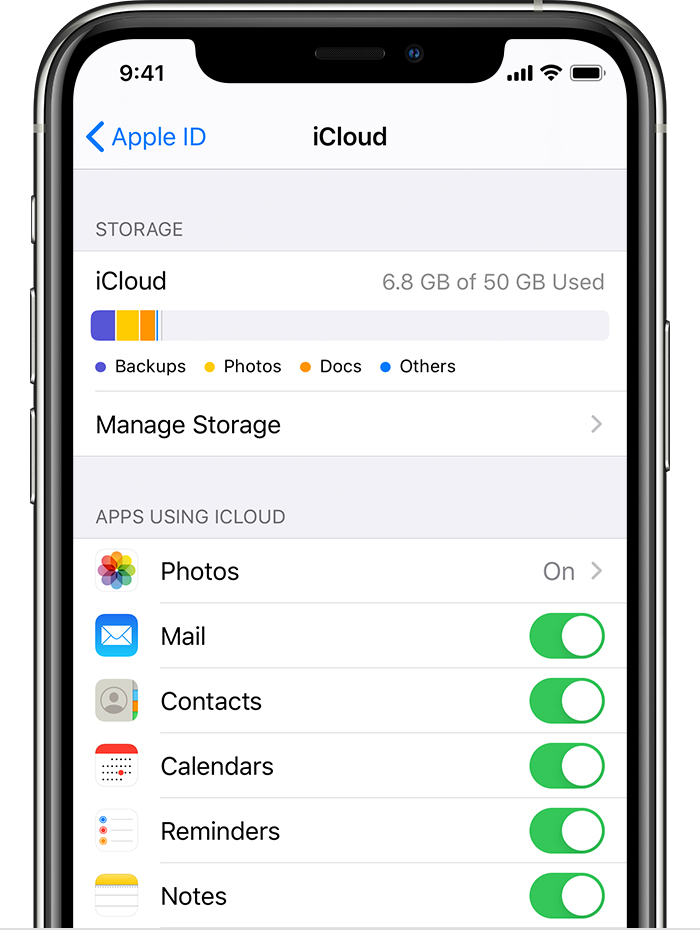
The one problem with using iCloud storage is that you only get 5GB for free. In the iCloud section, you can clearly see from the bar at the top how full it currently is. The easiest way to clear room is to select Manage Storage in the iCloud section. Here you can view and delete Backups, Photos, Health info, and other things kept in iCloud to ensure there’s always enough room.
If you store a lot of media with your iPhone, think about buying more iCloud storage. You can get 50GB for $1 per month, which isn’t a bad deal if your iPhone is perennially overcrowded. Or, you can save money by using a third-party cloud storage solution like ThunderDrive.
This is also a good time to look into small external storage devices that are specifically made for your iPhone.


