
Update Your Mac! 9 Best New Features in macOS Big Sur
 Apple
Apple
After what seemed to be an eternity, Apple finally released macOS Big Sur to the public. And if you've already downloaded Big Sur, you've probably noticed a bunch of changes right from the start. From the looks of the user interface to new widgets and a Control Center, there's a lot of things to discover.
The biggest change in Big Sur is its design, which mimics the iPhone and iPad's interface. These similarities make it easier for most iPhone users to quickly understand how to use a Mac. Combine that with the new M1 MacBooks and you can see the direction the company is taking. That being said, you still need to know how to use Big Sur, because it's not exactly the same as your iPhone.
There are many new changes that are hidden, as well as some more obvious ones, that you probably haven't tried yet. Continue reading to browse nine exciting new features and changes in macOS Big Sur.
New Widgets and Notification Center
Widgets are a popular trend across all Apple devices this year. First, iOS 14 introduced widgets to the iPhone's Home screen, which was a big deal for everyone who asked for this feature. The Mac also got a new set of widgets this year thanks to Big Sur, although they're more similar to the iPad's widgets than the iPhone's.
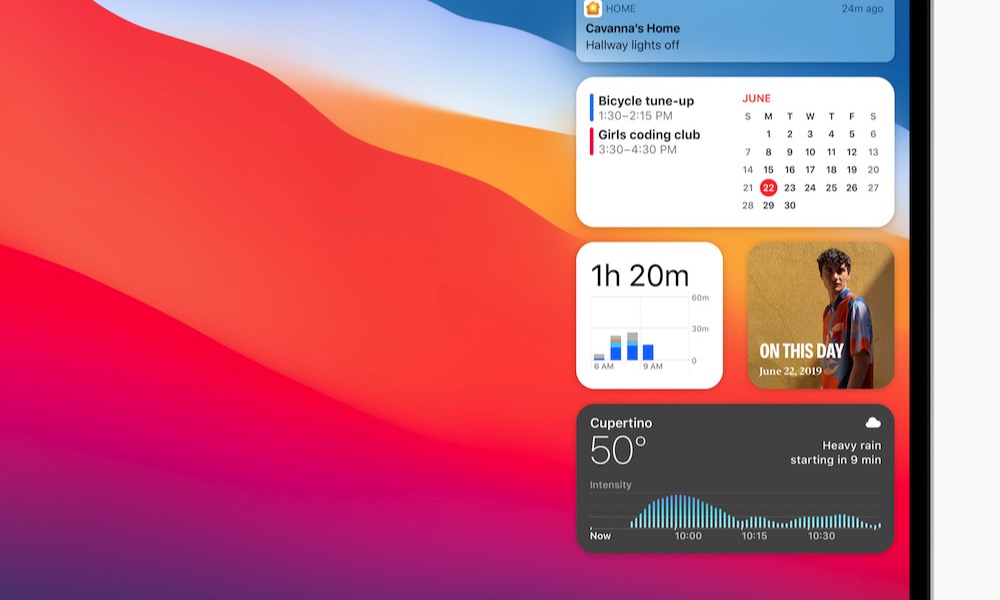
If you go to your Notification Center, that is, if you click the clock on the top right corner of your screen, you'll see a list of your notifications followed by a list of your widgets.
First, you'll notice that the Notification Center got a new design as well. Now your notifications will be grouped, just like what you see on your iPhone. You'll also be able to make some quick actions to your notifications right from the Notification Center.
Just below that, you'll see a list of widgets available. By default, you should see a bunch of widgets that you didn't add, but if you scroll down and click on Edit Widgets, you'll see all the widgets you have available on your MacBook.
Customizing the order of widgets is as simple as clicking and dragging them to where you want them. You can also add new widgets and choose from three different sizes.
As of right now, we mostly have first-party widgets, but as other developers start to work on Big Sur, we should see more third-party widgets available on the App Store.
Optimized Battery Charging
The battery is arguably the most important part of any MacBook. Sadly, all batteries age and they won't hold as much power as they used to.
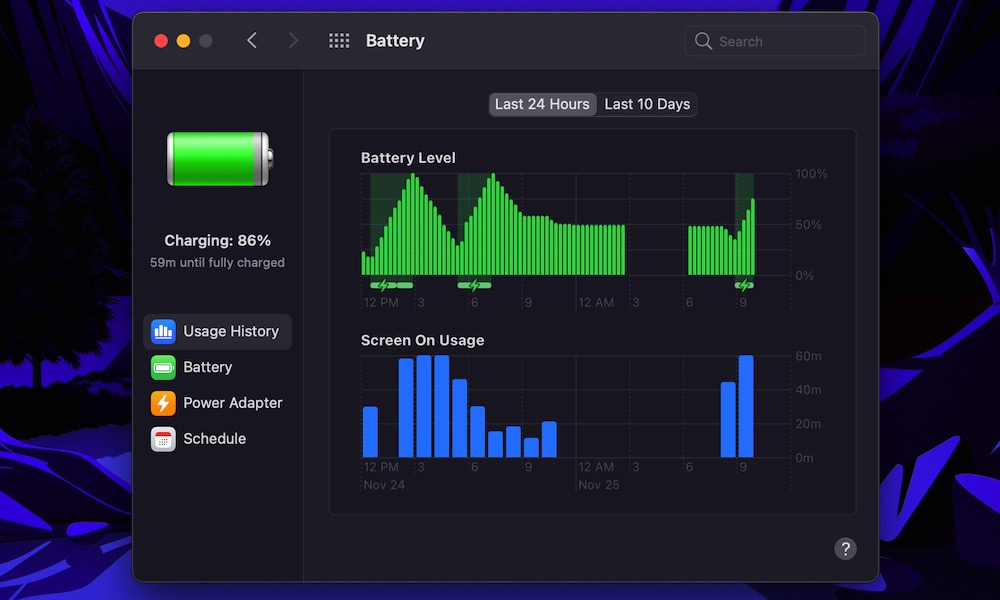
Fortunately, Big Sur brings a new feature that helps your battery last longer. This new feature is called Optimized Battery Charging, and it's meant to help reduce the wear on your battery.
When Optimized Battery Charging is on, it'll start learning your daily charging routines. That way, when your MacBook predicts it's going to be plugged in for a very long period of time, it'll turn Optimized Battery Charging on so it can wait to finish charging past the 80% mark until you need to start using your battery.
This is a great feature if you're always working or you have to plug your MacBook in constantly. The best part is that it's really easy to use. By default, Optimized Battery Charging should be on, but if you want to turn it on for yourself or turn it off, do this:
- On the top menu bar, click on the Apple Logo.
- Click on System Preferences.
- Click on Battery.
- Click on Battery on the sidebar.
- Make sure Optimized Battery Charging is checked.
New Design

The first change you'll see in macOS Big Sur is its brand new design. Everything from the icons to the windows and the apps themselves have changed to give macOS a simpler and cleaner look.
Everything looks new and yet, still looks familiar. Apple used a similar design to what we've seen in iOS and iPadOS, while still giving Big Sur its own aesthetic changes.
The top menu bar is also different. Now it's more transparent and you can customize the controls from the Control Center (more on this later). And at the bottom, you'll see a slight change to the Dock as well.
Now, instead of going all the way to the bottom, the Dock was lifted to "float" at the bottom. It's also more translucent and lets you see your apps and your wallpaper more clearly.
The sounds in Big Sur have also changed. Apple added new sounds that are more pleasing to your ears. All that while still using snippets from older sounds so that you'll recognize them easily.
AirPods Automatic Switching
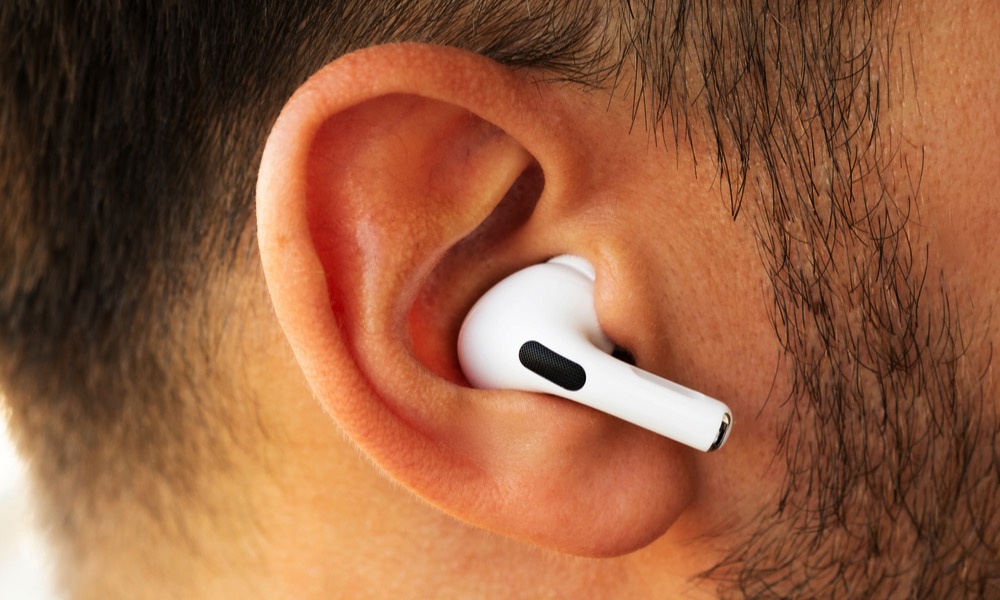
For the first time on Mac, you'll be able to automatically switch your AirPods between your Apple devices. That way, if you're listening to music on your iPad, but start watching a video on your Mac, you can make it so your AirPods will automatically switch and connect to your computer so you can hear your Mac when you need to.
Keep in mind, though, all of your devices must be paired to the same iCloud account for the automatic device switching feature to work.
Also, keep in mind this will work on all AirPods and Beats Headphones that have the Apple H1 Chip. This is a fairly new chip that you'll only find in the second-generation AirPods, the AirPods Pro, and other Beats headphones such as the Powerbeats Pro and the Powerbeats High-Performance Wireless Earphones.
Sign Language Prominence in FaceTime

FaceTime is an incredible tool to keep in touch with friends and family. Especially this year, we've seen how useful video calls can be, not just for chatting, but also for working.
One of the best things about FaceTime is how easy it is to make group calls to chat with a lot of people at the same time. However, this wasn't the best option for people who use sign language.
Before, when you were in a group FaceTime call, the person who was talking would get a bigger window so people could pay attention to them, leaving people using sign language in the background and making it harder for them to communicate.
Now, with Big Sur, if your Mac detects someone is using sign language, the FaceTime app will give them prominence in the FaceTime call, making it easier to communicate and talk freely.
It's worth mentioning that, this feature isn't exclusive to Big Sur, iOS 14 and iPadOS 14 also got it, so you can use sign language across all devices without any issues.
New Maps Features
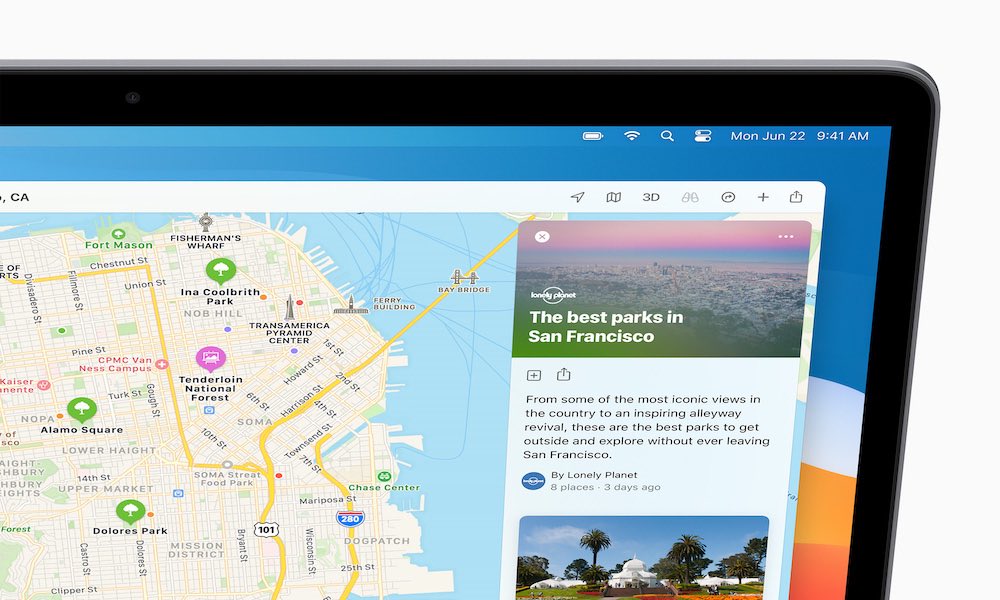
If you're like me, you use Maps mostly on your iPhone. The iPad and the Mac aren't as convenient to use for navigation as a smaller device. However, now Maps on Mac is getting brand new features that make it better to use compared to your iPhone. Starting with Guides. When you look for a new place you want to visit using Maps on your Mac, you can also see Guides that will tell you where you can eat, the best places to explore and visit.
These guides are created by popular brands, so you don't have to worry about misleading information. Plus, these guides will be updated constantly, making sure to show you the newest places you can go.
If you're always visiting new places and you want to share them with the world, you can also create your own Guides. Customize them to show the best places you've visited and then share them with your friends and family.
Other features include cycling and EV routes. You can create the best routes for you on your Mac, and once you're done you can send them to your iPhone and start your trip.
On the other hand, if you're planning a long trip on your electric car, you can always check the best route possible with charging stations along the way.
There are other features, like an interactive 3D view, Indoor Maps for major airports and shopping centers, as well as new maps in more countries.
A Necessary Update to Messages
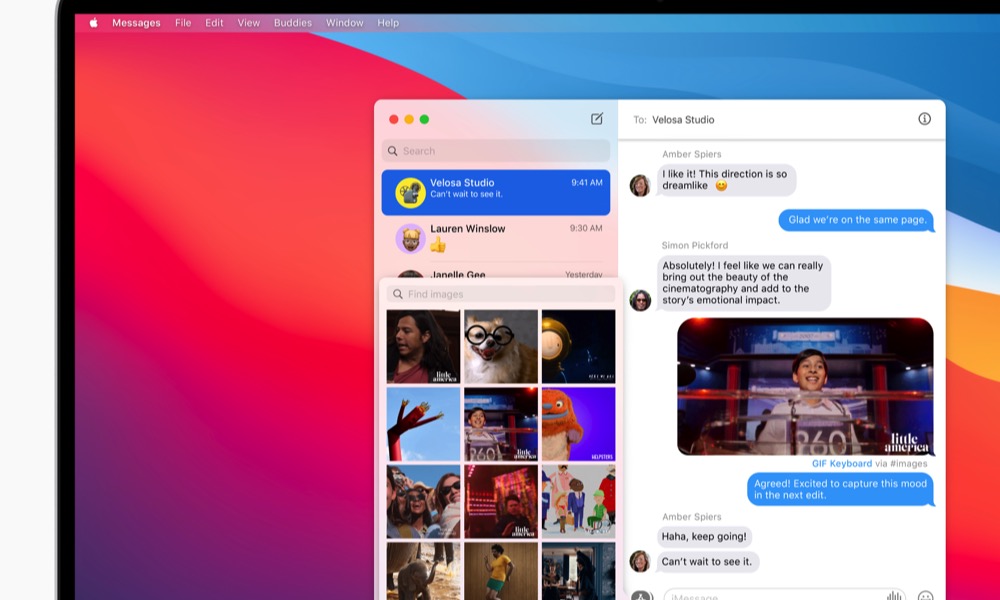
The Messages app got a big and necessary update in macOS Big Sur. Not only do you get a similar look and feel to Messages on iPhone, but you get cool new features as well.
You can pin up to nine conversations on Messages now, and you can sync them with your iPhone and iPad so you see the same pinned messages on top of every device.
Now you can also add images, GIFs, and even Memoji Stickers right from your Mac. If you want, you can also create your own Memoji to edit the ones that you have to reflect what you're trying to say.
You can also add some Message effects to send to people. When they open the message, a small effect will pop up, like a heart animation, a balloon, or even confetti.
The best thing is the overall look and feel of the Messages app. It's similar to the Messages app on your iPhone or iPad, and just as easy to use. I wasn't a big fan of the Messages app on my MacBook until Big Sur. Now it's even better to use on my Mac while I'm at home.
Safari's Biggest Changes

Safari was probably the app that received the most changes with Big Sur. There's a bunch of new features that we can't cover in totality in this section.
Starting with security and privacy. Safari is now doing a better job safe from trackers around the web. Not only that but you can check in real-time if the website you're on contains trackers that try to profile you. You do this by clicking the Privacy Report button next to the Address bar.
Safari also shows you a report of the last 30 days of your browsing history, the percentage of websites that contained trackers, and the trackers you avoided.
Safari also gets a boost in performance and power efficiency. Apple says that Safari will load frequently visited websites up to 50% faster than before. Plus, you can use your Mac longer than ever before. You can browse the web for up to one-hour more or stream video for one and a half hours longer than in other browsers like Firefox or Google Chrome.
Finally, the other big change is that you can customize your start page. You can see your favorite websites or your frequently used ones. If you want, you can also see your privacy report right when you start Safari.
You can also continue your readings from your iPad or iPhone if you were browsing using the Safari app. And the best part of all is that you can customize it by clicking the Settings button on the bottom right corner of the start page. You can choose what you want to see and choose your background image as well.
A Brand New Control Center
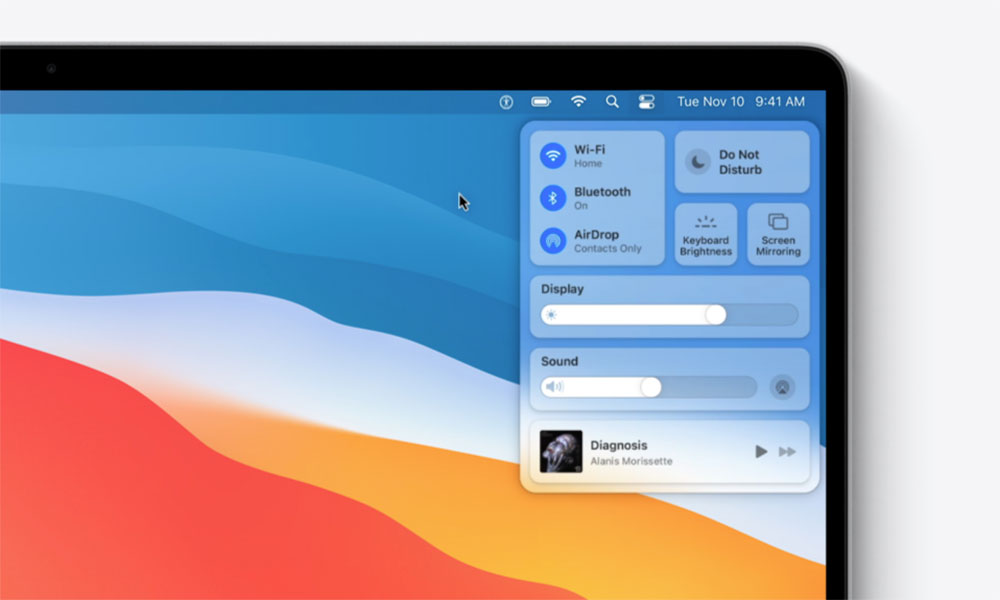
Last but not least is a brand new Control Center. Just like on iPhone and iPad, the Mac has a Control Center where you can access certain actions without going to the System Preferences.
If you click on the Control Center icon on the top right corner of your screen, you'll have quick access to the Wi-Fi settings, your screen brightness, sound, and many other features.
You can also take these actions out of the Control Center and add them to your Menu bar by clicking and dragging them out of the Control Center.
And just like you'd do on iPhone or iPad, you can also customize your Mac's Control Center. This is how:
- On the top menu bar, click on the Apple Logo.
- Click on System Preferences.
- Click on Dock & Menu Bar.
- On the sidebar, you'll see all the modules and controls you have or can add to the Control Center.
There are a bunch for you to choose from. You can choose whether you want them in the Control Center or the Menu bar, although some controls like Wi-Fi or Bluetooth can't be removed from the Control Center.