Six Calendar Tips and Tricks You Need to Start Using Today
Whether you're always working or just want to get your life a bit more organized, Apple's Calendar app is the way to go.
You can use it to see your upcoming events, get reminded of important dates throughout the year, and even sync the other calendars from other platforms like Google so you can have it all in one neat place.
What you probably don't know is that there are still a bunch of other features the Calendar app has for you. Whether you're on iPhone, iPad, or Mac, continue reading to learn Calendar tricks you need to try.
Sync Your Calendars Faster
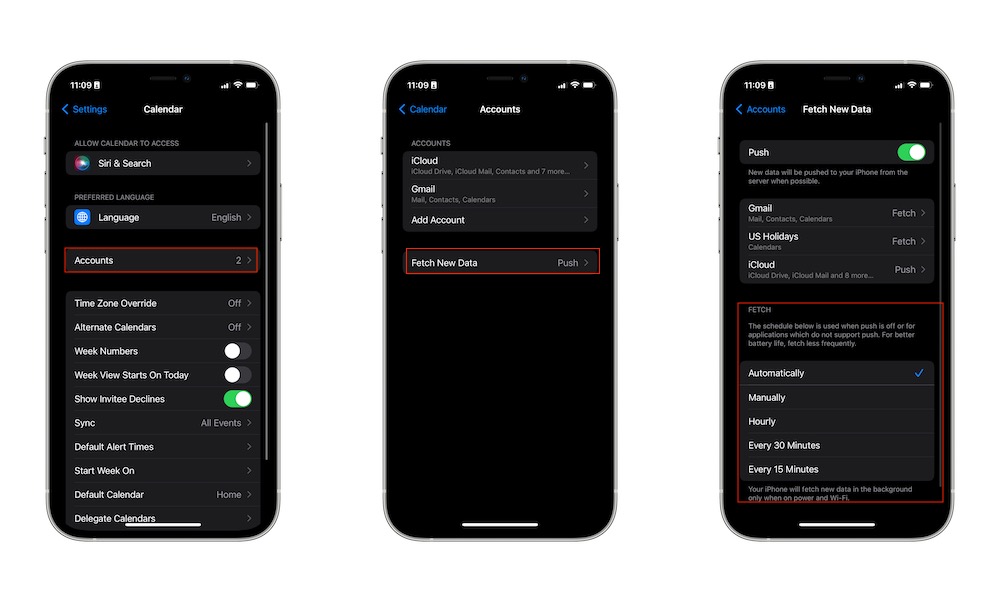
You probably already know that you can sync other calendars into the Calendar app on your iPhone or even on your Mac. But did you know there's a way to make them sync faster?
Say you add and even to your Google calendar; for instance, it'll take a moment for the Apple calendar to sync. But you can reduce that time from the Calendar app.
Here's how to do it on your iPhone or iPad.
- Open the Settings app.
- Scroll down and go to Calendar.
- Tap on Accounts.
- Tap on Fetch New Data.
- Under Fetch, select the time you want your Calendar to fetch for new data.
If you're on Mac, you can do it like this:
- Open the Calendar app.
- Click on Calendar on the menu at the top of your screen.
- Click on Preferences.
- Select the Accounts tab at the top of the window.
- Click on Refresh Calendar and select the time you want.
Use Siri to Schedule Events or Edit Them
Siri is a wonderful virtual assistant that can do basically everything you need, and that includes managing your schedules.
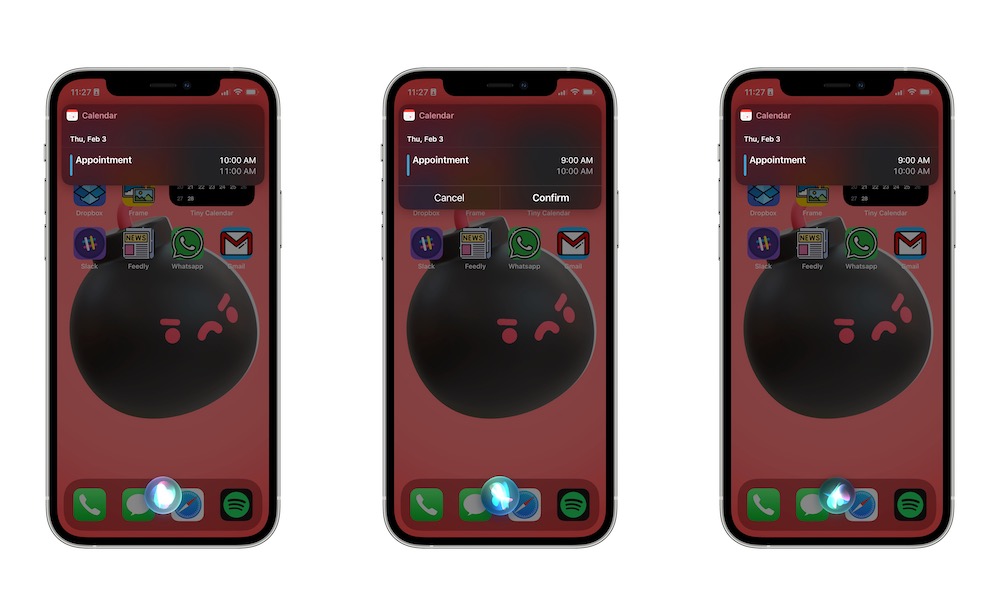
You can create events or edit them without having to open the Calendar app. All you need to do is ask Siri to "schedule an appointment for," and you say the day and time. You can also add a name for the appointment, so it's easier for you and Siri to manage them. Or you can ask Siri to change an appointment's time or date with just your voice.
And if you don't remember what you need to do for the day, you can quickly ask Siri to show you all your appointments, and Siri will show them on your screen and start reading them out to you.
Start Using Travel Time
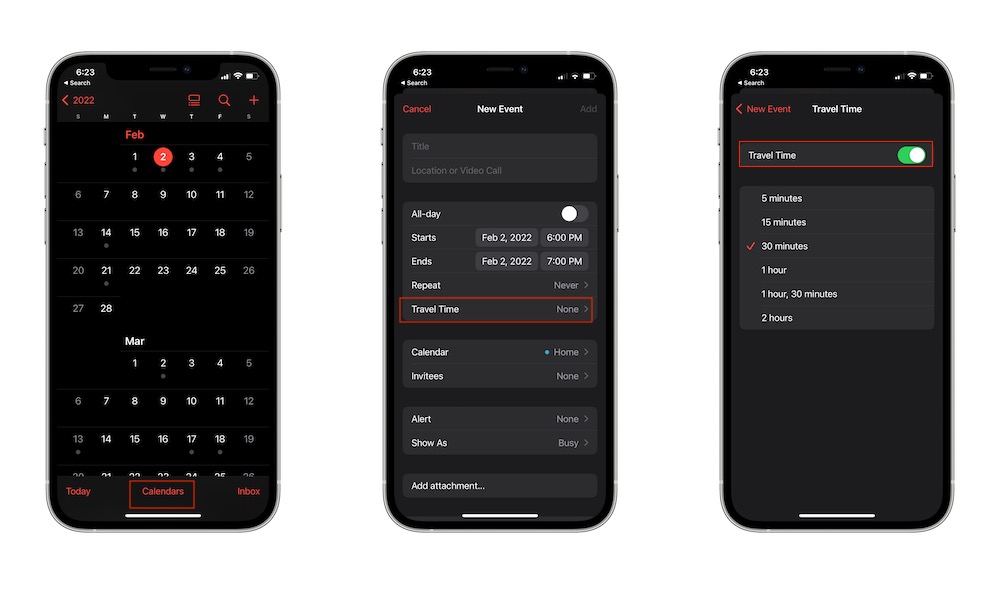
Travel time is a pretty useful feature from the Calendar app. What's cool about it is that you can enable this feature and turn on travel time. If you enter the location for your next event, your iPhone will automatically notify you when you need to get going based on where you're going and how you're getting there.
To use this feature on iPhone, do the following:
- Open the Calendar app.
- Tap on the plus icon in the top right corner of your screen to add a new event.
- Create your new event and make sure to enter the location.
- Tap on Travel Time.
- Toggle Travel Time on.
- If you entered a location for your event, enter your starting location.
If you're on Mac, do this:
- Open the Calendar app.
- Double click on the date when your event it's going to be.
- Create your event.
- Enter the location of your event.
- By default, Calendar should already add the option to Alert me when I need to leave. If not, click on Add Alert, Repeat or Travel Time and select that option.
Your Calendar will do the rest. Note that you'll need to have given the Calendar app access to your location.
Give Someone Else Control Over Your Calendar
A cool feature the Calendar has is that you don't even have to manage your calendars for yourself. Whether you have an assistant or want your friends and family to have control, you can make it so other people can control and manage your calendar without your worrying about it.
For iPhone and iPad users, you need to do the following:
- Open the Calendar app.
- Tap on Calendars at the bottom of your screen.
- Tap the "i" icon next to the calendar you want to share.
- Tap on Add Person.
- Enter the email or name of the person you want to share it with.
- Tap on Add in the top right corner of your screen.
- Make sure the person has the option to View & and Edit next to their name. If not, tap on the name and toggle Allow Editing on.
- Tap on Done in the top right corner of your screen.
If you're on Mac, do the following:
- Open the Calendar app.
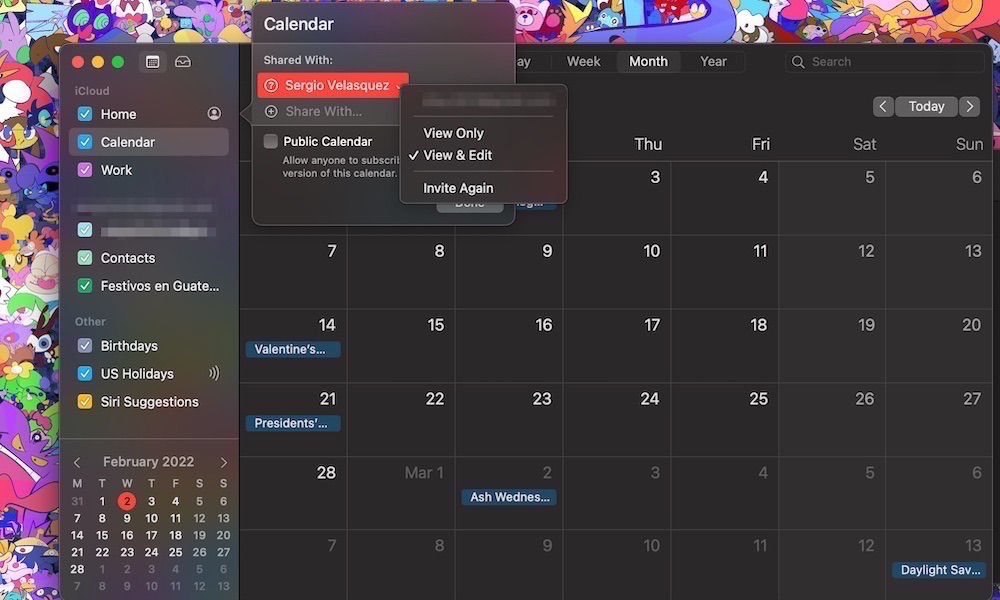
- Select your mouse over the calendar you want to share on the left sidebar, and rick click it.Â
- Select Share Calendar.
- In the Share With field, enter the name or email address of the person you want to share it with.
- Make sure they can edit your calendar by clicking on the down arrow on the right side of the name and select View and Edit.
- Click on Done.
And that's it. Just remember that you'll need to have the contact saved on your contacts list in order for you to add them to your calendars.
Rotate Your iPhone to View your Week
Granted, this trick is only available for iPhone, but it's still a pretty cool trick to change how you view your calendar easily.
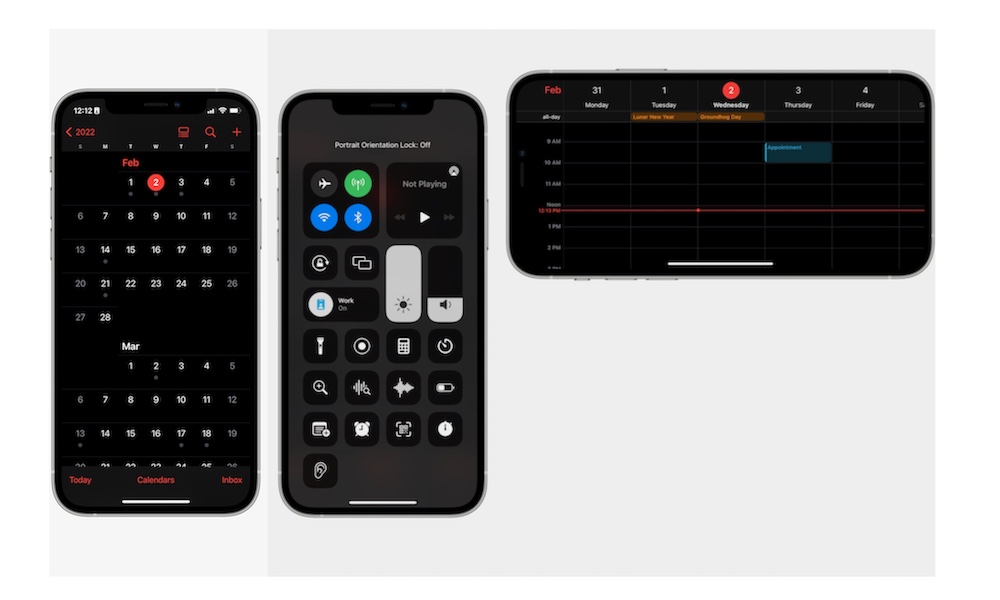
This trick is simple; you can rotate your iPhone to landscape mode to see the whole week and all your appointments automatically.
- Open the Calendar app on your iPhone.
- If you haven't already, go to your Control Center and disable the Portrait Orientation Lock.
- Go back to your Calendar and rotate your iPhone.
Pretty simple, right? You can access the week view whether you're on looking at your days, weeks, months, or even your year.
Make Calendar Open a File Automatically
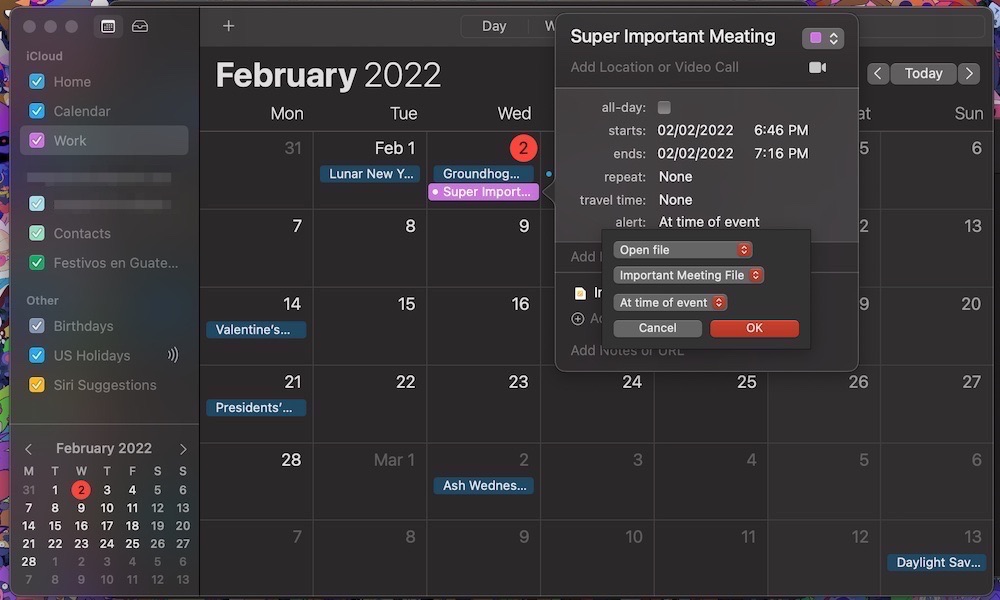
By far, one of the coolest Calendar tricks there are is that the app can automatically open a file for you right before an important event. This is perfect if you're about to do a presentation or want to have some notes ready before the event.
Unfortunately for iPhone and iPad users, this trick only works on Mac. However, you can still add a file to your events on iPhone and iPad, but you'll have to open it yourself, which is not as cool, but it's still pretty convenient.
- Open the Calendar app on your Mac.
- Double click on any date to create a new event.
- Create the event you want.
- Enter the time for your event.
- Click the Alert drop-down menu.
- Click on Custom.
- Click on Message with Sound and select Open File.
- Click on Calendar and select Other.
- Go through your files and choose the file you want to open.
- Select when you want the Calendar app to open the file.
- When you're done, click on Ok.
And that's it. As you probably saw, you can also use this option to automatically send an email, which is a great way to remind other people you have a meeting.

