
Just Got a New Mac? 10 Essential Settings to Change Right Now

If you found a new Mac under the tree this year, you're in for a real treat. Unboxing a new Mac is one of those feelings that never gets old. Even if you've used macOS for years, there's still a moment after you've gone through the setup screens that you may not be sure what to do next.
That's even trickier if this is your first Mac. If you’re coming from Windows, there are a few things that work just a little differently on a Mac, and getting your setup right on day one will save you a ton of time later.
To help you set up your Mac the right way, we've gathered some of the most important steps to take first. Sure, it might be a bit boring, but it will make sure your Mac is ready to use once you're done. Read on for the 10 things you should do once you've finished the initial Mac setup.
Update macOS Before You Do Anything Serious

New Macs seldom ship with the very latest macOS version. Unless you're buying the latest M5 MacBook Pro that Apple released in October, chances are you’ll be one version behind, as most current models may have been manufactured before Apple's fall macOS 26 Tahoe release,
However, even if your new Mac ships with Tahoe out of the box, there are still "point releases" like macOS 26.2 that include new features and security patches you'll surely need.
So before you start installing all your favorite apps, make sure to give your Mac time to get the latest software update so you don't have to worry about that later.
Here's how to manually update your Mac:
- Click the Apple menu (Apple logo) in the top left corner of your screen.
- Go to System Settings.
- On the left sidebar, click on General.
- Go to Software Update.
If there's a software update available, click on Update Now. It might take a few minutes, and your Mac will restart itself, so make sure to do it when you have time and when your Mac is plugged in to a power source.
If you don't want to worry about installing software updates in the future, you can click the i icon next to Automatic Software Update and turn on all the options available so your Mac takes care of updating itself automatically.
Unlock Your Mac With Touch ID (or With Your Apple Watch)
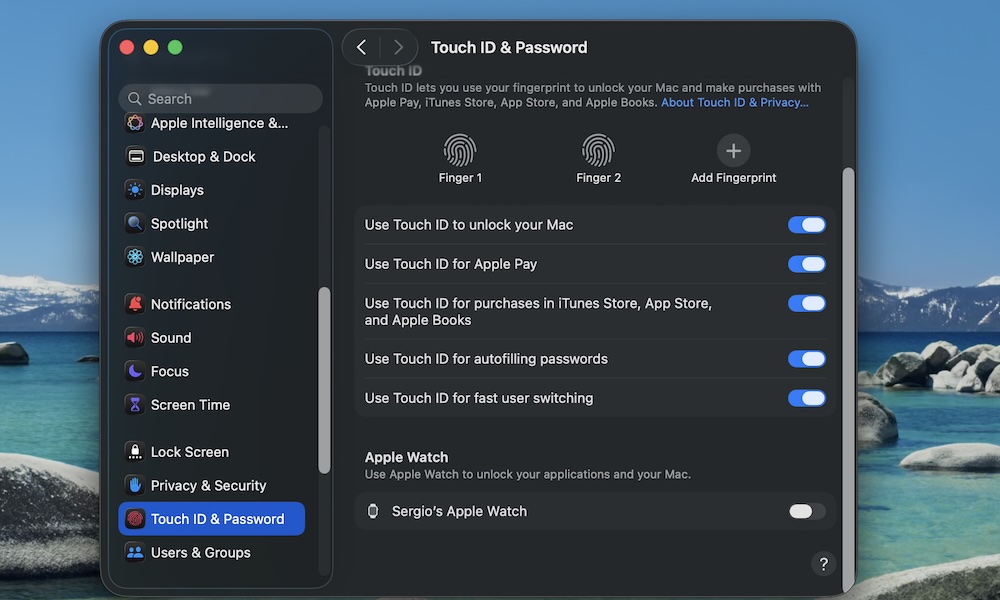
Typing your password a hundred times a day is no way to live. Touch ID on the Mac is fast, secure, and it also works for Apple Pay, password autofill, and App Store purchases.
By default, you'll be walked through the steps to enable Touch ID on your MacBook when you set it up for the first time. However, many new users don’t realize you can add more than one finger or that you can turn on Touch ID for more than just unlocking.
To enable more Touch ID features on your Mac, you can follow these steps:
- Click the Apple menu (Apple logo) in the top left corner of your screen.
- Go to System Settings.
- On the left sidebar, scroll down and click on Touch ID & Password.
- Click Add Fingerprint and follow the instructions on your screen.
From here, you can also choose when you want to be asked to use Touch ID instead of being asked for your password. We recommend using it for things like Apple Pay or autofilling passwords. This makes it both faster for you to use these features and a bit harder for others to control your Mac without your consent.
If you have an Apple Watch, you can also use that to unlock your Mac automatically, and this works even on Macs without Touch ID (or a MacBook connected to an external display and keyboard with the lid closed). To enable this, scroll down to the bottom of Touch ID & Password settings, and toggle the switch on beside the name of your Apple Watch.
Clean Up the Dock and Menu Bar Right Away
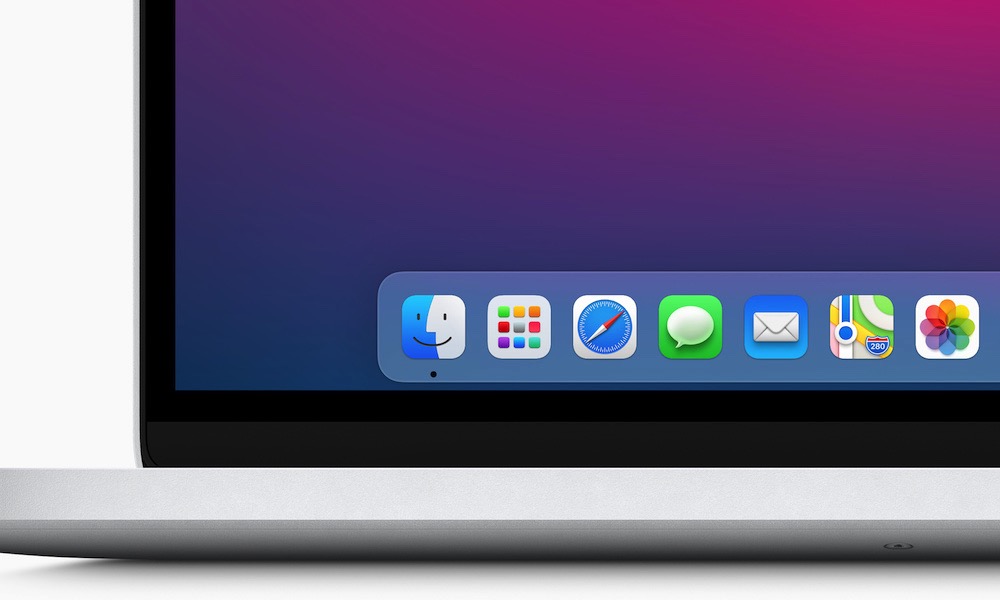
Apple gives you a really useful Dock full of default apps you might never use. Instead of having apps like TV on your work Mac, you can customize the Dock so your most important apps are always at hand — and the ones you don't want aren't cluttering things up.
To remove an app from the Dock, control-click (right-click or two-finger click) on it, choose Options > Remove From Dock. You can also drag an icon up and out of the dock until you see the word "Remove" appear over it and release the mouse button.
To add an app, click on the Apps icon on the left side of the Dock to open all your apps. Next, find the app you want, and drag it to the Dock. Once you find the perfect place for it, release your mouse. Apps will also show on the right side of the dock when they're running, so if you're already using an app, you can either right-click on it and choose Options > Keep in Dock or simply drag it to the left to place it in the spot where you want it to live.
You can add as many apps as you need, and you can drag them around to arrange them however you want.
You can also choose what appears in the menu bar by going to Apple menu > System Settings > Menu Bar and deciding which features you want to keep visible at the top.
Turn On Time Machine Backups
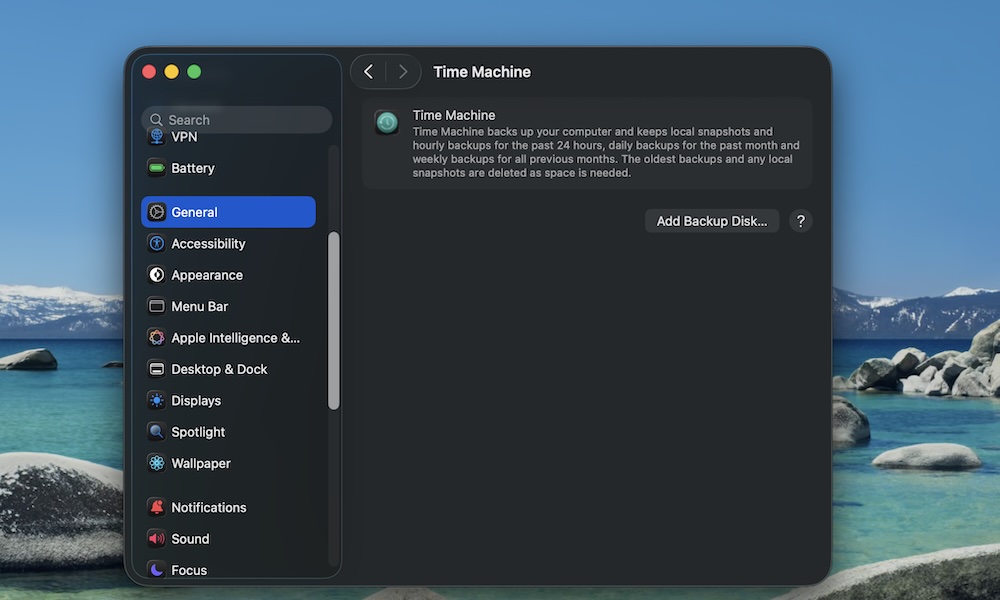
This is a big tip people often regret not doing. Your Mac has an excellent built-in backup system called Time Machine. If you plug in an external drive with enough storage, your Mac can back up your entire system on a regular schedule. That way, if your Mac ever fails or you delete the wrong thing, you can revert to a previous backup. This can be used to quickly recover a single file or even restore your whole system to how it was before a catastrophic crash.
To start using Time Machine on your Mac, you'll need to plug in an external drive or have a compatible network storage (NAS) device available. Then, go to Apple menu > System Settings > General > Time Machine and select the disk you want to use for backups. Be sure to tick Back Up Automatically, so your Mac does the backups for you. By default, this will keep hourly backups for the past 24 hours, daily backups for the past 30 days, and weekly backups until your storage is full. You can reduce the frequency of these in the Time Machine settings.
Of course, you'll need to keep your external drive or NAS connected for this to work. If you don't want that, you can always back it up manually. Also, keep in mind that the first backup can take several hours, as it has to capture everything on your Mac — and the more data you've moved over from your old computer, the longer it will take. Later backups will typically be much faster as they only back up what's changed since the last one.
Start Downloading All the Apps You Need
A new Mac comes with great default apps like Safari, Notes, and Photos. However, most people need a few extra tools to actually be productive with their new Mac.
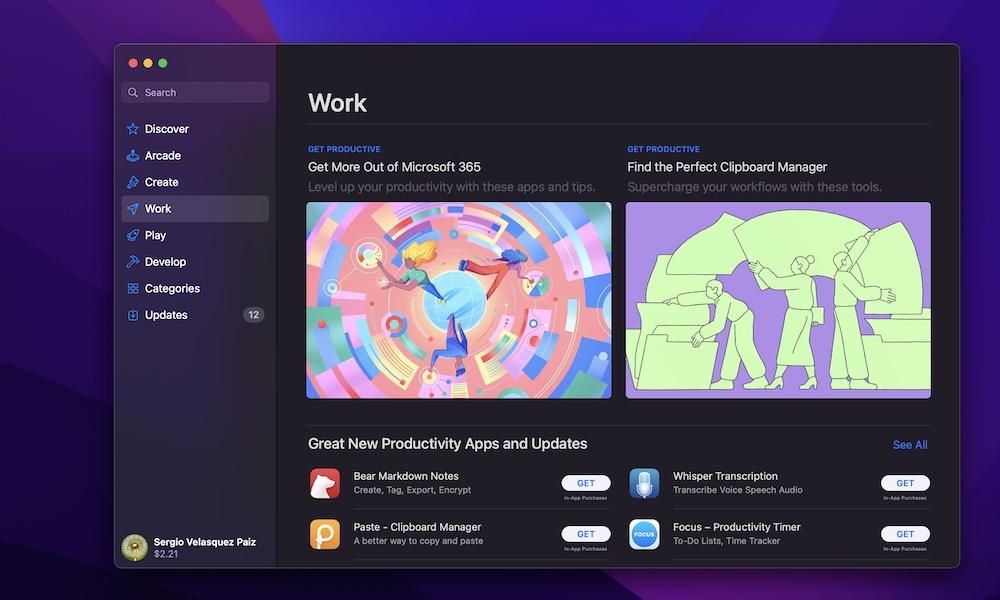
That's where the App Store comes in. This is where you'll find hundreds of different apps that you can download and start using in minutes — and it's far easier than trying to find and download these from various developer websites.
Open the App Store, and you can search for and install many of the things you know you’ll use every day. Some common options are Microsoft Office, Slack, and WhatsApp.
Unfortunately, you won't find all your favorite apps on the App Store. Standard tools like Zoom, Firefox, Chrome, and even Microsoft Teams are conspicuously missing, but that doesn't mean you can't download them: Just open Safari and search for the Mac version of the app you want, or visit the developer's website directly.
Of course, there's a slightly higher risk of downloading malicious software if you aren't careful, so be sure to download apps only from trusted, legitimate sources.
Set Up a New Focus for More Productivity
Your Mac's notifications can get noisy fast, especially if you've set up Messages, Reminders, and the Mail app. The mistake is allowing all your apps to send you notifications whenever they want.
Luckily, you can silence all the unnecessary alerts on your Mac by setting up a Focus mode. This is basically a Do Not Disturb mode that has a couple of extra features and perks. If you have an iPhone, you'll already have all your Focus modes on your Mac thanks to iCloud sync.
But if you want to create a new Focus mode from your Mac, here's what you need to do:
- Click the Apple menu (Apple logo) in the top left corner of your screen.
- Go to System Settings.
- On the left sidebar, scroll down and click on Focus.
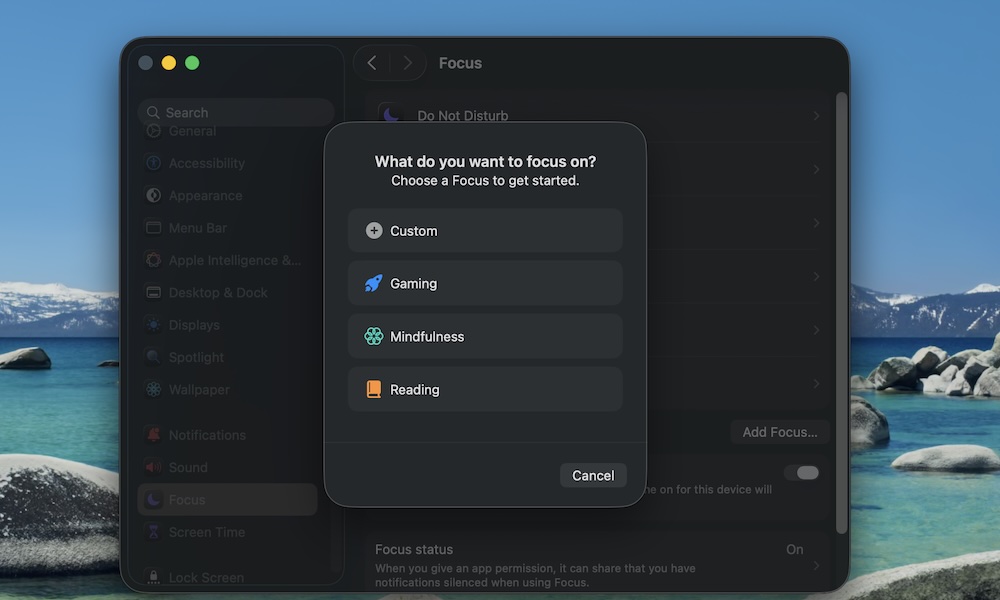
- Click on Add Focus.
- Select a default focus, or choose Custom and follow the instructions on your screen.
- Be sure to only allow certain people (e.g., family) and certain apps (e.g., calendar alerts), so you don't get distracted all the time.
- Optionally schedule it or turn it on from Control Center when you need peace.
If your Mac and iPhone use the same Apple ID, you can also turn on Share Across Devices, so when you turn on Focus on your Mac, your iPhone shuts up too.
Adjust the Trackpad So Your MacBook Feels Right
The MacBook's Trackpad is great out of the box, but it might be a little slow for some people. Luckily, you can adjust your trackpad so it feels and works however you want. Here's how:
- Click the Apple menu (Apple logo) in the top left corner of your screen.
- Go to System Settings.
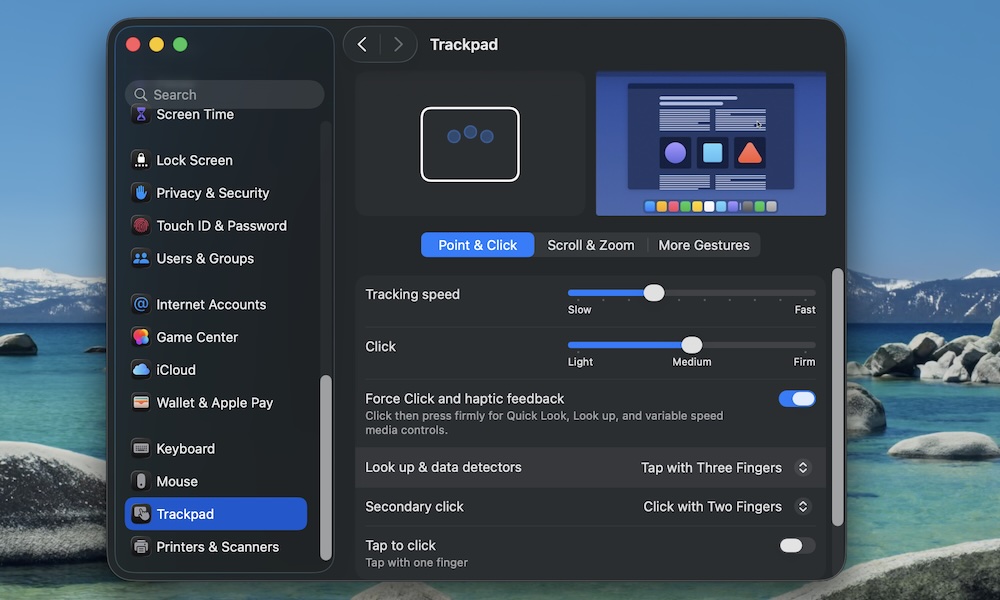
- On the left sidebar, scroll down to the bottom and click on Trackpad.
From here, you can customize things like your Tracking speed or how hard you need to click for it to work. You can also click the Scroll & Zoom or More Gestures tabs near the top to customize your experience further.
There's no right answer, so play with the settings until you find something that works for you.
Set Your Default Web Browser

This is a small thing, but it makes your Mac feel more personal. If you’re a Chrome user, you probably don’t want links opening in Safari, and fortunately that's really easy to change. Here's how:
- Click the Apple menu (Apple logo) in the top left corner of your screen.
- Go to System Settings.
- On the left sidebar, scroll down and click on Desktop & Dock.
- Scroll down again, and click Safari beside Default Web Browser, and choose the browser you want.
You'll need to have the other browser installed first, of course, and some make it even easier by offering the option to set them as the default as soon as you open them for the first time.
Customize Your Mac's Finder
Another thing that makes a new Mac feel more personal is getting Finder set up so you have all your important tools handy.
By default, Finder doesn’t always show all of the options it has available, but you can customize it by doing the following:
- Open Finder.
- Click on View near the top left corner of your screen.
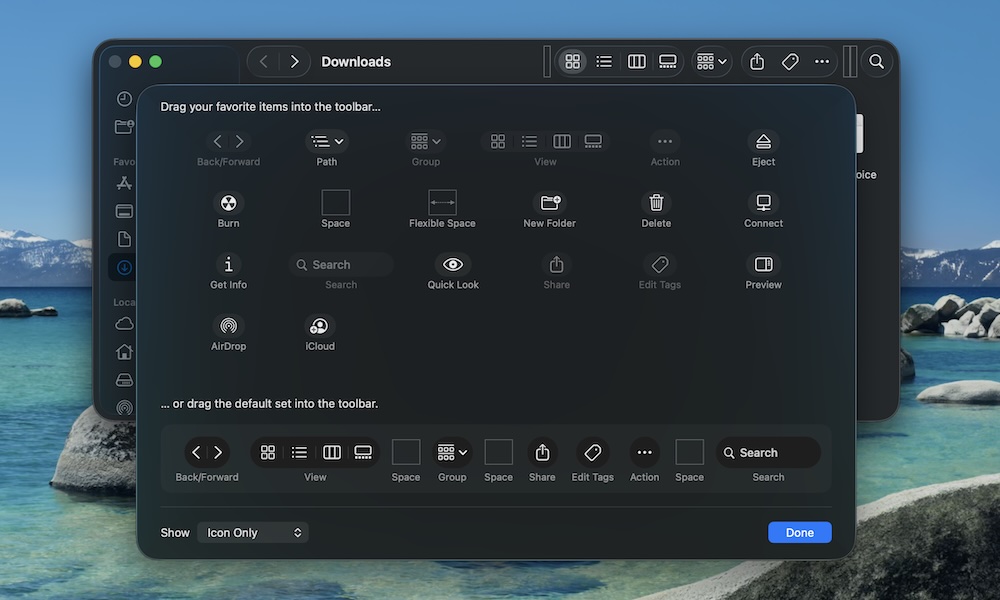
- Select Customize Toolbar.
In the new window, you'll see all of the extra buttons you can add to your Finder's toolbar. Additionally, you can also rearrange the buttons however you want.
Play around with the toolbar until you find something you like. If you still aren't convinced, you can drag the default toolbar at the bottom to go back to the default look.
Bonus: Additional Tips for Windows Users
Windows users might have a hard time finding a couple of useful gestures and keys that will make it a whole lot easier. To help things be easier, here are a few tips you should know.
- Right-click on a Mac is a two-finger tap on the trackpad or Control-click with a mouse.
- Spotlight (Cmd + Space) is your new best friend. Instead of browsing for apps or files, just open Spotlight and type their name.
- Cmd (Command) is the key you’ll use the most, not Ctrl like on a Windows computer. So copy is Cmd + C, paste is Cmd + V, and close window is Cmd + W.
- The Red Dot in the top left corner replaces the "X" found in most Windows apps, but it doesn't always close the entire app; sometimes it just closes the individual app window. CMD+Q can typically be used to quit an app nearly entirely.
Shortcut Cheat Sheet for Switchers
| Windows Shortcut | Mac Equivalent | Action |
| Ctrl + C / V | Cmd + C / V | Copy / Paste |
| Ctrl + Alt + Del | Cmd + Option + Esc | Force Quit Apps |
| Win + E | Cmd + N (in Finder) | Open New File Window |
| Alt + Tab | Cmd + Tab | Switch Between Apps |
| Win + S | Cmd + Space | Search (Spotlight) |
Start on the Right Foot
That’s your day-one Mac setup. If you do these things right away, your Mac will work perfectly as well as feel more personal than ever.
Of course, there's not a one-size-fits-all type of setup, so be sure to change the settings to whatever you will need. You can always go back and readjust them if necessary.