8 Quick, Easy Ways to Get the Best Apple Watch Battery Life
 Credit: oasisamuel / Shutterstock
There’s a good chance that watchOS 9 will finally introduce a Low Power Mode to the Apple Watch, reducing the amount of power used by some apps and features to help you get the most out of the battery on your Apple Watch.
When (and if) that comes, it will likely turn out to be a nice “one-button” solution that can automatically kick your watch into its most power-efficient mode, just the same way the iPhone’s Low Power Mode works.
However, that future feature doesn’t help you if you’re already struggling to get through the day on your Apple Watch with a single charge. Fortunately, there are a few things you can do. Continue reading for 8 quick and easy ways to maximize your Apple Watch’s battery life.
Just Updated watchOS? Wait a Few Days!
We always recommend running the latest version of watchOS that’s available, as Apple often includes new tweaks and other optimizations that can help to improve battery life. However, you shouldn’t panic if you’re experiencing poor battery life right after an update — especially if it’s a big jump, like moving from watchOS 7 to watchOS 8 — or even after buying a new Apple Watch.
Why? There are a bunch of things that happen in the background after an upgrade (or a restore), and these can result in an initial hit on battery life. That can be scary at first, but it usually levels out within three to four days. However, if you’re still not getting great battery life after that, read on for other things to check.
Enable Power Saving Mode for Workouts
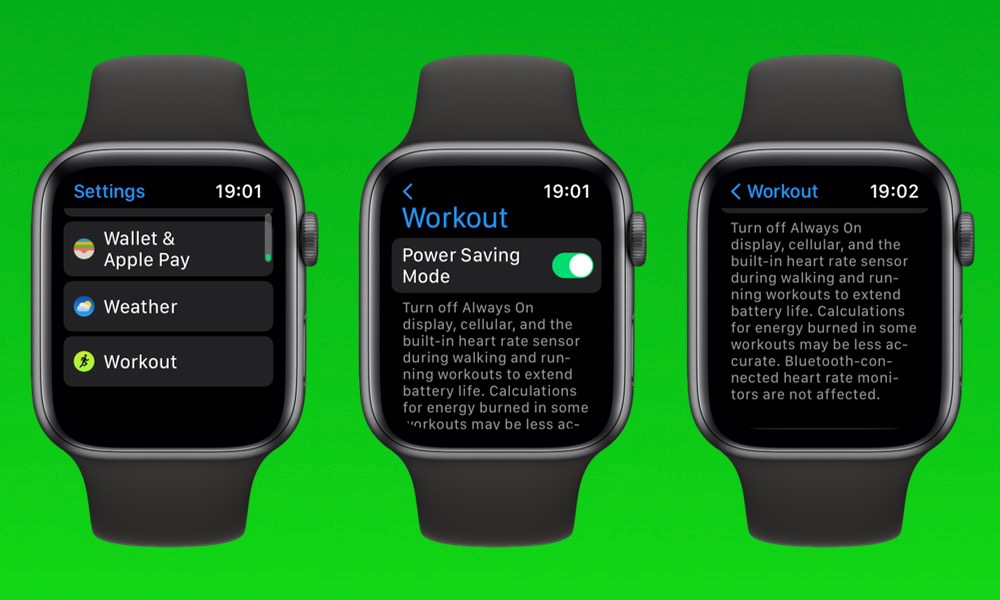
Depending on the type of workouts you do, and how much data you want to collect, you can take a lot of the load off your battery by switching on the one power-saving mode the Apple Watch already does have.
- On your Apple Watch, open the Settings app.
- Scroll down to the bottom and tap Workouts.
- Tap the toggle beside Power Saving Mode to turn it on.
As you can read from the description for this setting, this toggles off the Always-On display, cellular data, and the built-in heart rate sensor during walking and running workouts. You’ll still get calculations for active calories, distance, pace, and elapsed time, although the active calories may be slightly less accurate without the heart rate sensor.
Limit or Turn Off Cellular
If you have a cellular-capable Apple Watch, then you should know that relying on LTE data will drain your battery faster than almost anything else you do on your device.
For most folks, this isn’t a common problem; even when cellular data is on, the Apple Watch only uses it when it has no other option. If your iPhone is nearby and turned on, your Apple Watch will connect through that instead, relying on the iPhone’s much larger battery to handle the heavy lifting of your data onto the cellular network.
Further, even if your iPhone isn’t nearby, your Apple Watch still automatically connects to any Wi-Fi network that your iPhone knows about. That will use a lot less battery life than switching over to cellular.
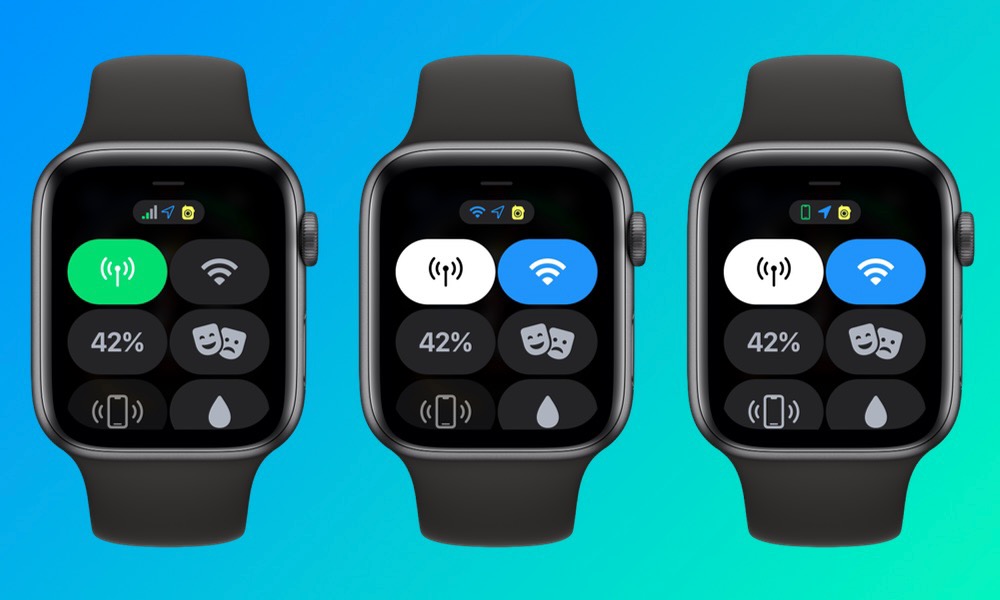
You can check what kind of connection you’re using just by swiping up from your watch face to bring up the Control Center. If you’re connecting through your iPhone, you’ll see a small green iPhone icon at the very top. Otherwise, you’ll see a Wi-Fi symbol or a series of cellular bars, depending on which type of network connection you’re using.
There’s also a button for Cellular Data in the watchOS Control Center, just like on the iPhone. This will be green when cellular data is actively in use, white when cellular data is on standby (meaning it’s enabled, but you’re on Wi-Fi or connected through your iPhone instead), or grey if you’ve manually turned cellular data off — which you can quickly do by tapping on this button.
The most common way that most Apple Watch users get tripped up with cellular power consumption is when going on workouts without their iPhone in tow. You may not care about receiving phone calls or messages while you’re working out, but that doesn’t mean your watch isn’t still consuming power just by maintaining a connection to the cellular network.
If you’re finding your watch drains more quickly after these types of workouts, either disable cellular data or bring your iPhone along on your run to provide the power to keep you connected.
Reduce Notifications
You probably don’t want to get too many notifications on your wrist anyway, but you may not realize that these can eat up your battery life pretty quickly. Not only does the Apple Watch need to process each notification, but it also needs to light up the screen and give you haptic and audible feedback for each one.
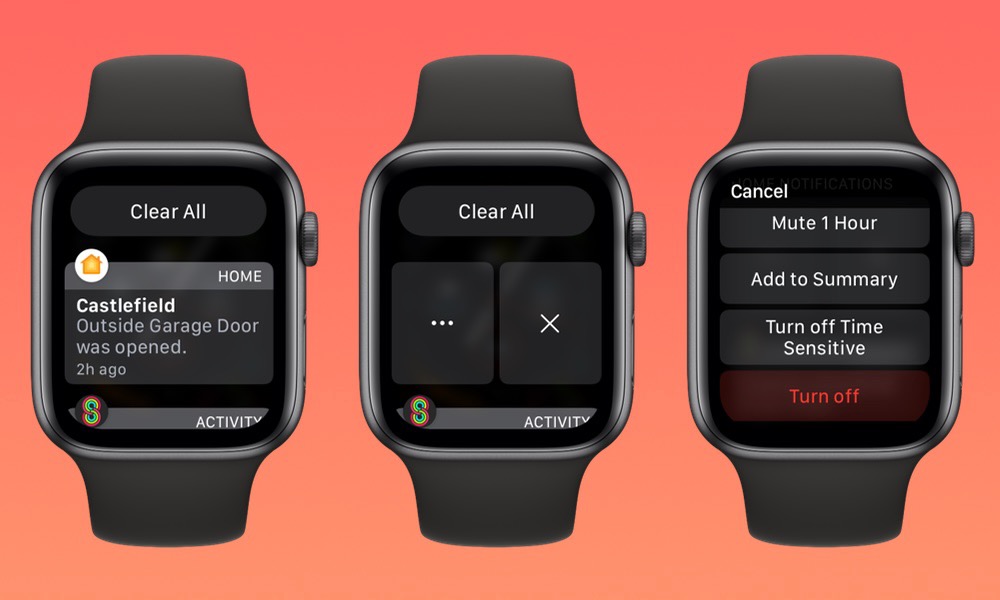
You can quickly turn off individual notifications by swiping to the left on them in the watchOS Notification Centre, tapping on the three-dot menu, and then tapping Turn Off. This will disable the notification on the Apple Watch but don’t worry, you’ll still get it on your iPhone (unless you turn it off there too).
However, to take stock of all your watch notifications, we’d recommend taking a trip into the Watch app on your iPhone, where you can find them all in the Notifications section. Most of these mirror your iPhone by default, but you can easily set them to work differently on your Apple Watch. Just pick a notification you want to disable, change the setting to Custom, and choose Notifications Off.
Avoid Busy Watch Faces
It may not be evident at first glance, but the more colorful and animated your watch face is, the more battery life it will consume.
These usually aren’t a problem for the Always On Display, as nearly every watch face remains pretty static when your wrist is down. However, if you’re frequently checking the time or raising your wrist for other reasons, that watch face is springing into action each time.
Similarly, complications that engage the Apple Watch sensors can also take a toll on your battery, such as the heart rate and noise monitoring complications.
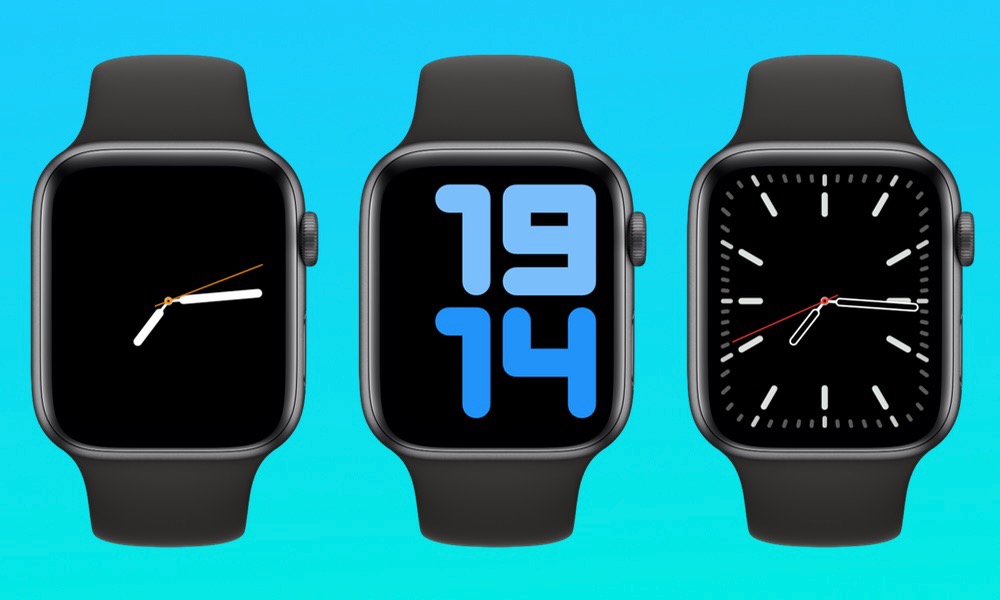
The most power-efficient watch faces are the ones that are mostly plain black backgrounds, like Simple and Numerals Duo.
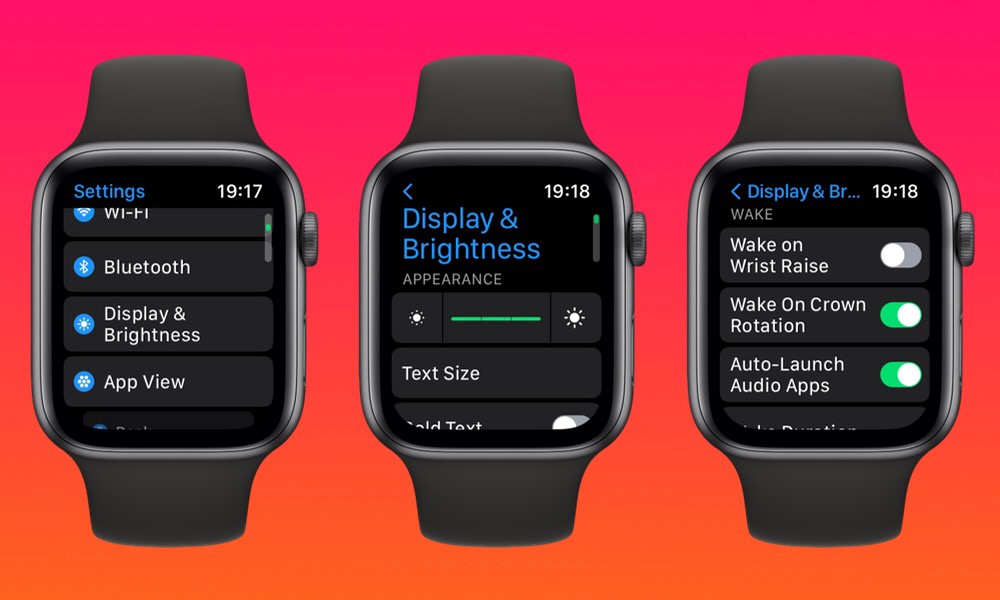
Turn off ‘Wake on Wrist Raise’
If you work in a job where you’re frequently raising your wrist, the Apple Watch’s default behavior of lighting up every time you raise your wrist will wear down your battery quickly. Fortunately, you can easily turn this off:
- On your Apple Watch, open the Settings app.
- Scroll down and tap Display & Brightness.
- Tap the toggle beside Wake on Wrist Raise to turn it off.
You’ll still be able to wake up your Apple Watch display by tapping on it or moving the Digital Crown, but it won’t automatically light up each time you lift your arm.
Plus, if your Apple Watch has an Always On Display, you may even find that you don’t need to wake up the screen nearly as often as you may think; the display will still show you the current time and even some of your complications for things like weather and the date.
Turn Down the Brightness
If you still want to use features like Wake on Wrist Raise, or you spent a lot of time checking your Apple Watch or using apps on it, you may want to consider taking the brightness down a few notches to save power.
- On your Apple Watch, open the Settings app.
- Scroll down and tap Display & Brightness.
- Tap on either end of the brightness slider to adjust it up or down.
You only get three levels of brightness settings, but unless you’re working in bright light, you probably don’t need to keep your Apple Watch at the highest one.
Use Power Reserve Mode (or Theater Mode)
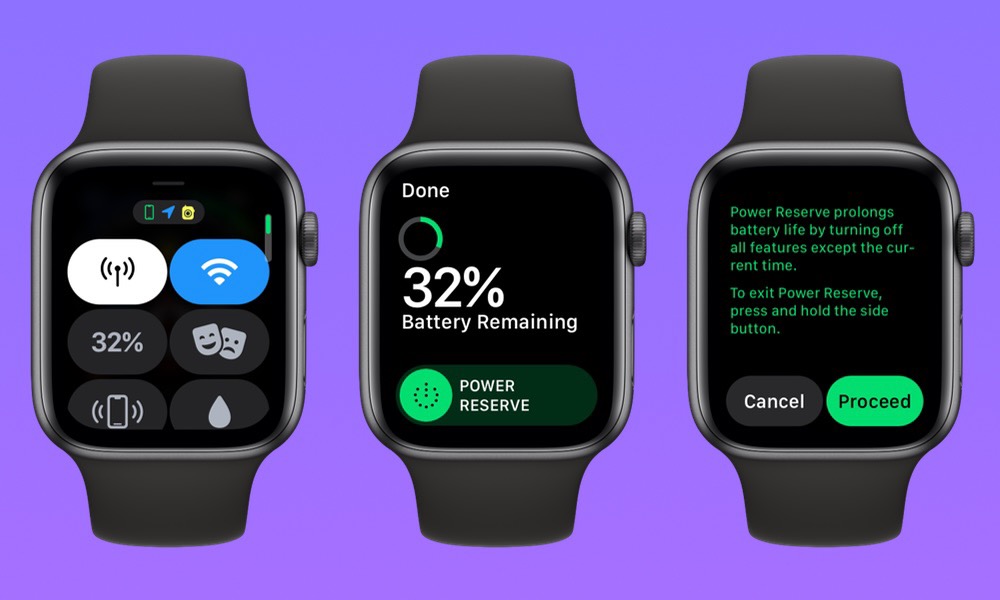
Lastly, you can strategically use power reserve mode to save your battery for when you really need it. While your Apple Watch will automatically kick into power reserve mode when the battery gets too low, you can put your Apple Watch into this mode manually at any time. Here’s how:
- From your watch face, swipe up from the bottom to bring up Control Center.
- Tap the button that shows the battery percentage.
- Slide the green button beside Power Reserve to the right.
- On the next screen, tap Proceed.
This effectively powers off the Apple Watch, turning it into a simple timepiece; you’ll still be able to check the time by pressing the side button, but that’s about it. However, this also means that the Apple Watch uses virtually no power. For all intents and purposes, it’s powered off. Keep in mind that your alarms won’t go off while your Apple Watch is in this mode.
When you’re ready to exit Power Reserve mode, just press and hold the side button of your Apple Watch until you see the Apple logo.
If you’re in a situation where you wouldn’t be using your Apple Watch anyway, such as in a meeting, a movie theatre, or simply taking a nap, Theater Mode can be a great way to preserve battery life!

